


Sharing a cloud flow
Now that you’ve got an understanding of what additional features a shared flow provides, let’s work on sharing a flow with some team members.
In this example, we’re going to take the Expense Reports flow we created in Chapter 4, Copying Files, and update it to work as a shared flow.
- Log into the Power Automate maker web portal (https://make.powerautomate.com) and select My flows.
- Click the ellipsis next to the flow you wish to change to a shared flow and select Save As.
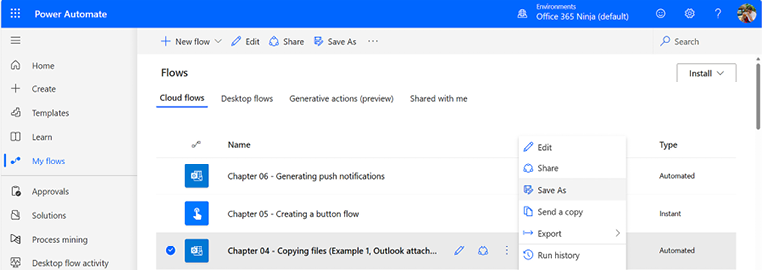
Figure 7.1 – Locating the flow to convert to shared
- In the Create a copy of this flow dialog, update Flow name and click Save to finish creating a copy of the flow.
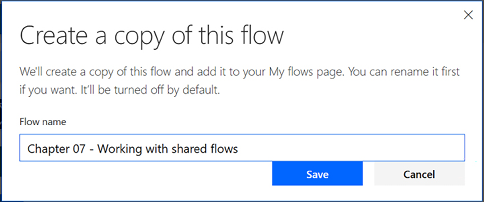
Figure 7.2 – Creating a copy of the flow
- Click the Share icon on the newly created flow to begin editing it.
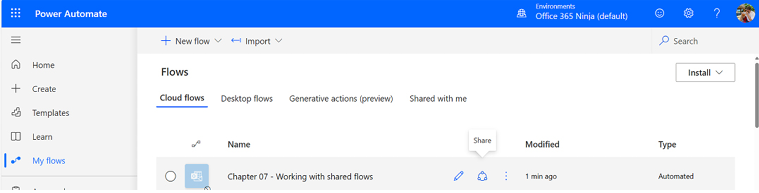
Figure 7.3 – Sharing the flow
- In the Owners section, under Users and groups, begin entering...


