Search icon CANCEL
Subscription
0
Cart icon
Your Cart (0 item)
Close icon
You have no products in your basket yet
Arrow left icon
Explore Products
Best Sellers
New Releases
Books
Videos
Audiobooks
Learning Hub
Free Learning
Arrow right icon
Arrow up icon
GO TO TOP
Qt 6 C++ GUI Programming Cookbook

You're reading from   Qt 6 C++ GUI Programming Cookbook Practical recipes for building cross-platform GUI applications, widgets, and animations with Qt 6

Arrow left icon
Product type Paperback
Published in Apr 2024
Publisher Packt
ISBN-13 9781805122630
Length 428 pages
Edition 3rd Edition
Languages
Tools
Arrow right icon
Author (1):
Arrow left icon
Lee Zhi Eng Lee Zhi Eng
Author Profile Icon Lee Zhi Eng
Lee Zhi Eng
Arrow right icon
View More author details
Toc

Table of Contents (17) Chapters Close

Preface 1. Chapter 1: Look-and-Feel Customization with Qt Designer FREE CHAPTER 2. Chapter 2: Event Handling – Signals and Slots 3. Chapter 3: States and Animations with Qt and QML 4. Chapter 4: QPainter and 2D Graphics 5. Chapter 5: OpenGL Implementation 6. Chapter 6: Transitioning from Qt 5 to Qt 6 7. Chapter 7: Using Network and Managing Large Documents 8. Chapter 8: Threading Basics –Asynchronous Programming 9. Chapter 9: Building a Touch Screen Application with Qt 6 10. Chapter 10: JSON Parsing Made Easy 11. Chapter 11: Conversion Library 12. Chapter 12: Accessing Databases with SQL Driver and Qt 13. Chapter 13: Developing Web Applications Using Qt WebEngine 14. Chapter 14: Performance Optimization 15. Index 16. Other Books You May Enjoy

Touch events

In this section, we will learn how to develop a touch-driven application that runs on mobile devices using Qt Quick.

How to do it…

Let’s get started by following this step-by-step guide:

  1. Create a new Qt Quick application project.
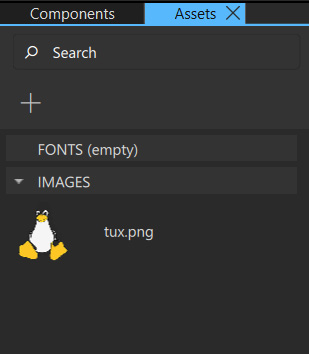
  2. In Qt Design Studio, click on the + button on the Assets Window. Then, select tux.png and add it to the project as follows:
Figure 9.17 – Import tux.png into your project

Figure 9.17 – Import tux.png into your project

  1. Next, open up Screen01.ui.qml. Drag an image widget from the Components window to the canvas. Then, set the source of the image to tux.png and set its fillMode to PreserveAspectFit. After that, set its width to 200 and its height to 220.
  2. Make sure that both the mouse area widget and the image widget are exported as the alias properties of the root item by clicking on the small icon beside their respective widget name.
  3. After that, switch over to the script editor by clicking on the Edit button...
lock icon The rest of the chapter is locked
Register for a free Packt account to unlock a world of extra content!
A free Packt account unlocks extra newsletters, articles, discounted offers, and much more. Start advancing your knowledge today.
Unlock this book and the full library FREE for 7 days
Get unlimited access to 7000+ expert-authored eBooks and videos courses covering every tech area you can think of
Renews at $19.99/month. Cancel anytime
Banner background image