Working with prefabs
With the basic coin functionality created, it's time to add additional coins to the scene. The problem with simply duplicating a coin arises if we make a change to one of these coins and need to propagate that change to the other coins. We'd then need to delete the former duplicates and manually replace them with newer, amended versions. To avoid this tedious process, we can use prefabs. Prefabs let you convert an object in a scene to an asset. The asset can then be instantiated in the scene as frequently as needed, as though it were any other kind of asset. The advantage is that changes made to the prefab can be easily applied to all instances of the object in the project, even across multiple scenes.
Now we know the benefits of prefabs, let's convert the coin object to one now. To do this, select the Coin object in the scene and then drag and drop it in the Project panel:
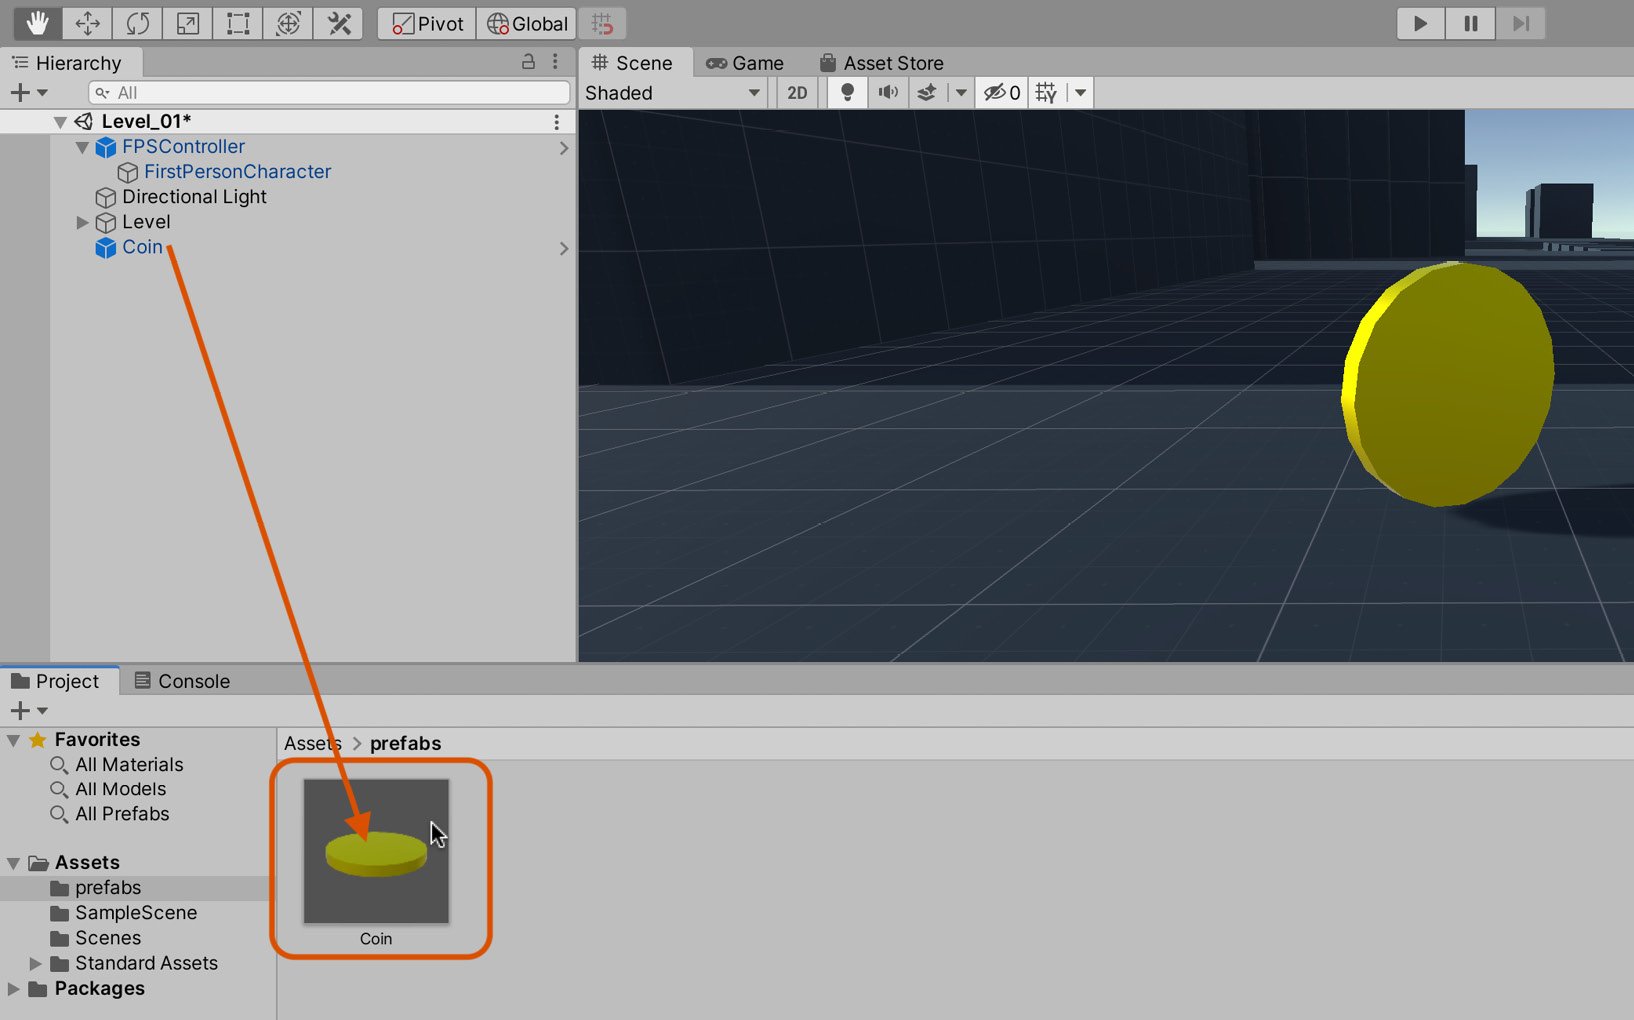
Figure 2.21 – Creating a coin prefab
A new prefab will be created, and the object in the scene will be automatically updated to be an instance of that prefab. This means that if the asset is deleted from the Project panel, the instance will become invalidated.
Once the prefab has been created, you can add more instances of the coin to the level by dragging and dropping the prefab from the Project panel to the scene. Each instance is linked to the original prefab asset, which means that all changes made to the prefab will propagate to all instances. Add as many Coin prefabs to the level as suitable for your coin collection game. Refer to the following figure for my arrangement:
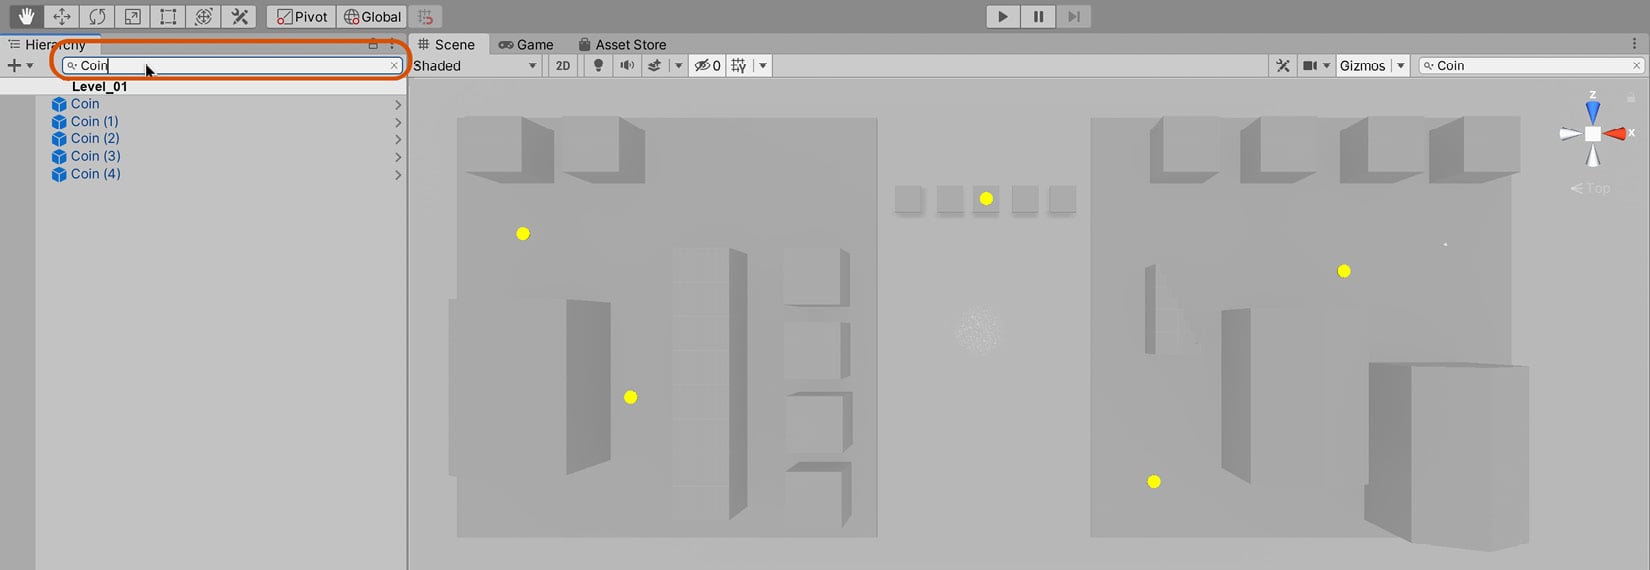
Figure 2.22 – Adding coin prefabs to the level
One question that naturally arises is how you can transform a prefab back into an independent GameObject that is no longer connected to the prefab asset. This is useful to do if you want some objects to be based on a prefab but to deviate from it slightly. To achieve this, right-click a prefab instance in the Scene, and then navigate to Prefab | Unpack Completely:
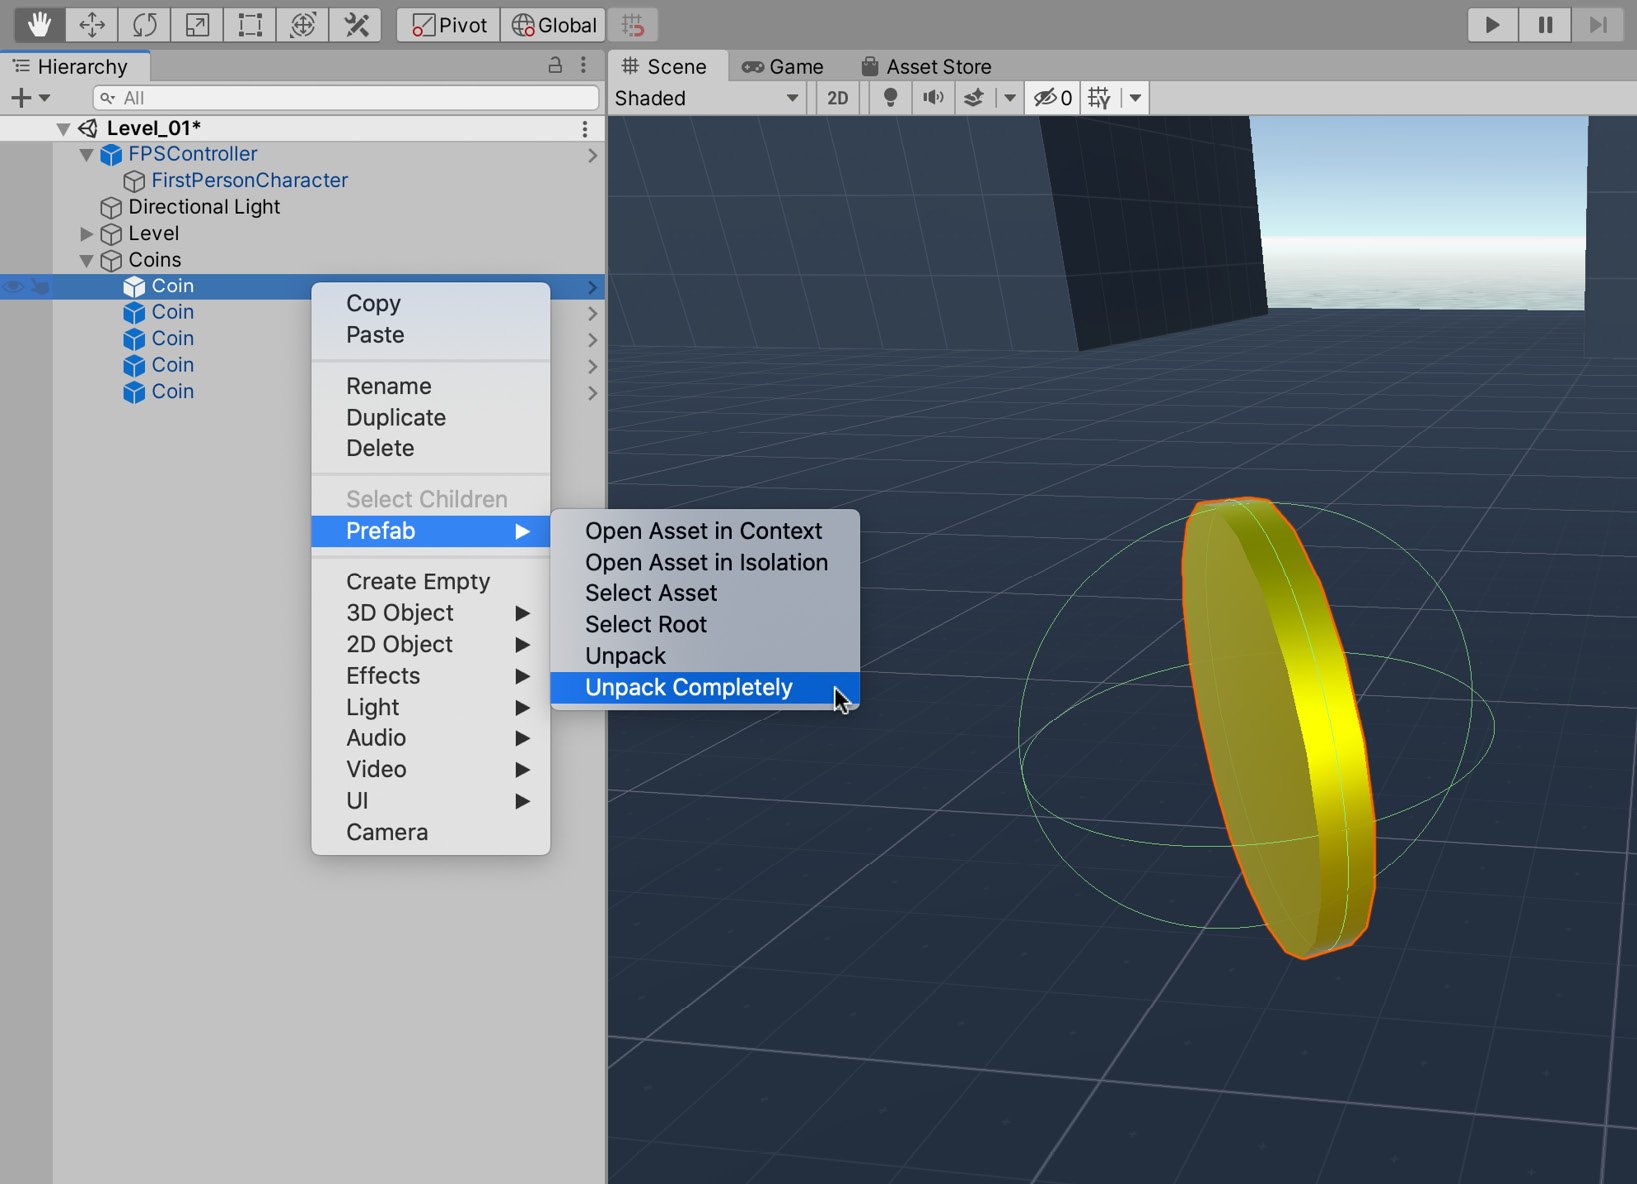
Figure 2.23 – Breaking the prefab instance
You may have noticed that you have two choices, Unpack or Unpack Completely. Both will return the Coin object to a regular GameObject; however, Unpack Completely will also unpack any child objects that are prefabs. As the coin has no child objects that are themselves prefabs, either of these options would be suitable for our purposes.
Conversely, if you wanted to apply changes you made to the Coin object upstream to the prefab asset, you would do the following:
- Select the Coin object.
- In the Inspector panel, click on the Overrides drop-down box. The window that appears lists all of the changes made to this instance that will be applied to the prefab.
- Select Apply All:
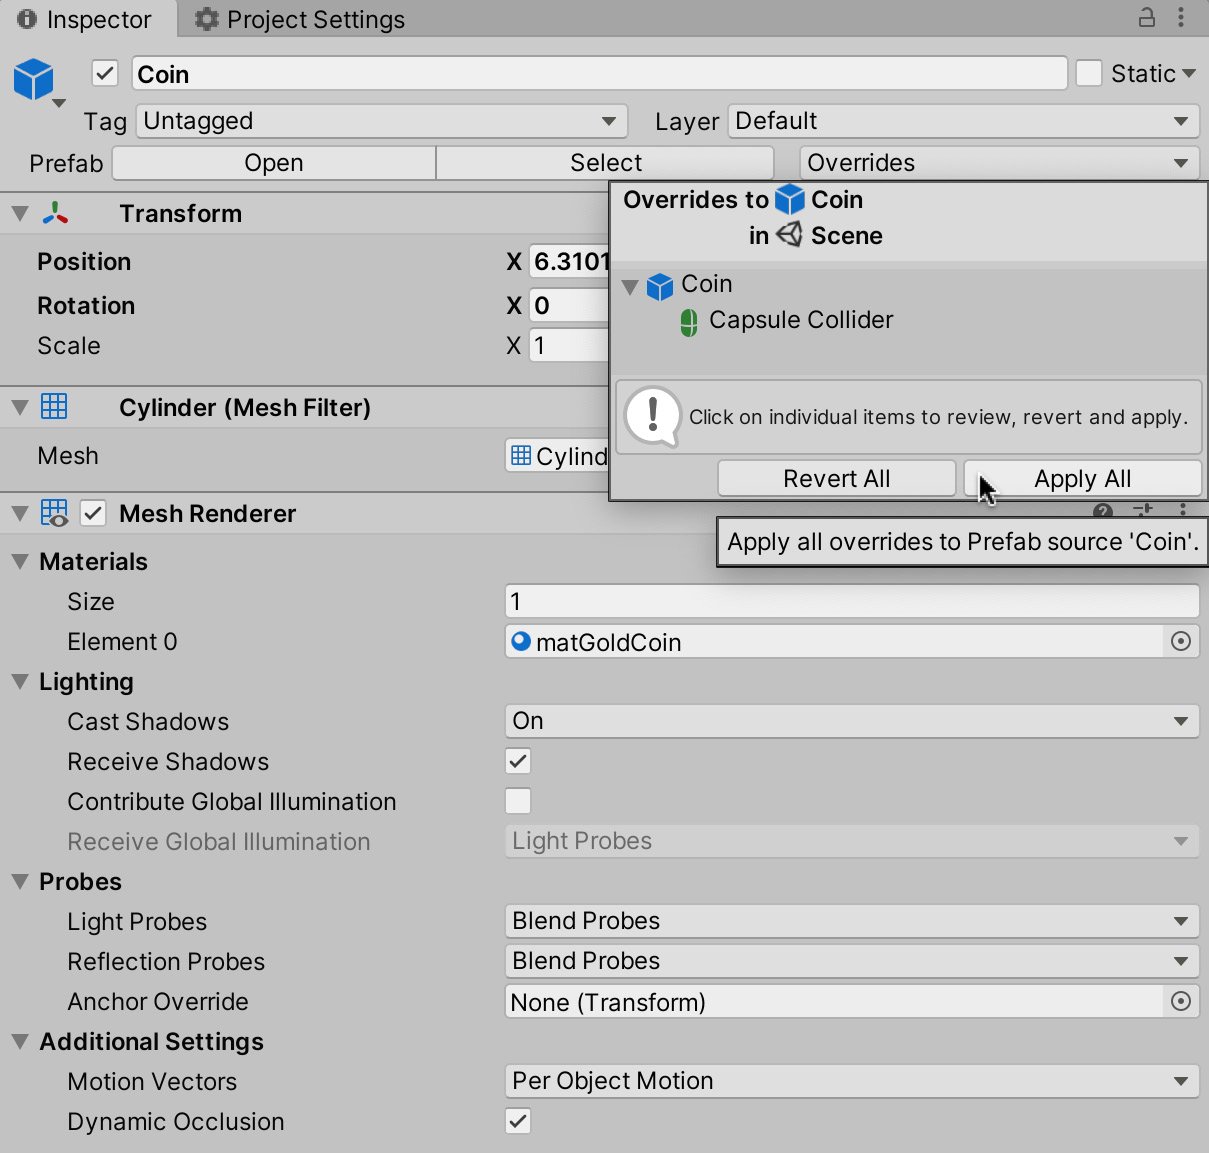
Figure 2.24 – Applying changes to the prefab
One last thing we should discuss regarding prefabs, at least for now, is Prefab Mode. Using this tool, you can easily edit a prefab. Enter Prefab Mode by clicking on the arrow next to the object's name in the Hierarchy panel:
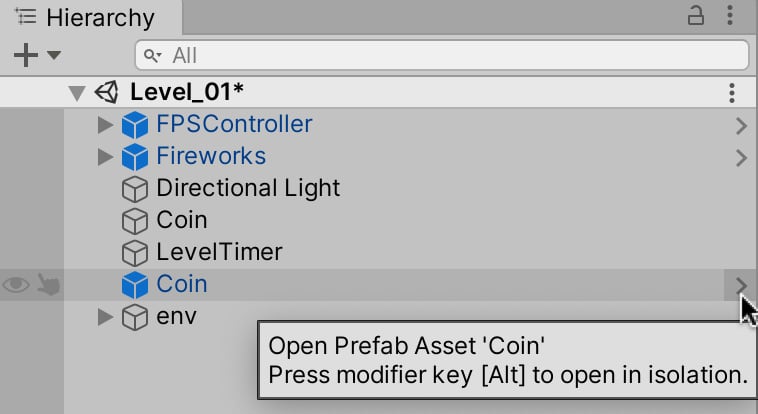
Figure 2.25 – Entering Prefab Mode
When you enter Prefab Mode, everything in the scene apart from the prefab will become gray—enabling you to focus on your prefab:
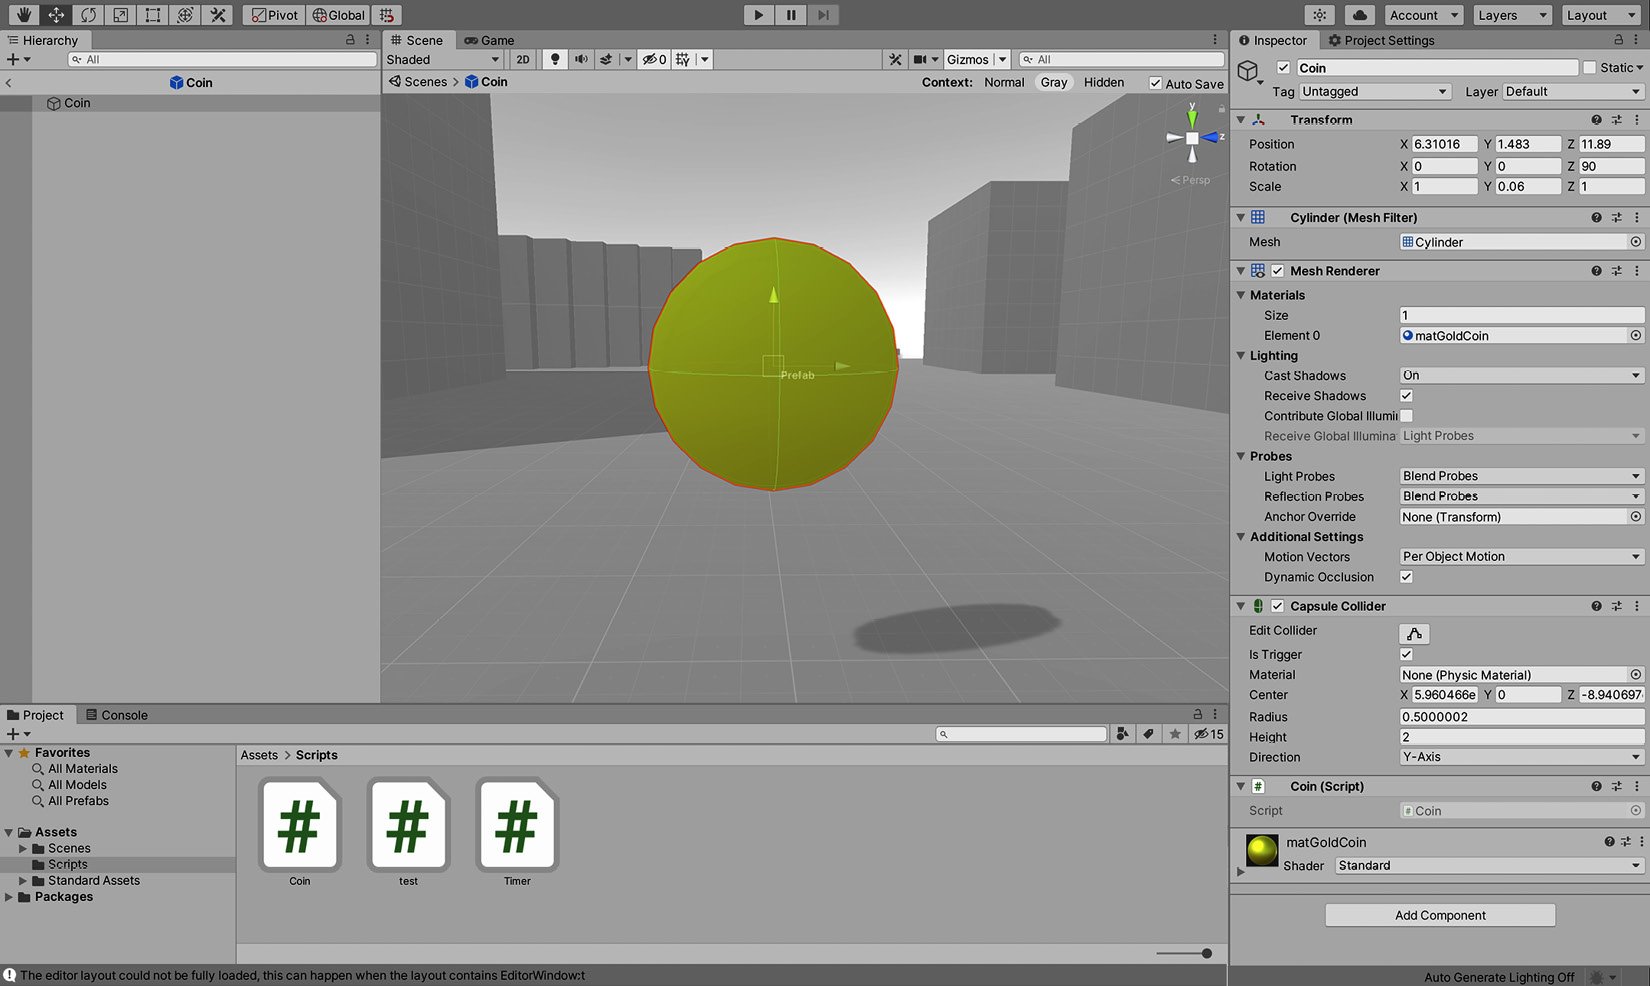
Figure 2.26 – Prefab Mode for the Coin object
Important note
Any changes you make to the prefab in Prefab Mode will be applied to all instances of the prefab.
You should now have a level complete with geometry and coin objects. Thanks to our newly added Coin.cs script, the coins are both countable and collectible. Even so, the level still poses little or no challenge to the player as there's nothing for the player to achieve. This is why a time limit is essential for the game: it defines a win and loss condition. We'll create a timer now.


