Navigating the Bubble.io interface
When using Bubble, your application will be developed inside the Bubble editor, so it is important that you get familiar with the main areas of the tool.
The editor is composed of a set of tools that allow you to access parts of your application, show/hide features, configure preferences, and define how your application should work. Let’s discover the main areas of the Bubble editor.
The following screenshot shows the Bubble editor, where you build your applications visually.
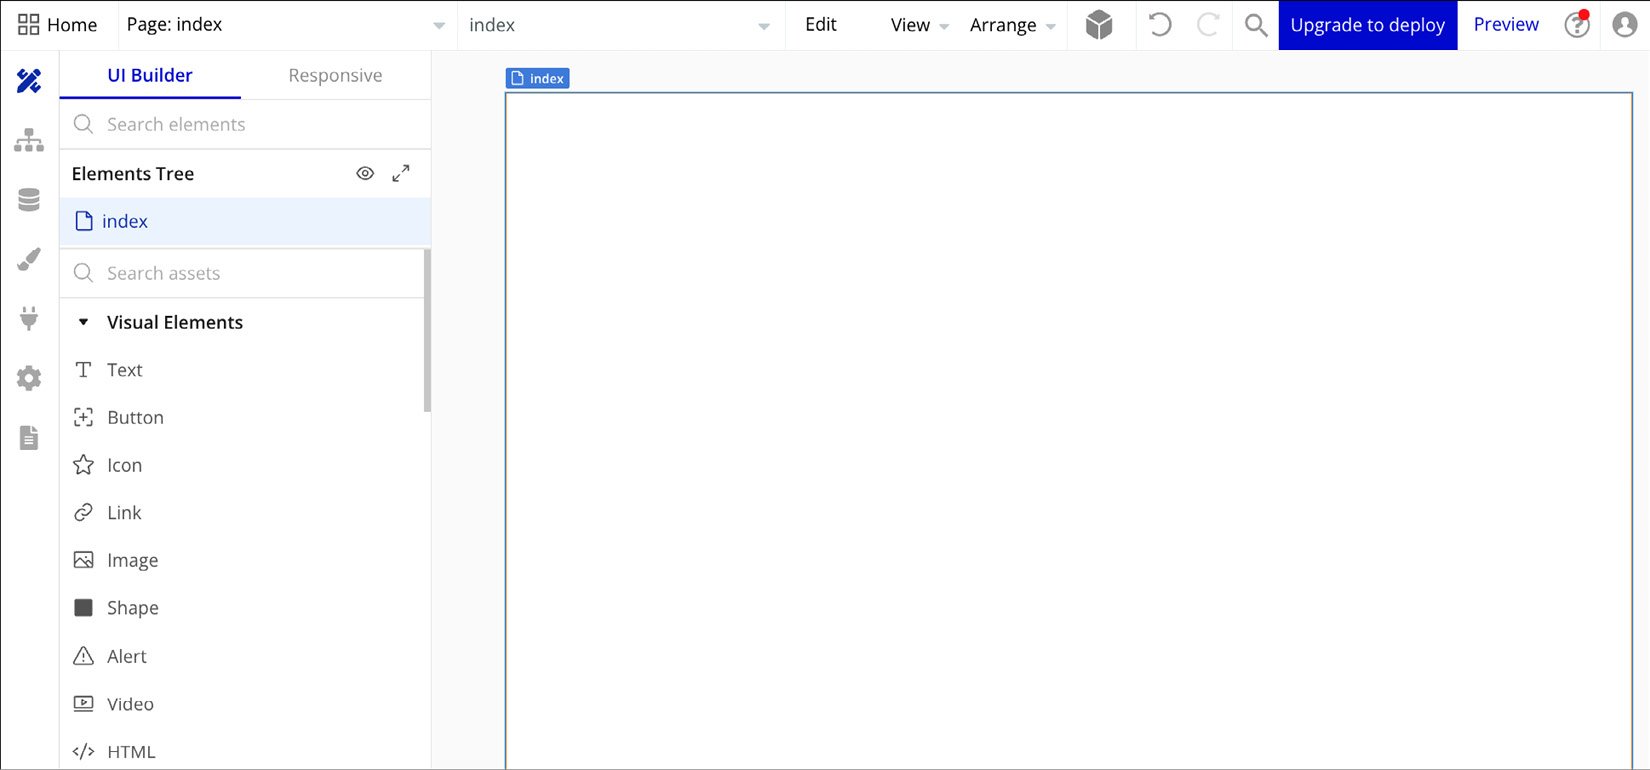
Figure 1.15: Bubble.io – the Bubble editor
The editor is composed of various areas. This big main area at the center is the canvas, where you will build your page layouts. You are going to use it a lot, but it is also important to know the other little parts of the editor and how to navigate to different areas using menus and tabs, so let’s dive right in.
1 – the top bar
The top bar is a very important part of your editor and is always visible. From here you can go back to your account’s projects, access the current project pages, configure visibility options to customize Bubble to your preferences, check that your project was saved, if there are any errors, and much more. One of the key features in the top bar is the preview button that allows you to visualize how your application looks in a new window.

Figure 1.16: Bubble.io – Bubble editor – top bar
2 – the sidebar
The sidebar is where you can find navigation tabs to access areas beyond the editor, such as workflows, data, styles, plugins, and more. At the top of the sidebar, you can also access responsive features, toggle your page to responsive mode, and visualize your page layers and components tree. It also shows all the components available for you to build your application, another very important part of the Bubble editor. The components sidebar is organized by categories. In each category, you can find specific components to be used to build your pages. All the components are drag and drop so you can easily select them and add them to the page. You will use the sidebar throughout your entire project build.
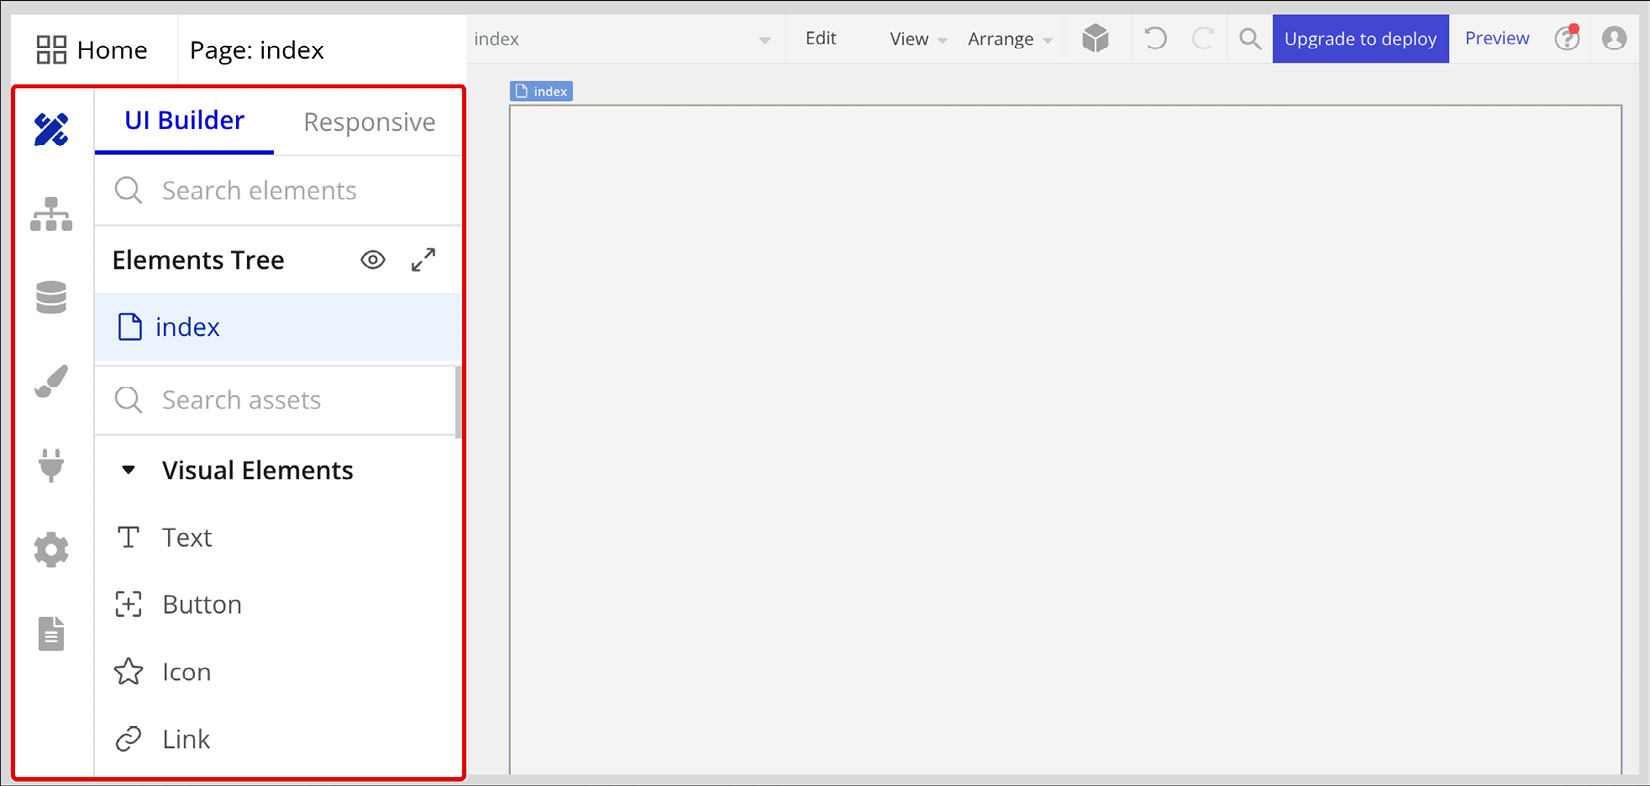
Figure 1.17: Bubble.io – Bubble editor – Sidebar
3 – the page
Inside the page is where you build your application layout by adding components and configuring their actions. If you were a painter, this would be your canvas. The page is a blank space where you will build your app’s interface, the frontend part of your application. The cool part of using no-code is that you build things visually; you don’t need to type code and then render the code to view the result. What you add on the screen and see as your page layout and design on that page is exactly what your users will see too. This is a much more creative, visual, and interactive way to build apps. As you may already have noticed, the page (canvas) is the heart of your application inside your Bubble editor.
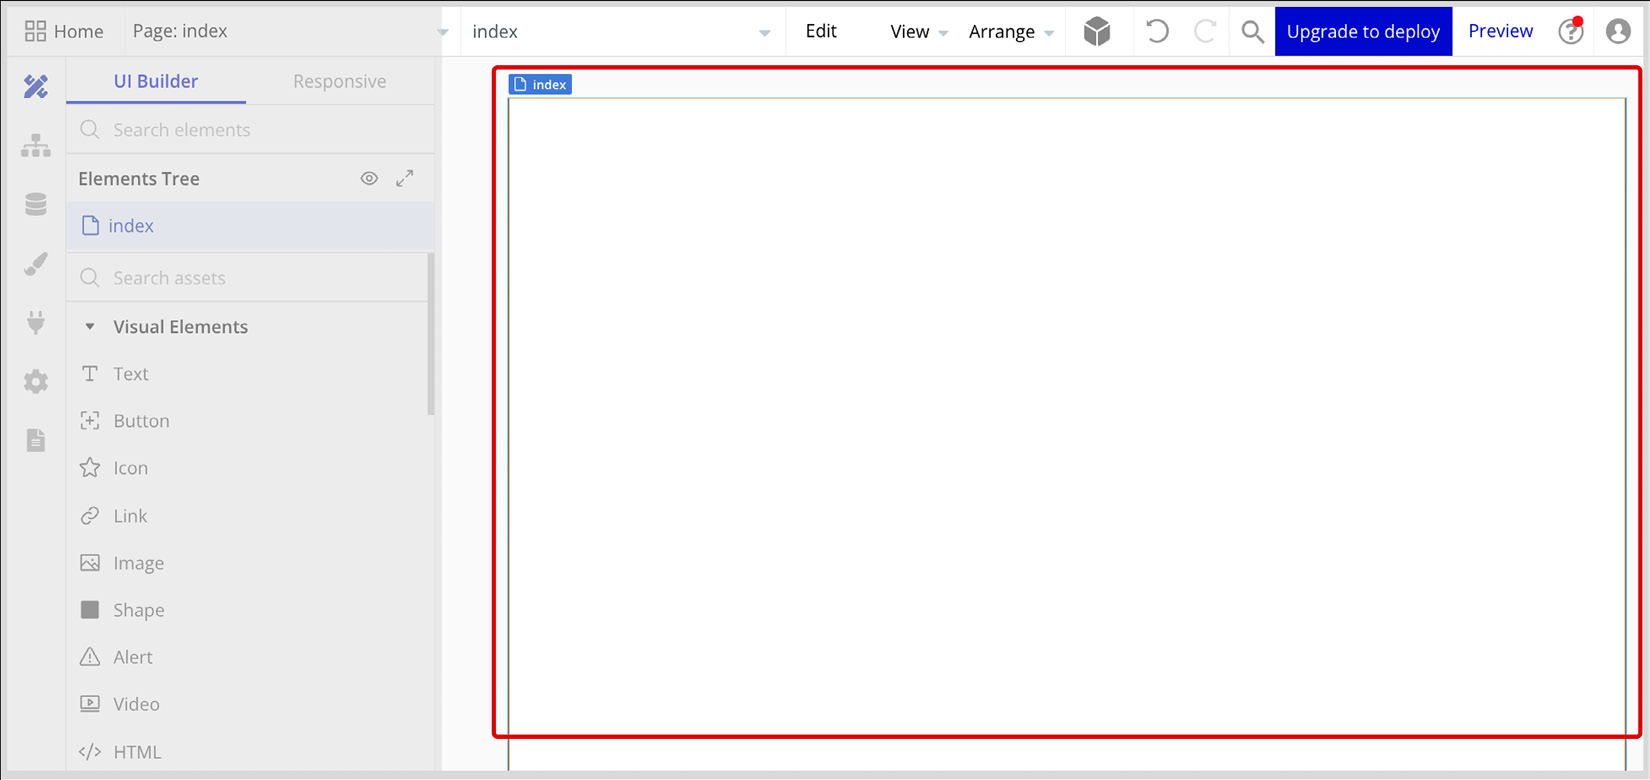
Figure 1.18 Bubble.io – Bubble editor – Page
Besides page, we can also call it the canvas, visual editor, or visual builder. When you are building your project inside the Bubble editor, you will see some things that your users won’t see, such as guidelines and extra information that help you understand your layout structure. That is normal because you are visualizing your page as the builder, not the user at this moment. To view it as a user, click the preview button in the top bar to open your project in a new window. When you go to preview mode, the Bubble interface will no longer be there, so you will be able to navigate on that specific page as if a user was actually opening your application from their browser. By using the preview mode you get a more authentic navigation experience of that page, without the view of the editor getting in the way.
It is also common to have components not being clickable or not loading dynamic content inside the editor. Likewise, when you preview the page, it will load the components and make static components work, buttons will be clickable, and dynamic features and data from the database will function normally. So keep this in mind: the editor and page area are used to build, not navigate or test the application. The preview option is used to navigate and test the application.
4 – the property editor
The property editor is a floating panel that is used to configure your components. It can also be fixed on the right side of your editor if you prefer. You can do this by clicking the View item at the top bar and checking the Lock property editor option. The property editor is a contextual component, meaning you will see information about the component you are selecting. For instance, if no component is selected, the page is treated as the primary target and is automatically selected, so in this case, the property editor will show the features and settings you can edit that are related to that page. If you add a button to the page and you are currently selecting that button, the property editor will automatically adjust and show the features and settings related to that specific button, and this will keep happening during your application-building process. Basically, the property editor exposes the settings of any component you want to configure and will show you all the options you have available to make that component work as you wish. Let’s see this in action in the following screenshot:
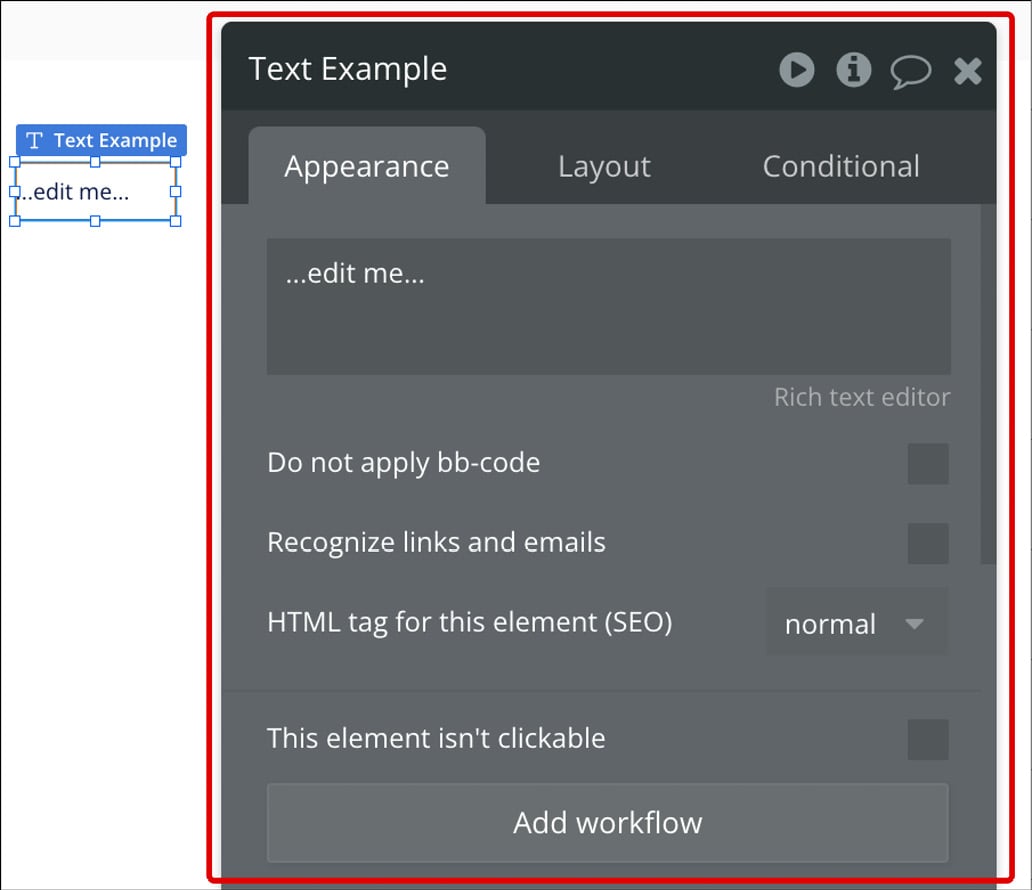
Figure 1.19: Bubble.io – Bubble editor – property editor
The property editor has a top bar where you will find the component name. Clicking this allows you to rename the component. On the right side, there are a few icons. The video icon displays a quick video explaining a bit more about the component you are using. The i icon shows more information about this element, and you can also access custom state settings there. The speech bubble icon is the notes area, which allows you to add custom notes to your component. This can be useful when collaborating with other people on Bubble or to just help you remember things in the future.
The second part of the property editor is the tabs. There are three tabs available that display different types of settings: Appearance, Layout, and Conditional. When you select an element, the property editor will appear and you can navigate through these tabs to access different areas and settings available for you to edit.
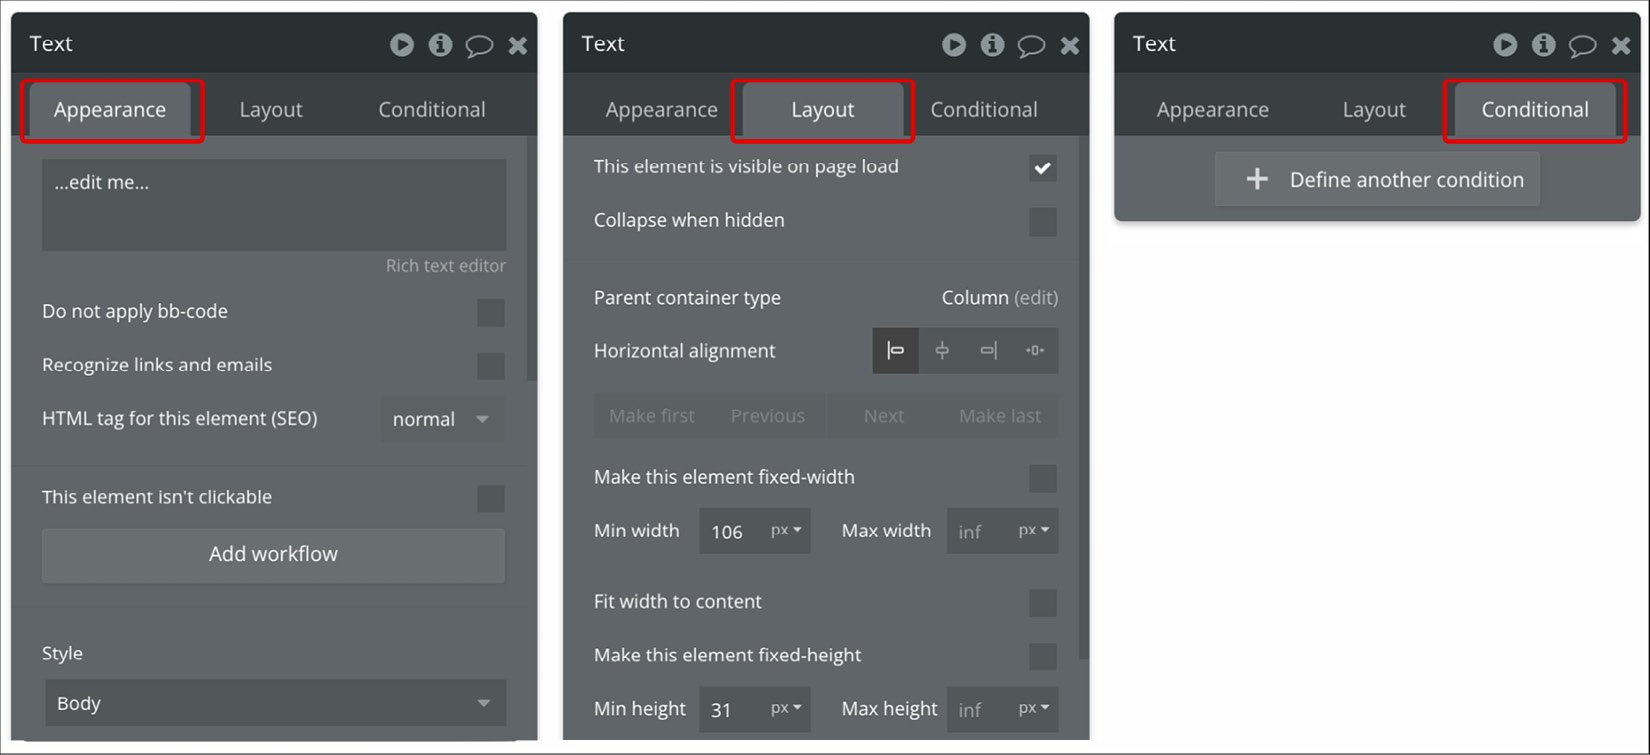
Figure 1.20: Bubble.io – Bubble editor – property editor tabs
Under the Appearance tab, you will find settings related to how the component looks and can change its colors, fonts, and styles. Under the Layout tab, you will find settings related to how the component behaves inside your page, its maximum and minimum size, whether it will stretch, be aligned to the left or right, its margins and paddings, and so on. Under the Conditional tab, you can create visibility rules to show or hide your component based on a variable condition or even change the style of that component if a user clicks a button, for instance. The Conditional tab allows you to work with dynamic data, as well as to create cool interactions, and even use custom states.
The property editor will follow you wherever you go inside Bubble and pretty soon it will be your best friend. Once you get the gist of it, you will understand how it works and how the fields adapt as you select new components and areas of the editor.
Note that some fields inside the property editor have fixed options for you to choose from, such as fonts, colors, and all sorts of fixed parameters, but other fields allow you to add dynamic data. This means you can add and create little formulas to display data coming from your database. We call this data binding. Basically, you write in plain English and in a logical way what type of information from the database you want to display inside a specific field, and with that you can bring dynamic data into components and build exciting things. But don’t worry, let’s not get ahead of ourselves. It might sound frightening and a lot at this point, but it will all make sense as we continue the book. Soon, things will start to connect and you will be ready to use Bubble in a simple and fluid way.
By now, you’ve learned about the main areas of your Bubble editor. This means you can now navigate around and understand how the tool is divided on screen. With this knowledge, it will be much easier to find things and play with the tool while building. It will also make you more familiar with Bubble, making it less intimidating to start. In the next section, you will learn about other areas of Bubble that are not initially shown to you and where you can find more interesting settings and features to play with to build amazing and powerful web applications.


