Configuring a security lab with VMware Player (Windows)
You can run a virtual security lab on a Windows PC with relatively low available resources by installing VMware Player on your Windows workstation. You can get VMware Player for free, or the more functional alternative, VMware Player Plus, for a low cost.
Getting ready
To install VMware Player on your Windows workstation, you will first need to download the software. The download for the free version of VMware Player can be found at https://my.vmware.com/web/vmware/free. From this page, scroll down to the VMware Player link and click on Download. On the next page, select the Windows 32- or 64-bit installation package and then click on Download. There are installation packages available for Linux 32-bit and 64-bit systems as well.
How to do it…
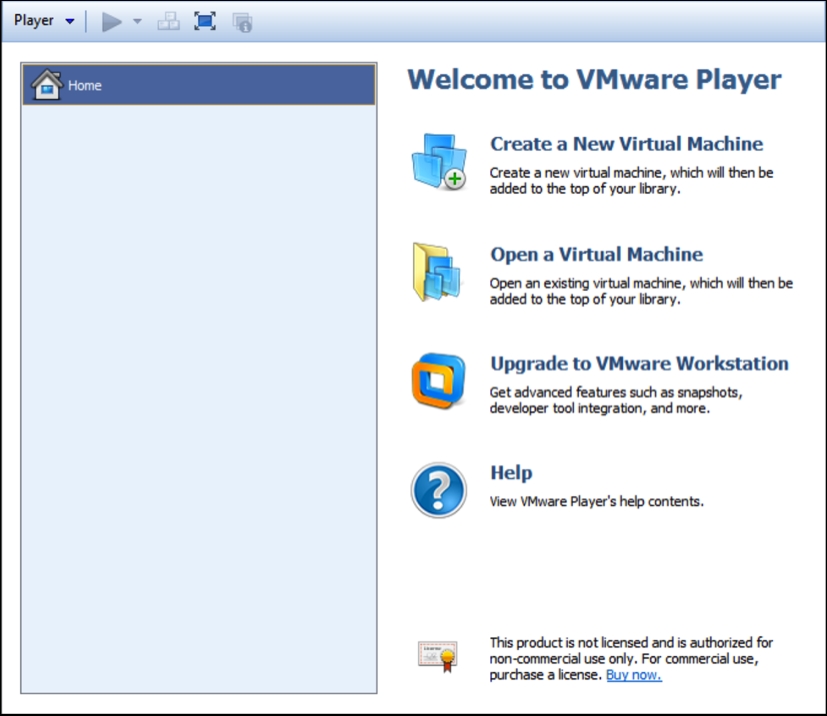
Once the software package has been downloaded, you should find it in your default download directory. Double-click on the executable file in this directory to start the installation process. Once started, it is as easy as following the onscreen instructions to complete the install. After the installation is complete, you should be able to start VMware Player by accessing the desktop icon, the quick launch icon, or by browsing to it in All Programs. Once loaded, you will see the virtual machine library. This library will not yet contain any virtual machines, but they will be populated as you create them on the left-hand side of the screen, as shown in the following screenshot:

Once you have opened VMware Player, you can select Create a New Virtual Machine to get started. This will initialize a very easy-to-use virtual machine installation wizard:

The first task that you need to perform in the installation wizard is to define the installation media. You can choose to install it directly from your host machine's optical drive, or you can use an ISO image file. ISOs will be used for most of the installs discussed in this section, and the place where you can get them will be mentioned in each specific recipe. For now, we will assume that we browsed to an existing ISO file and clicked on Next, as shown in the following screenshot:

You then need to assign a name for the virtual machine. The virtual machine name is merely an arbitrary value that serves as a label to identify and distinguish it from other VMs in your library. Since a security lab is often classified by a diversity of different operating systems, it can be useful to indicate the operating system as part of the virtual machine's name. The following screenshot displays the Specify Disk Capacity window:

The next screen requests a value for the maximum size of the installation. The virtual machine will only consume hard drive space as required, but it will not exceed the value specified here. Additionally, you can also define whether the virtual machine will be contained within a single file or spread across multiple files. Once you are done with specifying the disk capacity, you get the following screenshot:

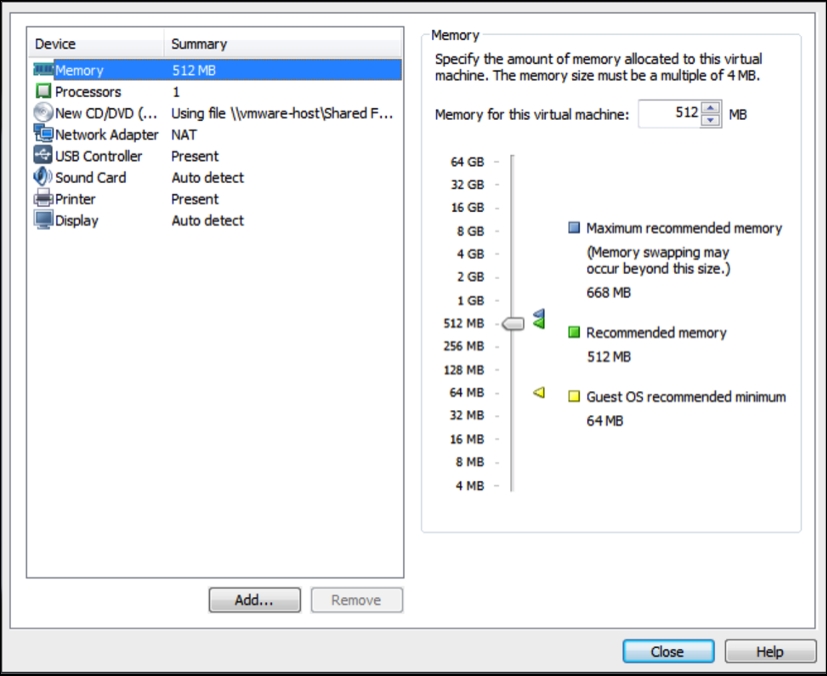
The final step provides a summary of the configurations. You can either select the Finish button to finalize the creation of the virtual machine or select the Customize Hardware… button to manipulate more advanced configurations. Have a look at the following screenshot for the advanced configurations:

The advanced configuration settings give you full control over shared resources, virtual hardware configurations, and networking. Most of the default configurations should be sufficient for your security lab, but if changes need to be made at a later time, these configurations can be readdressed by accessing the virtual machine settings. When you are done with setting up the advanced configuration, you get the following screenshot:

After the installation wizard has finished, you should see the new virtual machine listed in your virtual machine library. From here, it can now be launched by pressing the play button. Multiple virtual machines can be run simultaneously by opening multiple instances of VMware Player and a unique VM in each instance.
How it works…
VMware creates a virtualized environment in which resources from a single hosting system can be shared to create an entire network environment. Virtualization software such as VMware has made it significantly easier and cheaper to build a security lab for personal, independent study.


