Search icon CANCEL
Subscription
0
Cart icon
Your Cart (0 item)
Close icon
You have no products in your basket yet
Arrow left icon
Explore Products
Best Sellers
New Releases
Books
Videos
Audiobooks
Learning Hub
Free Learning
Arrow right icon
Arrow up icon
GO TO TOP
Implementing Cisco UCS Solutions

You're reading from   Implementing Cisco UCS Solutions Deploy, manage, and automate your datacenter

Arrow left icon
Product type Paperback
Published in Apr 2017
Publisher
ISBN-13 9781786464408
Length 482 pages
Edition 2nd Edition
Tools
Concepts
Arrow right icon
Authors (2):
Arrow left icon
Prasenjit Sarkar Prasenjit Sarkar
Author Profile Icon Prasenjit Sarkar
Prasenjit Sarkar
Anuj Modi Anuj Modi
Author Profile Icon Anuj Modi
Anuj Modi
Arrow right icon
View More author details
Toc

Table of Contents (15) Chapters Close

Preface 1. What's New with Cisco UCS FREE CHAPTER 2. Installing Cisco UCS Hardware 3. Setting Up a Lab Using Cisco UCS Emulator 4. Configuring Cisco UCS Using UCS Manager 5. Configuring LAN Connectivity 6. Configuring SAN Connectivity 7. Creating Identity Resource Pools, Policies, and Templates 8. Creating and Managing Service Profiles 9. Managing UCS through Routine and Advanced Management 10. Virtual Networking in Cisco UCS 11. Configuring Backup, Restore, and High Availability 12. Cisco UCS Failure Scenarios Testing 13. Third-Party Application Integration 14. Automation and Orchestration of Cisco UCS

Learning to create a WWPN pool


Similar in format to WWNNs, a WWPN is a 64-bit address assigned to individual vHBAs in servers. The WWNN for the vHBAs in a blade server is always identical, whereas the WWPN is always unique. Storage zoning is done using the WWPN addresses.

The following are the steps to create WWNN address pools:

  1. Log in to the UCSM screen.
  2. Click on the SAN tab in the navigation pane.
  3. Click on the Pools tab and expand root.


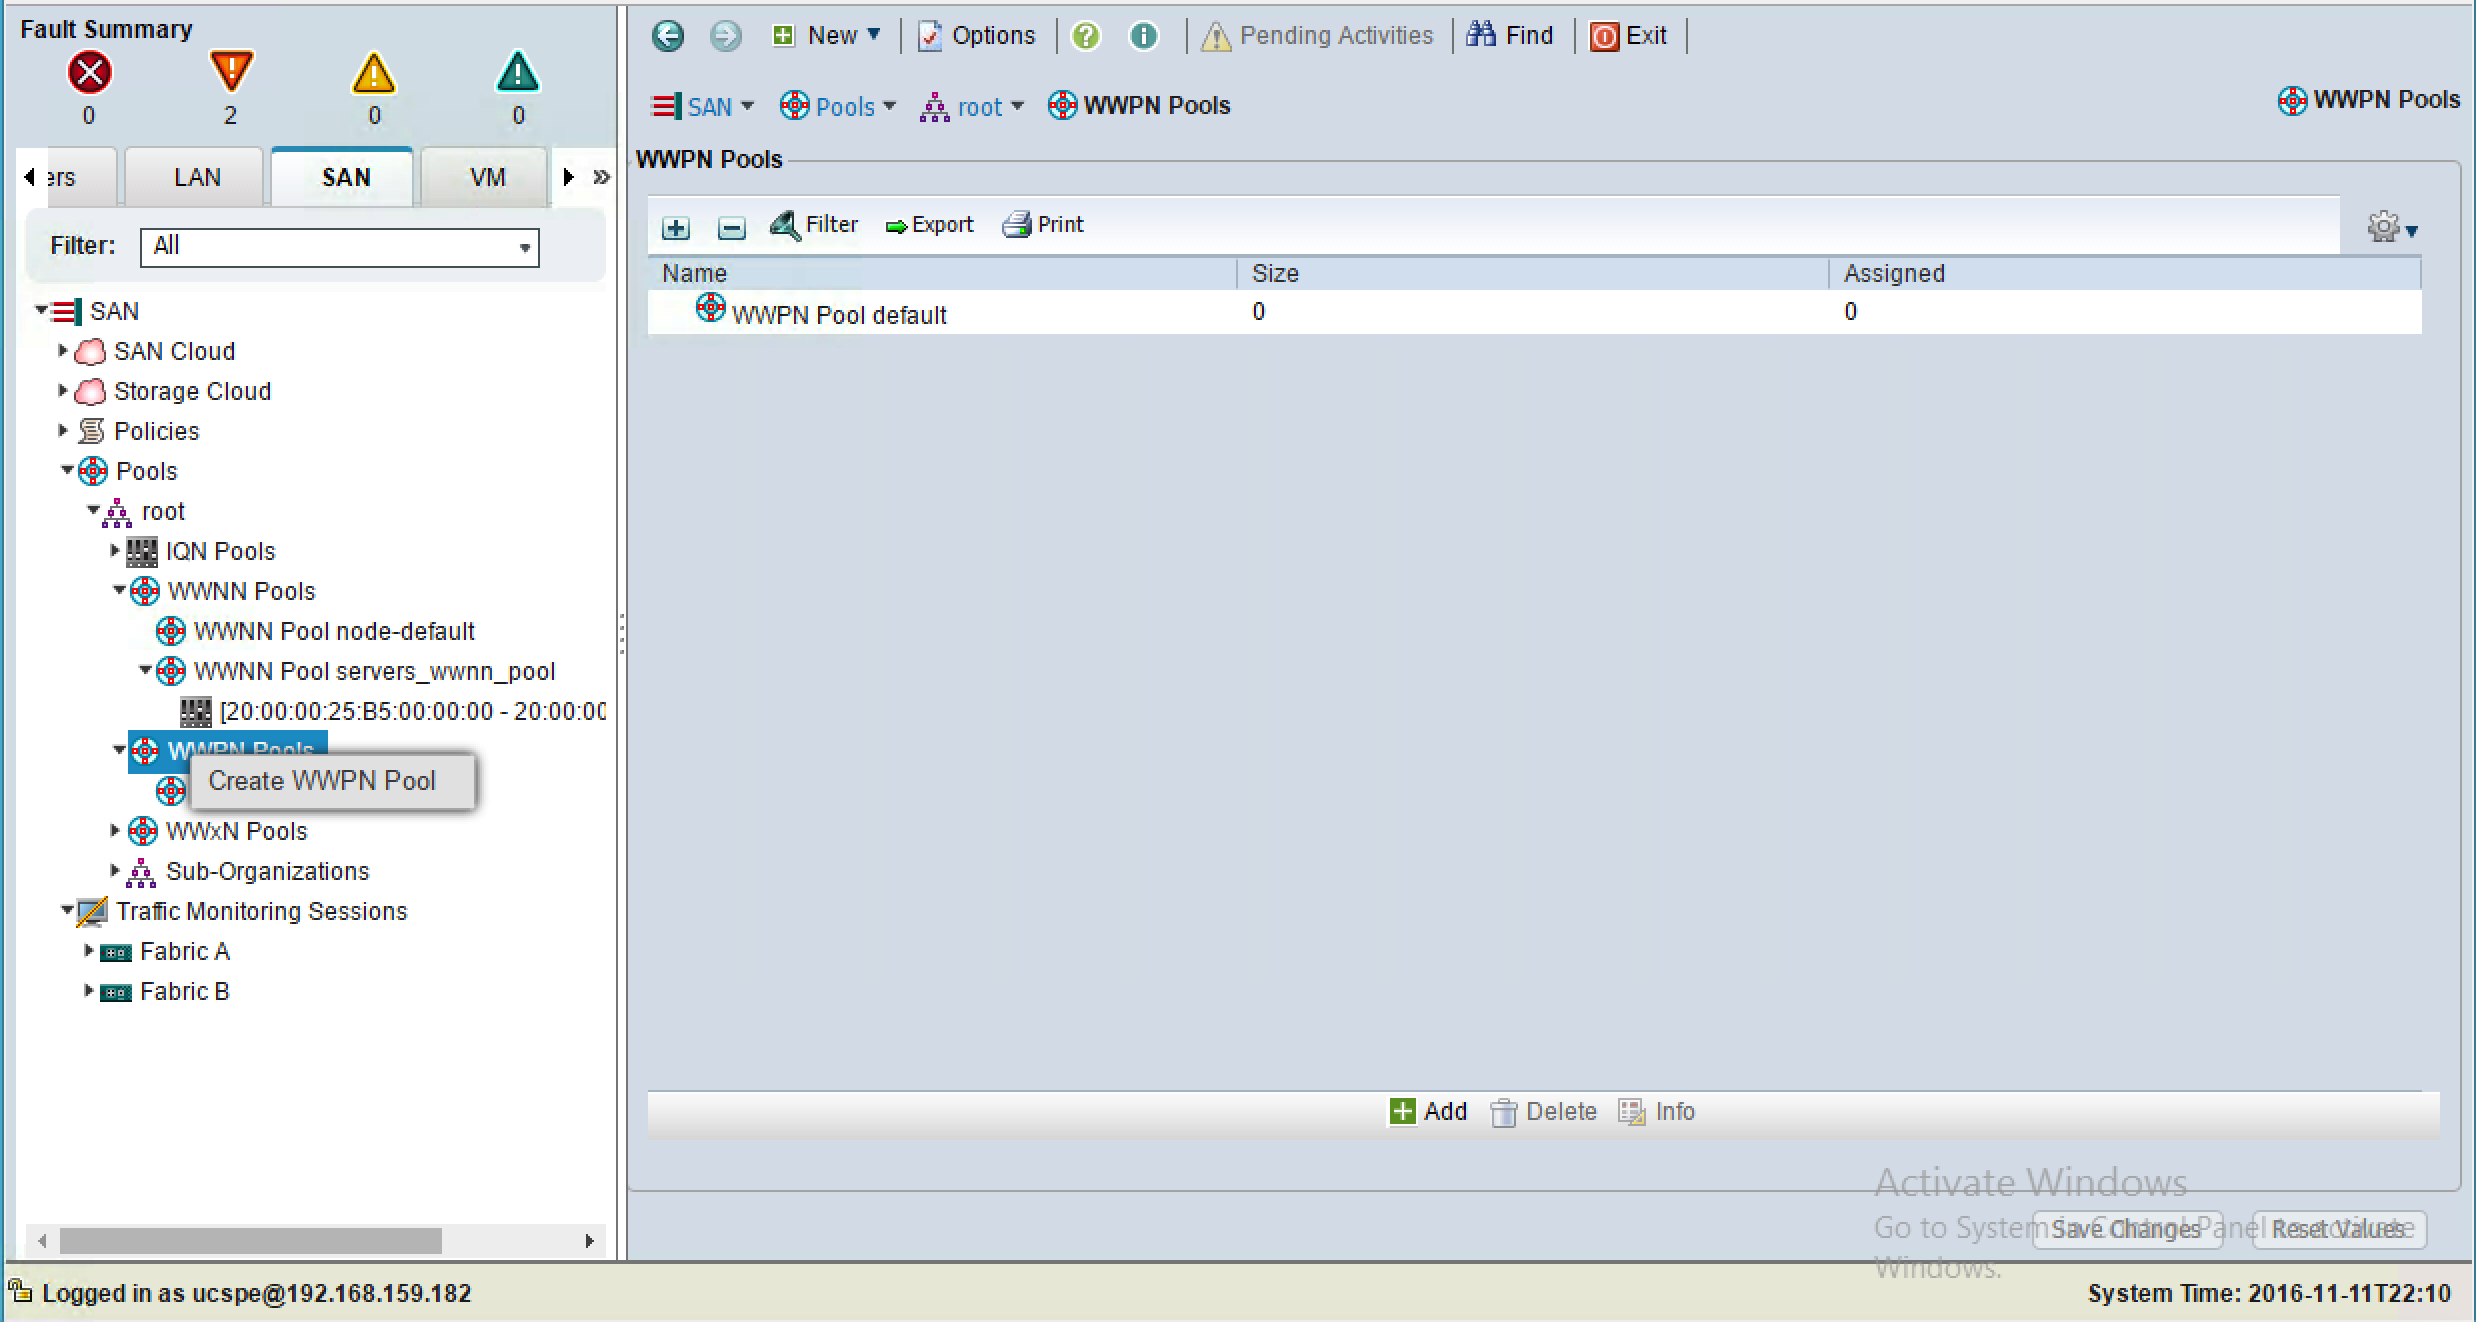
  1. Right-click on WWPN Pools, and click on Create WWPN Pool, as shown in the following screenshot:
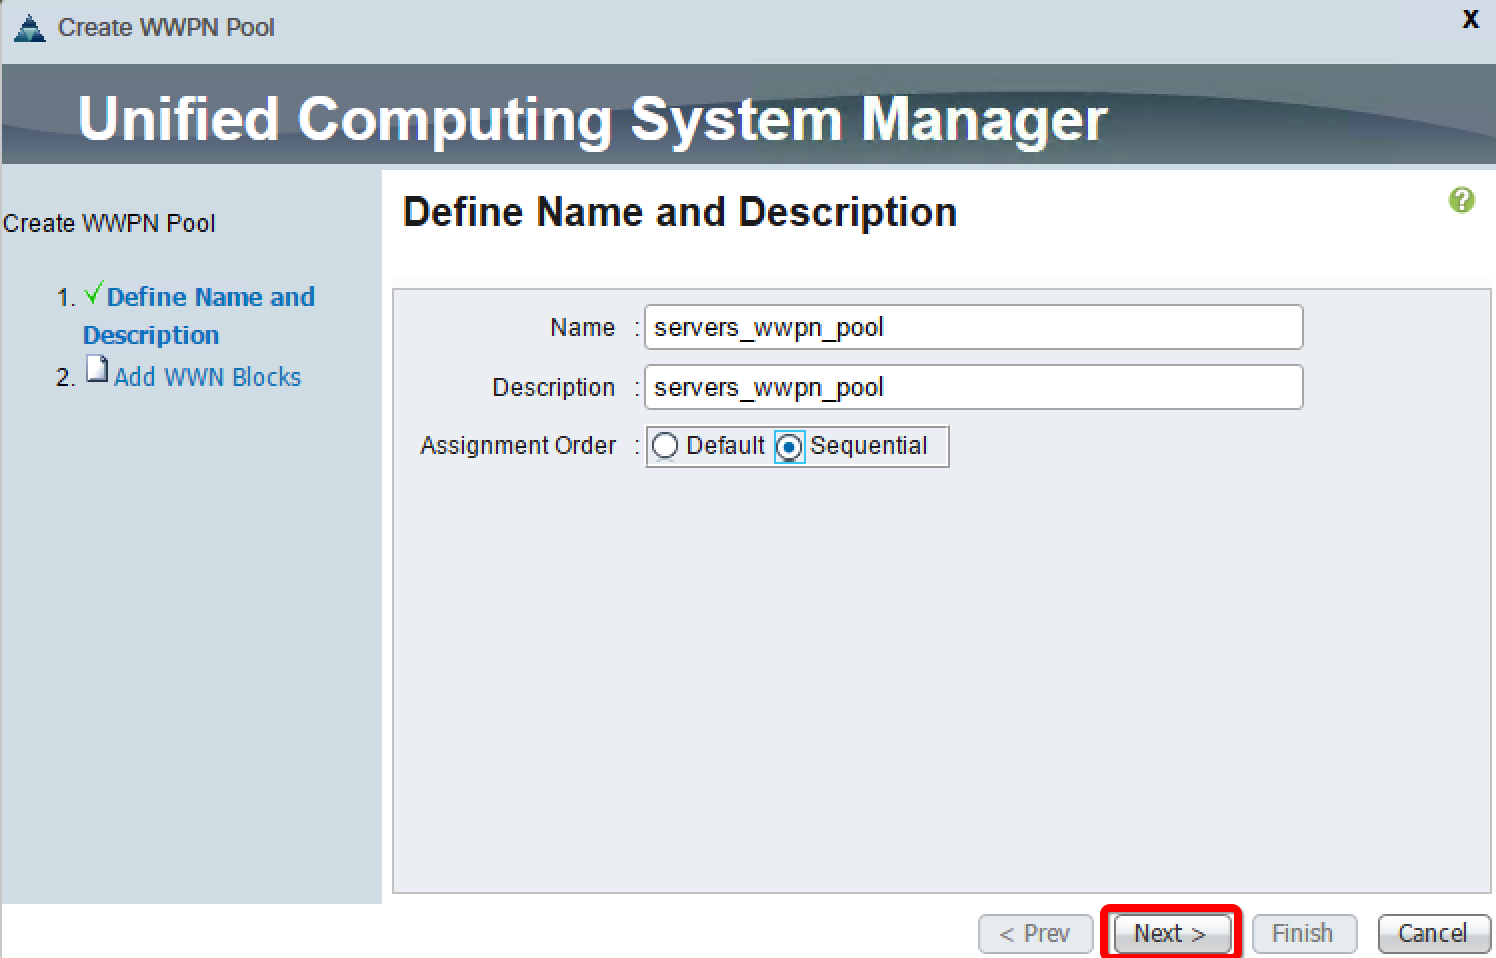
  1. In the pop-up window, assign the Name and Description values to the WWPN pool.
  2. The selection of Default as the Assignment Order value is random. Select Sequential to assign WWPNs sequentially.


  1. Click on Next:
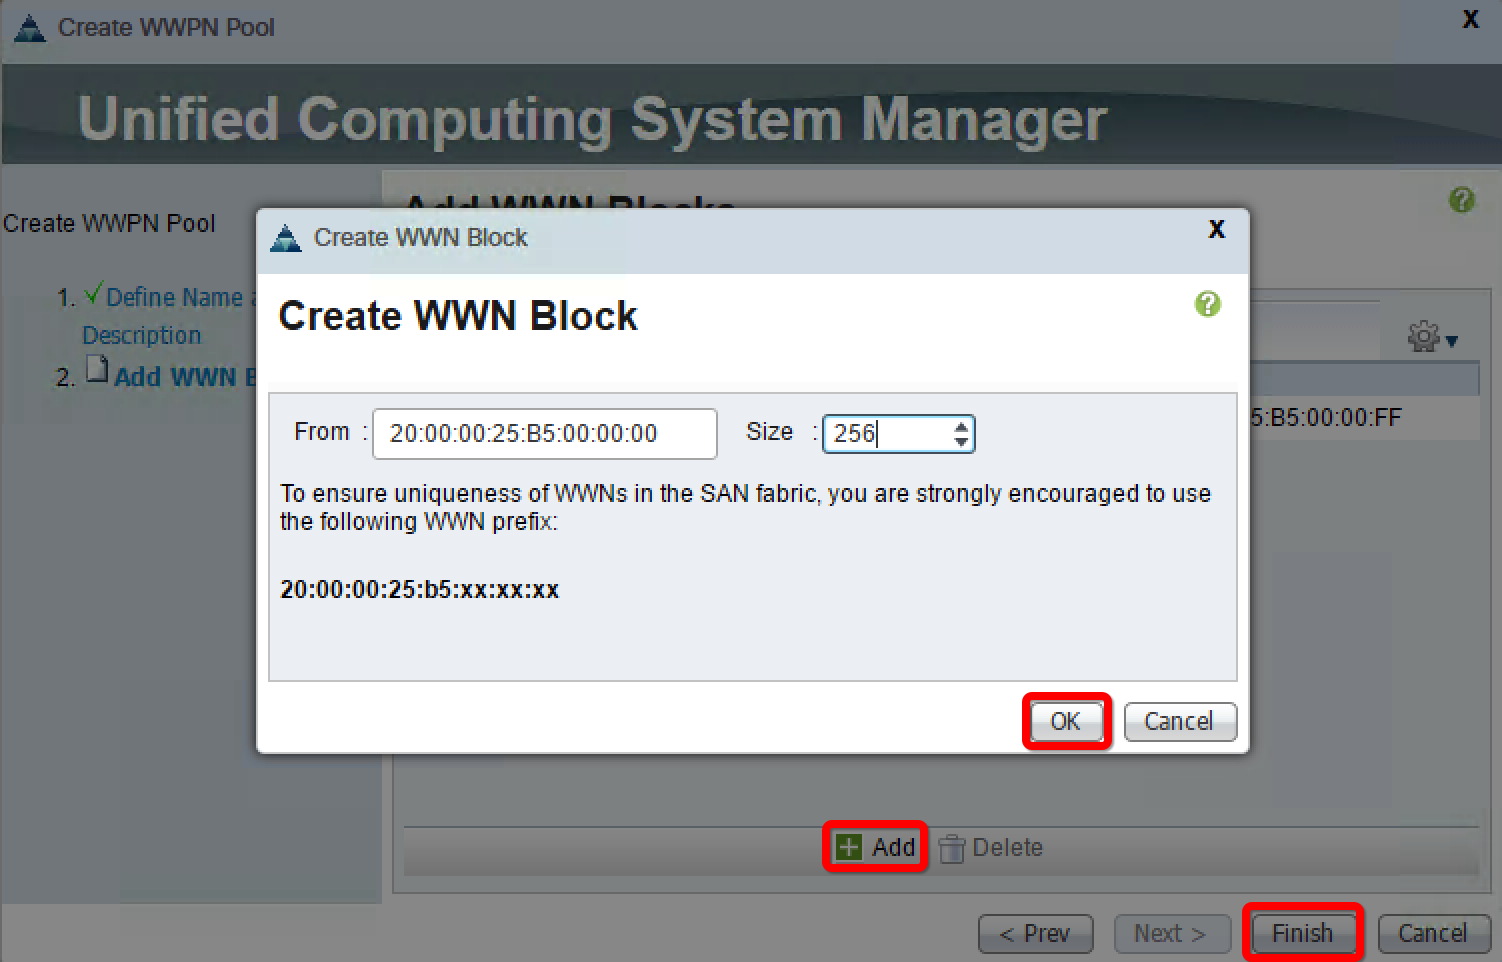
  1. Click on Add on the next screen.
  2. In the pop-up window, change Size to create the desired number of WWPN addresses.


  1. Click on OK and then on Finish, as shown here:
  1. In order to verify the WWPN pool, click on the WWPN Pools tab in the navigation pane, and click on the...
lock icon The rest of the chapter is locked
Register for a free Packt account to unlock a world of extra content!
A free Packt account unlocks extra newsletters, articles, discounted offers, and much more. Start advancing your knowledge today.
Unlock this book and the full library FREE for 7 days
Get unlimited access to 7000+ expert-authored eBooks and videos courses covering every tech area you can think of
Renews at $19.99/month. Cancel anytime
Banner background image