Adding a remote graphical user interface
For some steps in your robot build, you will need a graphical look at your system. You can get this on your Raspberry Pi using an application called vncserver. You'll need to install a version of this on your Raspberry Pi by typing in sudo apt-get install tightvncserver in a terminal window on your Raspberry Pi.
Tightvncserver is an application that will allow you to remotely view your complete graphical desktop. Once you have it installed, you can do the following:
- You'll need to start the server by typing in
vncserverin a terminal window on the Raspberry Pi. - You will then be prompted for a password, prompted to verify the password, and then asked if you'd like to have a view only password. Remember the password you entered; you'll need it to remotely log in via a VNC viewer.
- You'll need a VNC viewer application for your remote computer; a good choice is Real VNC, available from http://www.realvnc.com/download/viewer/. When you run it, you should see this:

- Enter the VNC server address, which is the IP address of your Raspberry Pi, and click on Connect. You will get a warning about an unencrypted connection; select Continue and you will get this pop-up window:

- Type in the password you just entered while starting the vncserver, and you should then get a graphical view of your Raspberry Pi, which looks like the following screenshot:

You can now access all the capabilities of your system, albeit they may be slower if you are doing a graphics-intense data transfer. To avoid having to type in vncserver each time you boot your Raspberry Pi, use the instructions at http://www.havetheknowhow.com/Configure-the-server/Run-VNC-on-boot.html.
Vncserver is also available via Linux. You can use an application called Remote Desktop Viewer to view the remote Raspberry Pi Windows system. If you have not installed this application, install it using the updated software application based on the type of Linux system you have. Once you have the software, do the following:
- Run the application, and you should see the following screenshot:

- Make sure that vncserver is running on the Raspberry Pi; the easiest way to do this is to log in using SSH and run vncserver at the prompt. Now, click on Connect on the Remote Desktop Viewer. Fill in the screen as follows. Under the Protocol selection, choose VNC, and you should see the following screenshot:

- Now, enter the Host inet address—make sure to include
:1at the end, and then click on Connect. You'll need to enter the vncserver password you set up, like the following screenshot:
You should now see the graphical screen of the Raspberry Pi. You are ready to start interacting with the system!
Establishing wireless access
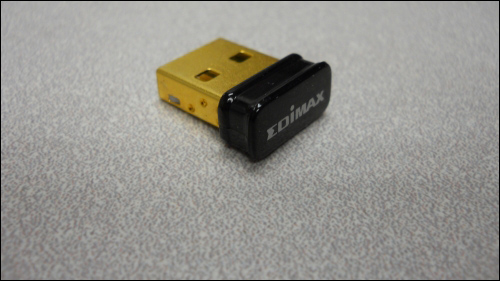
Now that your system is configured, the next step is to connect your Raspberry Pi to your remote computer using wireless. To do this, you'll add a wireless USB device and configure it. See http://elinux.org/RPi_USB_Wi-Fi_Adapters to identify wireless devices that have been verified to work with Raspberry Pi. Here is one available at many online electronics outlets:

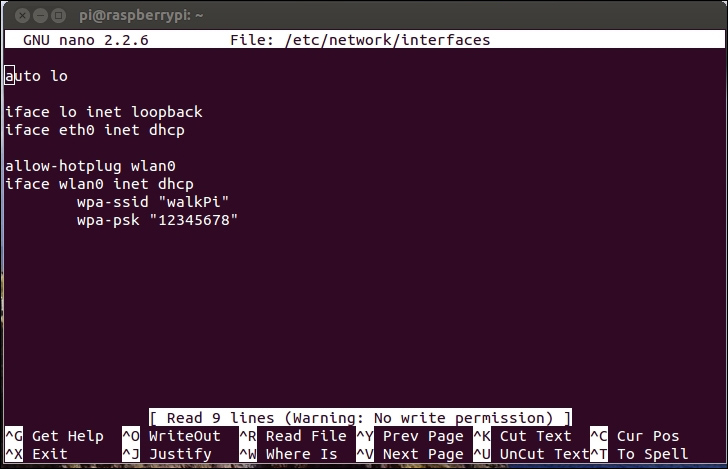
To connect to your wireless LAN, boot the system and edit the network file by typing in sudo nano /etc/network/interfaces. Then, edit the file to look like this:

Reboot your device and it should now be connected to your wireless network.
Note
If you are using a US keyboard, you may need to edit the keyboard file for your keyboard to use nano effectively. To do this, type in sudo nano /etc/default/keyboard and change XKBLAYOUT="gb" to XKBLAYOUT="us".
Your system has lots of capabilities. Feel free to play with the system, which will give you an understanding of what is already there and what you'll want to add from a software perspective.


