Serial setup
BeagleBone Black uses a serial debug port to communicate with the host machine. We will use minicom as a serial terminal client to communicate over the serial port. To set up minicom, perform the following steps:
- Run this setup command as a privileged user:
$ sudo minicom -s
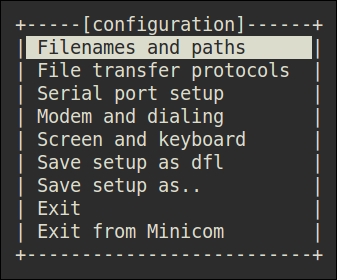
Mmicom main configuration dialogue
A menu will appear on the terminal with nine different options, as shown in the preceding screenshot. We won't be changing many of these. The up and down arrow keys can be used to select these options. We will select the third option, Serial port setup. Choose this option by pressing the Enter key. You will enter into another menu in which each option is listed, along with a corresponding key on the keyboard on the left-hand side to choose the option. Press the A key on the keyboard to set your serial device to
/dev/ttyUSB0, and then press Enter. If you are not sure which device is created in your case, you could find this out by using the following command combination on another terminal:$ dmesg | grep "pl2303 converter" [37532.385583] pl2303 3-3:1.0: pl2303 converter detected [37532.386415] usb 3-3: pl2303 converter now attached to ttyUSB0
- Press E to set the baud rate. Use the A and B keys to navigate the baud rate values. A corresponds to next and B to previous. Keep pressing B till you get
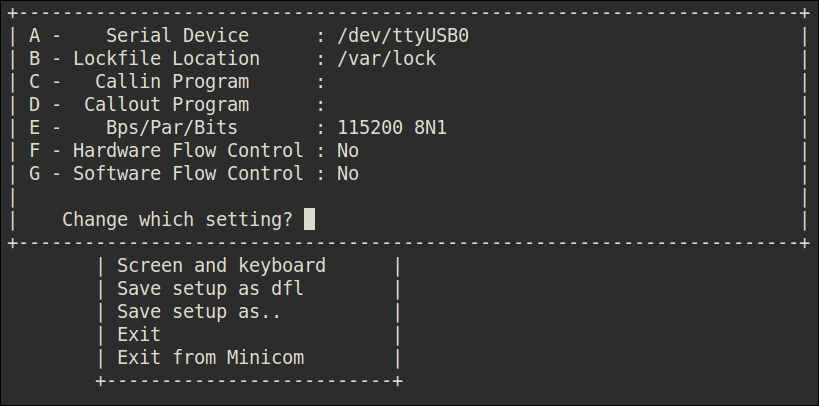
115200 8N1. Then, press Enter to choose this setting and go back to the previous menu. - Next, we need to press F and G to change enablement statuses of hardware flow control and software flow control. Both need to be set to No. Finally, the settings should look as shown in this screenshot:

Minicom Serial Port Setup dialogue
- Choose Save setup as dfl to avoid reconfiguring every time and choose Exit to go to minicom. Don't exit from it if you want to observe whether there is any activity on the serial port.


