Chapter 4. Controlling the Data Flow
In the previous chapter, we learned how to store data in our database persistently. In this chapter, we will take a look at how we can tell Meteor what to send to the clients.
Until now, this all worked magically because we used the autopublish package, which synced all of the data with every client. Now, we will control this flow manually, sending only the necessary data to the client.
In this chapter, we'll cover the following topics:
- Synchronizing data with the server
- Publishing data to clients
- Publishing partial collections
- Publishing only the specific fields of documents
- Lazy loading more posts
Note
If you want to jump right into the chapter and follow the examples, download the previous chapter's code examples from either the book's web page at https://www.packtpub.com/books/content/support/17713, or from the GitHub repository at https://github.com/frozeman/book-building-single-page-web-apps-with-meteor/tree/chapter3.
These code examples will also contain all the style files, so we don't have to worry about adding CSS code along the way.
Syncing data – the current Web versus the new Web
In the current Web, most pages are either static files hosted on a server or dynamically generated by a server on a request. This is true for most server-side-rendered websites, for example, those written with PHP, Rails, or Django. Both of these techniques required no effort besides being displayed by the clients; therefore, they are called thin clients.
In modern web applications, the idea of the browser has moved from thin clients to fat clients. This means most of the website's logic resides on the client and the client asks for the data it needs.
Currently, this is mostly done via calls to an API server. This API server then returns data, commonly in JSON form, giving the client an easy way to handle it and use it appropriately.
Most modern websites are a mixture of thin and fat clients. Normal pages are server-side-rendered, where only some functionality, such as a chat box or news feed, is updated using API calls.
Meteor, however, is built on the idea that it's better to use the calculation power of all clients instead of one single server. A pure fat client or a single-page app contains the entire logic of a website's frontend, which is send down on the initial page load.
The server then merely acts as a data source, sending only the data to the clients. This can happen by connecting to an API and utilizing AJAX calls, or as with Meteor, using a model called publication/subscription. In this model, the server offers a range of publications and each client decides which dataset it wants to subscribe to.
Compared with AJAX calls, the developer doesn't have to take care of any downloading or uploading logic. The Meteor client syncs all of the data automatically in the background as soon as it subscribes to a specific dataset. When data on the server changes, the server sends the updated documents to the clients and vice versa, as shown in the following diagram:

Note
If this does sound insecure, be assured that we can set rules that filter changes on the server side. We will take a look at these possibilities in Chapter 8, Security with the Allow and Deny Rules.
Removing the autopublish package
To work with Meteor's publications/subscriptions, we need to remove the autopublish package, which was added by default to our project.
This package is useful for rapid prototyping, but infeasible in production since all of the data in our database would be synced to all the clients. This is not only insecure but also slows down the data loading process.
We just run the following command from inside our my-meteor-blog folder on the terminal:
$ meteor remove autopublish
Now we can run meteor again to start our server. When we check out the website, we will see that all our posts from the previous chapter are gone.
They are not really gone, however. The current server just didn't publish any yet, and the client just didn't subscribe to any; therefore, we can't see them.
Publishing data
In order to access the post on the client again, we need to tell the server to publish it to subscribing clients.
To do so, we will create a file called publications.js inside the my-meteor-blog/server folder and add the following lines of code:
Meteor.publish('all-posts', function () {
  return Posts.find();
});
The
Meteor.publish function will create a publication called all-posts and return a cursor with all the posts from the Post collection in that publication.
Now, we only have to tell the client to subscribe to this publication and we will see our posts again.
We create a file called subscriptions.js inside the my-meteor-blog/client folder with the following content:
Meteor.subscribe('all-posts');Now, when we check out our website, we can see that our blog posts have reappeared.
This happens because the client will subscribe to the all-posts publication when the subsciptions.js file is executed, which happens right before the page is fully loaded, as Meteor adds the subsciptions.js file automatically to the head of the document for us.
This means that the Meteor server sends the website first and the JavaScript builds the HTML on the client; then, all the subscriptions get synced, which populate the client's collections, and the template engine, Blaze, can display the posts.
Now that we have our posts back, let's see how we can tell Meteor to send only a subset of the documents from the collection.
Publishing only parts of data
To make our front page future-ready, we will need to limit the amount of posts shown on it, as we will probably have a lot of posts added with time.
For this, we will create a new publication called limited-posts, where we can pass a limit option to the posts' find() function and add it to our publications.js file, as follows:
Meteor.publish('limited-posts', function () {
  return Posts.find({}, {
    limit: 2,
    sort: {timeCreated: -1}
  });
});
We add a sort option, with which we sort the posts in descending order on the timeCreated field. This is necessary to ensure that we get the latest posts and then limit the output. If we only sort the data on the client, it might happen that we leave out newer posts, as the server publication would send only the first two documents it found, regardless of whether they are the latest ones or not.
Now we just have to go to subscriptions.js and change the subscription to the following line of code:
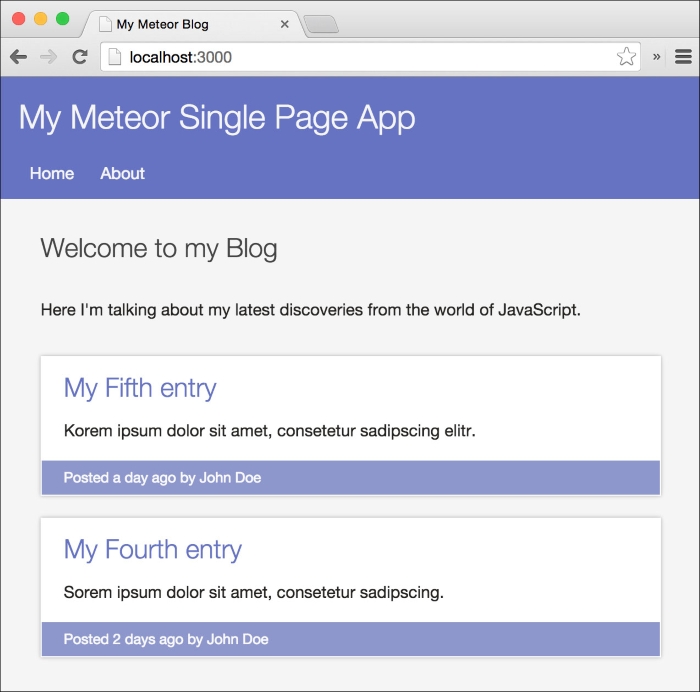
Meteor.subscribe('limited-posts');If we check out our browser now, we will see that only the last two posts appear on our front page, since we only subscribed to two, as shown in the following screenshot:

Note
We must be aware that if we keep the code for the old subscription alongside the code for the new subscription, we will subscribe to both. This means Meteor merges both subscriptions and therefore keeps all the subscribed documents in our client-side collections.
We need to either comment out the old subscription or remove it before adding the new one.
Publishing specific fields
To improve publications, we can also determine which fields we want to publish from the document. For example, we can only ask for the title and text properties instead of all other properties.
This speeds up the synchronization of our subscriptions since we don't require the whole post but only the necessary data and short descriptions when listing posts on the front page.
Let's add another publication to our publications.js file:
Meteor.publish('specificfields-posts', function () {
  return Posts.find({}, {
    fields: {
      title: 1
    }
  });
});
As this is just an example, we pass an empty object as a query to find all the documents, and as the second parameter to find(), we pass an options object containing the fields object.
Every field that we give a value of 1 will be included in the returned document. If we rather want to work by excluding fields, we can use the field name and set the value to 0. However, we can't use both including and excluding fields, so we need to choose what fits better, depending on the document size.
Now we can simply change the subscription in our subscriptions.js file to the following line of code:
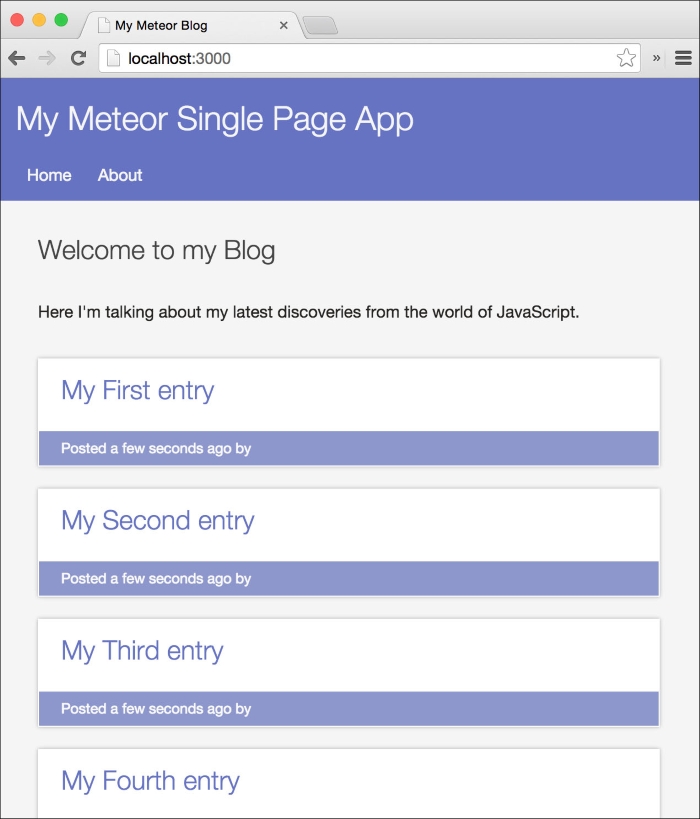
Meteor.subscribe('specificfields-posts');Now, when we open the browser, it will present us with a list of our posts. Only the titles are present and the description, time, and author fields are empty:

Lazy loading posts
Now that we've gone through these simple examples, let's put them all together and add a nice lazy load feature to our posts' list on the front page.
Lazy loading is a technique that loads additional data only when the user desires it or when they scroll to the end. This can be used to increase page load, since the data to be loaded is limited. To do this, let's perform the following steps:
- We need to add a lazy load button to the bottom of the list of posts on the front page. We go to our
home.htmlfile and add the following button at the end of ourhometemplate, right below the{{#each postsList}}block helper:<button class="lazyload">Load more</button>
- Next, we will add the publication that will send a flexible number of posts to our
publications.jsfile, as follows:Meteor.publish('lazyload-posts', function (limit) { return Posts.find({}, { limit: limit, fields: { text: 0 }, sort: {timeCreated: -1} }); });
Basically, it's a combination of what we learned earlier.
- We used the
limitoption, but instead of setting a fixed number, we used thelimitparameter, which we will later pass to this publication function. - Previously, we used the
fieldsoption and excluded thetextfield. - We can just include
fieldsto get the same result. This will be safer, as it ensures that we won't get any extra fields in case the documents get extended:fields: { title: 1, slug: 1, timeCreated: 1, description: 1, author: 1 } - We sorted the output to make sure we are always returning the latest posts.
Now that we have set our publication, let's add a subscription so that we can receive its data.
Note
Be aware that we need to remove any other subscription beforehand so that we are not subscribing to any other publication.
To do this, we need to make use of Meteor's session object. This object can be used on the client side to set variables reactively. This means every time we change this session's variable, it will run every function that uses it again. In the following example, we will use the session to increase our posts' lists' number when clicking on the lazy load button:
- First, in the
subscription.jsfile, we add the following lines of code:Session.setDefault('lazyloadLimit', 2); Tracker.autorun(function(){ Meteor.subscribe('lazyload-posts', Session.get('lazyloadLimit')); }); - Then we set the
lazyloadLimitsession variable to2, which will be the initial number of posts shown on the front page. - Next, we create a
Tracker.autorun()function. This function will run at the start time and later at any time when we change thelazyloadLimitsession variable to another value. - Inside this function, we subscribe to
lazyload-posts, giving thelazyloadLimitvalue as a second parameter. This way, every time the session variable changes, we change our subscription with a new value. - Now we only need to increase the session value by clicking on the lazy load button and the subscription will change, sending us additional posts. To do this, we add the following lines of code to our
home.jsfile at the end:Template.home.events({ 'click button.lazyload': function(e, template){ var currentLimit = Session.get('lazyloadLimit'); Session.set('lazyloadLimit', currentLimit + 2); } });This code will attach a
clickevent to the lazy load button. Every time we click on this button, we get thelazyloadLimitsession and it increases by two. - When we check out our browser, we should be able to click on the lazy load button at the bottom of our posts list and it should add two more posts. This should happen every time we click on the button until we reach our five example posts.
This doesn't make much sense when we have only five posts, but when there are more than 50 posts, limiting the initially shown posts to 10 will noticeably speed up page loading time.
We then need to change only the session's default value to 10 and increase it by 10, and we have a nice lazy loading effect.
Switching subscriptions
Now that we have the nice logic of lazy loading in place, let's take a look at what happens here under the hood.
The .autorun() function , which we created earlier, will run the first time the code gets executed, subscribing us to the lazyload-posts publication. Meteor then sends the first two documents of the Posts collection, as the limit we first sent is 2.
The next time we change the lazyloadLimit session, it changes the subscription by changing the limit to the value we passed to the publication function.
Meteor then checks which documents exist in our client-side database in the background and requests to download the missing ones.
This will also work the other way when we decrease the session value. Meteor removes the documents that don't match the current subscription/subscriptions.
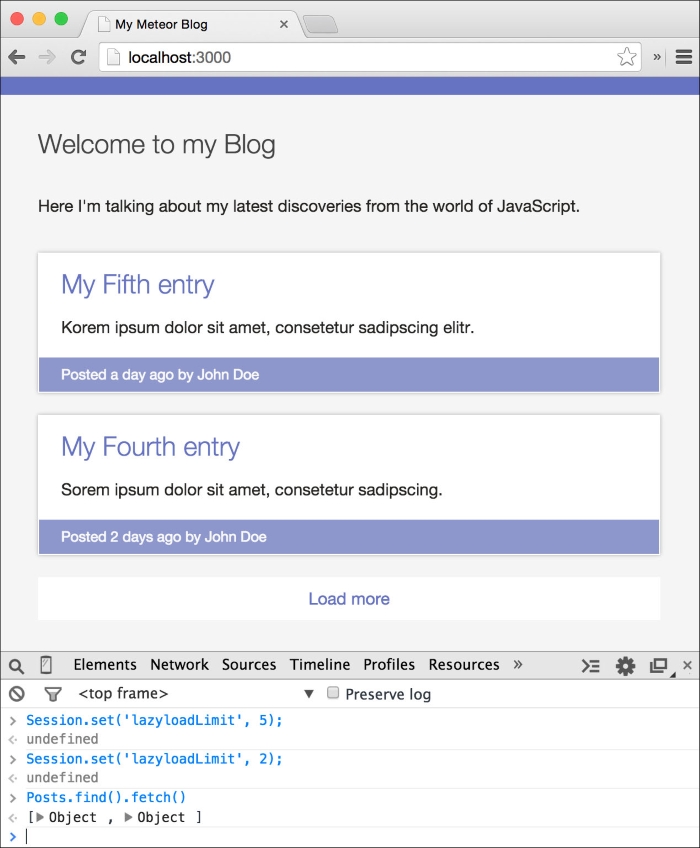
So, we can try this; we open the console of our browser and set the session limit to 5:
Session.set('lazyloadLimit', 5);This will immediately display all five example posts in our list. When we now set it back to a smaller value, we will see how they are removed:
Session.set('lazyloadLimit', 2);To ensure that they are gone, we can query our local database to check, as follows:
Posts.find().fetch();
This will return us an array of two items, showing that Meteor removed the posts that we are not subscribing to anymore, as shown in the following screenshot:

Some notes on data publishing
The publication and subscription model makes it fairly easy to receive and send data to the client, but as with every call to the server, sending and requesting data is expensive, as the server and the client both have to process the requests. Therefore, keep a few things in mind when building an app:
- Subscribe only to the documents that are necessary to make up the screen.
- Avoid sending fields with large content when we don't need them. This keeps our data stream leaner and faster.
- If we're using
limitorskipin our publication, we need to make sure we're sorting it on the server so that we get the required data first and not some wrong tail of it.
You also should be aware that the Meteor.publish() function is not reactive. This means you can't use make one cursor depending on the result of another one, like you would mostly do on the client. For example, the following code snippet will not work, as it will never rerun when the comment count in the Posts collection changes:
Meteor.publish('comments', function (postId) {
    var post = Posts.find({_id: postId});

    return Comments.find({_id: {$in: post.comments}});
});
To solve this, you can either publish posts and comments separately and connect them in the client or use a third-party package, which allows for reactive publications such as the great reywood:publish-composite package at https://atmospherejs.com/reywood/publish-composite.
Note
Note that the only case where the Meteor.publish() function reruns is when the current user changes so that this.userId which is accessible in this function will change.
Summary
In this chapter, we created a few publications and subscribed to them. We used the fields and limit options to modify the number of published documents and created a simple lazy load logic for the front page of our blog.
To dig deeper into what we learned, we can take a look at Chapter 3, Storing Data and Handling Collections. While the following Meteor documentation will give us details about the options we can use in the collections find() functions:
You can find this chapter's code examples at https://www.packtpub.com/books/content/support/17713 or on GitHub at https://github.com/frozeman/book-building-single-page-web-apps-with-meteor/tree/chapter4.
In the next chapter, we will give our app what makes a real app—different pages and routes.


