To install the sample application, you will need to fork the application from GitHub (we will discuss what this means shortly), which requires you to have an active GitHub account. If you already have a GitHub account, you can skip this step, however if you don't have an account, you can sign up for a free account at https://github.com:
Signing up for GitHub
Once you have an active GitHub account, you can access the sample application repository at https://github.com/docker-in-aws/todobackend. Rather than clone the repository, a better approach is to fork the repository, which means that a new repository will be created in your own GitHub account that is linked to the original todobackend repository (hence the term fork). Forking is a popular pattern in the open source community, and allows you to make your own independent changes to the forked repository. This is particularly useful for this book, as you will be making your own changes to the todobackend repository, adding a local Docker workflow to build, test, and publish the sample application as a Docker image, and other changes as you progress throughout this book.
To fork the repository, click on the fork button that is located in the top right hand corner:
Forking the todobackend repository
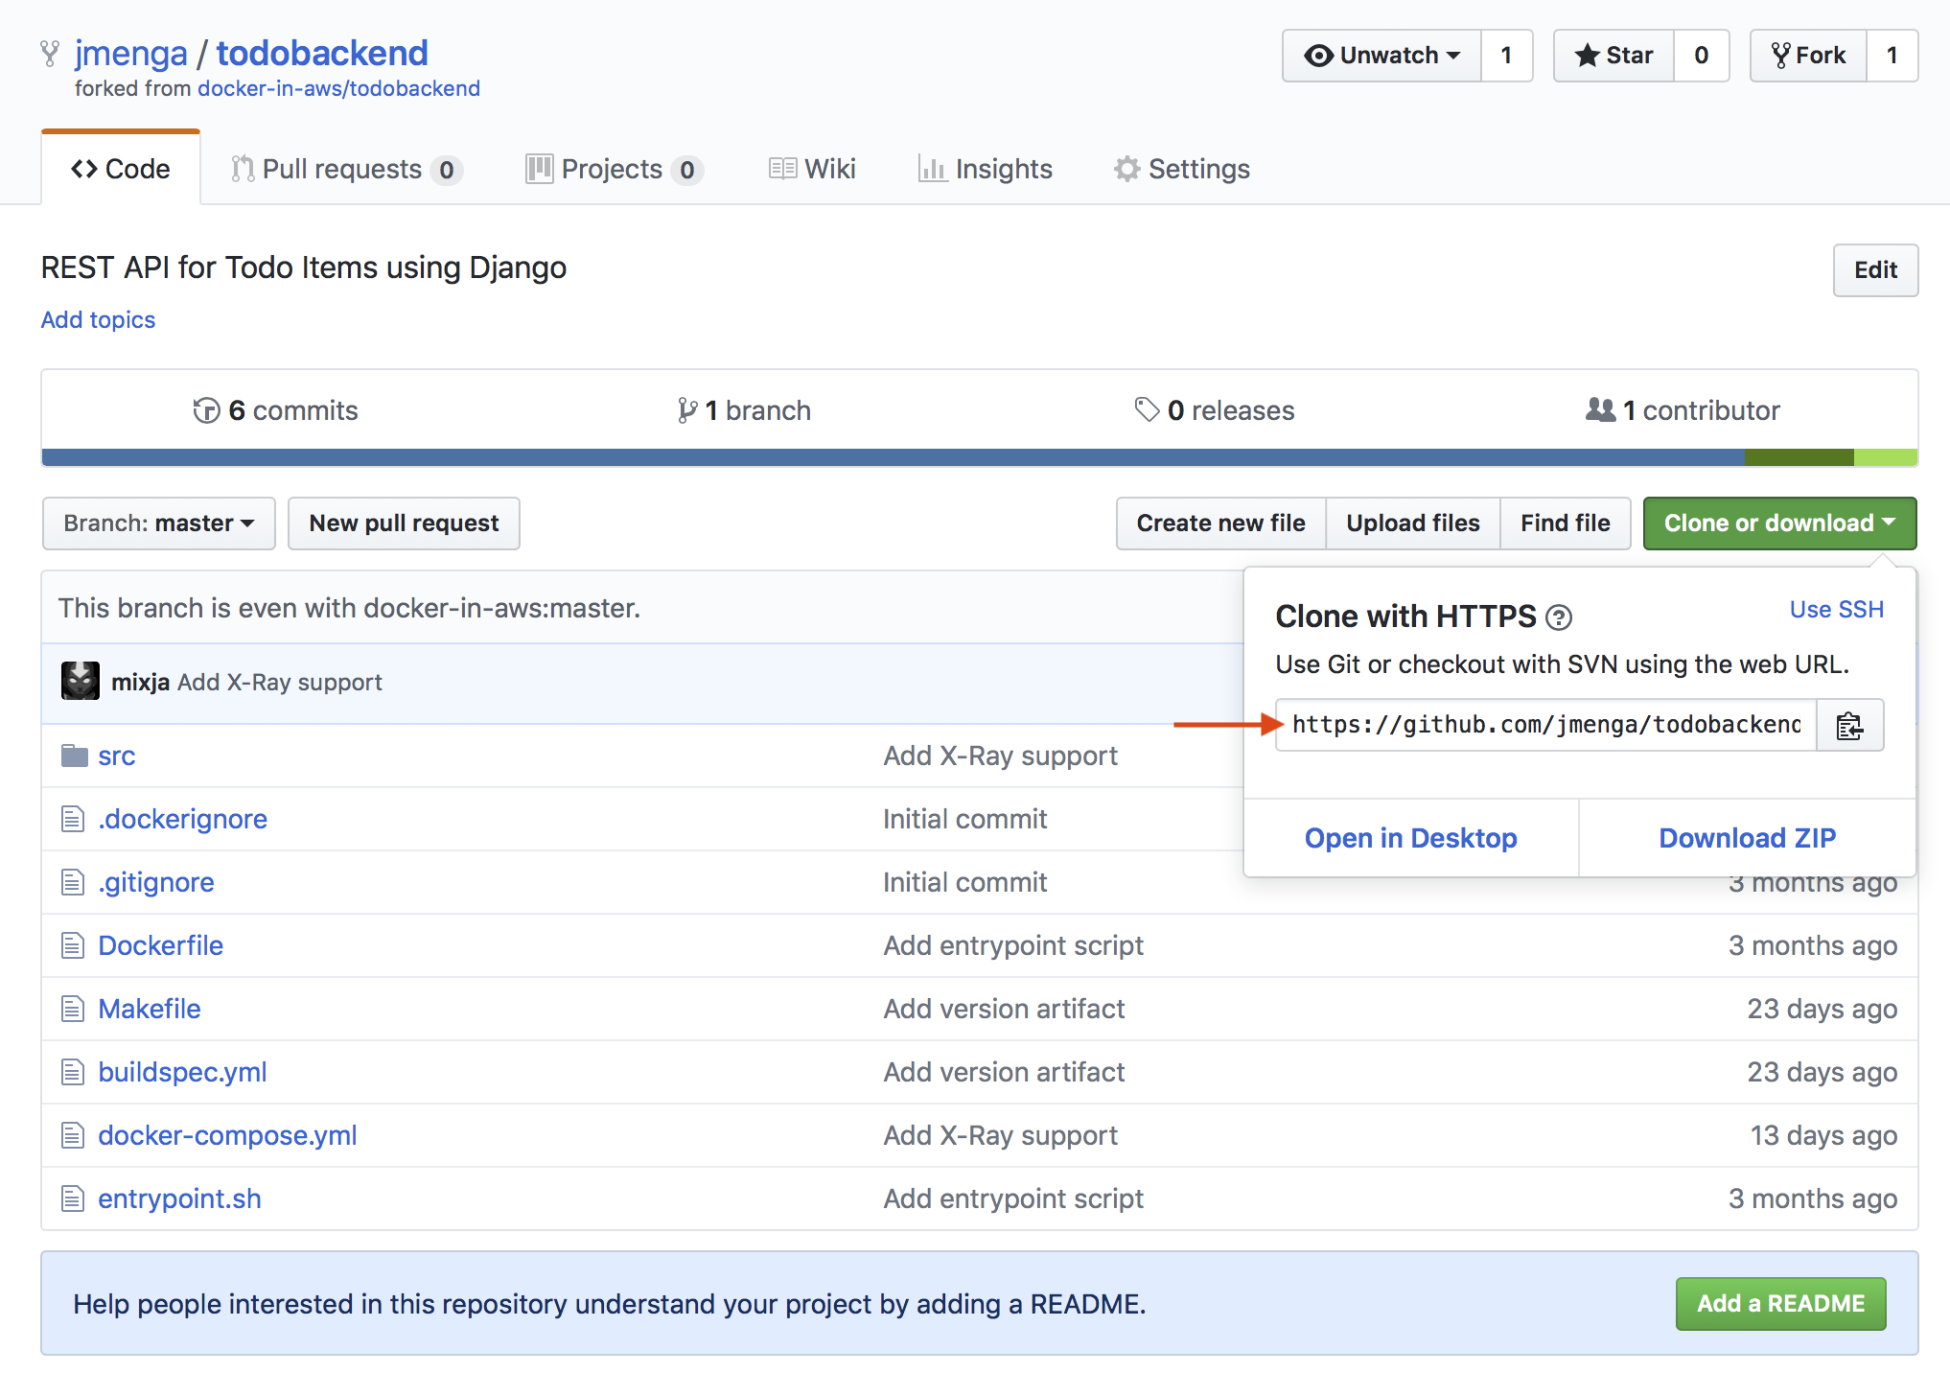
A few seconds a after clicking the fork button, a new repository should be created with the name <your-github-username>/todobackend. At this point, you can now clone your fork of the repository by clicking on the Clone or download button. If you have just set up a new account, choose the Clone with HTTPS option and copy the URL that's presented:

Getting the Git URL for the todobackend repository
Open a new terminal and run the git clone <repository-url> command, where <repository-url> is the URL you copied in the preceding example, and then go into the newly created todobackend folder:
> git clone https://github.com/<your-username>/todobackend.git
Cloning into 'todobackend'...
remote: Counting objects: 231, done.
remote: Total 231 (delta 0), reused 0 (delta 0), pack-reused 231
Receiving objects: 100% (231/231), 31.75 KiB | 184.00 KiB/s, done.
Resolving deltas: 100% (89/89), done.
> cd todobackend
todobackend>
As you work through this chapter, I encourage you to commit any changes you make frequently, along with descriptive messages that clearly identify the changes you make.
The sample repository includes a branch called final, which represents the final state of the repository after completing all chapters in this took. You can use this as a reference point if you run into any issues by running the command git checkout final. You can switch back to the master branch by running git checkout master.
If you are unfamiliar with Git, you can refer to any of the numerous tutorials online (for example, https://www.atlassian.com/git/tutorials), however in general you will need to perform the following commands when committing a change:
> git pull
Already up to date.
> git diff
diff --git a/Dockerfile b/Dockerfile
index e56b47f..4a73ce3 100644
--- a/Dockerfile
+++ b/Dockerfile
-COPY --from=build /build /build
-COPY --from=build /app /app
-WORKDIR /app
+# Create app user
+RUN addgroup -g 1000 app && \
+ adduser -u 1000 -G app -D app

+# Copy and install application source and pre-built dependencies
> git status
On branch master
Your branch is up to date with 'origin/master'.

Changes not staged for commit:
  (use "git add <file>..." to update what will be committed)
  (use "git checkout -- <file>..." to discard changes in working directory)

  modified: src/todobackend/settings.py
  modified: src/todobackend/wsgi.py

Untracked files:
  (use "git add <file>..." to include in what will be committed)

  docker-compose.yml
  src/acceptance.bats
> git add -A
> git commit -a -m "Some commit message"
> git push -u origin master
> git push
You should always check frequently that you have the most up-to-date version of the repository by running the git pull command, as this avoids messy automatic merges and push failures, particularly when you are working with other people that may be collaborating on your project. Next, you can use the git diff command to show, at a content level, any changes you have made to existing files, while the git status command shows, at a file level, changes to existing files and also identifies any new files that you may have added to the repository. The git add -A command adds all new files to the repository, and the git commit -a -m "<message>" command commits all changes (including any files you have added with git add -A) with the specified message. Finally, you can push your changes using the git push command – the first time you push, you must specify the remote branch at the origin using the git push -u origin <branch> command – after which you can just use the shorter git push variant to push your changes.
A common mistake is to forget to add new files to your Git repository, which may not be apparent until you clone the repository to a different machine. Always ensure that you run the git status command to identify any new files that are not currently being tracked before committing your changes.


