Creating and running a program with an IDE
Working with an IDE such as IntelliJ as compared to working with a plain text editor is a breeze. We’re now going to guide you through creating, running, and debugging a program with the use of IntelliJ. We’ll create the same program as we did when we were using the text editor.
Creating a program in an IDE
When you use an IDE to type code, you’ll see that it helps you to complete your code constantly. This is considered very helpful by most people, and we hope you’ll enjoy this feature too.
In order to get started with IntelliJ, we first need to create a project. Here are the steps for creating our Hello World program again:
- Launch IntelliJ IDEA and click on New Project from the Welcome screen or go to File | New | Project.
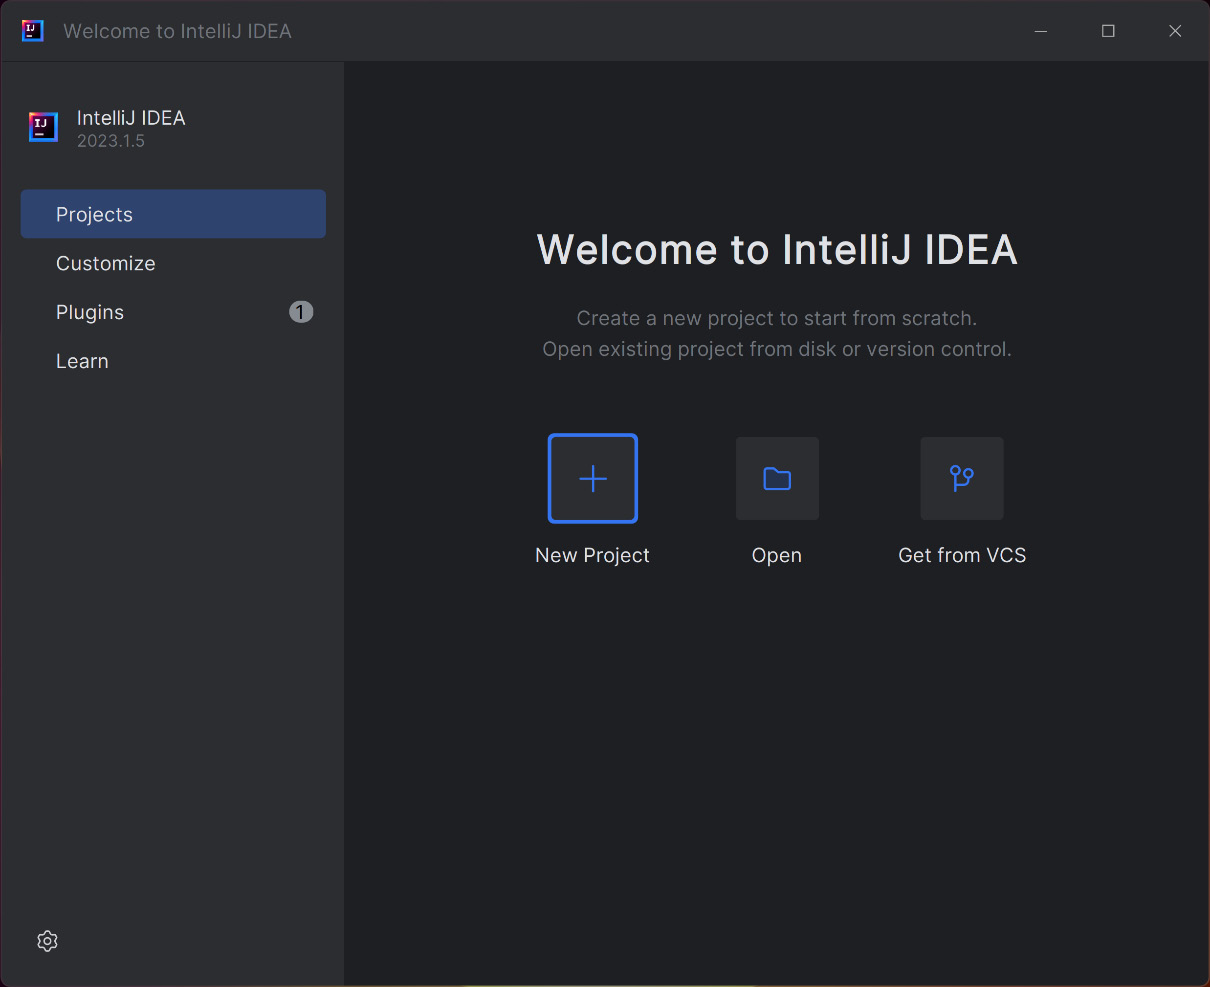
Figure 1.7 – Initial screen of IntelliJ
- Name the project
HelloWorld. - Select Java for the language and make sure that the correct project SDK is selected. Click Next.
- Don’t tick the Create Git repository box and don’t tick the Add sample code box.
- Click Create to create the project.
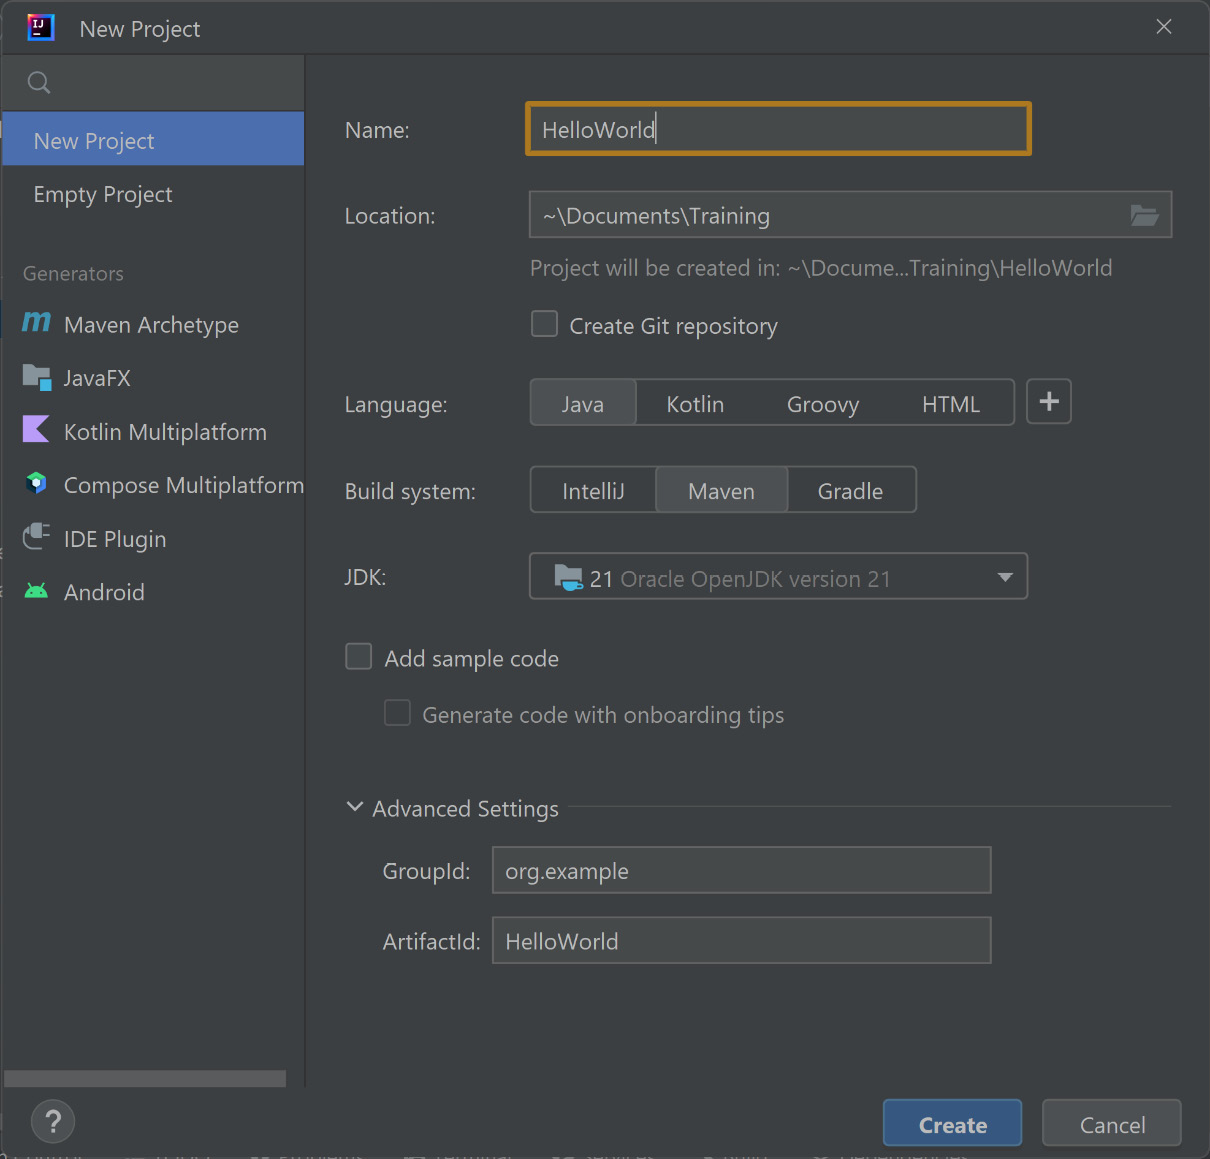
Figure 1.8 – Wizard to create a new project
- Once the project is created, expand the
srcfolder in the Project view on the left. If there is no other folder underneath it, right-click on thesrcfolder and select New | Java Class. If there is another folder underneath it, there is probably a main folder with a Java folder in there. Right-click on the Java folder and select New | Java Class. If it’s called something differently, just right-click on the blue folder.
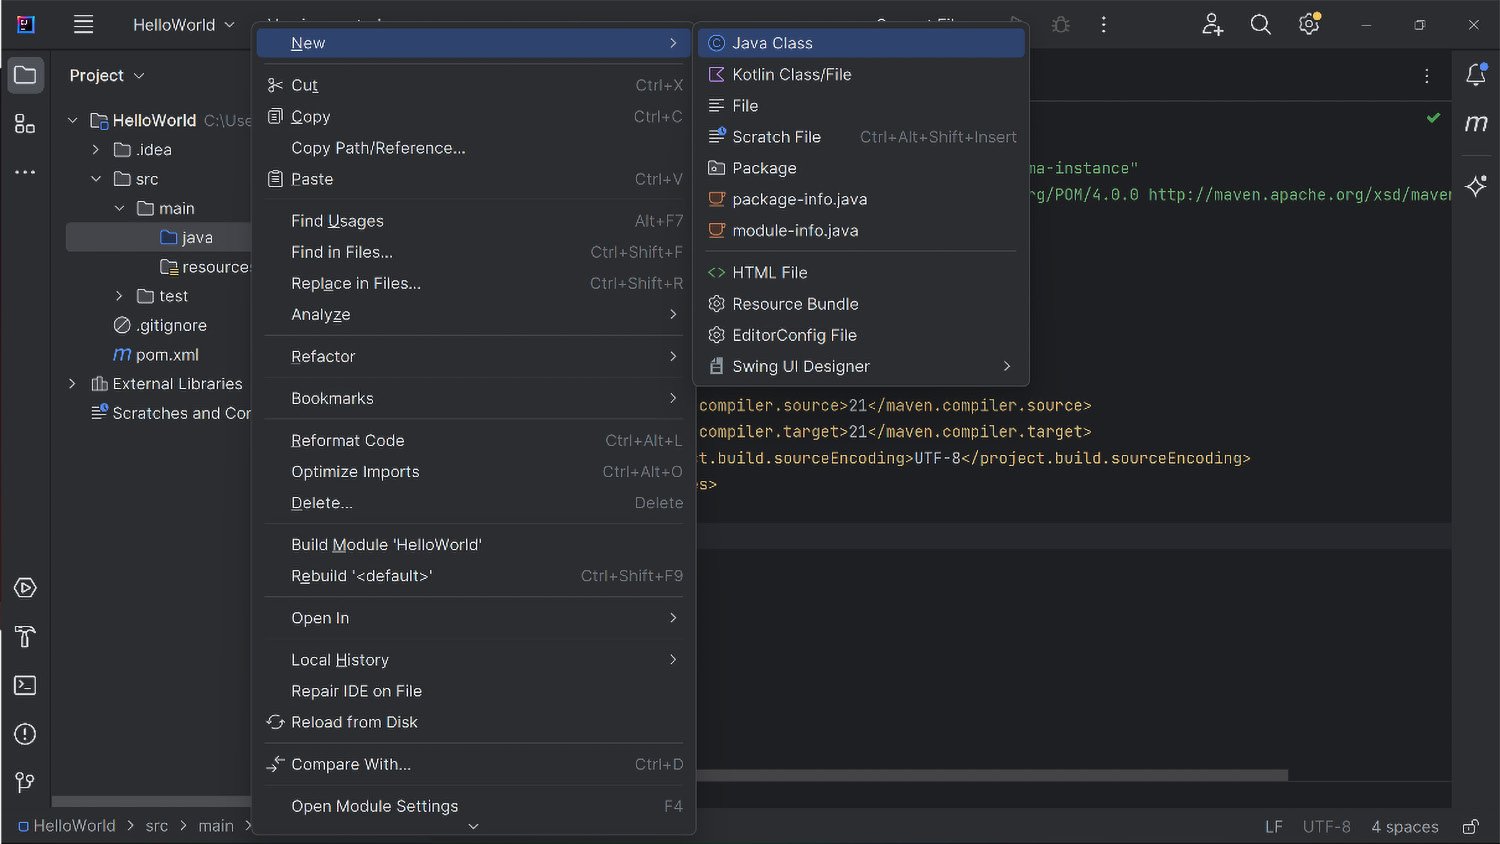
Figure 1.9 – Create a new Java Class
- Name the new class
HelloWorldand click OK. IntelliJ will create a new.javafile with the class definition.
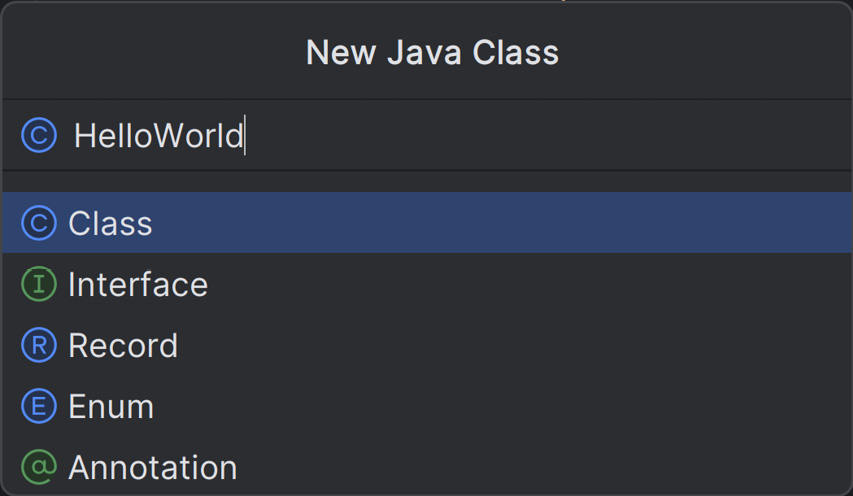
Figure 1.10 – Call the class ”HelloWorld”
- In the
HelloWorldclass, write ourmainmethod:public class HelloWorld { public static void main(String[] args) { System.out.println("Hello world!"); } }
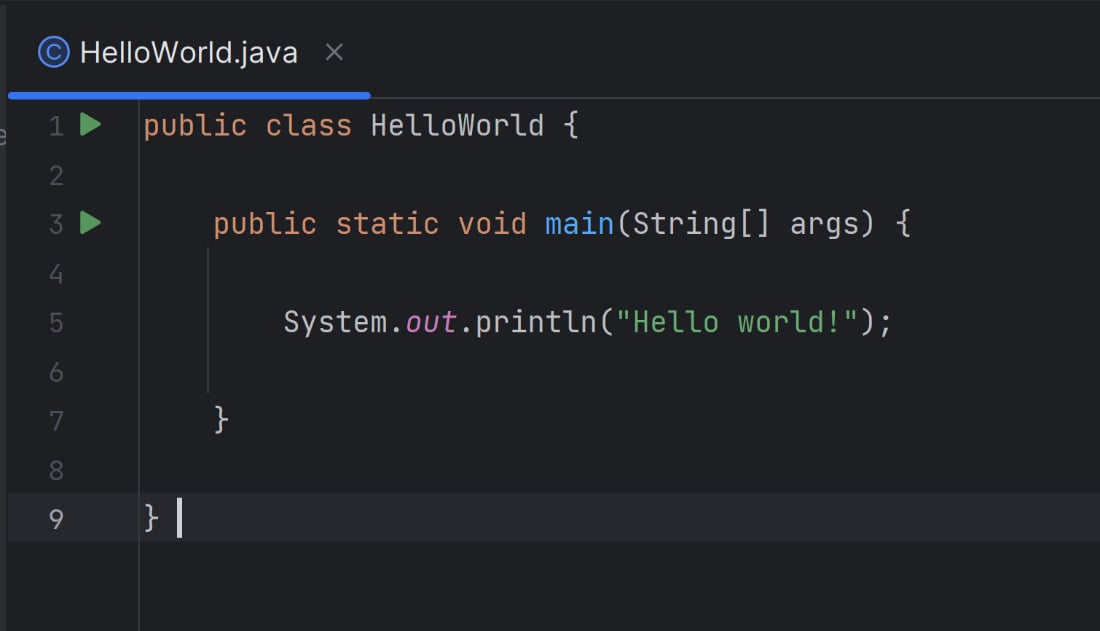
Figure 1.11 – Code in HelloWorld.java
Now that we’ve written our first program, make sure that it is saved. By default, IntelliJ automatically saves our files. Let’s see whether we can run the program as well.
Running your program
Admittedly, we had to take a few extra steps to create our program. We had to create a project first. The good news is, running the program is easier! Here’s how to do it:
- If you haven’t done so, make sure your changes are saved by pressing Ctrl + S (Windows/Linux) or Cmd + S (macOS). By default, auto-save is enabled.
- To run the program, right-click anywhere in the
HelloWorldclass and selectRun 'HelloWorld.main()'. Alternatively, you can click the green triangle icon next to the main method and selectRun 'HelloWorld.main()'. IntelliJ will compile and run the program.
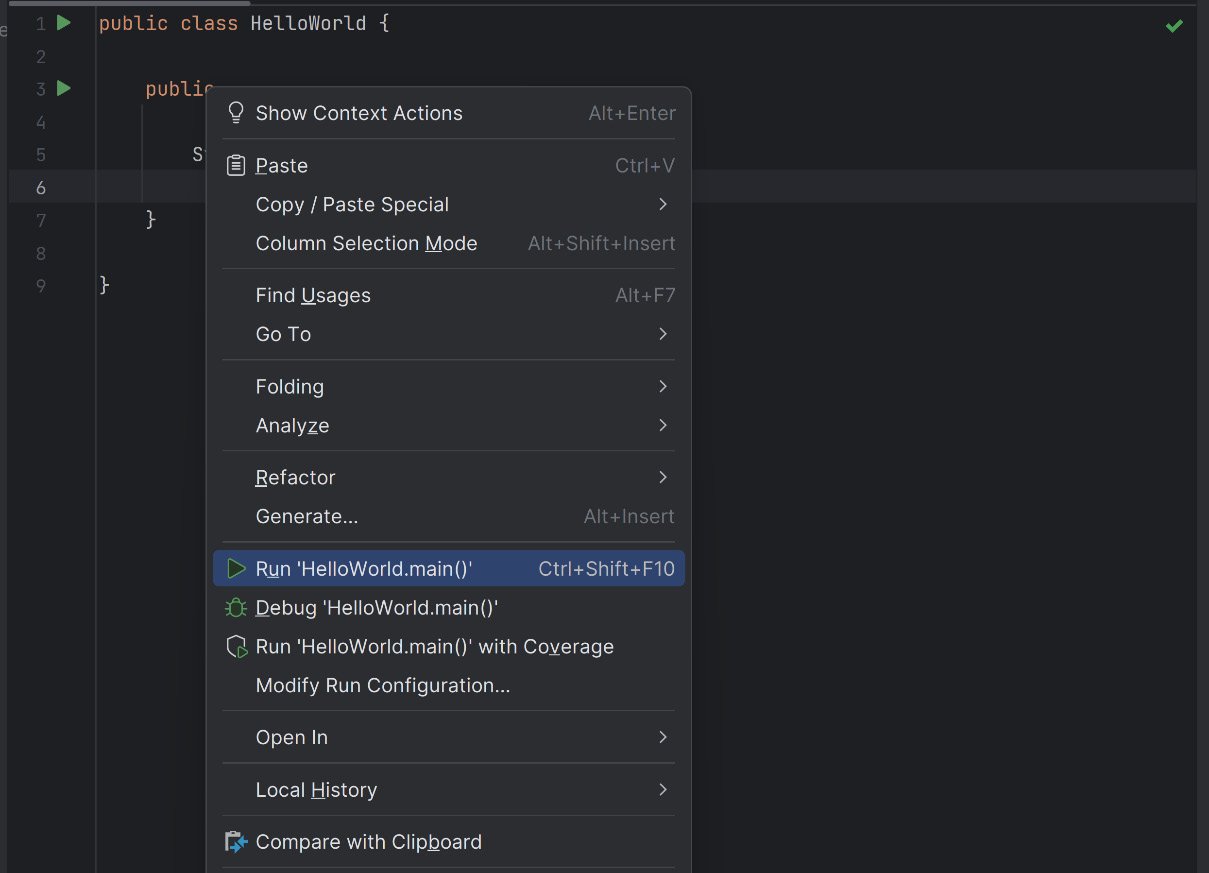
Figure 1.12 – Running the program
- Verify that the output of the program,
"Hello world!", is displayed in the Run tool window at the bottom of the screen.

Figure 1.13 – Output of the program
Saved and unsaved files
In most IDEs, you can tell whether a file is saved or not by looking at the tab of the open file. It has a dot or an asterisk next to it if it isn’t saved. The dot is missing if it has been saved.
Debugging a program
Our program is quite easy right now, but we may want to step through our program line by line. We can do that by debugging the program. Let’s give our file a little extra content for debugging. This way we can see how to inspect variables, understand the execution flow, and, this way, find the flaws in our code:
- Update the
HelloWorld.javafile with the following code:public class HelloWorld { public static void main(String[] args) { String greeting = "Hello, World!"; System.out.println(greeting); int number = 5; int doubled = doubleNumber(number); System.out.println("The doubled number is: " + doubled); } public static int doubleNumber(int input) { return input * 2; } } - In this updated version of the program, we added a new method called
doubleNumber, which takes an integer as input and returns its double. In themainmethod, we call this method and print the result. Don’t worry if you don’t fully get this – we just want to show you how you can step through your code. - Save your changes by pressing Ctrl + S (Windows/Linux) or Cmd + S (macOS).
Now, let’s debug the updated program.
- Set a breakpoint on the line you want to pause the execution at by clicking in the gutter area next to the line number in the editor. A red dot will appear, indicating a breakpoint. For example, set a breakpoint at the line
int doubled = doubleNumber(number);. An example is shown in Figure 1.7.
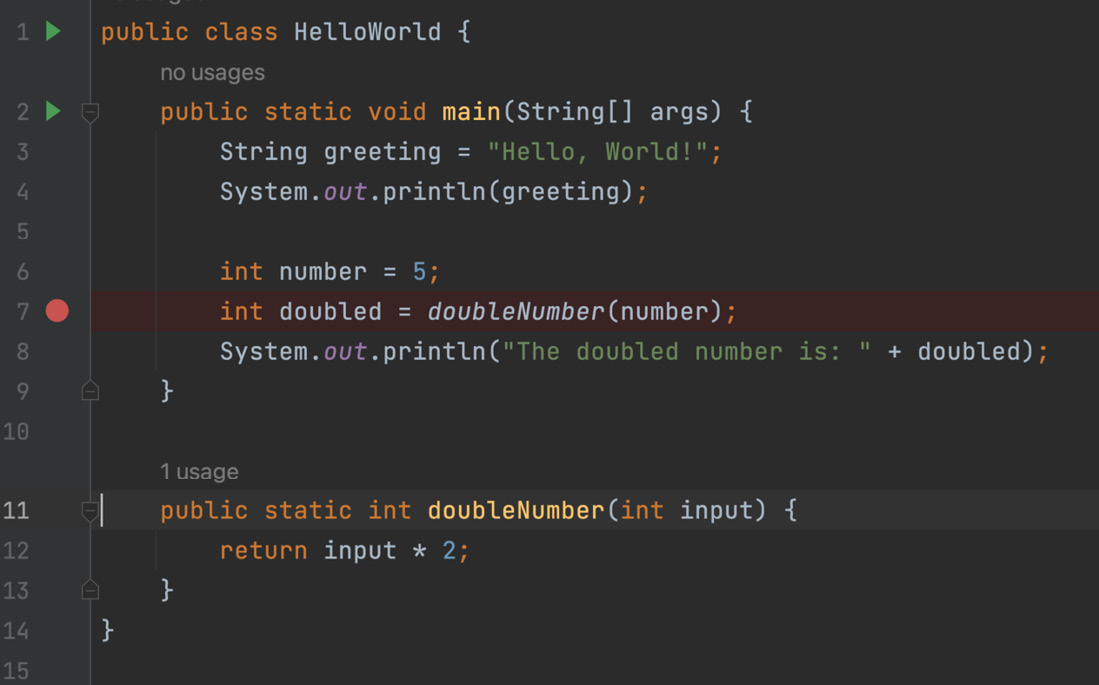
Figure 1.14 – Adding a breakpoint on line 7
- Start the debugger by right-clicking in the
HelloWorldclass and selectingDebug 'HelloWorld.main()'or you can click the green play icon next to themainmethod and select the debug option. IntelliJ will compile and start the program in debug mode. - When the line with the breakpoint is going to be executed, the program will pause. During the pause, you can use the Debug tool window, which will appear at the bottom of the screen. Here, you can view the state of the program, including the values of local variables and fields. An example is shown in Figure 1.8.
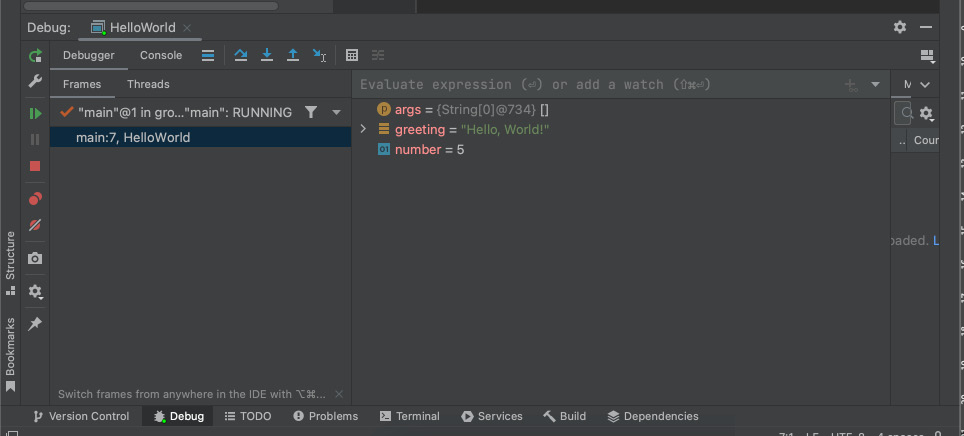
Figure 1.15 – Debug tool window in IntelliJ. The intent of this screenshot is to show the layout and text readability is not required.
- Use the step controls in the Debug tool window to step through the code (blue arrow with the angle in Figure 1.8), step into the method that is being called (blue arrow down), or continue the execution (green arrow on the left in Figure 1.8).
By following these steps, you can debug Java programs using IntelliJ IDEA and step through the code to see what is happening. This is something that will come in handy to understand what is going on in your code. This process will be similar in other Java IDEs, although the specific steps and interface elements may vary.


