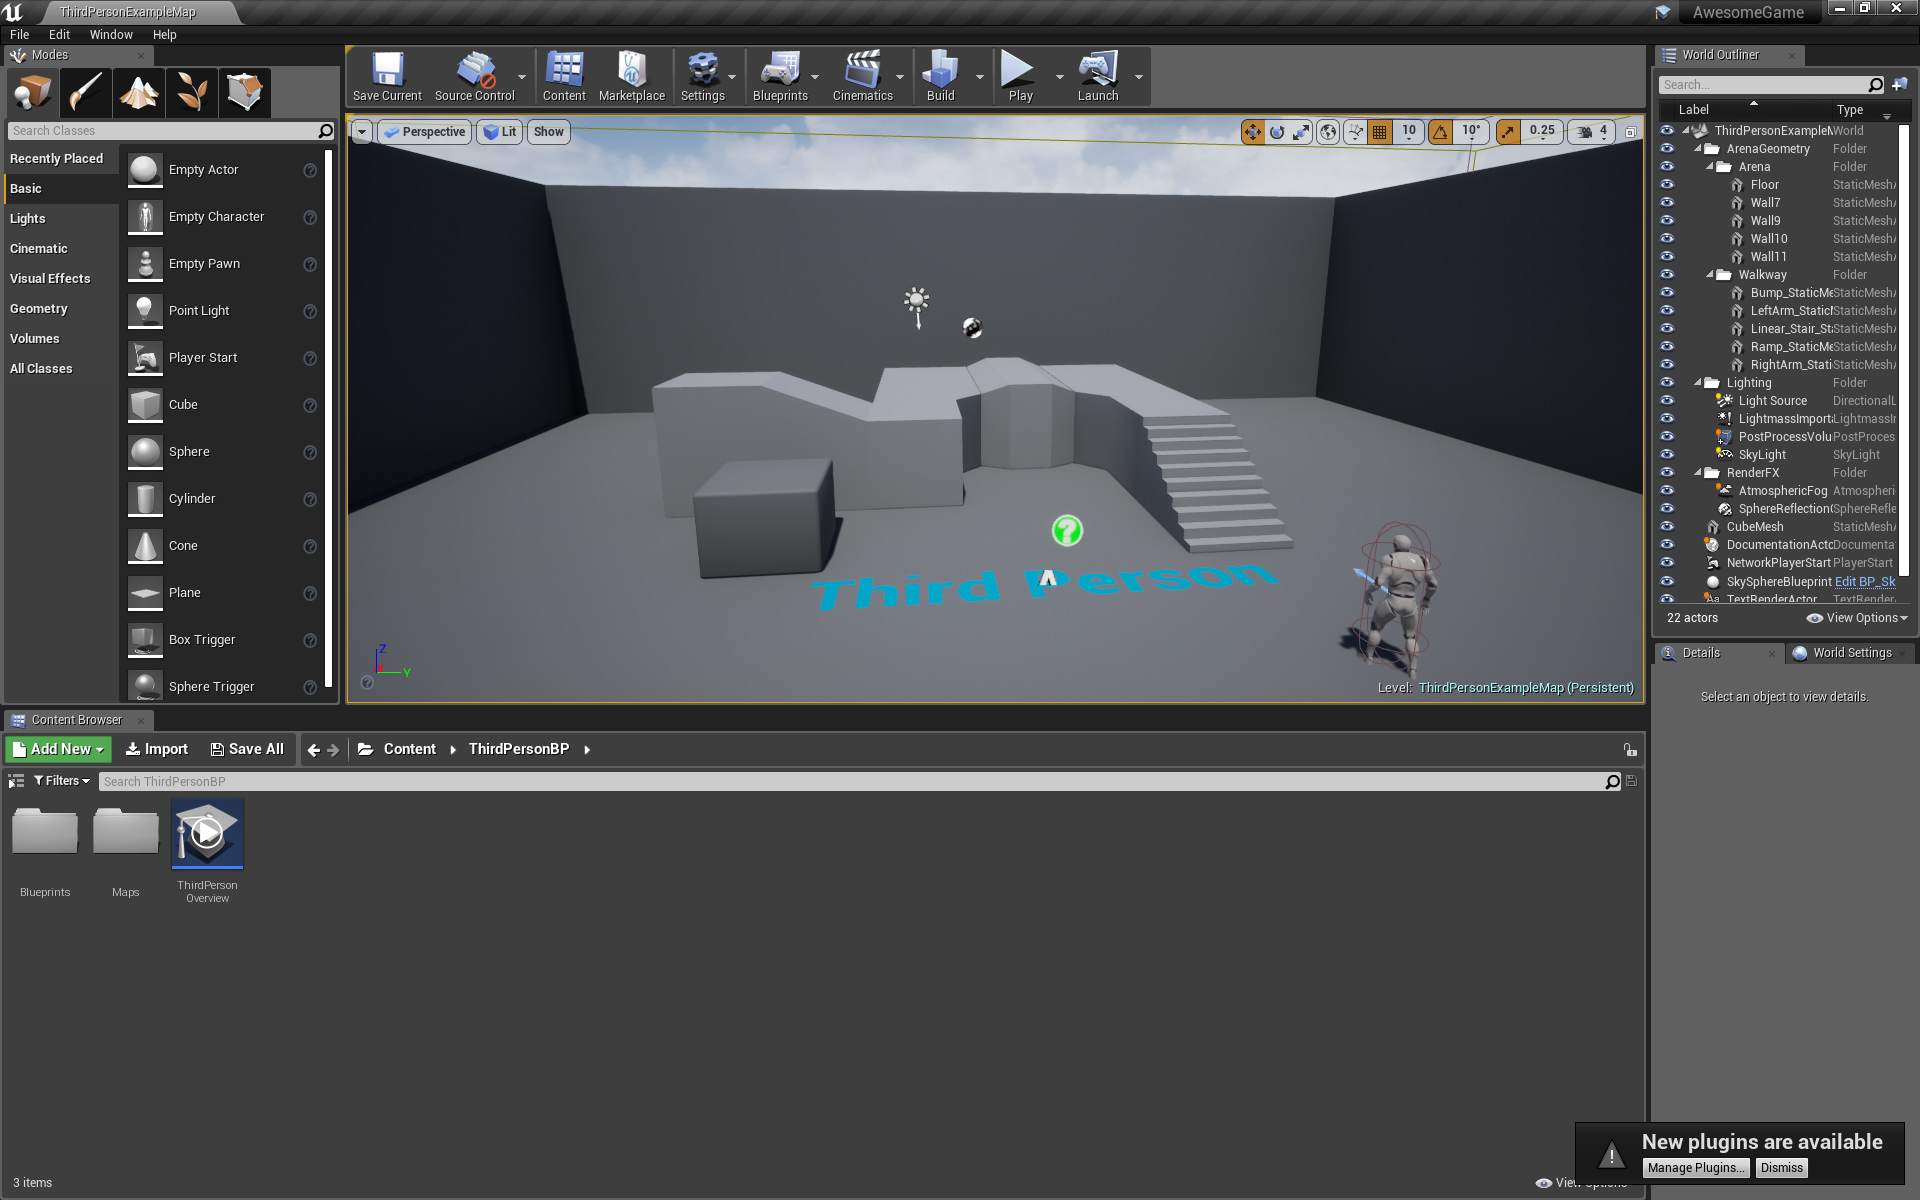
On the upper left of the Viewport are a few drop-down menus that let us customize and configure the Viewport. Starting from the left with the drop-down arrow, a few of the important options are as follows:
- Realtime: This toggles real-time rendering of any animated elements of the level. You can see it with the spinning green DocumentationActor, but this also applies to any animated materials and particle effects. With this off, elements will only update while you are moving the camera.
- Show Stats / Show FPS: This toggles frames per second (FPS) and stats that show information such as poly counts, rendering times in milliseconds, and memory usage. A full list of stat options can be found in the Stat submenu a bit further down the menu.
- Game View: This toggles any editor-only icons and assets so you can see what the level will look like in game. Pressing G also toggles this, so if you've accidentally hidden the editor icons, it was probably this way.
- Bookmarks: This allows you to set bookmarks for camera locations so you can use keyboard numbers to teleport there. This option is incredibly useful and often overlooked, so getting into the habit of using these early can save you a lot of time navigating your levels. These are level-specific, making them even more useful, but don't forget to save your level if you change these; otherwise, you will lose them.
- Layouts: This lets you choose from a variety of Viewport layouts with up to four views. If, for some reason, you need even more Viewports, at the top of the editor, press Window | Viewports and select one of the other Viewports (Viewport 1 is the existing one). Each of these can also be configured with up to four panes.
- Advanced Settings: This lets you further customize the Viewports by inverting the mouse, combining the translate/rotate widgets, and adjusting highlight intensity, among other things. Don't worry about messing things up here; you can always press the Reset to Defaults button in the top-right corner.
Next to the drop-down arrow at the top of the Viewport is Perspective. This is the setting for the Viewport type. By default, it shows a 3D perspective, but this can be configured to show a 2D wireframe view from the top or left, and so on.
Navigation while in a 2D perspective is a bit different than the 3D view. Holding the right mouse button lets you move around, and the mouse wheel lets you zoom in and out.
While in a 2D view, holding the left mouse button lets you drag a selection box. Another useful tool is holding the middle mouse button to use the measuring tool. This is useful for programmers when we're trying to figure out how far enemies should be able to see, for example.
Next in the Viewport options is the Viewport's visual style, which defaults to Lit. You can choose Unlit and Wireframe for example, but this also offers a lot of optimization views, such as Shader Complexity and Collision views. Most of these are more useful for artists.
The final dropdown in the upper-left corner is the Show list. This can be used to hide things that might be in your way, such as fog, or to show extra options, such as a collision. This includes a few advanced options, such as showing bones for skeletal meshes. This menu also includes a Default so that you can reset anything you've changed here.


