Creating a LookML model and Explore
As seen in the previous recipe, a LookML project is a collection of files that define a semantic data model for a SQL database. It contains model files, view files, and other types of files. We explored views that represent your database/data warehouse tables. Now, to make these dimensions and measures in the views usable, we need to create Explores.
An Explore is a custom view of the data that is defined using a LookML model. It is the starting point for querying data in Looker. Explores in Looker empower self-service data analysis with secure access, enabling creation of reports, dashboards, and visualizations. Explores can be based on one or multiple tables.
Explores are created in the LookML model file. The LookML model files contain Explores based on one or multiple tables joined (Figure 1.31).
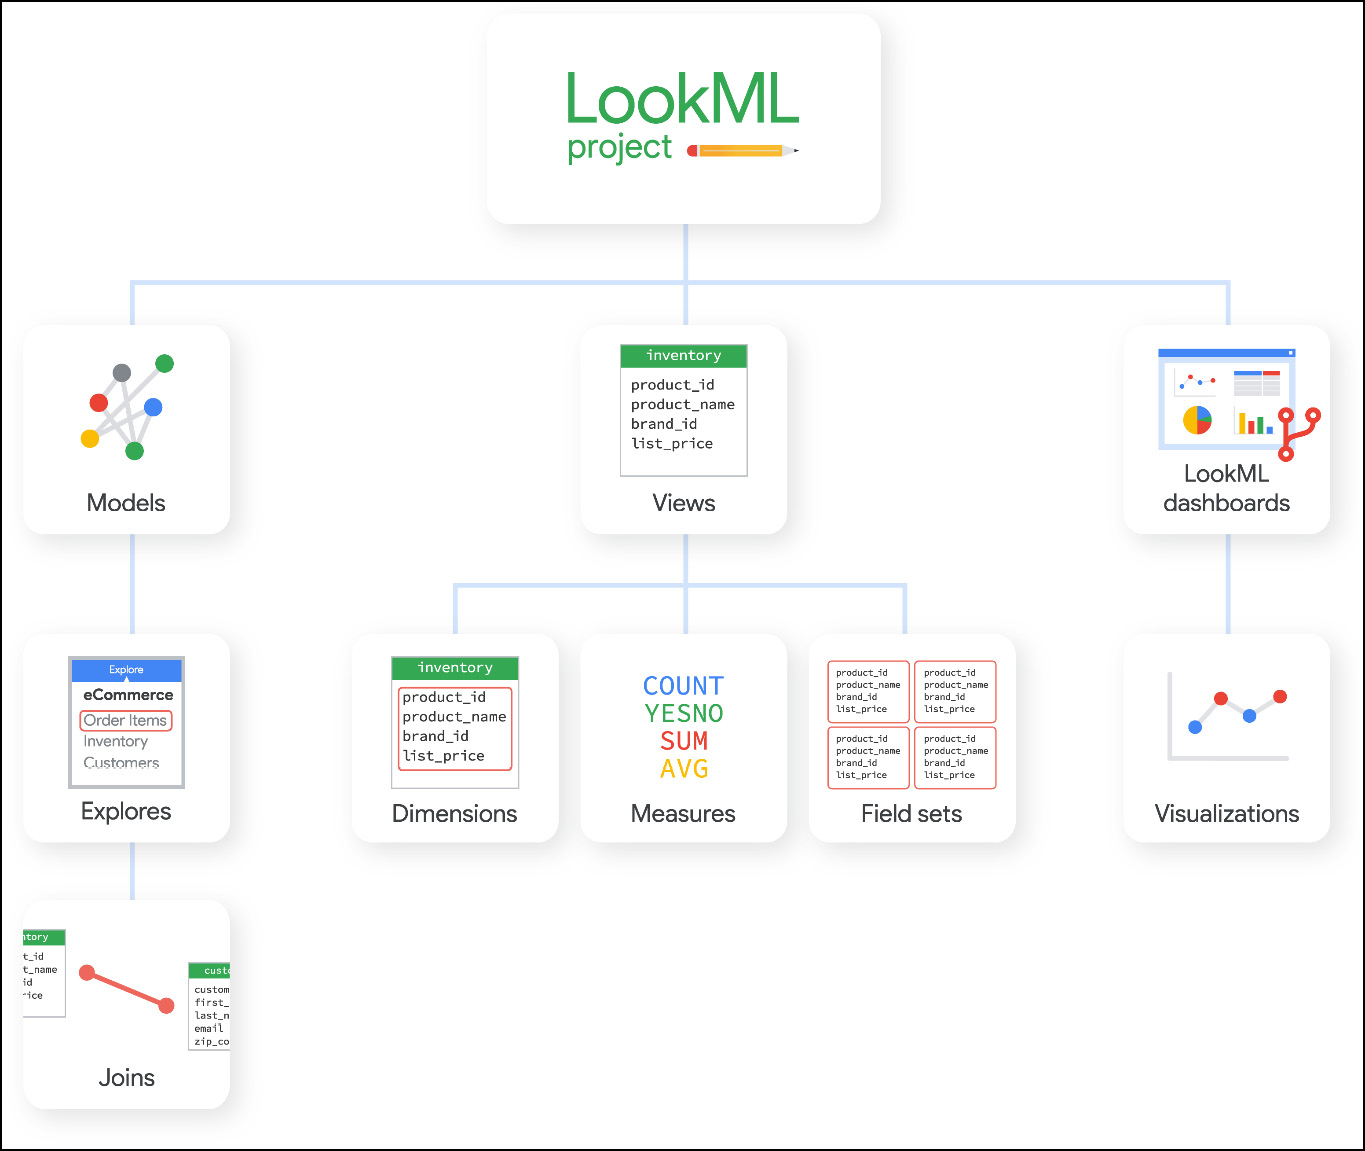
Figure 1.31 – LookML project organization (image from GC documentation)
Model files can contain different additional parameters, which we will review later in this book.
Getting ready
When you created your LookML projects and chose Generate Model from Database Schema, your model file was created by default. Click on your test_project.model model file to open it in the code editor (Figure 1.32). In this model file created automatically, you see multiple elements: connection, include, datagroup, persist_with, and explore. We will understand the meaning of all of them later, but for now, let’s create our own model file and the Explore in it.
Make sure you’re in Development Mode.
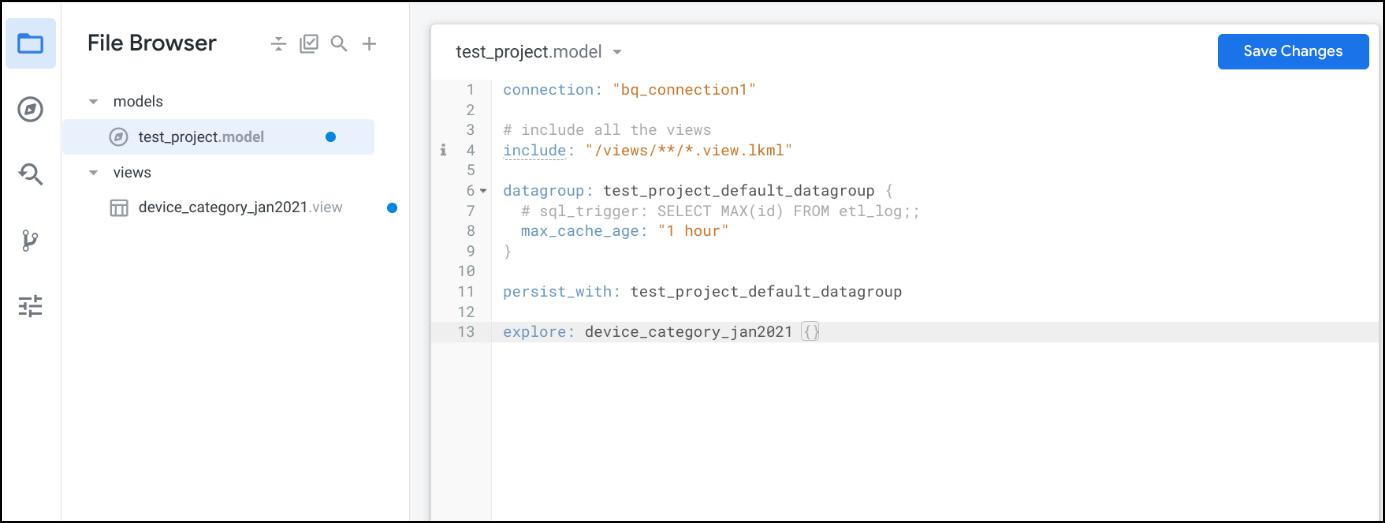
Figure 1.32 – Model
How to do it...
The steps for this recipe are as follows:
- To the right of File Browser, click on the + symbol and choose Create Model (Figure 1.33). You will need to provide a name for your model; let’s call it
devices_model.
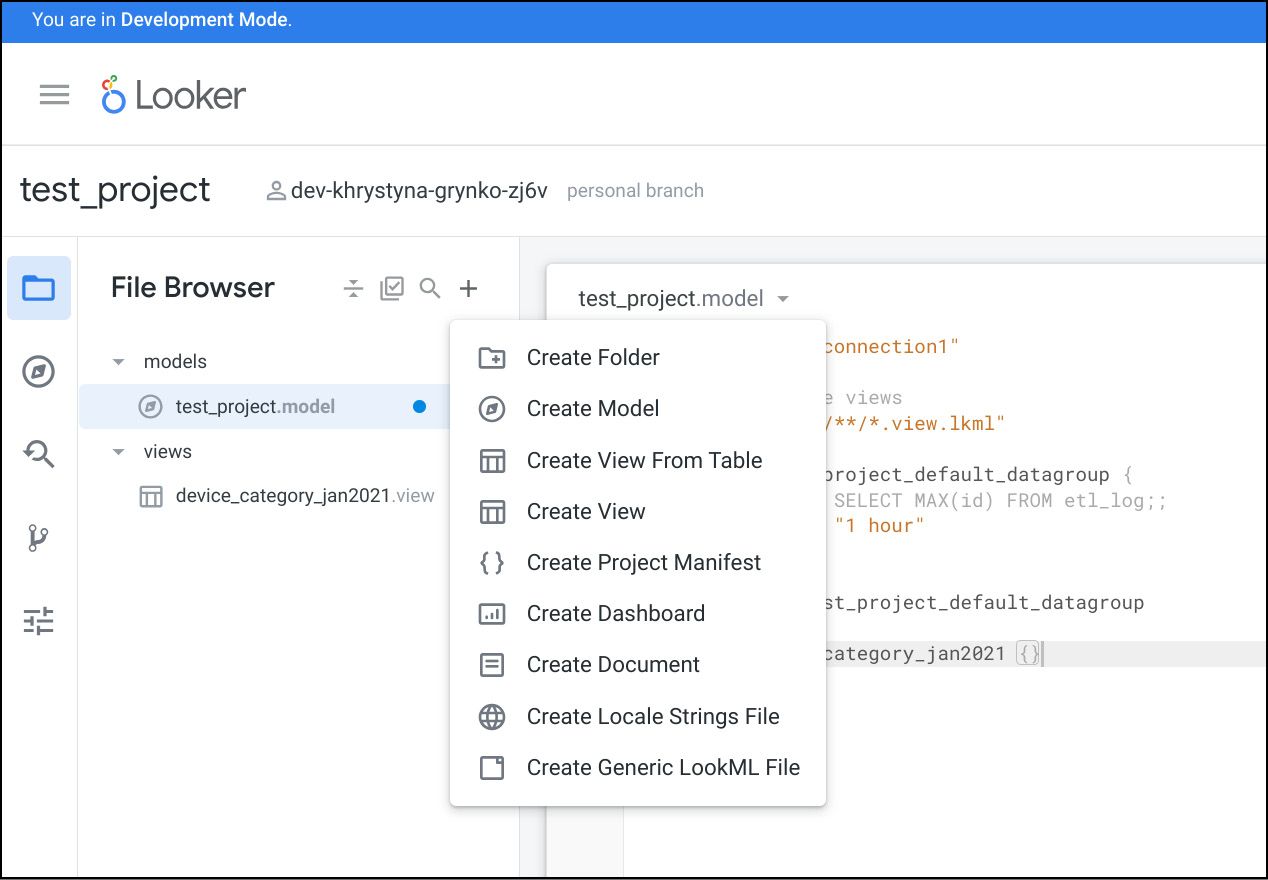
Figure 1.33 – LookML file creation
- When the model file is created, it is usually created outside of the models section but you can always move it there (just drag and drop it). You will see that the model contains
connectionandincludesample elements.connectionspecifies the database/data warehouse connection, andincludespecifies the files that can be used in this model. You can change these elements if needed, but for now, we’ll keep the default options. Other elements are commented with the#symbol, and serve to show you how to create your first Explores based on multiple views (Figure 1.34).
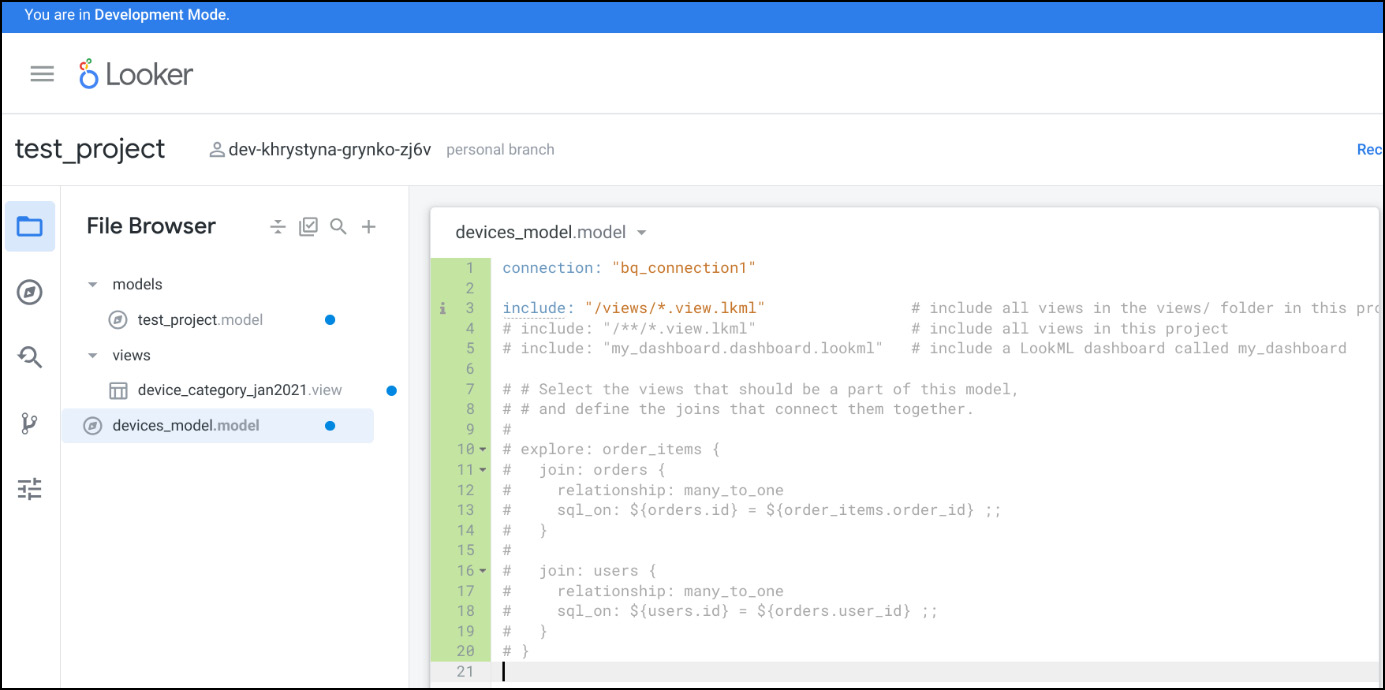
Figure 1.34 – Device model
- Delete all the commented (gray) section and start typing
explore:{}. Add the name of our only view,device_category_jan2021. It will look like this:explore: 'device_category_jan2021 {}'(Figure 1.35). It is something we’ve seen in the automatically created model. Theincludeparameter that you see in the figure is a way to bring together different LookML files. It lets you access and use components from other files within your current file. You can use it inmodel,view, andexplorefiles to include different types of files, such as view files, dashboard files, Explore files, and data test files.
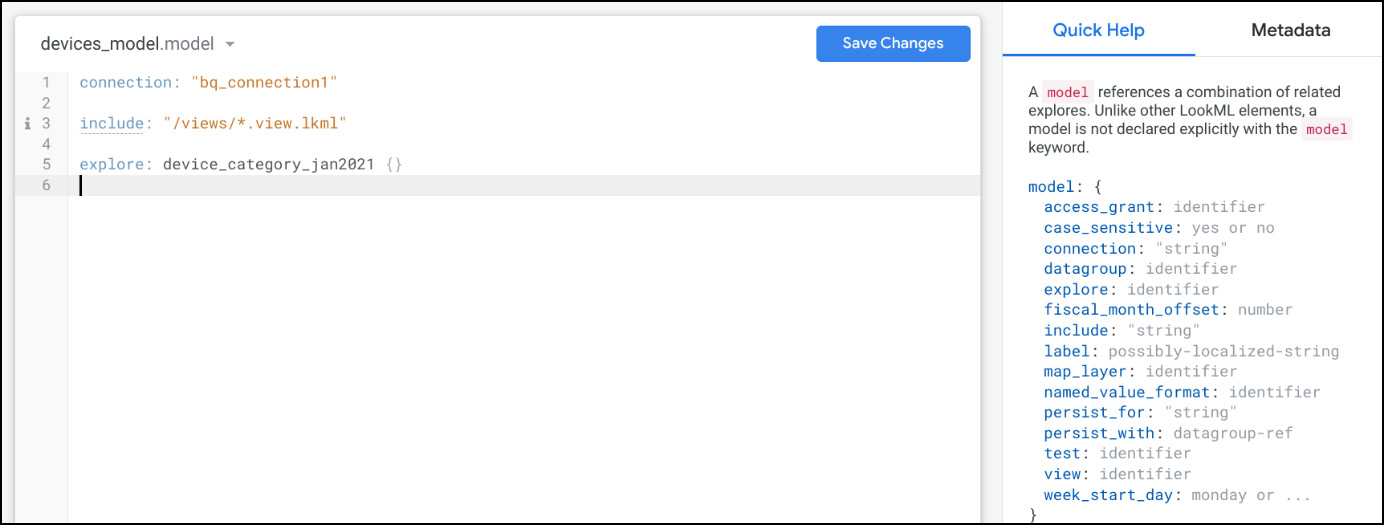
Figure 1.35 – Explore
- Click on Save Changes.
- Click on the arrow icon to the right of
devices_model.modeland make sure thatExplore Device Category Jan2021 – devices_modelwas created (Figure 1.36).
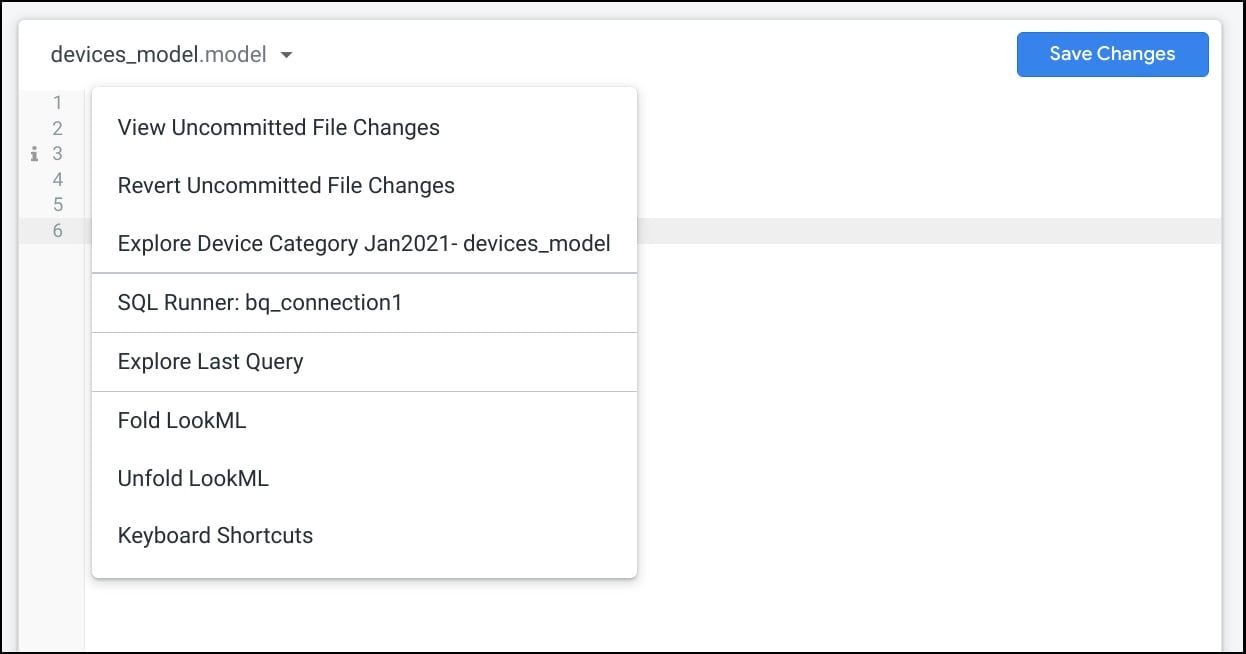
Figure 1.36 – Model drop-down list
- Click on
Explore Device Category Jan2021 – devices_modeland the Explore environment will open (Figure 1.37).
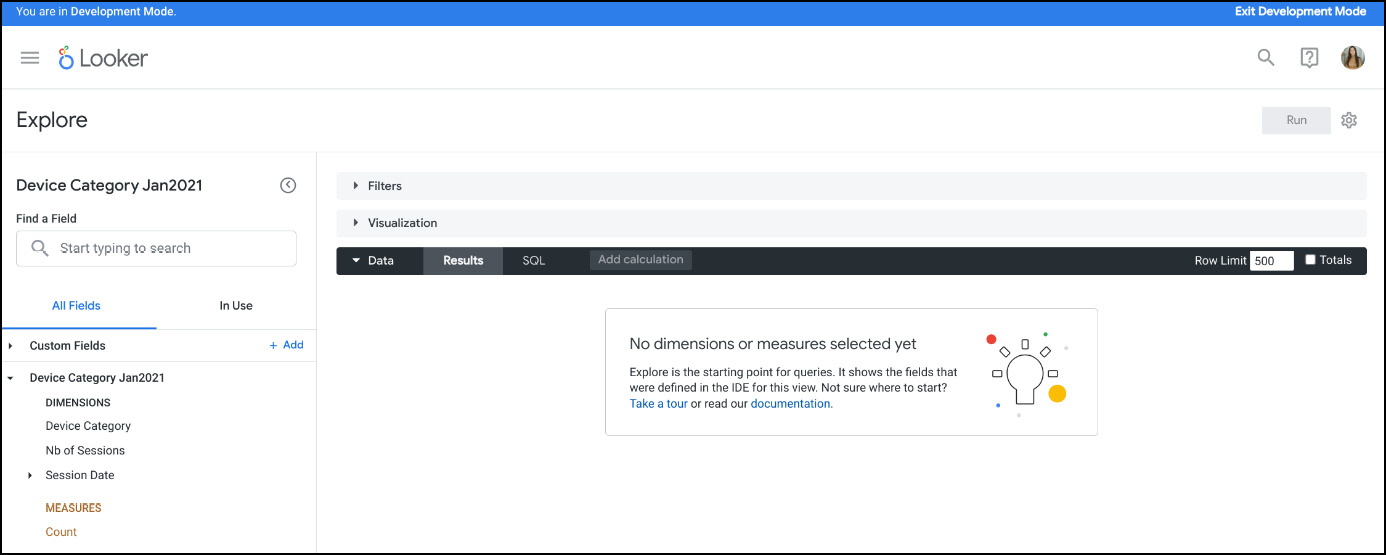
Figure 1.37 – Explore environment
How it works...
Looker has three basic types of users: Developer (Admin), Standard (Creator), and Viewer. When we were in the LookML project, we acted as a Developer user.
In the Explore space that we just opened, we’ll act as Standard users or creators, those who can create visualizations (or Looks). Let’s explore Explores in the next sections.
See also
- For a more in-depth exploration of the views and models, please refer to the following chapter: Chapter 2, Configuring Views and Models in a LookML Project
- For a more in-depth exploration of the Explores, please refer to the following chapter: Chapter 3, Working with Data in Explores
- Looker model files: https://cloud.google.com/looker/docs/lookml-project-files#model_files
- Explore in Looker: https://cloud.google.com/looker/docs/reference/param-explore-explore


