Configuring your Galileo for the first time
The first step when you receive your Galileo board is to set it up. This is relatively easy but is a bit more complex than it is with other boards such as the Arduino. Therefore, we need to make sure that it is perfectly configured and set up before we move on to the other recipes in this chapter.
Inside the box, you will find the board itself and a power adapter that you can use to power up the board. You will also find a short manual about the board and the Intel Galileo platform.
Getting ready
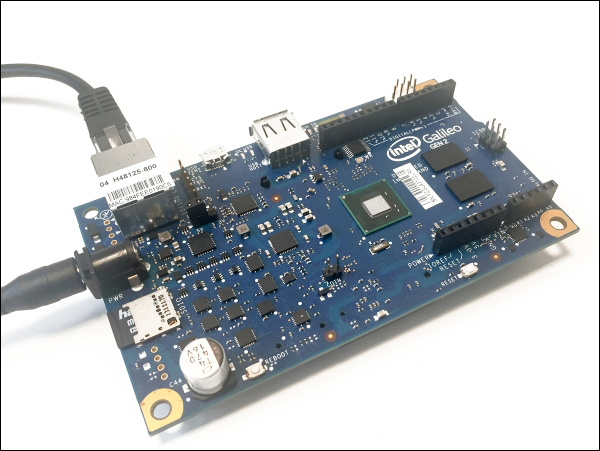
The first thing you will need is, of course, a Galileo board, which is shown here:

Note that you will need a Galileo Gen 2 board for the rest of this book. You might be able to follow along just fine with a Gen 1, but there might be some differences.
You can find a Galileo board on SparkFun:
https://www.sparkfun.com/products/13096
You also need an external power supply for your board, which is shown here:

This power supply is usually provided with the Galileo board but, if this is not the case, or you got your Galileo board separately, you will need to use the 12V DC power supply found in the box, or any other DC power supply in the 7V to 15V range.
Finally, you will also need a micro SD card, as shown here, which we will use in some projects in this chapter:

This SD card will be used to install the different Linux images, and also to store measurement data. I recommend an SD card with more than 2 GB of storage.
How to do it...
Let's now assemble our Galileo board. These are the steps to follow to set up your Galileo board:
- Insert the micro SD card into the corresponding slot on the Galileo board.
- Insert an Ethernet cable from your router into the Galileo board.
- Connect the Galileo board to your power supply by connecting the DC jack.
This should be the result:

You will see that some LEDs light up when this is done.
How it works...
The Galileo board basically needs three things to work correctly:
- The correct power supply
- A connection to your local network via Ethernet or Wi-Fi
- A micro SD card inserted into the board (this is not required for the basic operation of the board, but to install Linux images)
Having done this, we are then able to use our board for all the projects in this book.
See also
This is really the foundation of the whole book, so make sure that you complete this recipe correctly. To go further, follow one of the two upcoming recipes to install Linux on your Galileo board.


