
Creating a Blueprint Interface for pickup objects
To create a Blueprint Interface, follow the given steps:
- Right-click in your project's
Blueprintsdirectory, and selectCreate Advanced Asset|Blueprints|Blueprint Interface:

- Name it
BPI_PickupActor.
When you open it up, you'll see that it contains a Functions list, and nothing else. You'll notice that the graph can't be edited. This is because the interface is simply a list of functions that the attached object must implement, but those functions don't get written in the interface.
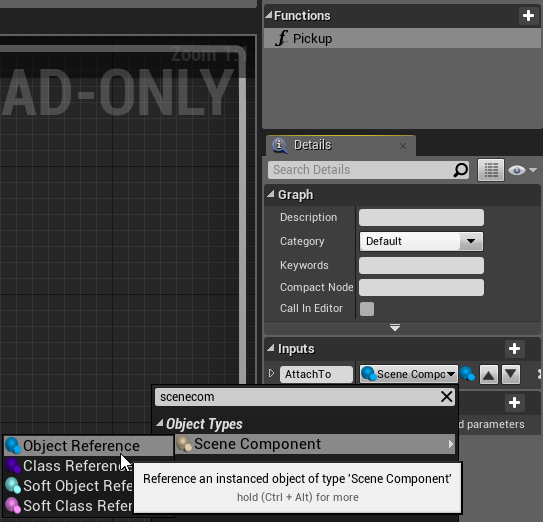
- By default, it's created a new function declaration for you. Name it
Pickup. - Under the function's
Details|Inputs, add a new input. Set its type toScene Component|Object Reference, and name itAttachTo:
- Add another function, and call it
Drop. This one doesn't need any input. - Compile, save, and close the interface.
Now, let's apply this new interface to BP_PickupCube:
- Open
BP_PickupCube, and hit theClass Settingsitem on the toolbar. - Under
Details|Interfaces, hit...