Setting up your document
As with any content creation application you may be familiar with, having an idea of the type of document that you wish to create upfront is helpful. You can use InDesign to create documents for high-end print or online delivery.
Documents can be set up in two ways. You can create a new, empty document by using presets. These documents have predefined dimensions and settings. You can then tweak specific settings to meet your project requirements, for example, the size of the page, the number of columns, or the text margins.
You can also make use of the range of templates. These are predesigned InDesign files that you can use as a launchpad for your designs. You can use the templates that are available in-app, or you can search Adobe Stock (Adobe's stock service) for a specific theme that you may require. Some content requires you to pay an additional fee.
Try it yourself – setting up a new document
In this section, we will set up a business card from the ground up. Let’s recreate the business card document we opened earlier in the chapter:
- Launch InDesign. Click the New file button on the Start screen. This will open the New Document dialog.
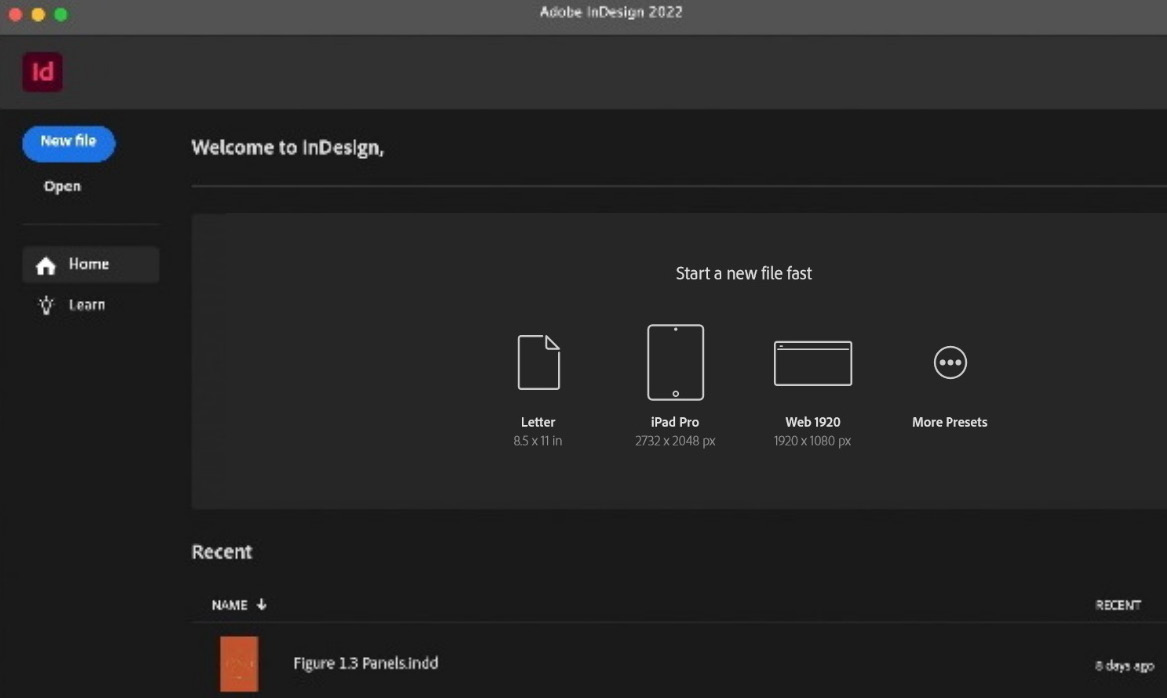
Figure 1.17: The New file button is found at the top left of the Start screen
- If you use imperial units, complete steps 1 to 4. If you work with the metric system, skip to step 5. Click on the Print tab. From the list of blank document presets, choose US Business Card. Under PRESET DETAILS on the right, we’ll make the following adjustments:
- For Units, you can stick with Picas or switch to inches. We’ll use Picas in this exercise.
- Uncheck Facing Pages. This is primarily used in magazine and book design.
- Increase the page count to
2for the front and the back of the business card. - Change all margin values to 1 pica.
- Add 1 pica bleed for all sides. The term bleed in printing refers to the space beyond the trimmed area of the page. It ensures that you have a nice clean edge when the document is trimmed. If page elements touch the outer edge of the format, they should be extended to the bleed guides.
- Click Create to accept the changes.
- Choose File | Save. You can name it anything you wish. You can find a reference file called
Try it yourself 2 - Business Card Imperial.inddin the Chapter 1 - Example Files folder should you need a visual guide.
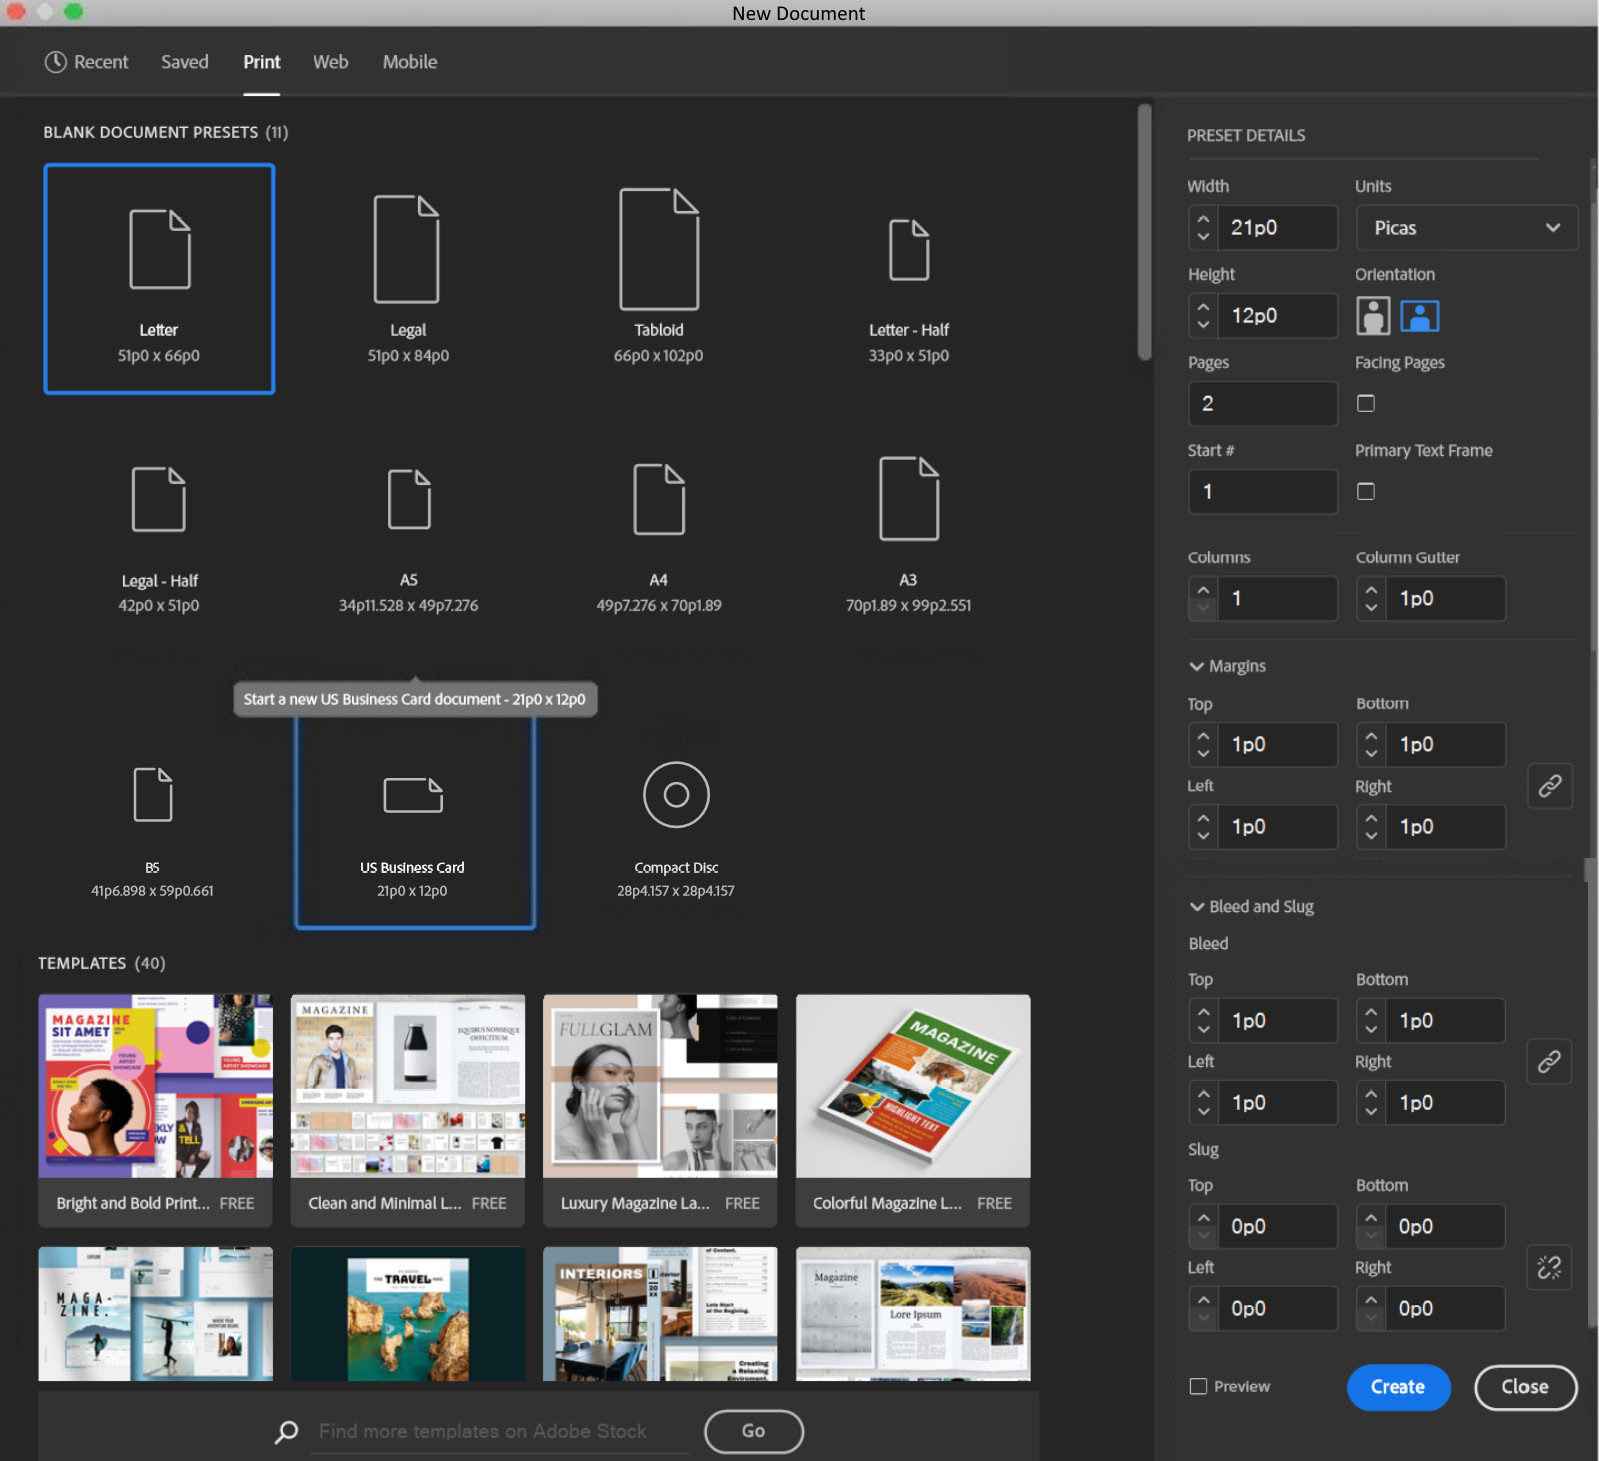
Figure 1.18: Business card setup for imperial units
- For readers who use the metric system, set up your document as follows. Click on the Print tab from the list of blank document presets and choose US Business Card. Under PRESET DETAILS on the right, let’s make the following changes:
- For Units, choose millimeters.
- Change the width to 90mm and the height to 50mm.
- Uncheck Facing pages. This is used in magazine and book design.
- Increase the page count to
2for the front and the back of the business card. - Change all margin values to 4mm. Click the link icon
 to make the changes to all margins all at once. The link icon keeps all values identical. If you need to add different values, disable the link option.
 - Add 3 mm bleed for all sides. The term bleed in printing refers to the space beyond the trimmed area of the page. It ensures that we have a nice clean edge if colors or objects run to the edge of the format.
- Click Create to accept the changes and create the document.
- Choose File | Save. You can name it anything you wish. You can find a reference file called
Try it yourself 2 - Business Card Metric.inddin the Chapter 1 - Example Files folder should you need a visual guide.
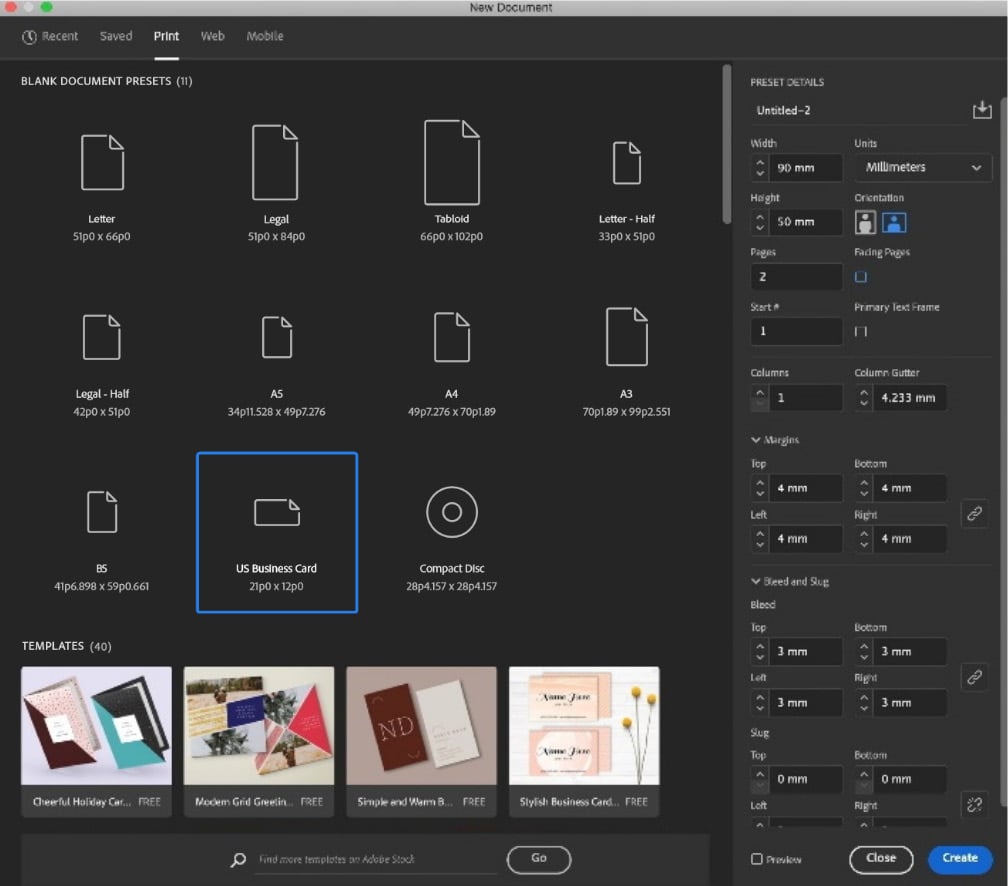
Figure 1.19: Business card setup for metric units
- InDesign will present a newly created document. Take note of the following in the main viewing window.
- Your working page is the white area that you see in the middle of the screen.
- Margins are the pink- and purple-colored lines found inside your page. This is called the text area. These lines do not print or export. The guides are meant to assist you in making sure elements are positioned correctly and accurately on the page.
- The red lines that fall outside the page are your bleed guides. We extend colors or images to these guides if they touch the format edge. Bleeds are trimmed away by the printer.
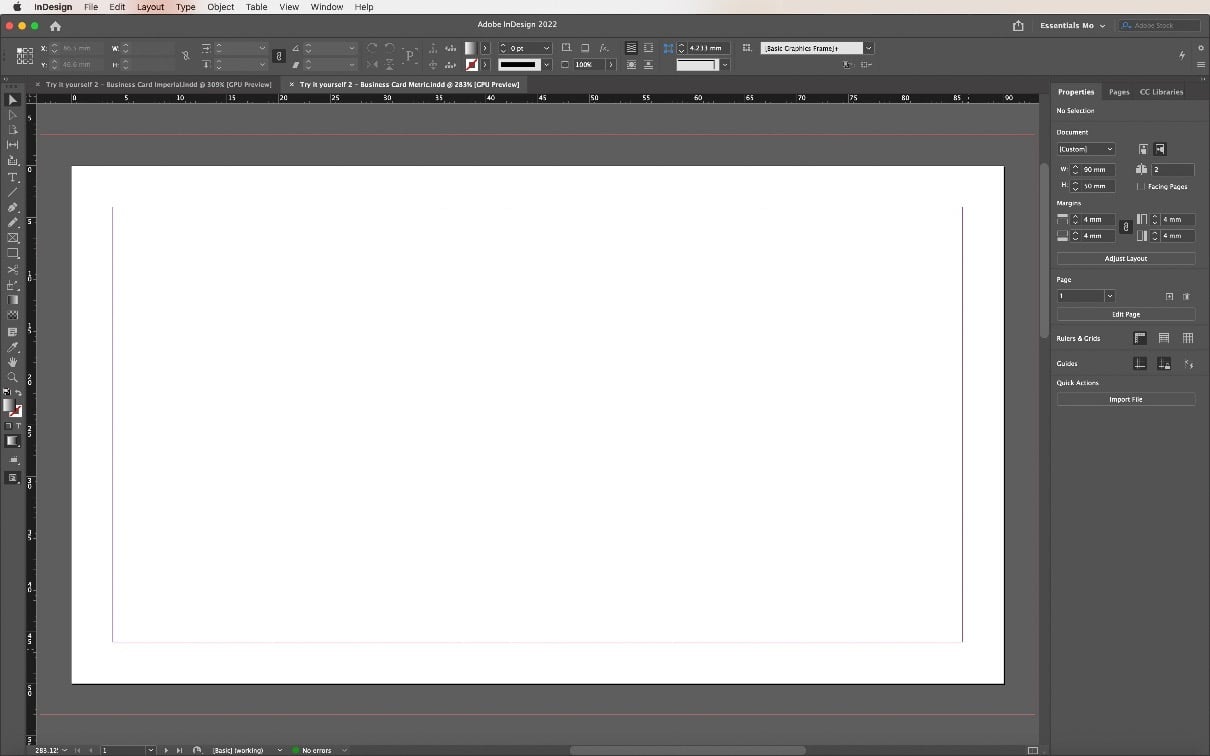
Figure 1.20: Your newly created document showing the page, margins, and bleed
- To navigate between pages, choose the Pages panel. Double-click on the thumbnail of the page you would like to navigate to – for example, Page 2 in the following graphic as shown in Figure 1.21. The page you have selected is highlighted.
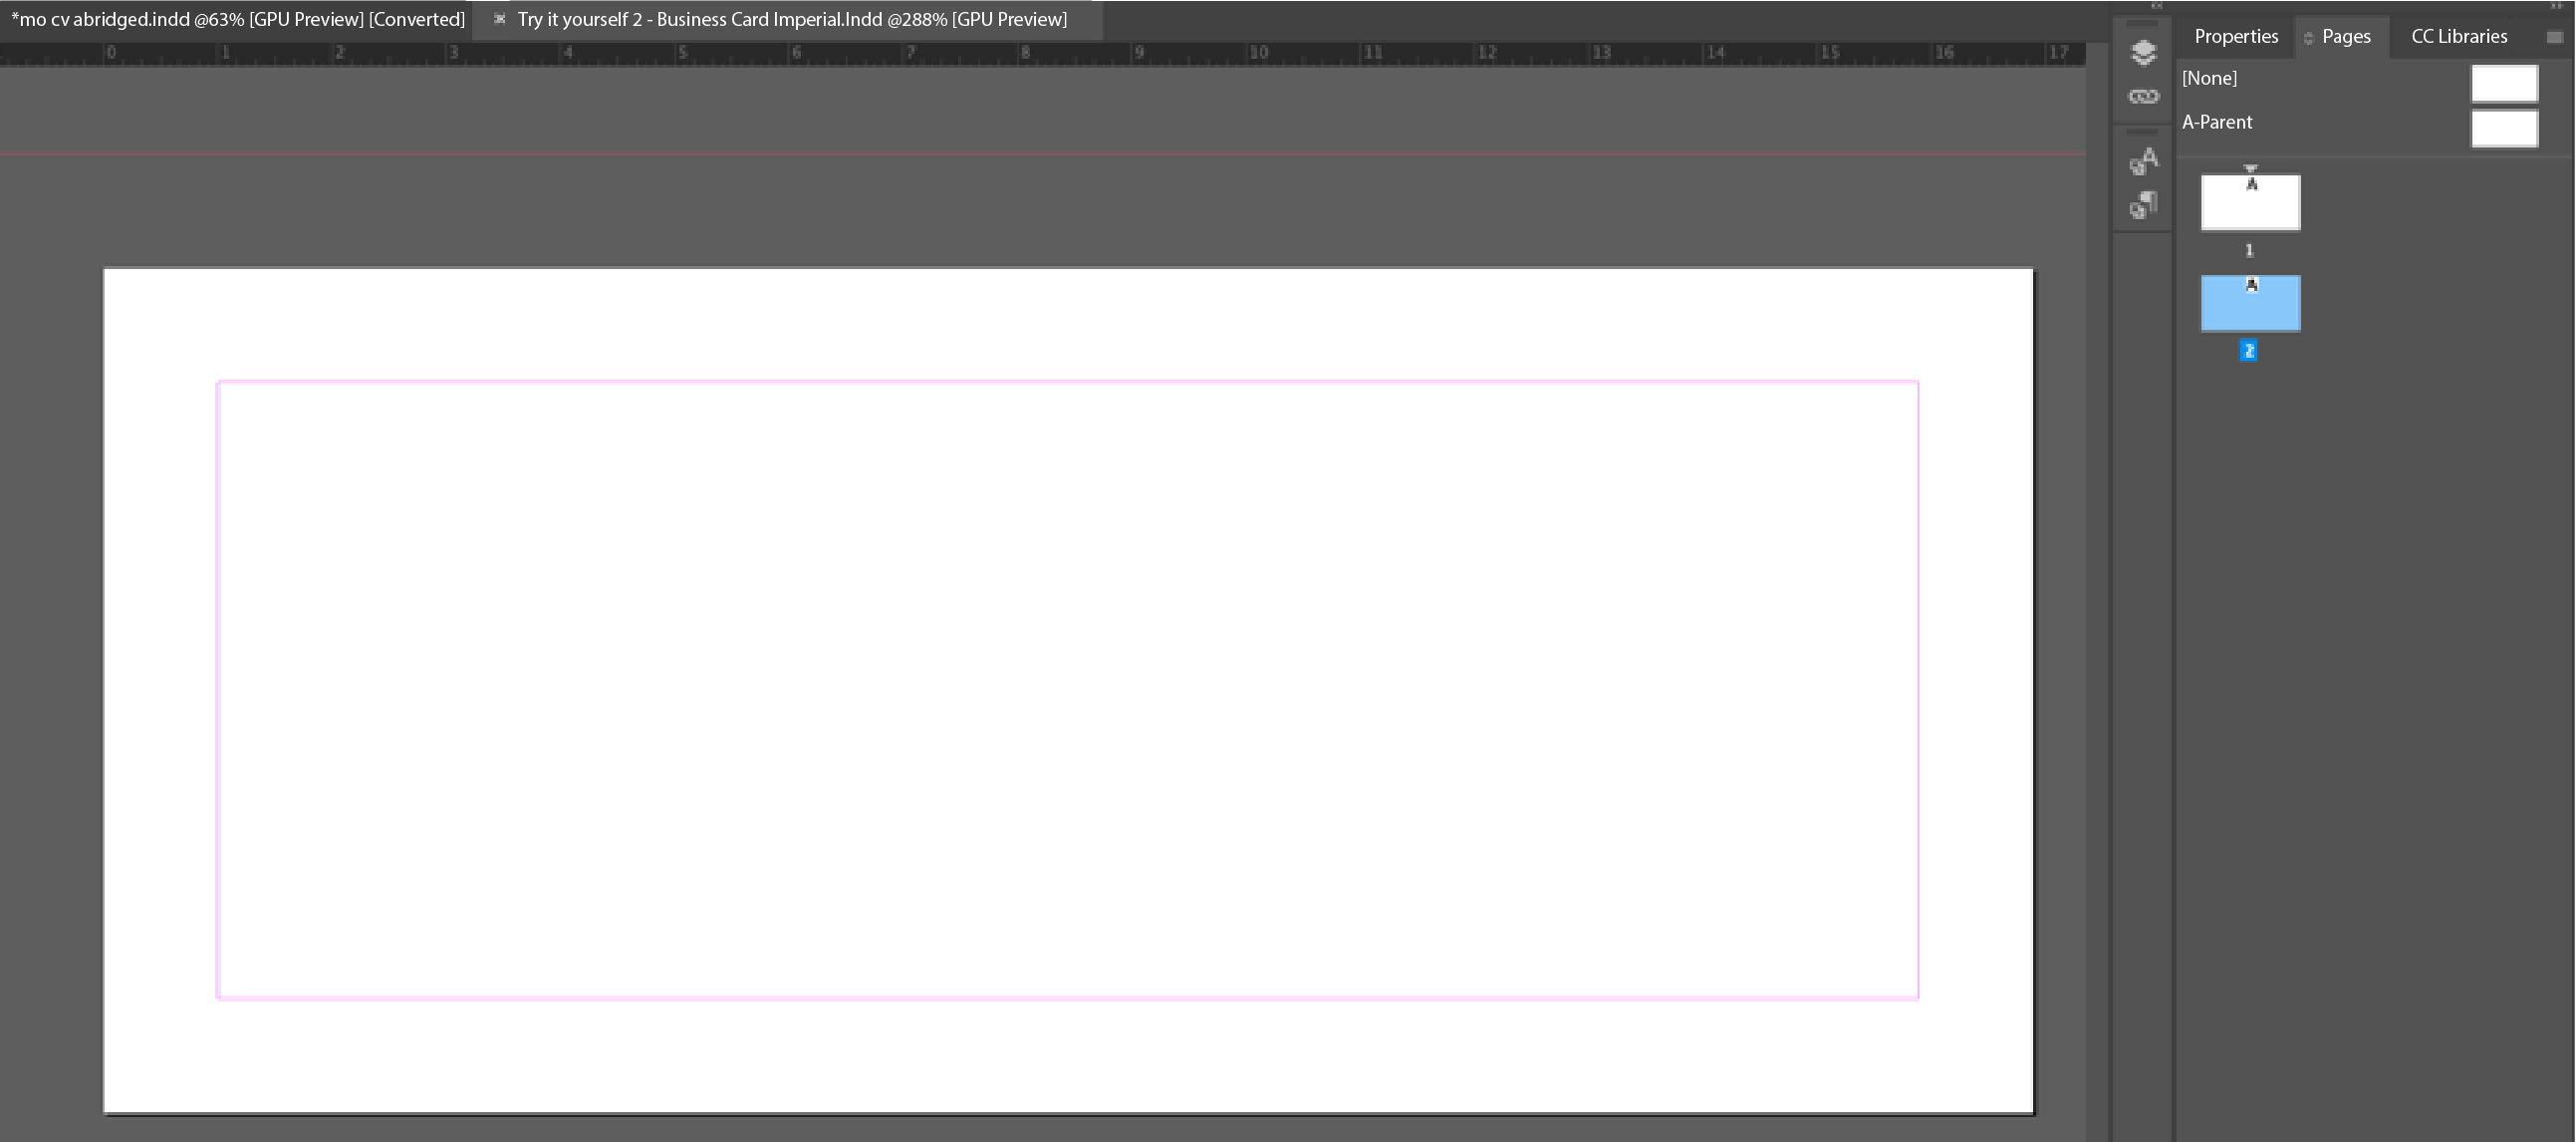
Figure 1.21: The Pages panel with Page 2 highlighted
Well done. You have successfully set up a multi-page document in InDesign. Save your file at this point. Choose File | Save. Choose location on your computer where you would like the file to be saved, and choose a filename of your choosing. For example, Business Card Design.indd. We will use this document to add the business card design and text elements to in the next chapter. At this point, you should feel relatively comfortable with the interface and how to get around InDesign. Be sure to revisit any concepts you may feel uncomfortable with. Remember, this book progressively builds on concepts covered in a linear way. It is helpful to understand each concept being discussed before moving on to the next chapter. More experienced users can jump to chapters that you may find relevant.


