Microsoft Azure comes up with some core concepts that are important to understand before we go ahead and work with it. These core concepts help to manage resources and help to understand the pricing structure as well.
Overview of concepts related to Microsoft Azure
Regions
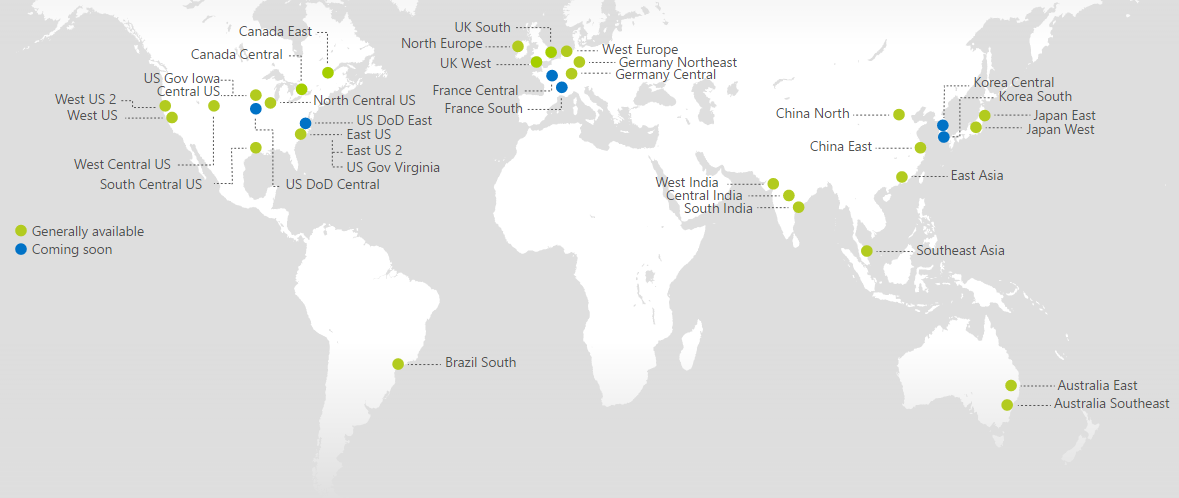
Microsoft Azure services are available in 34 regions around the globe and more regions are continuously planned to be supported. The more regions, the more it allows customers to achieve better performance with cost optimization. It also helps in scenarios where data location is legally restricted.
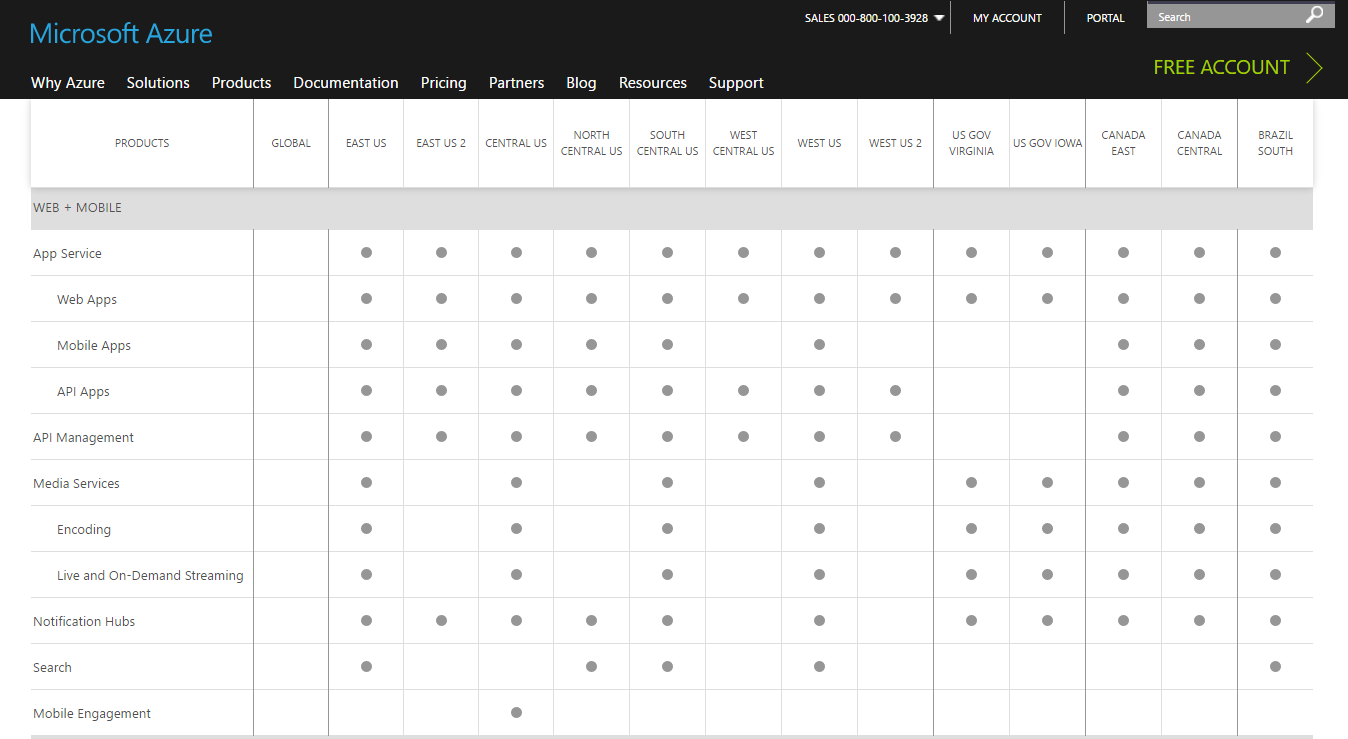
To verify WEB + MOBILE products available by region go to https://azure.microsoft.com/en-in/regions/services/ and check the WEB + MOBILE section:
Azure is generally available in 34 regions and 12 geos around the globe. It has already announced plans for six additional regions and two additional geos. For customers, it is extremely important to have legal compliance in the context of a storage location of their data. There are two different possibilities/authorities in this scenario:
- The customer may copy, move, or access data from any location
- Microsoft may replicate data in other regions of the same geo for high availability:
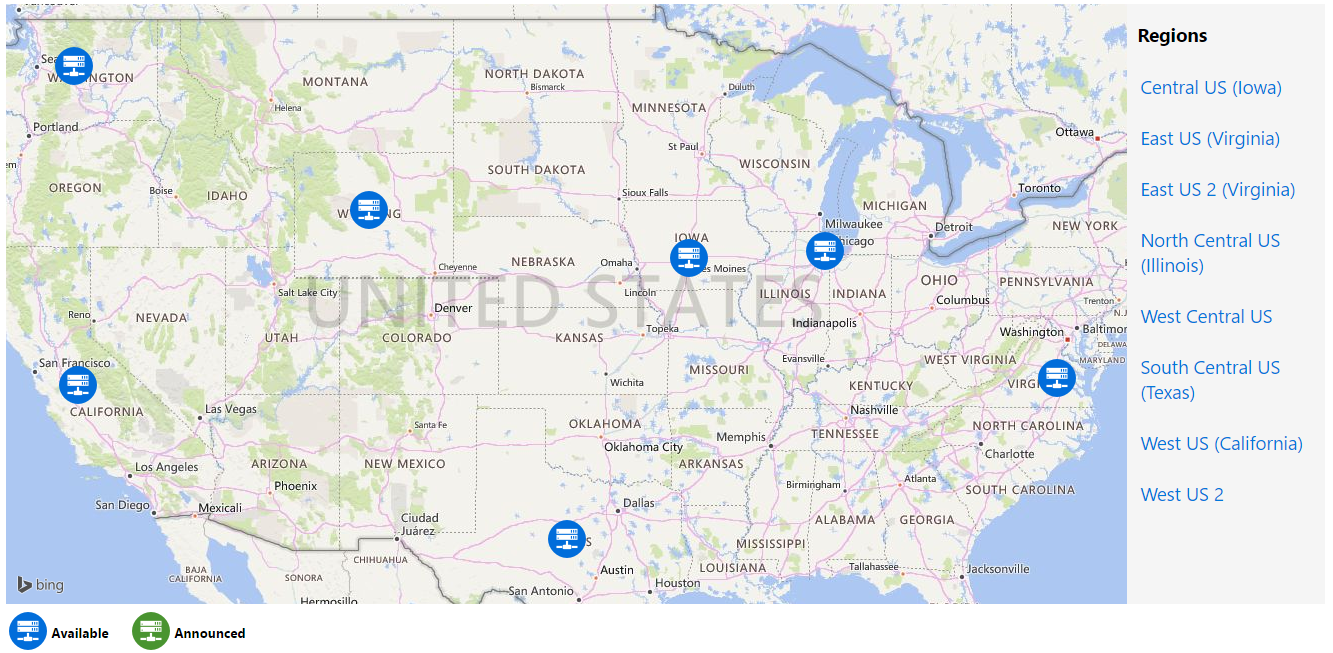
Resource groups
Resource groups in Microsoft Azure is nothing but a logical container. It can be used to group all different resources such as App Service, SQL Databases, and Storage Accounts, available in Microsoft Azure. We are going to consider services that we will use in this chapter for most of the examples. Resource groups provide a simple way to manage resources together. One of the biggest advantages is to manage the role-based access on the resources in an easy manner.
For example, we need to create resources such as Azure Web Apps, SQL Database, and Storage Account in the West US and provide access to all of them to some users. It is painful to assign a user to individual resources. Rather, it is more manageable if we can provide group access to all resources. This way resources can be managed in a better way.
To create a resource group, click on Resource groups in the left-hand sidebar menu. Click on the +Add button to create a resource group. Provide the Resource group name, select Subscription, select Resource group location, and click on Create:
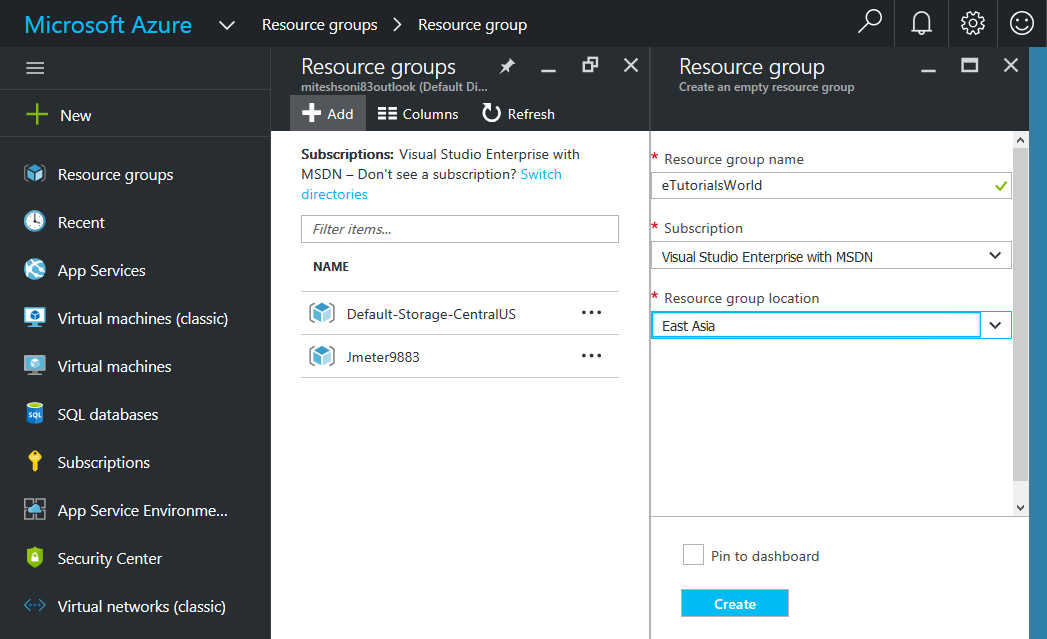
Wait until the resource group is created.
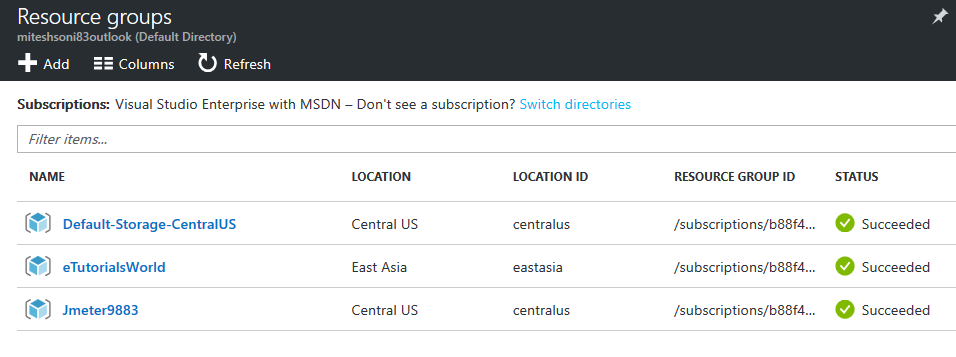
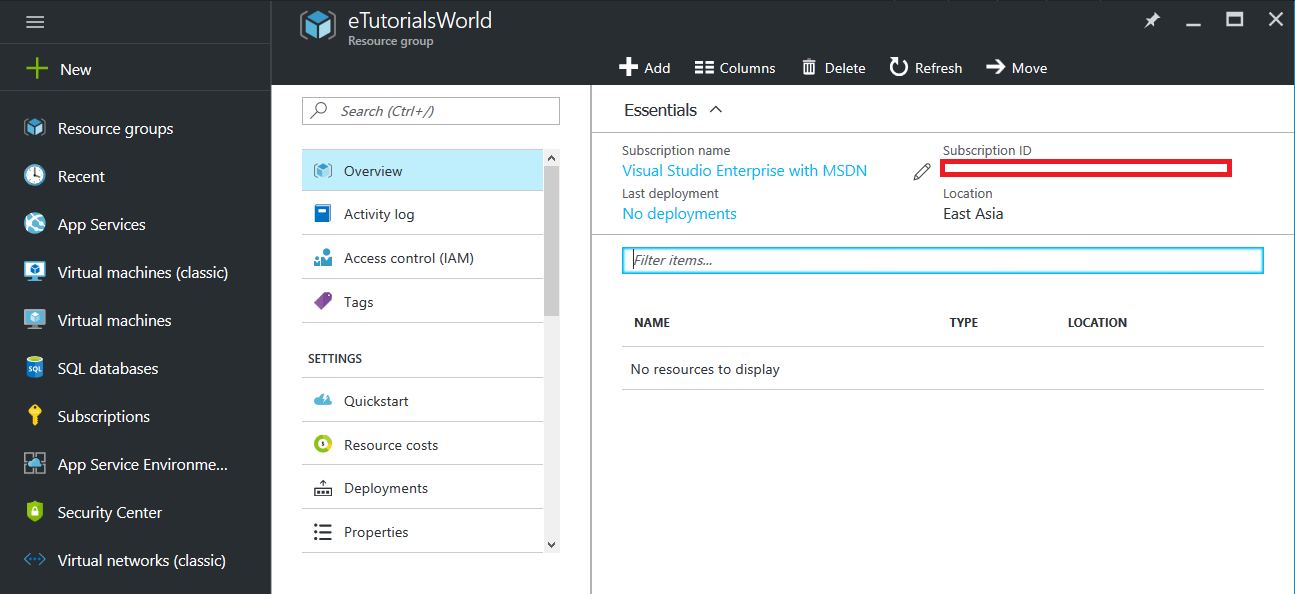
Once the eTutorialsWorld resource group is created, click on it and verify the Overview section.
As of now, there are no resources in the resource group; hence there are No deployments in the Overview section—No resources to display:
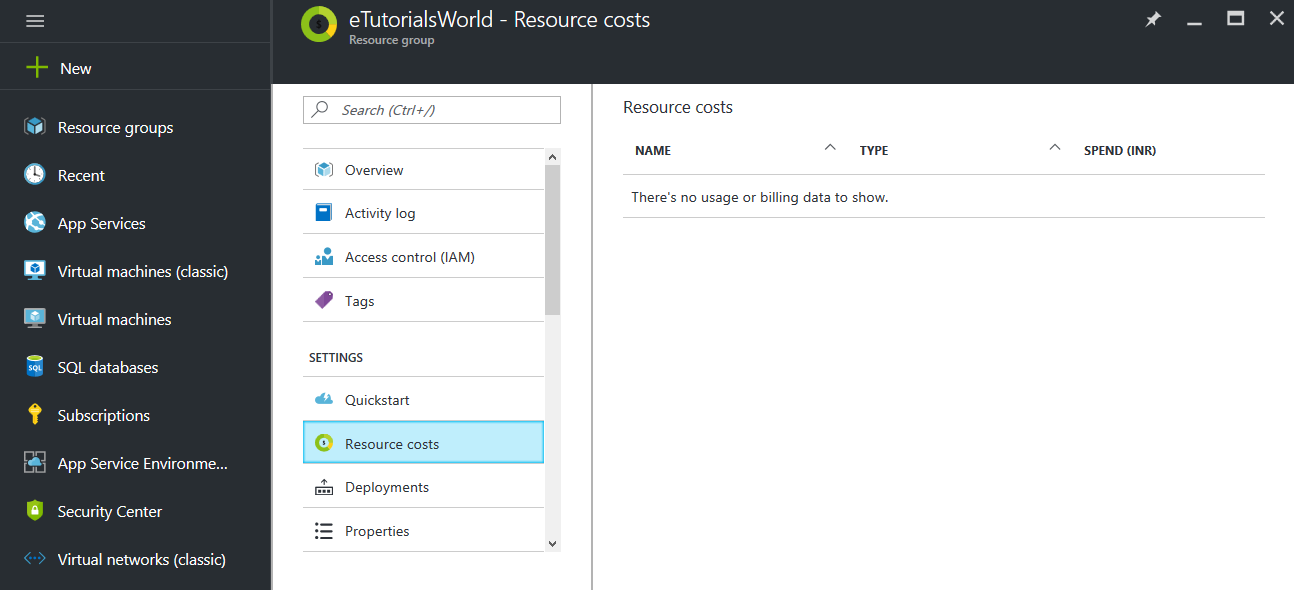
As there are no resources, there is no cost available in the Resource costs section of the eTutorialsWorld resource group:
We will use this resource group in the coming chapters as a logical container for different resources such as Azure Web Apps and Azure SQL Database.
App Service plans
An App Service Plan (ASP) is a set of capacities (the instance size and instance count on which the application is hosted) and features. Capacity is directly linked to cost and hence it is similar to choosing a pricing tier. There are different capabilities and limits within ASPs.
There are five pricing tiers, namely Free, Shared, Basic, Standard, and Premium. Each ASP can be used for different purposes and they are different in providing features too. SLAs for Basic, Standard, and Premium are 99.95 percent. Autoscale, geo-distributed deployment, VPN hybrid connectivity, deployment slots, and automated backups are available only in the Standard and Premium tiers. In the Standard tier, five deployment slots are available, while in the Premium tier, 20 slots are available. Another major difference is the maximum instances, as they are directly associated with scaling. Hence, it is important to pick the proper tier or ASP to gain the desired performance. The Basic, Standard, and Premium tiers allow up to 3, 10, and 50 instances respectively.
The following are some important points regarding ASPs:
- ASPs can be shared by multiple applications
- Deployment slots are usually deployed on the same ASP
- Azure Web Apps configured with an ASP are changed and these changes affect all applications hosted on the ASP
- By default, an ASP comes with a single instance. If we increase the instance count, then applications hosted on a single instance will be hosted on other instances too
- The number of instances in an ASP is directly associated with the price of the Azure Web Apps
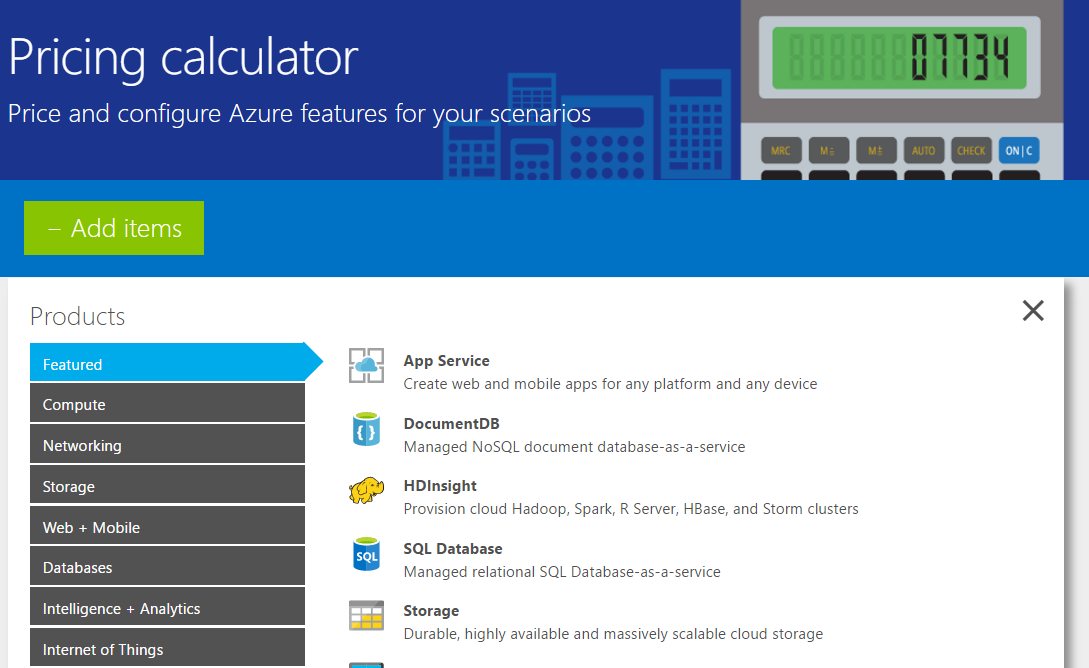
Let's consider the Azure calculator and understand how the pricing works. Go to https://azure.microsoft.com/en-in/pricing/calculator/. Click on +Add items and click on App Service in the Featured category:
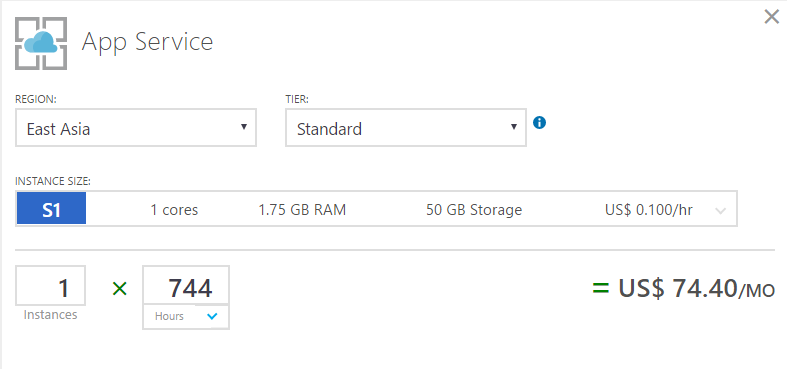
Select REGION, TIER, INSTANCE SIZE; by default, the instance size is 1 and the hours are 744. Verify the cost estimate:
Now change the instance count and verify the cost:
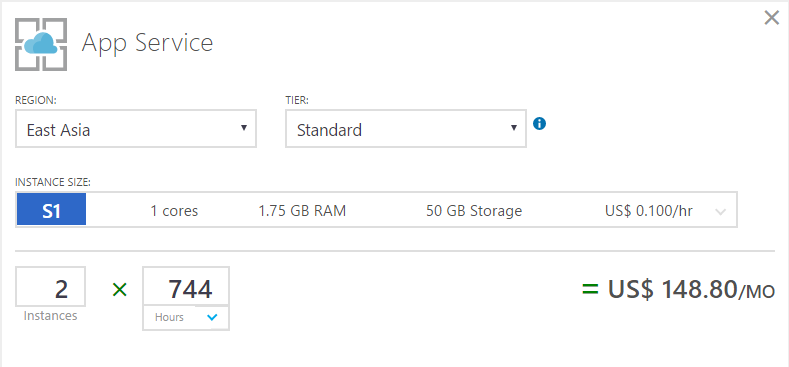
As the instance count directly affects pricing, let's see from where we can change the instance size as we need to be careful while doing it.
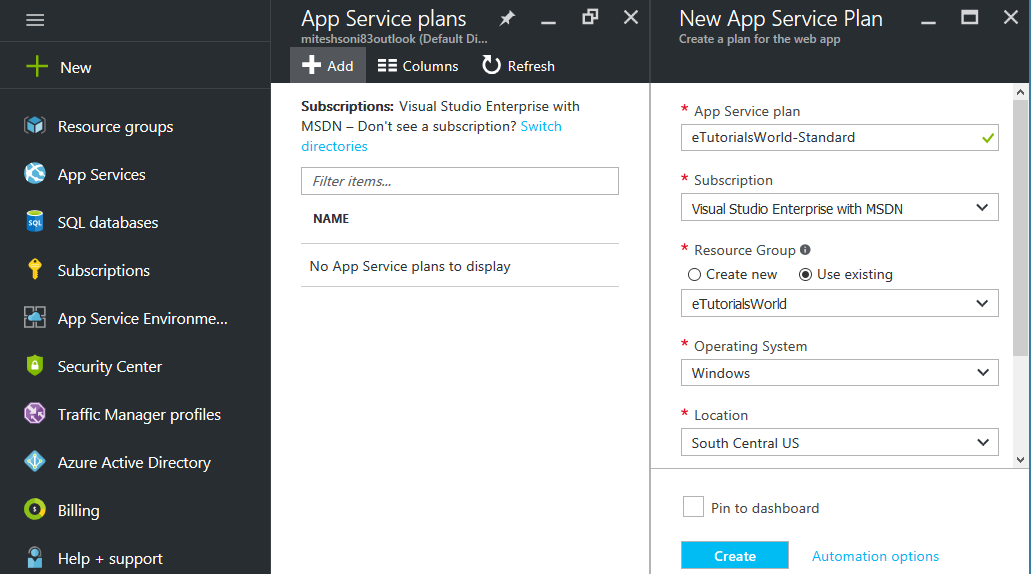
Let's create an ASP and verify the instance count. Go to the left-hand side menu bar, find App Service plans, and click on +Add.
Select the eTutorialsWorld resource group we created; select Operating System, Location, and Pricing tier. Click on Create:
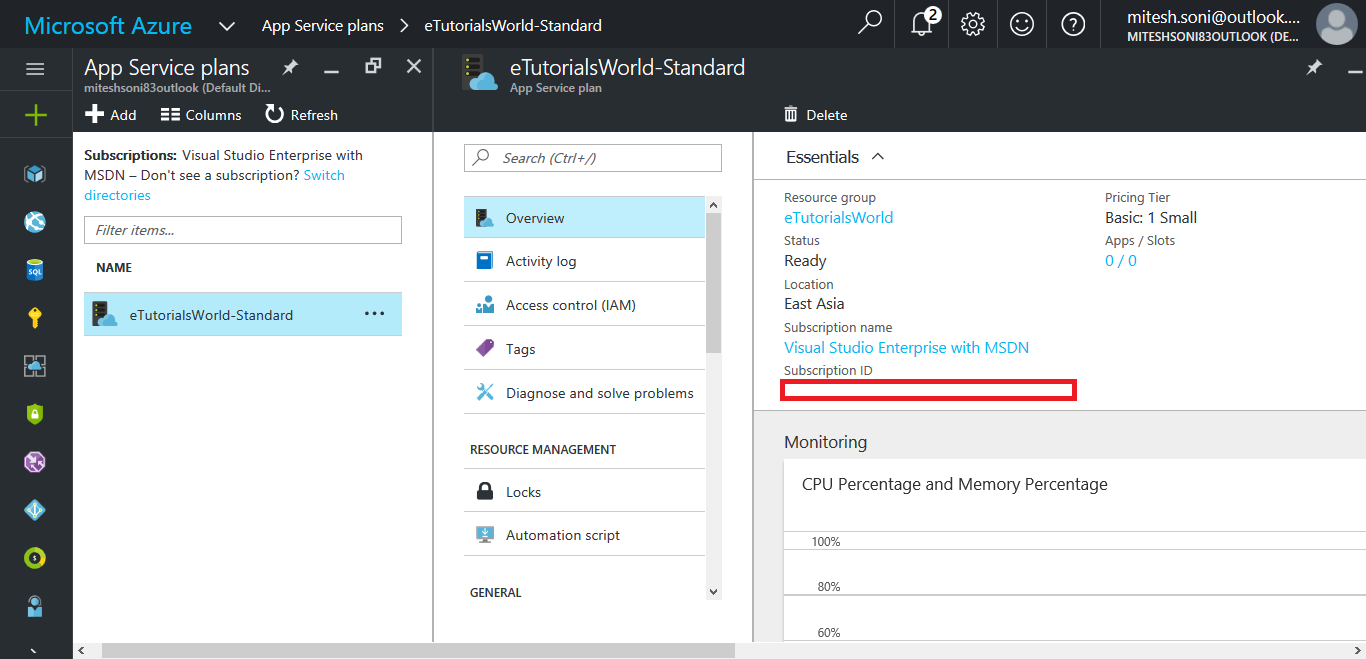
Once the ASP is created, verify its Overview section. Verify the Apps / Slots count. It is 0 / 0 as no app or the slot is using the ASP:
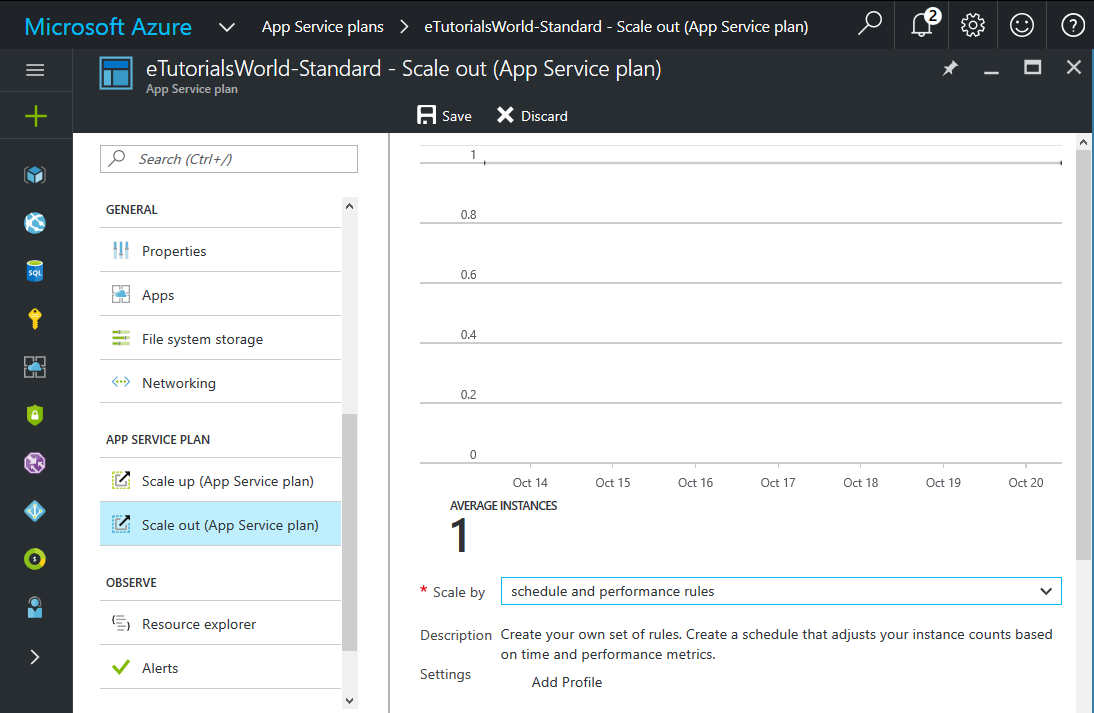
Go to the Scale out (App Service plan) section in APP SERVICE PLAN, and verify the default number of instances. As we kept the Basic pricing tier, it allows us to scale up to three instances only:
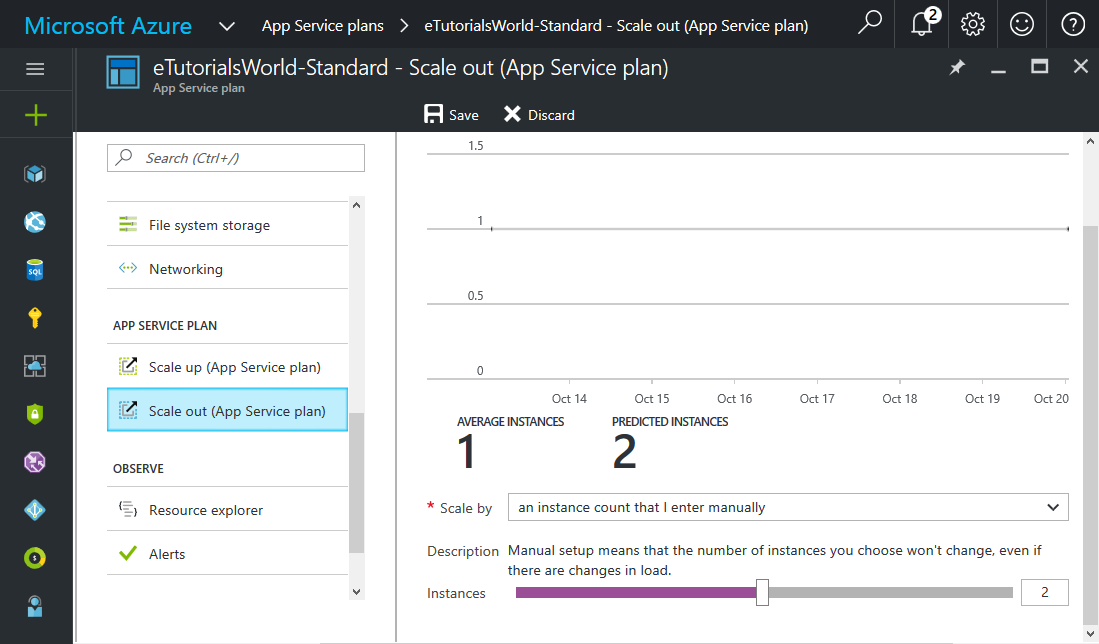
If we want to cancel the changes, click on Discard.
Autoscaling
Scaling resources is a significant part of making an application highly available and having good performance. There are two types of scaling:
- Vertical Scaling (scale up and scale out): We can increase or decrease the size of the instance by choosing different pricing tiers. We can do it manually:
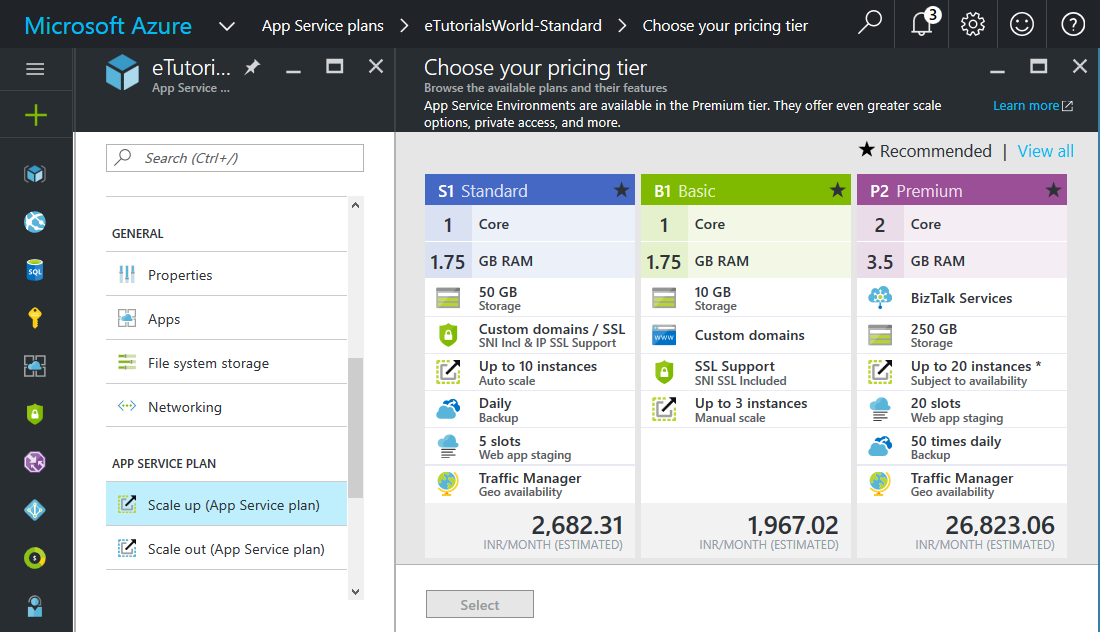
- Horizontal Scaling (scale in and scale Out): We can increase or decrease the number of instances that are used to host web applications.
Horizontal scaling is the most commonly used as we can schedule it also. It is important to understand what will impact on the performance and availability of an application and accordingly we can decide the scaling part:
- Gather the data the load application faces in the existing condition; find the peak load data and date
- Note the existing capacity of Azure Web Apps and database that are used for the web application
- Make sure the architecture of the application supports stateless
- Use any load testing tool and find out how many concurrent requests it can manage before crashing
- Increase the database capacity to manage concurrent requests
- Schedule autoscaling for Azure App Service instances based on different conditions
- Understand the usability of an application from the number of regions
There are three types of scaling out supported in Azure Web Apps:
- Scale instances manually
- Scale instances by the CPU percentage
- Scale instances by schedule and the performance rule
Scale instances manually
We can configure a number of instances manually based on the existing patterns and usage and these will serve the application hosting. We cannot change this dynamically. We need to change the setting in the ASP:

Scale instances by CPU percentage
We can automatically or dynamically scale up or down instances based on the performance of the CPU we have configured. We can also configure the number of instances too.

Scale instances by schedule and performance rule
Based on multiple rules, we can increase or decrease the number of instances used in an ASP. This is the most flexible and widely used scale out option out of the three:
