DCM – setting up a connection
To be able to connect to data using credentials, DCM needs you to create a connection. A connection object is a combination of a data source and a set of credentials.
In this recipe, we’ll be creating a new connection using DCM capabilities.
Getting ready
We’ll prepare to do this using the following steps:
- If you’ve already enabled DCM on Alteryx Designer you can skip this next step, otherwise, you need to do it to make DCM available for you. To do so, go to Options → User Settings → Edit User Settings and from the DCM tab click on Enable DCM.
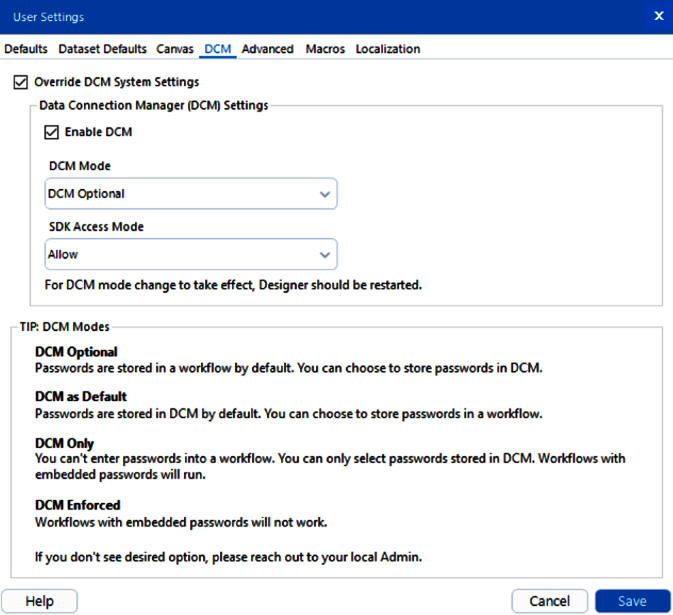
Figure 2.36: DCM options in User Settings
- Make sure DCM Optional is the selected value for DCM Mode and SDK Access Mode is set to Allow.
- Restart Alteryx Designer and you’ll be ready to work with DCM.
If you have access to Alteryx Server, you’ll be able to synchronize your local and remote connections with it.
Also, make sure you have access to at least one database from any of the technologies supported by Alteryx.
Important note
This synchronization process is manual and can only be triggered from Alteryx Designer.
How to do it…
We’ll set up the actual connection using the following steps:
- Go to File → Manage Connections.
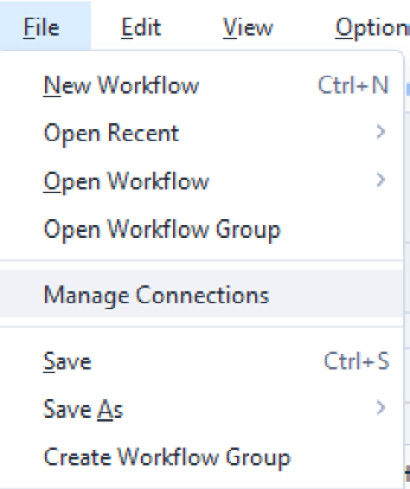
Figure 2.37: Manage Connections menu
A new window is displayed (yours might be blank).
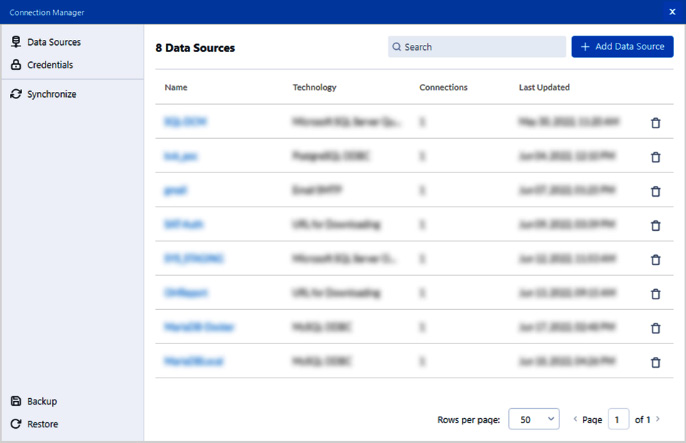
Figure 2.38: DCM main window
- Click on Add Data Source at the top right of the new window, so the Select Technology option shows up.
- From the dropdown, select the type of technology you will be connecting to (see the complete list of tools and technologies supported by DCM here: https://help.alteryx.com/current/designer/dcm-designer):
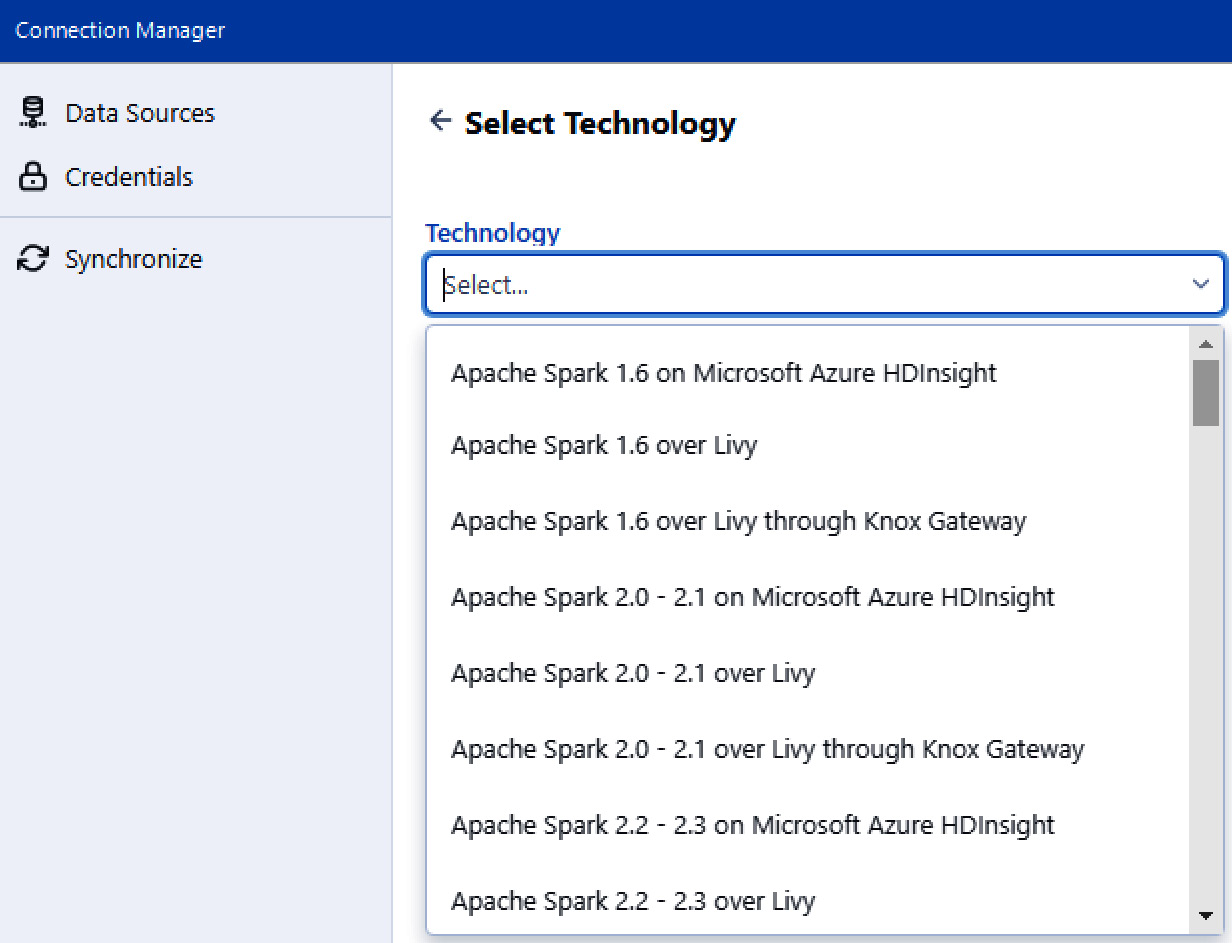
Figure 2.39: Technology selection for new connections
For this recipe, we’ll be using Microsoft SQL Server Quick Connect, but feel free to select the technology you want. The steps will be the same – what will change is the data you need to enter to connect to that technology.
- Enter your connection’s specifics and click Save.
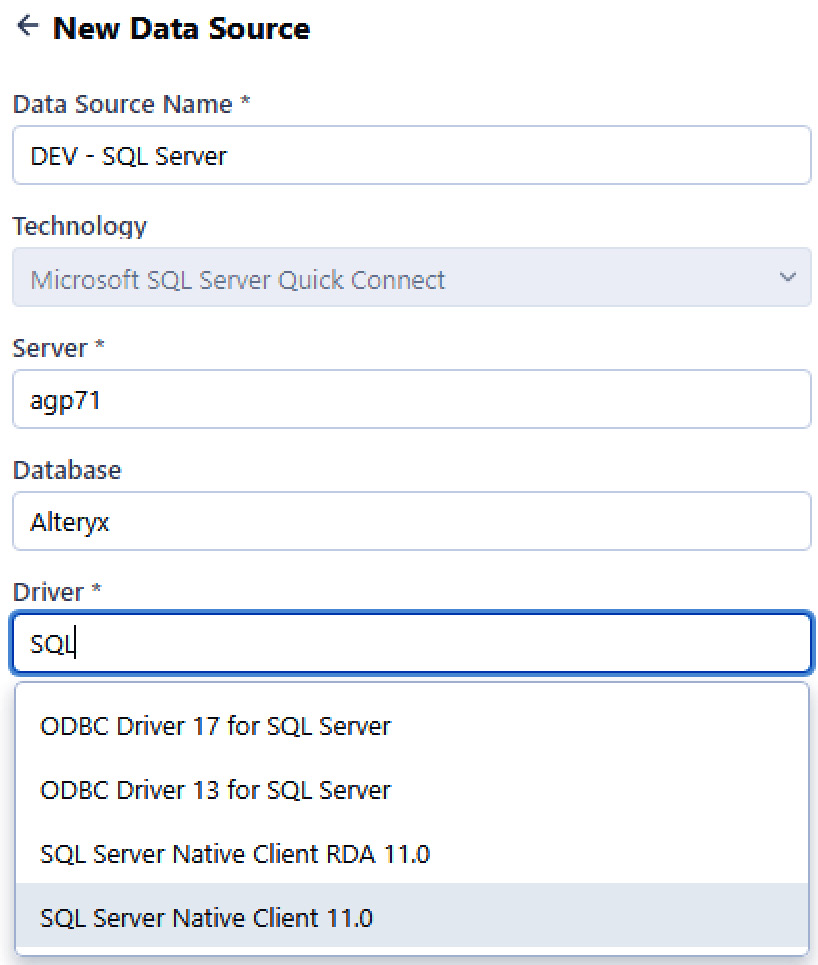
Figure 2.40: Setting up a SQL Server connection
- Now, we need to link the credentials with the data source object to create a connection.
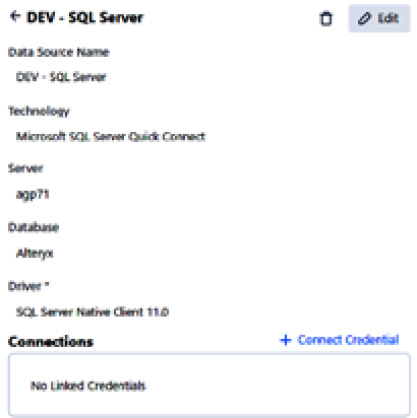
Figure 2.41: Linking credentials to a connection
- Click on + Connect Credential and the panel will change, so you can select the type of credentials (Authentication Method) you’ll be using for this connection.
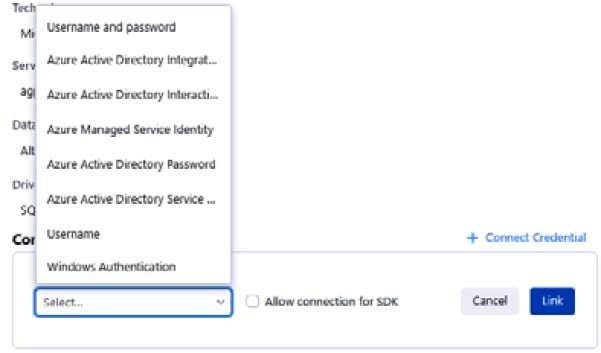
Figure 2.42: Selecting Authentication Method for linked credentials
Depending on your selection, Alteryx will filter and show all credentials of the selected type for you to choose.
Select Username and password and you’ll see that a new field was added to the panel, with a dropdown to select from all existing username and password credentials.
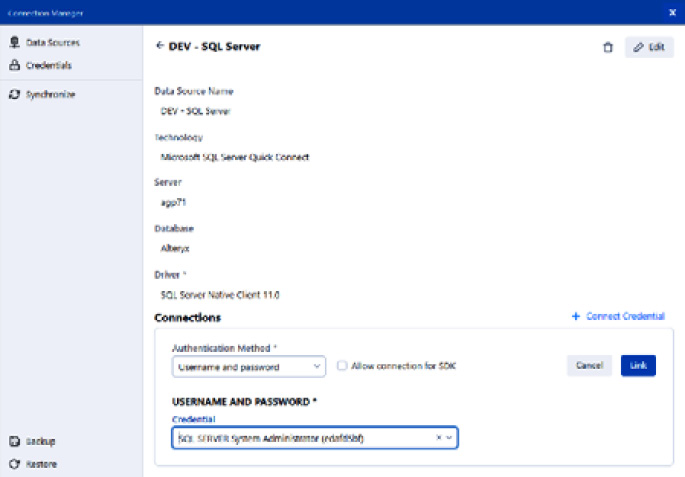
Figure 2.43: Selecting the credentials
- Select the one we created in recipe #3 (
SQL SERVER System Administrator) and click on the Link button.

Figure 2.44: Linked credential
Now we have our connection ready to be used.
How it works…
DCM allows us to create credentials and data sources. Those objects can be individually administrated in a centralized secure space. The combination of a data source and a set of credentials gives us a connection object that we can use in our workflows without caring about logins and server names.
Important note:
If you use DCM, every change you make to a connection will be picked up by your workflows. So, for example, you need to change your password once (in DCM’s Connection Manager) and all workflows using that credential will get updated.
There’s more…
If you see the underlying XML within the workflow for your connections, you’ll notice the difference in how they’re stored and managed by Alteryx Designer.

Figure 2.45: Using DCM and without using DCM
See the complete list of tools and technologies supported by DCM here: https://help.alteryx.com/current/designer/dcm-designer


