Building your first AMLS workspace
Within Azure, there are numerous ways to create Azure resources. The most common method is through the Azure portal, a web interface that allows you to create resources through a GUI. To automate the creation of resources, users can leverage the Azure CLI with the ml extension (V2), which provides you with a familiar terminal to automate deployment. You can also create resources using ARM templates. Both the CLI and the ARM templates provide an automatable, repeatable process to create resources in Azure.
In the upcoming subsections, we will first create an AMLS workspace through the web portal. After you have mastered this task, you will also create another workspace via the Azure CLI. Once you understand how the CLI works, you will create an ARM template and use it to deploy a third workspace. After learning about all three deployment methods, you will delete all excess resources before moving on to the next section; leaving excess resources up and running will cost you money, so be careful.
Creating an AMLS workspace through the Azure portal
Using the portal to create an AMLS workspace is the easiest, most straightforward approach. Through the GUI, you create a resource group, a container to hold multiple resources, along with your AMLS workspace and all its components. To create a workspace, navigate to https://portal.azure.com and follow these steps:
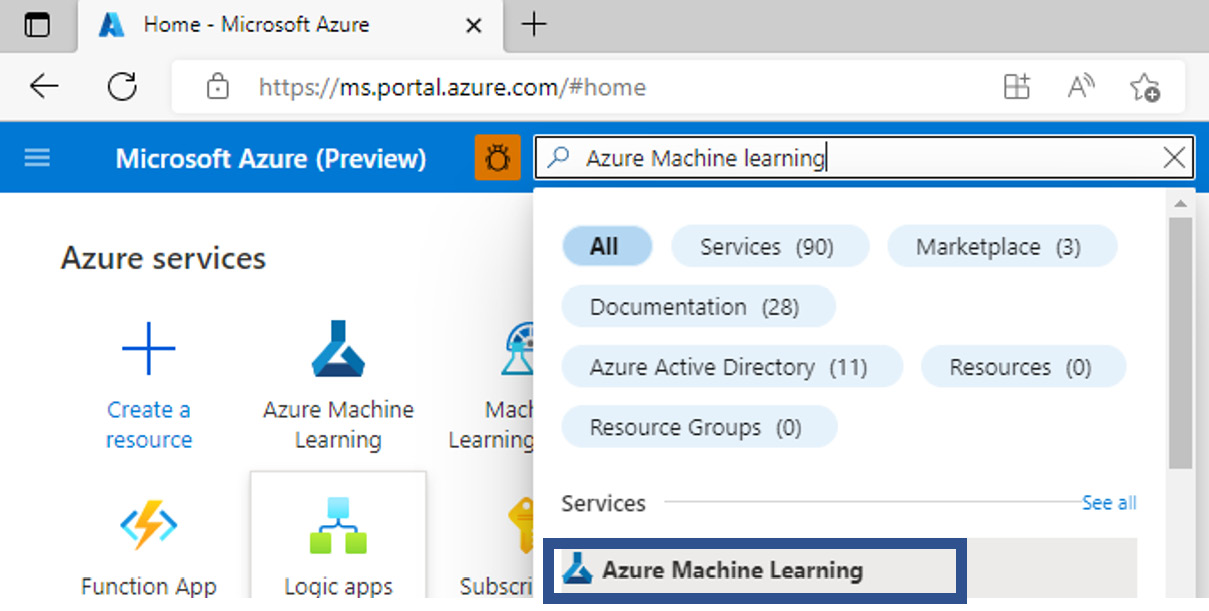
- Navigate to https://portal.azure.com and type
Azure Machine Learninginto the search box as shown in Figure 1.1 and press Enter:

Figure 1.1 – Selecting resource groups
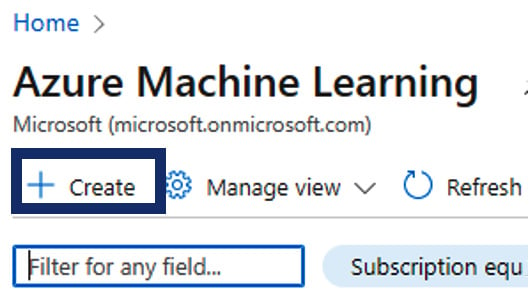
- On the top left of the Azure portal, select the + Create option shown in Figure 1.2:

Figure 1.2 – Creating an AML workspace
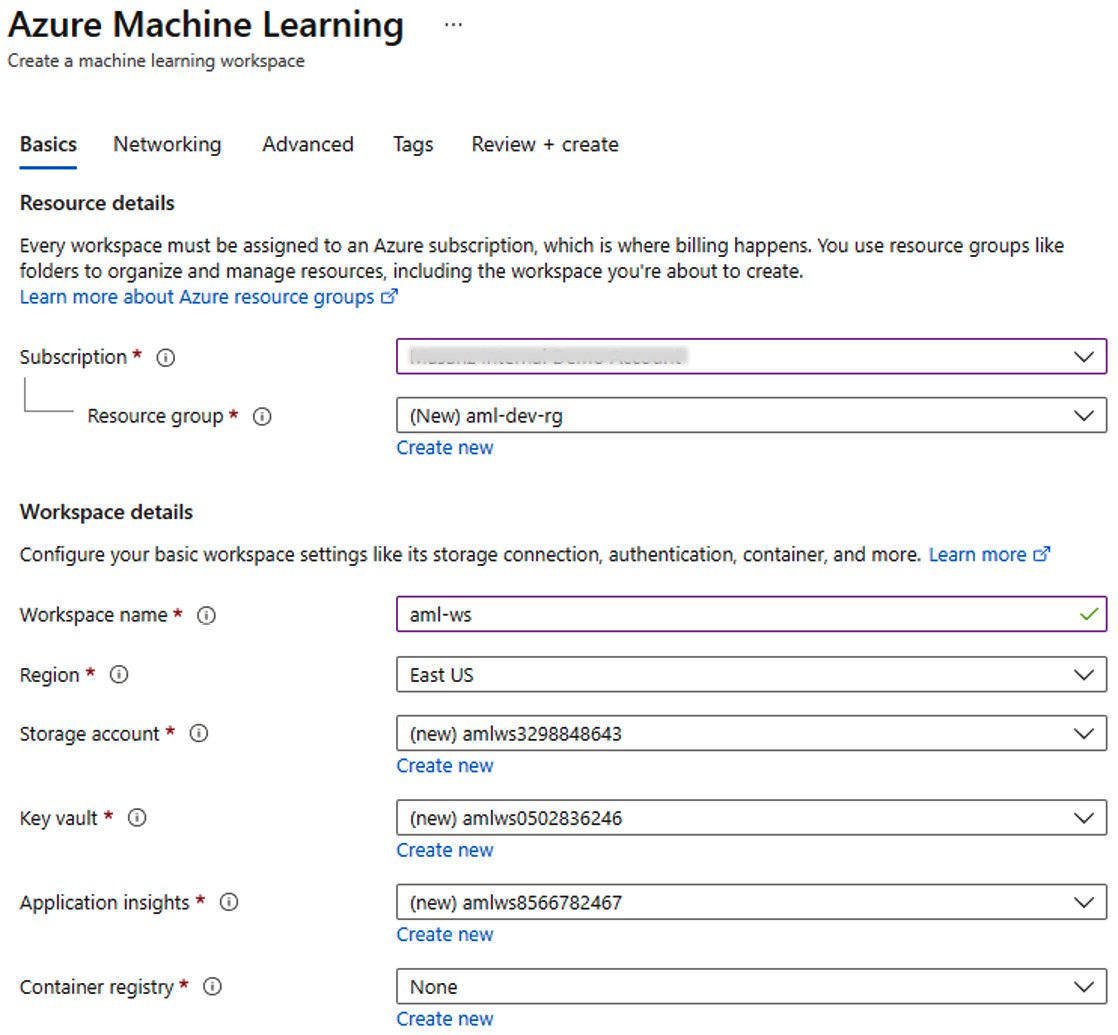
Selecting the + Create option will bring up the Basics tab as shown here:

Figure 1.3 – Filling in the corresponding fields to create the ML workspace
- In the Basics tab shown in Figure 1.3 for creating your AML workspace, populate the following values:
- Subscription: The Azure subscription you would like to deploy your resource.
- Resource group: Click on Create new and enter a name for a resource group. In Azure, resource groups can be thought of as folder, or container that holds resources for a particular solution. As we deploy the AMLS workspace, the resources will be deployed into this resource group to ensure we can easily delete the resources after performing this exercise.
- Workspace name: The name of the AMLS workspace resource.
- The rest of the options are the default, and you can click on the Review + create button.
- This will cause validation to occur – once the information has been validated, click on the + Create button to deploy your resources.
- It usually takes a few minutes for the workspace to be created. Once the deployment is completed, click on Go to resource in the Azure portal and then click on Launch studio to go to the AMLS workspace.
You are now on the landing page for AMLS as shown in Figure 1.4:

Figure 1.4 – AMLS
Congratulations! You have now successfully built your first AMLS workspace. While you can start by loading in data right now, take the time to walk through the next section to learn how to create it via code.
Creating an AMLS workspace through the Azure CLI
For people who prefer a code-first approach to creating resources, the Azure CLI is the perfect fit. At the time of writing, the AML CLI v2 is the most up-to-date extension for the Azure CLI available. While leveraging the Azure CLI v2, assets are defined by leveraging a YAML file, as we will see in later chapters.
Note
The Azure CLI v2 uses commands that follow a format of az ml <noun> <verb> <options>.
To create an AMLS workspace via the Azure CLI ml extension (v2), follow these steps:
- You need to install the Azure CLI from https://docs.microsoft.com/en-us/cli/azure/install-azure-cli.
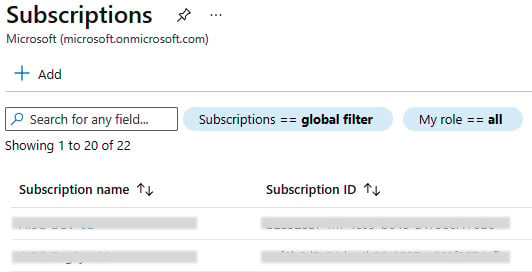
- Find your subscription ID. In the Azure portal in the search box, you can type
Subscriptions, and bring up a list of Azure subscriptions and the ID of the subscriptions. For the subscription that you would like to use, copy the Subscription ID information to use it with the CLI.
Here’s a view of Subscriptions within the Azure portal:

Figure 1.5 – Azure subscription list
- Launch your command-line interpreter (CLI) based on your OS – for example, Command Prompt (CMD) or Windows Powershell (Windows PS) – and check your version of the Azure CLI by running the following command:
az version
Note
You will need to have a version of the Azure CLI that is greater than 2.15.0 to leverage the ml extension.
- You will need to remove old extensions if they are installed for your CLI to work properly. You can remove the old
mlextensions by running the following commands:az extension remove -n azure-cli-ml
az extension remove -n ml
- To install the
mlextension, run the following command:az extension add -n ml -y
- Now, let’s connect to your subscription in Azure through the Azure CLI by running the following command here, replacing
xxxxxxxx-xxxx-xxxx-xxxx-xxxxxxxxxxxxwith the Subscription ID information you found in Figure 1.5:az login
az account set --subscription xxxxxxxx-xxxx-xxxx-xxxx-xxxxxxxxxxxx
- Create a resource group by running the following command. Please note that
rg_nameis an example name for the resource group, just asaml-wsis an example name for an AML workspace:az group create --name aml-dev-rg --location eastus2
- Create an AML workspace by running the following command, noting that
eastus2is the Azure region in which we will deploy this AML workspace:az ml workspace create -n aml-ws -g aml-dev-rg -l eastus2
You have now created an AMLS workspace with the Azure CLI ml extension and through the portal. There’s one additional way to create an AMLS workspace that’s commonly used, ARM templates, which we will take a look at next.
Creating an AMLS workspace with ARM templates
ARM templates can be challenging to write, but they provide you with a way to easily automate and parameterize the creation of Azure resources. In this section, you will first write a simple ARM template to build an AMLS workspace and then deploy your template using the Azure CLI. To do so, take the following steps:
- An ARM template can be downloaded from GitHub and is found here: https://github.com/Azure/azure-quickstart-templates/blob/master/quickstarts/microsoft.machinelearningservices/machine-learning-workspace/azuredeploy.json.
This template creates the following Azure services:
- Azure Storage Account
- Azure Key Vault
- Azure Application Insights
- Azure Container Registry
- An AML workspace
The example template has three required parameters:
environment, where the resources will be createdname, which is the name that we are giving to the AMLS workspacelocation, the Azure Region the resource will be deployed to
- To deploy your template, you have to create a resource group first as follows:
az group create --name rg_name --location eastus2
- Make sure your command prompt is opened to the location to which you downloaded the
azuredeploy.jsonfile, and run the following command:az deployment group create --name "exampledeployment" --resource-group "rg_name" --template-file "azuredeploy.json" --parameters name="uniquename" environment="dev" location="eastus2"
It will take a few minutes for the workspace to be created.
We have covered a lot of information so far, whether creating an AMLS workspace using the portal, the CLI, or now using ARM templates. In the next section, we will show you how to navigate the workspace, often referred to as the studio.


