Search icon CANCEL
Subscription
0
Cart icon
Your Cart (0 item)
Close icon
You have no products in your basket yet
Arrow left icon
Explore Products
Best Sellers
New Releases
Books
Videos
Audiobooks
Learning Hub
Free Learning
Arrow right icon
Arrow up icon
GO TO TOP
Build Customized Apps with Amazon Honeycode

You're reading from   Build Customized Apps with Amazon Honeycode Quickly create interactive web and mobile apps for your teams without programming

Arrow left icon
Product type Paperback
Published in Jun 2022
Publisher Packt
ISBN-13 9781800563698
Length 438 pages
Edition 1st Edition
Arrow right icon
Author (1):
Arrow left icon
Aniruddha Loya Aniruddha Loya
Author Profile Icon Aniruddha Loya
Aniruddha Loya
Arrow right icon
View More author details
Toc

Table of Contents (20) Chapters Close

Preface 1. Part 1: Introduction to Honeycode
2. Chapter 1: Amazon Honeycode – Day One FREE CHAPTER 3. Chapter 2: Introduction to Amazon Honeycode 4. Chapter 3: Building Your First Honeycode Application 5. Chapter 4: Advanced Builder Tools 6. Chapter 5: Powering Apps with Automations 7. Part 2: Deep-Dive into Honeycode Templates
8. Chapter 6: Introduction to Honeycode Templates 9. Chapter 7: A Simple Survey Template 10. Chapter 8: Instant Polls Template 11. Chapter 9: Event Management Template 12. Chapter 10: Inventory Management Template 13. Part 3: Let's Build Some Apps
14. Chapter 11: Building a Shopping List App in Honeycode 15. Chapter 12: Building a Nominate and Vote App in Honeycode 16. Chapter 13: Conducting Periodic Business Reviews Using Honeycode 17. Chapter 14: Solving Problems through Multiple Apps within a Workbook 18. Assessments 19. Other Books You May Enjoy

Creating the first application

In this section, we'll create a Free Tier account on Amazon Honeycode and then quickly create a to-do application.

Creating an account on Amazon Honeycode

To create an account on Amazon Honeycode, let's follow these steps:

  1. We will start by using our browser to navigate to www.honeycode.aws and click on the Try for free button at the top-right corner of the page. Provide your details in the form, verify the email, and complete the signup.
  2. On the first login, you will be greeted with a Welcome to Honeycode! popup. It is up to you whether you want to provide the requested data review the content of the popup or skip it. In our next chapter, we'll cover in detail the information provided on the pop-up screens:
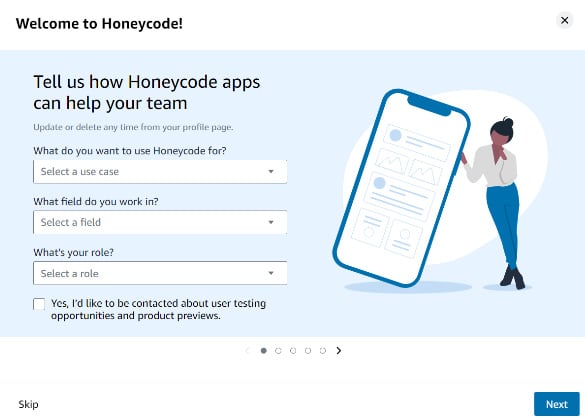
Figure 1.1 – The first Welcome to Honeycode! pop-up screen

Figure 1.1 – The first Welcome to Honeycode! pop-up screen

  1. After logging in and skipping through the popups and nudges, we land on a screen that is called DASHBOARD (there'll be more on the dashboard in Chapter 2, Introduction to Honeycode), which is the place where we'll start creating our To-Do application:
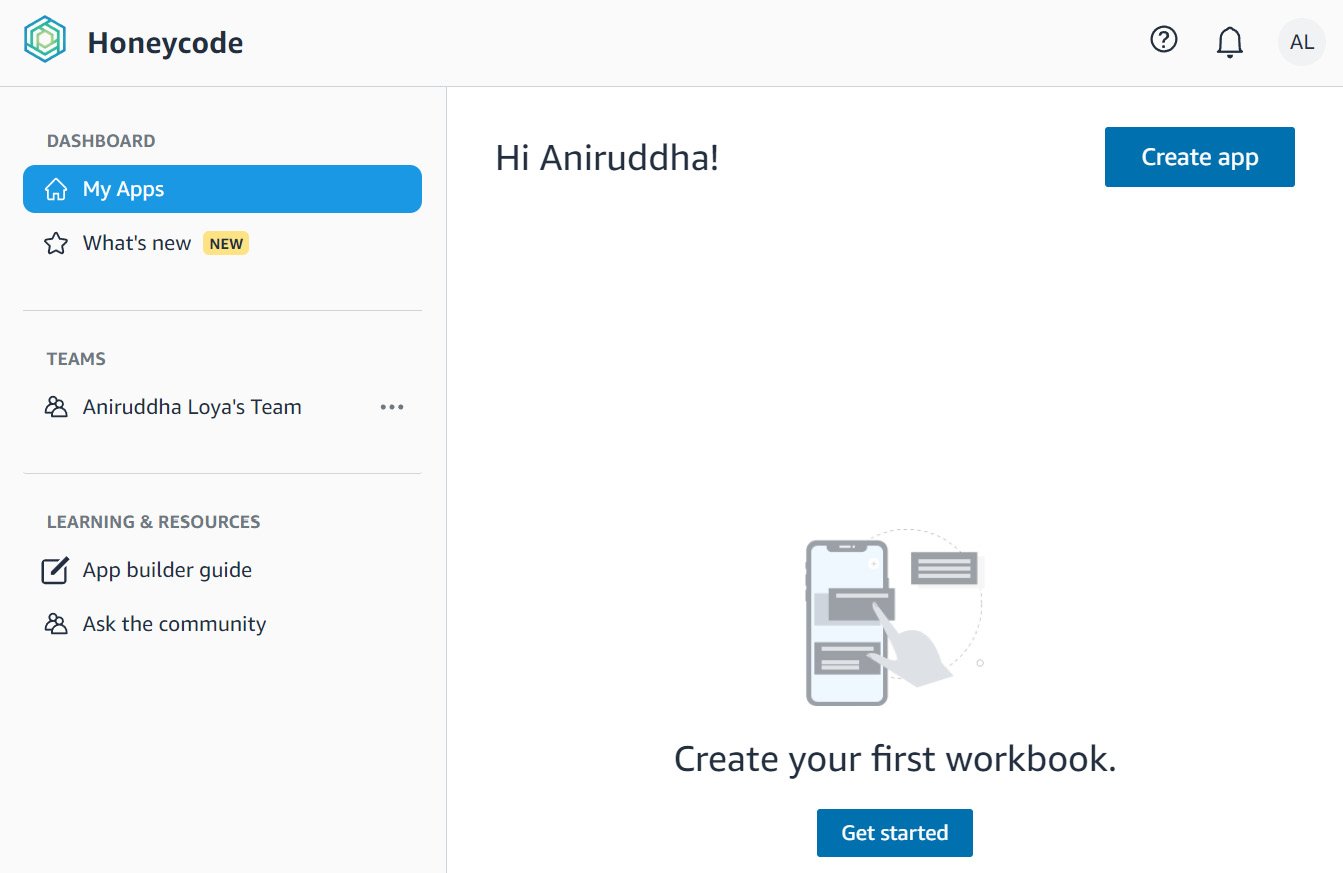
Figure 1.2 – An empty dashboard on the first login

Figure 1.2 – An empty dashboard on the first login

Creating a To-Do application

Let's understand how to create a To-Do application with the following steps:

  1. On the DASHBOARD screen, locate the Create app button in the top-right corner and click it.
  2. This loads a popup with quite a number of options for us. Under the USE A TEMPLATE header, locate a tile with the Simple To-Do label and click it:
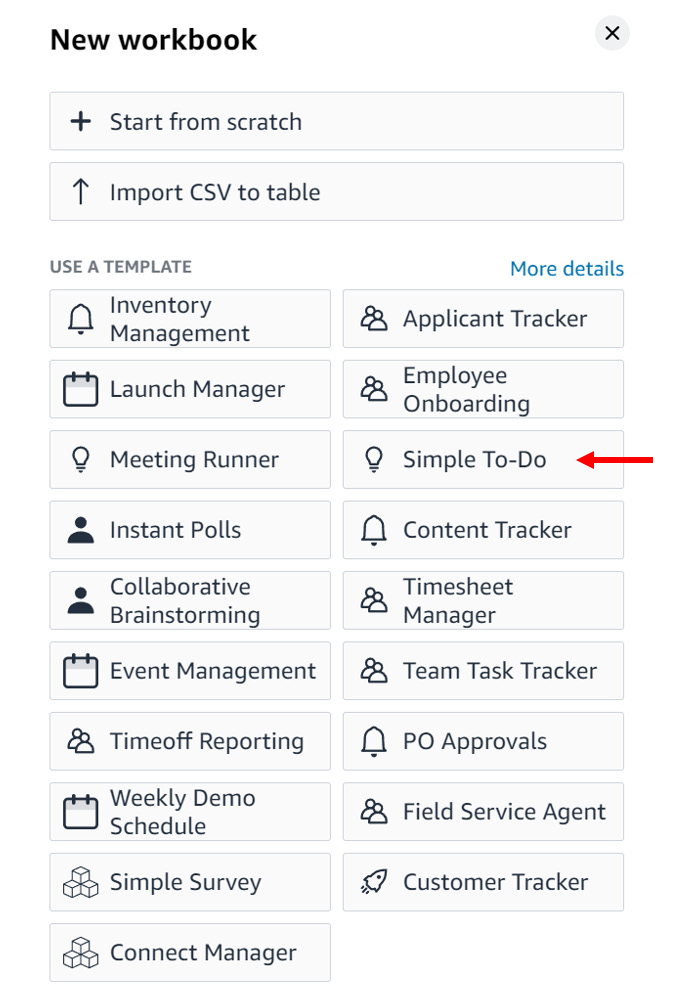
Figure 1.3 – Selecting the Simple To-Do application template

Figure 1.3 – Selecting the Simple To-Do application template

  1. Next comes a popup to name the workbook and choose a team. For now, let's leave the default values and click on the Create button:
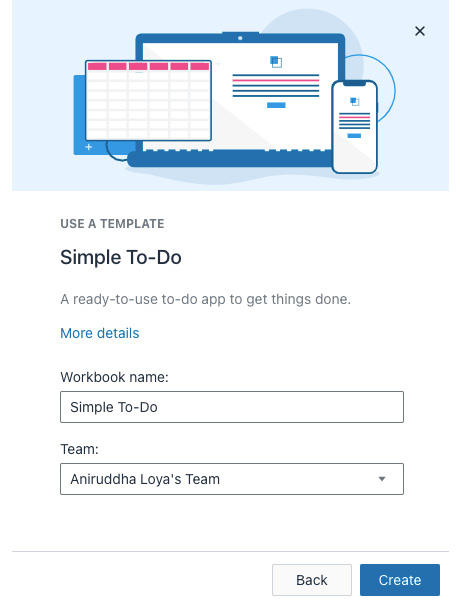
Figure 1.4 – Providing a workbook name and team details to create the workbook

Figure 1.4 – Providing a workbook name and team details to create the workbook

  1. This creates and loads our Simple To-Do workbook and, given it is our first time using it, another set of popups with links and information about the components of the workbook.

It is up to you whether you want to review the links and follow the popups or skip them.

  1. After reviewing or skipping the popups, click on the Honeycode icon in the top left, which navigates back to the dashboard.
  2. Your Honeycode dashboard now has the newly created Simple To-Do app:
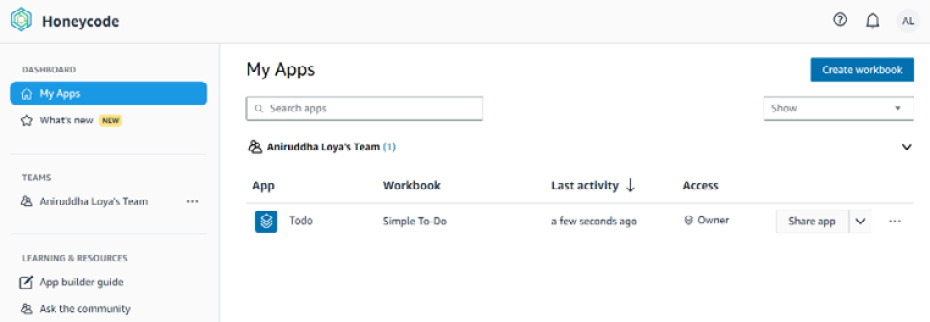
Figure 1.5 – The dashboard showing the newly created application

Figure 1.5 – The dashboard showing the newly created application

And that's it. In six simple steps, you have created your first Honeycode application that is ready to be used. In the next section, we'll learn how to start using this application through browsers and mobile devices.

You have been reading a chapter from
Build Customized Apps with Amazon Honeycode
Published in: Jun 2022
Publisher: Packt
ISBN-13: 9781800563698
Register for a free Packt account to unlock a world of extra content!
A free Packt account unlocks extra newsletters, articles, discounted offers, and much more. Start advancing your knowledge today.
Unlock this book and the full library FREE for 7 days
Get unlimited access to 7000+ expert-authored eBooks and videos courses covering every tech area you can think of
Renews at $19.99/month. Cancel anytime
Banner background image