Working on a hello world project in the Micronaut framework
To understand the practical aspects of using the Micronaut framework for developing a microservice, we will work with a hello world project. This will help you quickly get started with the Micronaut framework and also give you first-hand experience of how easy it is to do microservices development.
Micronaut works seamlessly with the Maven and Gradle packaging managers. We will cover one example for each using the Micronaut CLI as well as Micronaut Launch (web interface) for generating barebones projects.
Creating a hello world project using the Micronaut CLI
Please take the following steps to create a hello world application using the Micronaut CLI:
- Open the terminal (or Command Prompt).
- Change the directory to your desired directory where you want to create the hello world project.
- Type the following command:
mn create-app hello-world-maven --build maven
- Wait for the Micronaut CLI to finish and it will create a
hello-world-mavenproject. Thecreate-appcommand will create a boilerplate project for you with a Maven build and your system-installed Java version. It will createApplication.javaas well as a sample test class calledApplicationTest.java. - To explore your freshly created
hello-world-mavenproject, open this project in your preferred IDE. - To run your project, run the following command in a Bash terminal:
./mvnw compile exec:exec
Please note that if you are copying the project from somewhere else, then it's required to regenerate
mvnwby typing the following command:mvn -N io.takari:maven:wrapper
- The Maven wrapper will build and run your project on
http://localhost:8080by default.
Adding HelloWorldController
To create a simple endpoint, let's add a simple controller to the hello-world-maven project:
- Add a web package to our
hello-world-mavenproject. - Add a
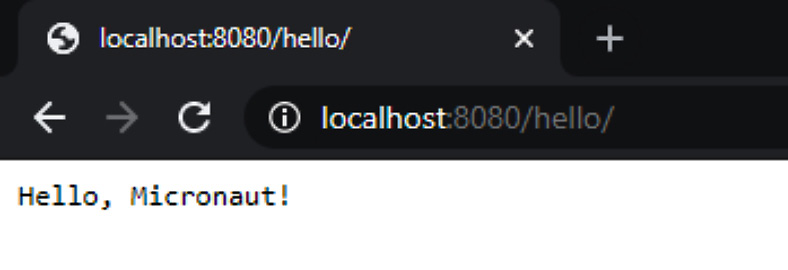
HelloWorldControllerJava class. It will contain a simplehelloendpoint:@Controller("/hello") public class HelloController { @Get("/") @Produces(MediaType.TEXT_PLAIN) public String helloMicronaut() { return "Hello, Micronaut!"; } }HelloControlleris accessible on the…/hellopath.helloMicronaut()will generate a plain text"Hello, Micronaut!"message. - Rerun your application and hit http://localhost:8080/hello/ in a browser window. The server will return the following response:

Figure 1.9 – Hello, Micronaut!
By default, the application will be accessible on port 8080, and this port can be changed in the application properties.
So far, we have worked on a hello world project using the Micronaut CLI. Next, we will explore Micronaut Launch, which is a web interface, to generate a boilerplate project.
Creating a hello world project using Micronaut Launch
Micronaut Launch (https://micronaut.io/launch/) is an intuitive web interface that came into existence with Micronaut 2.0.1. We can use this interface to quickly generate boilerplate for different kinds of Micronaut applications (such as server applications, the CLI, serverless functions, a messaging application, and so on). Let's quickly use this to generate a hello world application for us.
Please follow these instructions to generate the hello world project using the Micronaut Launch web interface:
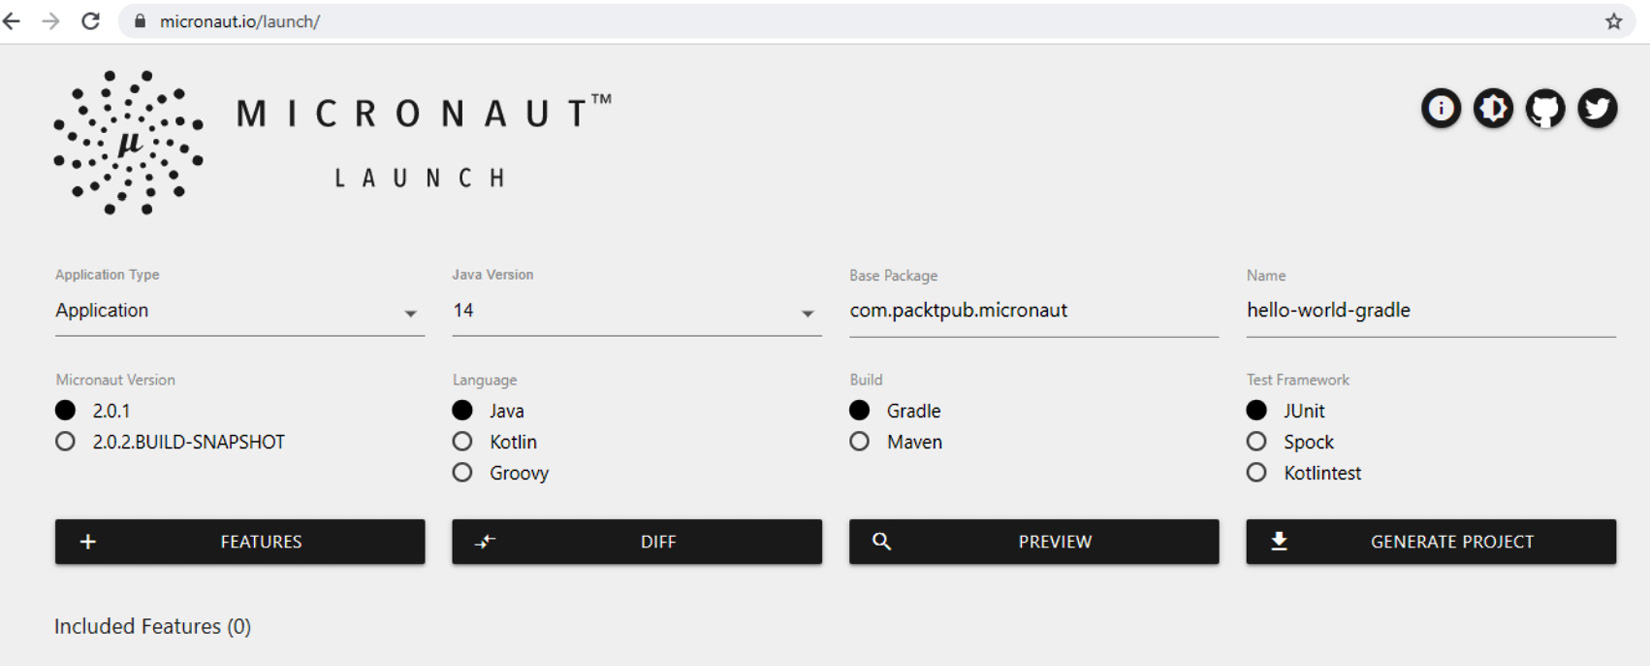
- Open Micronaut Launch in a browser window: https://micronaut.io/launch/.
- Under Application Type, choose Application.
- Under Micronaut Version, choose 2.0.1.
- For the Java version, choose Java 14.
- For Language, choose Java.
- Give a base package name such as
com.packtpub.micronaut. - Choose Gradle as the build option.
- Give a name to the application, such as
hello-world-gradle. - Choose JUnit as the testing framework
- After you've finished choosing all the options, click on GENERATE PROJECT.
After choosing the preceding options and providing various inputs, the Micronaut Launch interface should look as follows:

Figure 1.10 – Using Micronaut Launch to generate a boilerplate project
Your project boilerplate source code will be generated into a zipped file. You can unarchive this zipped file into your desired directory and open it in your preferred IDE. Just like the previous example (hello-world-maven), we can add a basic HelloWorldController instance.
To run your project, run the following command in a Bash terminal:
gradlew.bat run
When the project is running, go to http://localhost:8080/hello and you should see the Hello, Micronaut! message in the browser tab.
In this section, we explored how to get started with the Micronaut framework by developing small hello world projects using the Micronaut CLI as well as the Micronaut Launch user interface. This small exercise will be a good preface for what we will cover in the next chapter.


