Working with lambda functions
In this recipe, we are going to go through some examples of how to use lambdas in Godot 4. First, we create a lambda that takes a greeting parameter, then we will call the lambda and pass in "hello" to the parameter. In the next example, we declare a variable called health outside of the player_health lambda and call the variable inside of the lambda. We will learn two ways to write a lambda function with a button signal. Finally, we use a lambda function, moving the button across the screen with a tween.
Getting ready
For this recipe, create a new scene by clicking + to the right of the current Scene tab and adding Node2D. Select Save Scene As and name it Lambda.
How to do it…
Let’s start by creating a Button node and referencing it to the button variable:
- Add a script named
Lambdato Node2D and delete all of the default lines except line 1 and the_ready()function. - In the new scene named
Lambdathat you created, add aButtonnode and make it big enough to see. - Let’s use
@onreadyand create a variable calledbuttonto reference ourButtonnode:1 extends Node2D 2 3 @onready var button = $Button
- On line 5, in the
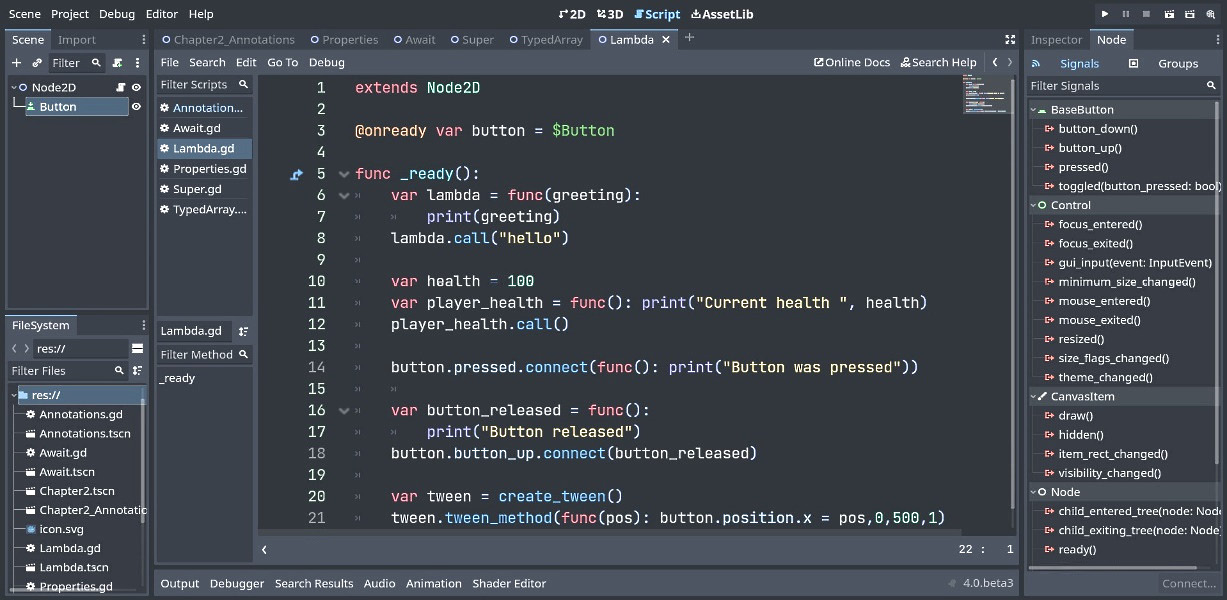
_ready()function, we create a lambda that will pass in"hello"to the lambda parametergreeting:5 func _ready(): 6 var lambda = func(greeting): 7 print(greeting) 8 lambda.call("hello") - On line 10, we declare a variable called
health:10 var health = 100
- On line 11, we create a lambda function called
player_health:11 var player_health = func(): print("Current health ", health) - On line 12, we call the
player_healthlambda function:12 player_health.call()
- On line 14, we create a lambda function to run when the button is pressed:
14 button.pressed.connect(func(): print("button was pressed")) - On lines 16–18, we create a lambda to run when the button is released:
16 var button_released = func(): 17 print("Button released") 18 button.button_up.connect(button_released) - On lines 20–21, we create a
tweento move the button across the screen:20 var tween = create_tween() 21 tween.tween_method(func(pos): button.position.x = pos, 0, 500, 1)
- Now click the Run the current scene button or hit the F6 key.

Figure 2.9 – Lambda code (GDScript for steps 3–10)
How it works…
We added a script called Lambda to Node2D and deleted everything in the script except line 1 and the _ready() function. Then, we created a Button node in the Scene tab. In the Lambda script, we used @onready to declare a variable called button to the Button node.
We created a variable called lambda equal to the lambda function with the greeting parameter, which prints the greeting. Since lambdas are a type of callable, we call the lambda variable with the "hello" string to be used as the greeting.
We declared a variable called health and gave it a value of 100 in line 10. You can use variables from the outer class or outer function inside the lambda. In line 11, we created a lambda called player_health, which prints out Current health and the value of the health variable. In line 12, we call the player_health lambda to print out ("Current health ", health) to the console.
We pass the lambda as a function argument. When the pressed() button signal is emitted, Button was pressed will be printed to the console.
We essentially do the same thing we did last in the step except we use more than one line. When the button_up() signal is emitted, Button released is printed to the console.
On line 20, we create a tween. On line 21, we use a lambda in tween_method() to move the Button node from position (0) to position (500) with a duration of (1). If we wanted the button to go slower, we would increase the duration number.
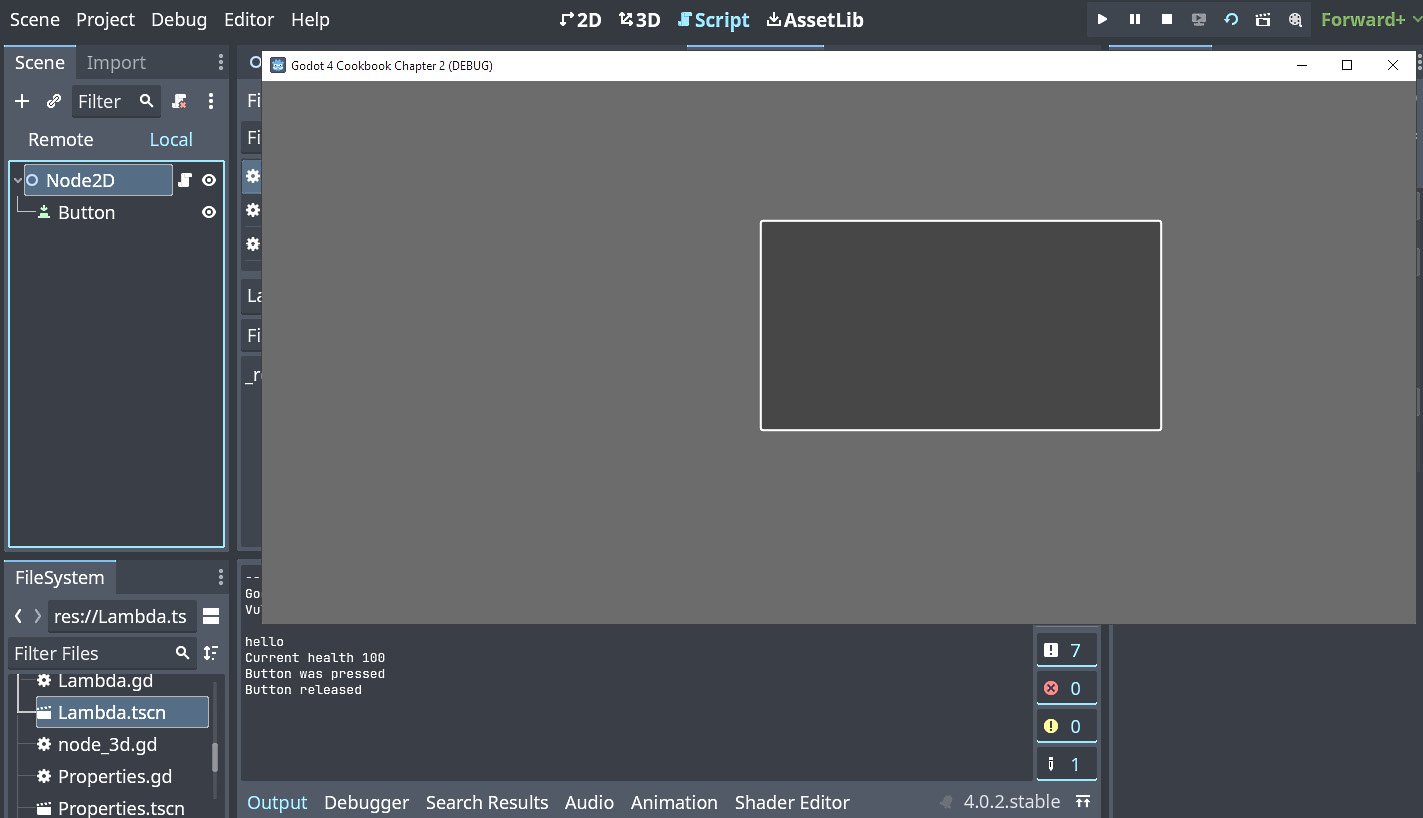
We run the current scene. It shows the button move across the screen and on the console, you will see "hello" and "Current health 100". After you click the button, you will see Button was pressed and Button released.

Figure 2.10 – Button and console output


