The command-line interface
As the development of graphical user interfaces progressed, the use of the command line was often discarded. However, it is the main tool for operating system administration in general, whether it’s for system administrators or Advanced and Power users. Apart from Linux-based systems, the CLI is also used on Windows or Mac systems. The use of the command line extends system management and administration capabilities.
Achieving the fluency necessary for maximum efficiency requires practice at every opportunity. Using Linux as a workstation allows us to practice this skill so that we can improve our productivity and efficiency when performing daily tasks.
The default command-line interpreter (shell) in Fedora Linux is Bourne Again Shell (Bash) and can be accessed through different Terminal emulators available with the distribution:
xterm: This is the original terminal emulator program for the X Window System.Konsole: The terminal emulator program for the Konsole Desktop Environment (KDE).gnome-terminal: The terminal emulator program for the GNOME desktop environment.Alacritty: This is a lightweight, OpenGL-based terminal emulator program that focuses on performance.yakuake(guake): This is a drop-down terminal emulator program that can easily be accessed via a keyboard shortcut.guakeis the version that’s used for the GNOME desktop environment.Terminator: This is based ongnome-terminal. It provides multiple instances of the terminal emulator in a single window, generating a terminal console that fills the size of the screen area and divides it into a resizable grid.
Now that we know about the different terminal emulator options, let’s dive into the topics that will help us get into system administration.
The basics
Practice is the only way to develop our console skills, but there is a path that can help with such improvement. This path consists of four sections with three levels each; following it as a guide while practicing should help you develop fluency in the console.
1. Ask the one who knows
Upon encountering an unexpected behavior or requiring a tool to make a task more efficient, it is a very common mistake to first look it up on the internet; it has even become a common term: Google it. But open source projects offer us reference material (that is, man and info pages) explaining the options, and, in most cases, the use of the packages, commands, processes, and services that follow it. The flow of information search is the first paradigm we have to break to develop efficiency as a system administrator.
Basic level
Use the built-in help command. If you do not know or remember how to use a command, use the built-in help module. To do so, add the --help or -h parameter or even run the command without parameters. The command may have one of these basic help options.
Note
Not all commands have a built-in help option. In some cases, they may offer one or two. Just test which one comes with the command. If not, use the next level.
Let’s look at an example of each of them:
- A command run with the built-in
helpmodule:
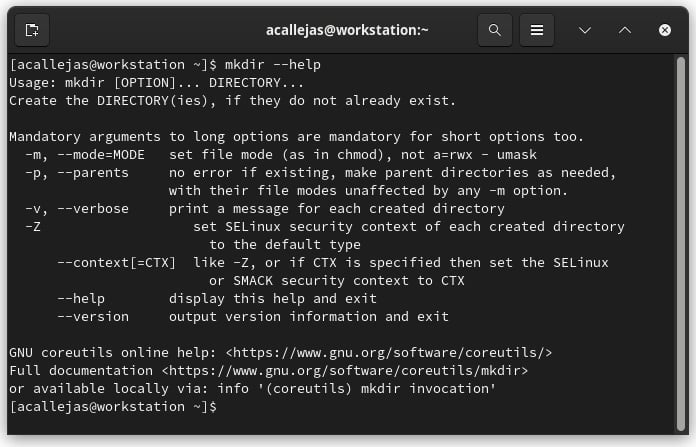
Figure 1.11 – Built-in help module
- A command run with the
-hparameter:
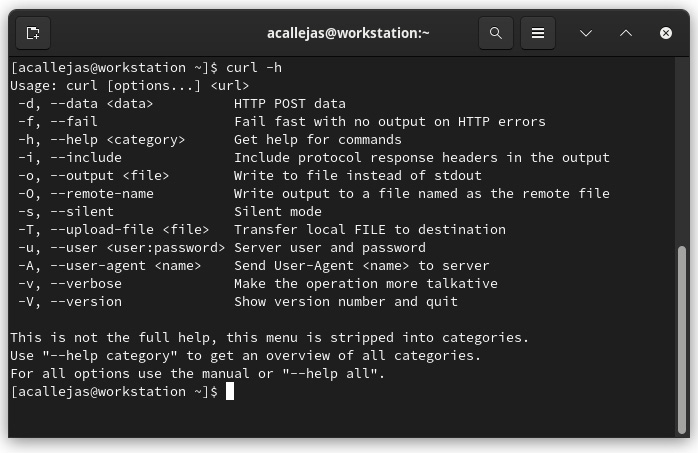
Figure 1.12 – Command run with the -h parameter
- A command run without parameters:
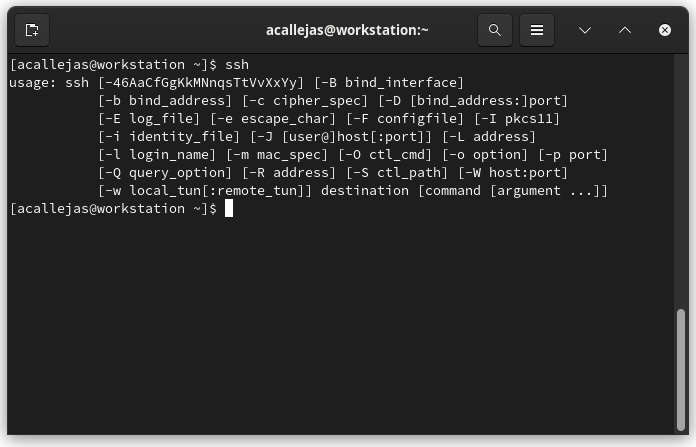
Figure 1.13 – Command run without parameters
These are the basic recommended options included in most of the commands. Now let’s look at a more elaborate type of help. Unfortunately, sometimes it is not included as part of the package or requires a separate package to be installed to get this help. In each case, there is mention of it.
Intermediate level
man is your friend. Most of the commands, besides the built-in help command, come with a user manual, which details the use of each of the options and parameters that are available with it. To consult the manual, run the man <command> command:
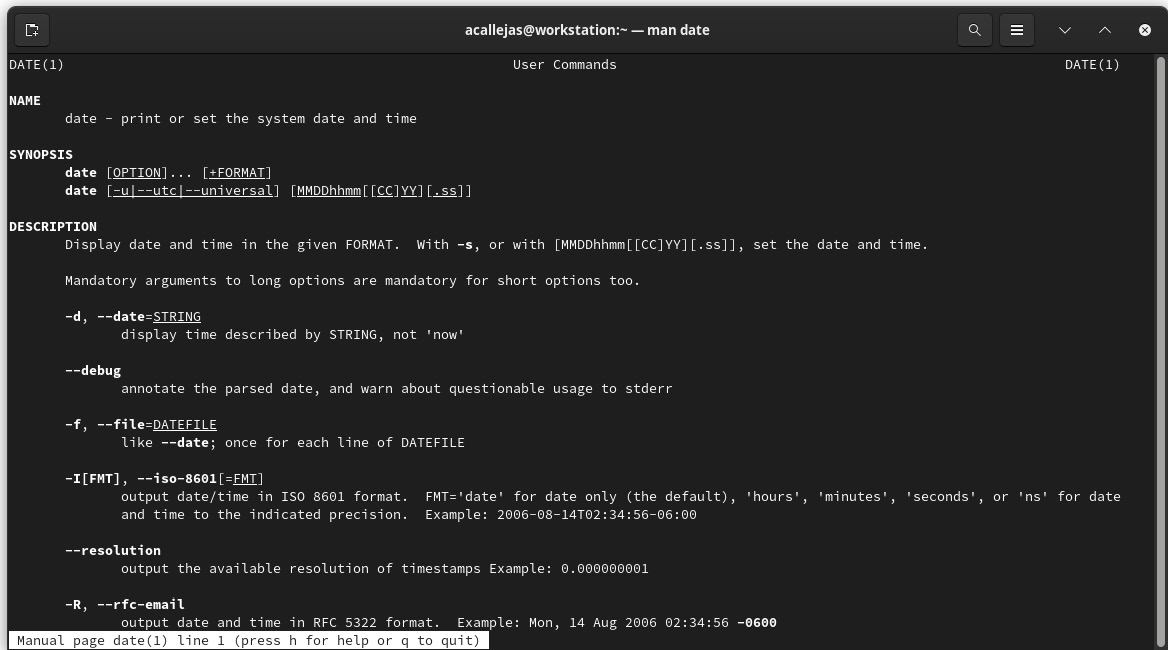
Figure 1.14 – Command user manual
In some cases, the commands may include info pages. These may reference the same man pages or, in some cases, have more detailed information on the usage and options of the command. To consult the info pages, run the info <command> command.
Advanced level
The operating system provides a directory where the documentation for packages and services resides – for example, in /usr/share/doc. You should consider installing the kernel documentation, which includes documentation for the drivers shipped with the kernel, and references to various configuration options. The kernel-doc package contains the kernel documentation for installing and running several tasks as a root user:
[root@workstation ~]# dnf -y install kernel-doc
...output omitted…
[root@workstation ~]# ls /usr/share/doc/kernel-doc-6.0.9-300/Documentation/
ABI atomic_t.txt crypto  features  ia64  kernel-hacking memory-barriers.txt
...output omitted...
[root@workstation ~]# cat \
> /usr/share/doc/kernel-doc-6.0.9-300/Documentation/networking/bonding.rst
...output omitted...
Introduction
============
The Linux bonding driver provides a method for aggregating
multiple network interfaces into a single logical "bonded" interface.
The behavior of the bonded interfaces depends upon the mode; generally
speaking, modes provide either hot standby or load balancing services.
Additionally, link integrity monitoring may be performed.
...output omitted...
After exhausting the options that the operating system contains, you can access the different online options. The community is very helpful if you haven’t found a suitable solution. To do so, you can access mailing lists, telegram channels, and IRC sites such as Reddit, Stack Overflow, or the ones provided by the Fedora Project itself, such as Ask Fedora. Using these options, you can get in touch with the community, which will always offer a helping hand.
2. Use the console
Having a Linux-based workstation brings with it the ability to use the console in all circumstances, even in your free time. The idea is to take advantage of any opportunity to use it to launch applications or tasks and reduce the use of the mouse and graphic solutions as much as possible.
The use of the console depends on the privileges of the users who use it. A privileged account is a user account that has more privileges than regular users. Privileged accounts can, for example, install or remove software, update the operating system, or change system or application settings. They might also have access to files that non-privileged users can’t access.
The command prompt provides information on the privileges of the user using it.
If, upon opening the console, the prompt shows $, this means that the user is logged on to this system as a non-privileged user. The $ prompt is the default for normal users:
[user@workstation ~]$
The root user’s prompt is #. Logging in as a root user can be done in two ways:
- By logging in with the
rootuser’s username and password - By switching to the
rootuser
This last point could involve the same username and password of the privileged user. Use the su – command to become the root user:
[user@workstation ~]$ su -
Password: [root password]
[root@workstation ~]#
Alternatively, we can use the sudo (Super User DO) command, which is a program that helps us provide privileges to normal users.
Most Linux distributions have sudo installed by default. In some cases, even root access is turned off. When this happens, we can only access it through the sudo command.
While installing the operating system, when creating the user, we can choose to add them as part of the system administration group. This will allow them to switch to the root user by using the sudo command and their own password.
To find out if your user has access to different privileges with sudo, run the following code:
[user@workstation ~]$ sudo -l
Password: [user password]
Matching Defaults entries for user on workstation:
...output omitted...
User user may run the following commands on workstation:
    (ALL) PASSWD: ALL
...output omitted...
(ALL) PASSWD: ALL indicates that the user can gain access to any command of the operating system by using the sudo command and their password. To switch to the root user, run the following code:
[user@workstation ~]$ sudo -i
Password: [user password]
[root@workstation ~]#
So, now that we know how to use the console, depending on our activities and privileges, let’s learn how to improve our console skills.
Basic level
Just use it. Type as much as you can to list, search for, and open applications.
Intermediate level
Chain, redirect, and concatenate. After typing commands and understanding the result of their output, we can start playing with them and put them together in such a way that they simplify tasks. By using pipes (|) and redirecting the output and input with > and <, we can generate a string of commands that we know as one-liners. Bash-one-liners are famous in the computer world, and it is even considered an art to be able to chain commands for certain tasks. There are many internet sites and even social networks where we can find them. Some of them use such redirection to interpret pattern processing written in the AWK programming language as output.
Example: Send the output of the following command to a new file:
[user@workstation ~]$ ip link show > link.txt
[user@workstation ~]$ cat link.txt
1: lo: <LOOPBACK,UP,LOWER_UP> mtu 65536 qdisc noqueue state UNKNOWN mode DEFAULT group default qlen 1000
    link/loopback 00:00:00:00:00:00 brd 00:00:00:00:00:00
2: enp1s0: <BROADCAST,MULTICAST,UP,LOWER_UP> mtu 1500 qdisc fq_codel state UP mode DEFAULT group default qlen 1000
    link/ether 52:54:00:f9:69:14 brd ff:ff:ff:ff:ff:ff
Example: Get the open and listening TCP ports and the processes related to them, separated by commas:
[root@workstation ~]# ss -tulpn | grep tcp | awk '{ print $1","$2","$5","$7 }'
tcp,LISTEN,0.0.0.0:22,users:(("sshd",pid=844,fd=3))
tcp,LISTEN,127.0.0.54:53,users:(("systemd-resolve",pid=707,fd=19))
tcp,LISTEN,0.0.0.0:5355,users:(("systemd-resolve",pid=707,fd=11))
tcp,LISTEN,127.0.0.1:6010,users:(("sshd",pid=1514,fd=9))
tcp,LISTEN,127.0.0.53%lo:53,users:(("systemd-resolve",pid=707,fd=17))
tcp,LISTEN,127.0.0.1:631,users:(("cupsd",pid=842,fd=7))
tcp,LISTEN,[::]:22,users:(("sshd",pid=844,fd=4))
tcp,LISTEN,[::]:5355,users:(("systemd-resolve",pid=707,fd=13))
tcp,LISTEN,[::1]:6010,users:(("sshd",pid=1514,fd=8))
tcp,LISTEN,[::1]:631,users:(("cupsd",pid=842,fd=6))
Advanced level
If you typed it twice, you should have scripted it once.
In system administration, it is very common for tasks to become repetitive. The first step in automating them, and with this, reducing the time taken to perform them, is to put them together and turn them into a series of instructions, known as a shell script. This script or series of instructions can contain the commands to run complex tasks, such as using outputs as variable settings and reusing them in the same execution.
There is a lot of documentation on how to create shell scripts. They should have a structure similar to the following:
#!/bin/bash ← [1]
#
# IDENTITY ← [2]
#
# VARIABLES ← [3]
# COMMANDS ← [4]
Let’s look at what the highlighted text indicates in each section:
- [1]: Shebang. This indicates the command-line interpreter that uses the instructions; the functional tests of the script must confirm its use.
- [2]: The script must contain identification information – what it works for, who the author is, what version is being used, and even the date of creation and the changes it has undergone. This documentation will help you use it and identify its scope.
- [3]: In this section, the variables used to execute the instructions are set.
- [4]: In this section, you will find the instructions that will be executed.
3. Edit text files
On Linux, everything is a file. Thus, we must use a text editor to help us perform configuration or administration tasks. Knowing about the editor of choice in more depth helps make this activity more efficient, especially if some of them have specialized add-ons or plugins for cases such as identifying or validating syntax in files written in diverse programming languages or formats.
Basic level
GNU Nano is a simple, lightweight, open source command-line text editor written in C. Developed as part of the GNU Project, it emulates the Pico text editor, part of the Pine mail client:
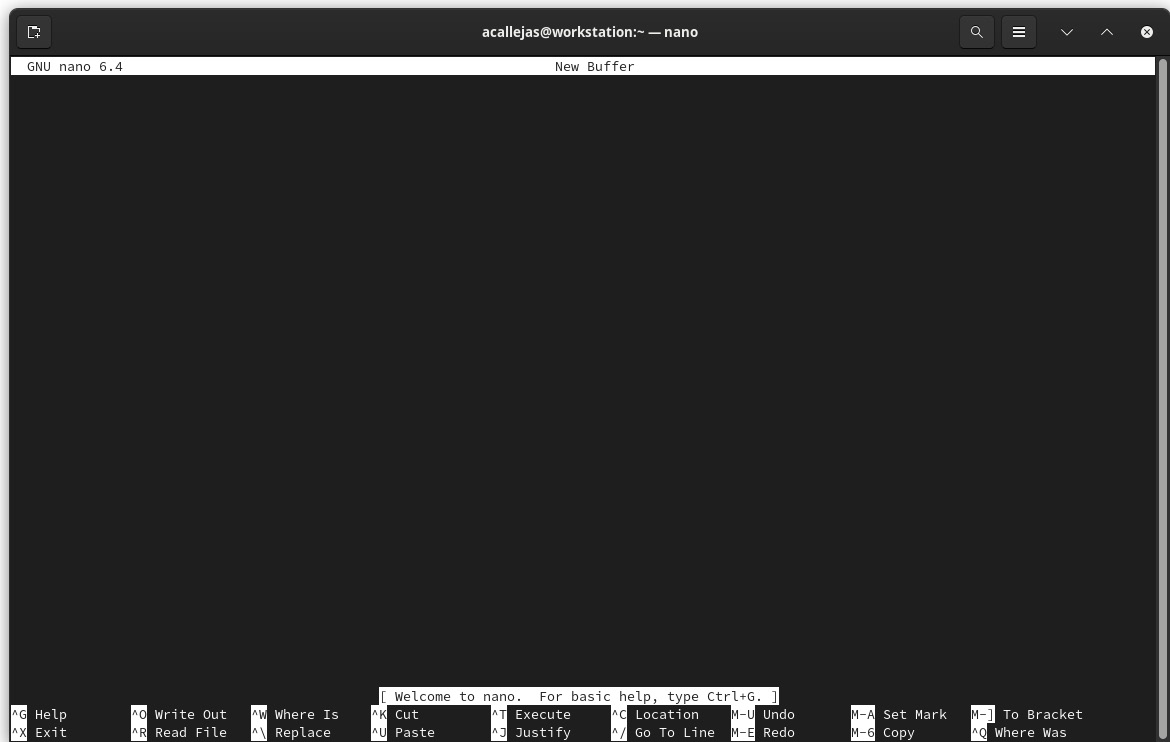
Figure 1.15 – The Nano editor
GNU Nano does not have many add-ons, but it does have built-in features, such as one to highlight different programming languages.
Intermediate level
Vim is an open source command-line text editor (licensed under its charityware license), written in C and with a scripting language called Vim (or VimL). It was developed in the 1970s as the visual mode (vi, its base) of the ex line editor. The original vi was a modal text editor that had no syntax highlighting, was written in C, and had only a command-line interface. Later, in the 1980s, vim was released as a clone of the vi text editor for personal computers, ported as Vi IMproved (Vim). Eventually, Vim got a graphical user interface (along with a CLI) called gVim, syntax highlighting, a scripting language (to customize and extend it), and support for many more computer platforms:
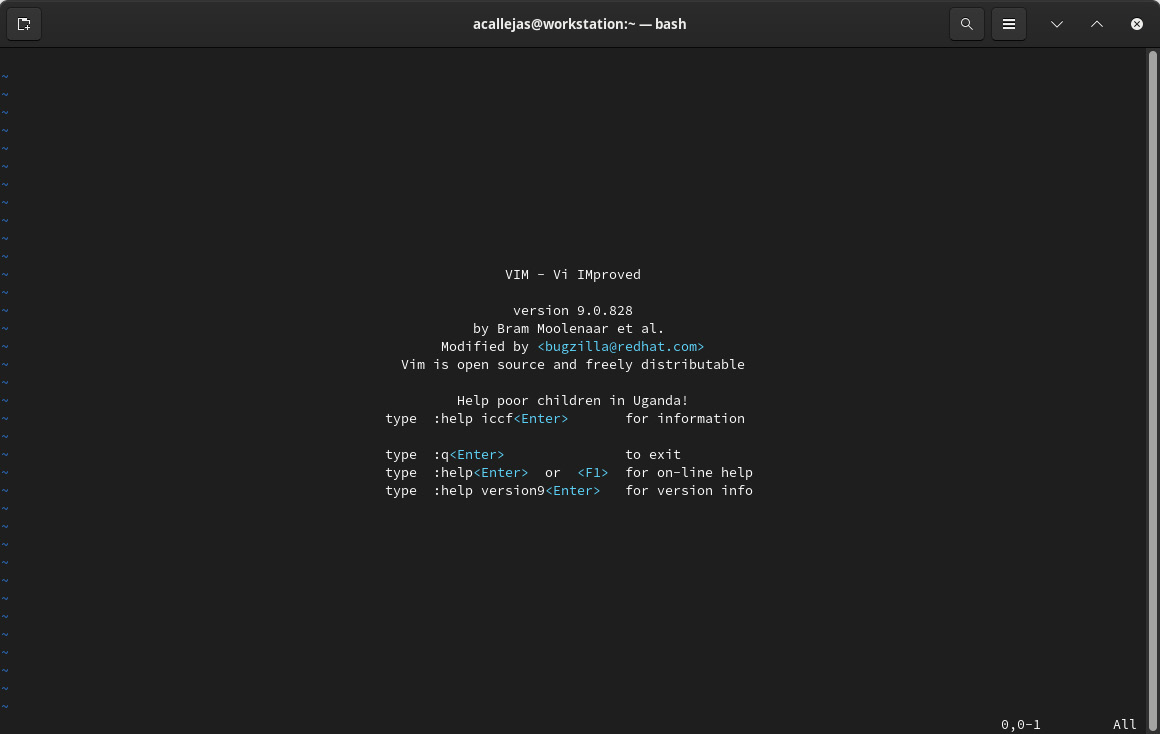
Figure 1.16 – The Vim editor
vim has many add-ons and plugins to enhance its use. It is even possible to create special add-ons for specific or special needs.
Advanced level
GNU Emacs is a free, open source, extensible, self-documenting text editor written in C and its own Lisp programming language (Emacs Lisp). It was developed by Richard Stallman and Guy L. Steele Jr.. Its initial release was in 1985 and it has been ported to all major operating systems. Developed as part of the GNU Project, its use is extended through plugins written in Emacs Lisp, which are available in the official Fedora repositories. It also runs on Fedora via an AppImage package (sandboxed application):
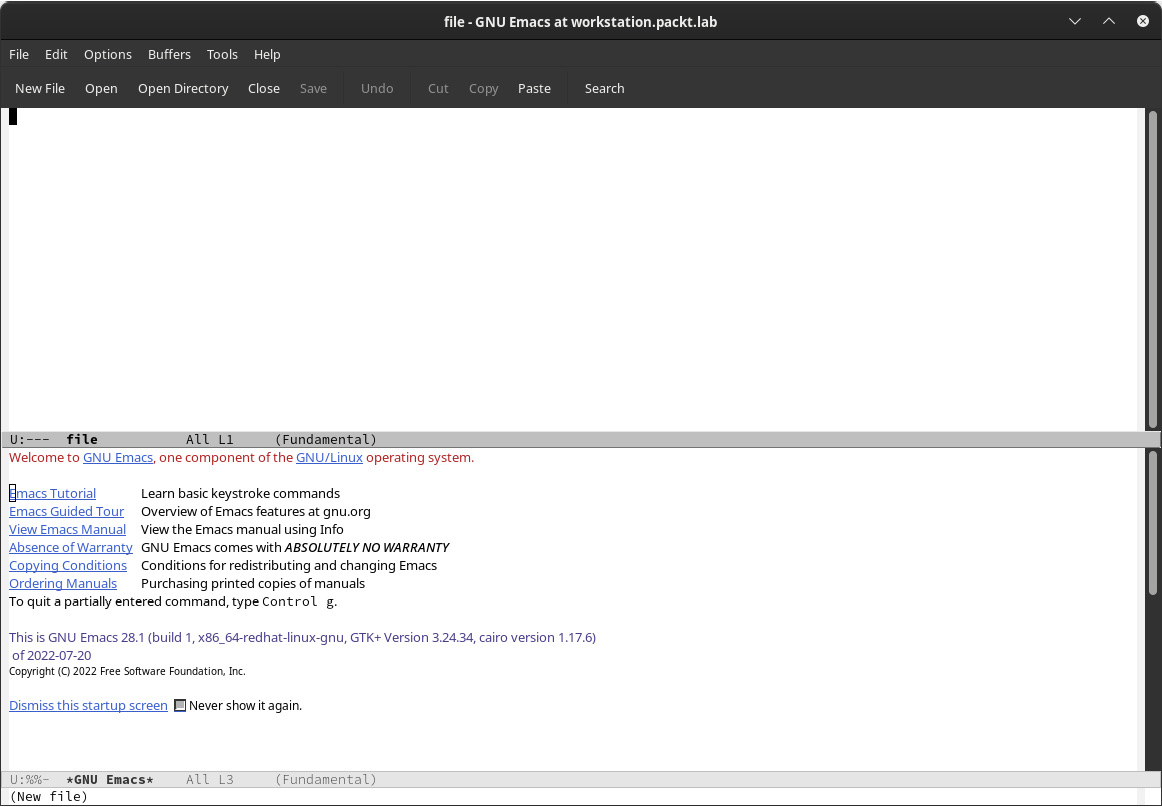
Figure 1.17 – The GNU Emacs editor
4. Handle regular expressions
The bash command interpreter has many ways to handle regular expressions, which it does by expanding the power of the command line.
Basic level
At a basic level, it is important to use pattern matching (wildcards), loops, and exit codes. With wildcards, it is easier to handle many files. By using metacharacters as wildcards that expand to match the filenames and paths searched for, commands act on one set of files at a time.
The following table shows the characters that are used as wildcards in terms of basic usage:
|
Character |
Description |
|
|
Matches any number of characters – for example, list all $ ls *.txt |
|
|
Matches any single character – for example, list the $ ls compar*.sh compare.sh |
|
|
Matches one of the characters between the brackets – for example, list files in a directory and filter out files starting with letters: $ ls | grep ^[a-z] c c l l |
|
|
Contains a comma-separated list of strings or a sequence. If so, use double-dot syntax. An example is to create five empty files and list them: |
|
|
Match the current user’s home directory – for example, list the $ ls ~/Downloads/ |
|
|
Denotes a string as a variable – for example, print the user’s $ echo $PATH |
Loops help us perform repetitive tasks simply. In Bash, a for loop is built from the following syntax:
for <variable> in <list>
do
command <variable>
done
You could add a condition to these loops so that they run different actions, depending on the situation:
if <condition>;
   then
       <statement 1>
       ...
       <statement n>
   else
       <statement alternative>
fi
Running a script provides an output and passes control to the calling process. The script may exit before finishing if it encounters an error condition, for example. The exit command shown in the following code, with an optional argument between 0 and 255, represents an exit code:
[user@workstation ~]$ cat test.sh
#!/bin/bash
echo "Hello, I'm a test"
exit 0
[user@workstation ~]$ ./test.sh
Hello, I'm a test
[user@workstation ~]$ echo $?
0
In the output, the exit code’s value of 0 indicates that the script ran successfully with no errors; any other value indicates an error output.
Intermediate level
Regular expressions provide a pattern-matching mechanism that helps you search for specific content. The grep, less, and vim commands support regular expressions in their use. Most programming languages also support them, although the syntax in each may differ. As mentioned previously, these commands can be chained and converted into a search for more complex structures.
At the end of this section, you will find a guided example that better illustrates this level.
Advanced level
Write scripts with regular expressions and patterns in an optimized way.
Be careful when handling regular expressions within scripts since chained commands use a certain amount of memory and CPU processing that should not be underestimated. The battery and functional testing phase should be planned carefully and never on a productive server; at this point, it is highly profitable to have a Linux workstation to manage our servers. We can recreate the production environment in an instance based on a local virtual machine and perform the first functional tests of our super-script.
“This is the way.”
“Patience, young Padawan.”
It may seem a very laborious journey, but it is not. A lot of it depends on practice, incorporating the characteristics mentioned, and thus, developing the necessary skills. It is not a matter of 1 day of practice – it requires effort and dedication, so you must go one step at a time.
Next, we will perform a guided exercise where I will show, step by step, how to go from a simple command to a chained command with a defined purpose. This will show you how the tools shown below can be incorporated as the need arises.
Guided example – releasing space in the filesystem
Description: A ticket gets assigned to us because a managed server shows the root filesystem at 92% disk use. It is necessary to determine various responsibilities and provide evidence so that we can document the issue and resolve it so that we can close it.
Analysis: Since the server has no separate directories in the filesystems, it is necessary to determine which directory or directories have used the most disk space and identify which application or service it is relative to.
Solution:
- As root, switch to the
rootdirectory (/) and list the available directories:[root@workstation ~]# cd / [root@workstation /]# ls afs bin boot dev etc home lib lib64 lost+found media mnt opt proc root run sbin srv sys tmp usr var
- Run the following command to list the directories. Use the
-lparameter to run a long list and identify the directories only:[root@workstation /]# ls -l | grep ^d dr-xr-xr-x. 1 root root 0 Aug 9 08:27 afs dr-xr-xr-x. 6 root root 4096 Nov 22 13:12 boot drwxr-xr-x. 21 root root 4000 Nov 22 13:12 dev drwxr-xr-x. 1 root root 5186 Nov 22 13:12 etc drwxr-xr-x. 1 root root 18 Nov 21 21:41 home drwx------. 1 root root 0 Nov 5 02:18 lost+found drwxr-xr-x. 1 root root 0 Aug 9 08:27 media drwxr-xr-x. 1 root root 0 Aug 9 08:27 mnt drwxr-xr-x. 1 root root 0 Aug 9 08:27 opt dr-xr-xr-x. 329 root root 0 Nov 22 13:12 proc dr-xr-x---. 1 root root 188 Nov 22 01:45 root drwxr-xr-x. 58 root root 1580 Nov 22 13:14 run drwxr-xr-x. 1 root root 0 Aug 9 08:27 srv dr-xr-xr-x. 13 root root 0 Nov 22 13:12 sys drwxrwxrwt. 20 root root 460 Nov 23 00:06 tmp drwxr-xr-x. 1 root root 168 Nov 5 02:4.0 usr drwxr-xr-x. 1 root root 200 Nov 5 03:15 var
- Use
awkto select only the names of the directories (column 9):[root@workstation /]# ls -l | grep ^d | awk '{ print $9 }' afs boot dev etc home lost+found media mnt opt proc root run srv sys tmp usr var - Determine the disk space used by each directory with the
xargsandducommands:[root@workstation /]# ls -l | grep ^d | awk '{ print $9 }' | xargs du -sk 0 afs 293680 boot 0 dev 33212 etc 176728 home 0 lost+found 0 media 0 mnt 0 opt du: cannot read directory 'proc/3945/task/3945/net': Invalid argument du: cannot read directory 'proc/3945/net': Invalid argument du: cannot read directory 'proc/3946/task/3946/net': Invalid argument du: cannot read directory 'proc/3946/net': Invalid argument du: cannot access 'proc/7762/task/7762/fd/3': No such file or directory du: cannot access 'proc/7762/task/7762/fdinfo/3': No such file or directory du: cannot access 'proc/7762/fd/3': No such file or directory du: cannot access 'proc/7762/fdinfo/3': No such file or directory 0 proc 32 root du: cannot access 'run/user/1000/doc': Permission denied 1632 run 0 srv 0 sys 8 tmp 8371056 usr 6576996 var - To avoid confusion, send the standard error output (
stderr) to/dev/null:[root@workstation /]# ls -l | grep ^d | awk '{ print $9 }' | \ > xargs du -sk 2> /dev/null 0 afs 293680 boot 0 dev 33212 etc 176728 home 0 lost+found 0 media 0 mnt 0 opt 0 proc 32 root 1632 run 0 srv 0 sys 8 tmp 8371056 usr 6576996 var - Sort the results:
[root@workstation /]# ls -l | grep ^d | awk '{ print $9 }' | \ > xargs du -sk 2> /dev/null | sort -n 0 afs 0 dev 0 lost+found 0 media 0 mnt 0 opt 0 proc 0 srv 0 sys 8 tmp 32 root 1632 run 33212 etc 176728 home 293680 boot 6576996 var 8371056 usr - Discard the directories with the lowest disk space usage and keep only the Top 5:
[root@workstation /]# ls -l | grep ^d | awk '{ print $9 }' | \ > xargs du -sk 2> /dev/null | sort -n | tail -5 33212 etc 176728 home 293680 boot 6576996 var 8371056 usr - Now that we have found the Top 5 directories with the highest disk usage, we will only deal with this order so that we can use it as evidence:
[root@workstation /]# ls -l | grep ^d | awk '{ print $9 }' | \
> xargs du -sk 2> /dev/null  | sort -n | tail -5 \
> awk '{ print $2 }' | xargs du -sh
33M        etc
173M    home
287M    boot
6.3G    var
8.0G    usr
The same steps should be executed for each of the Top 5 directories so that we can find the subdirectory that occupies the most disk space and is the one causing the issue. Finding out which service determines who handles releasing the issue depends on the directory.
Now that these concepts are clear, we can start thinking about how to install our workstation for system administration purposes. However, before that, we should take a moment to select the desktop environment we want to use.


