About the Book
Are you fascinated with applications like Alexa and Siri and how they accurately process information within seconds before returning accurate results? Are you looking for a practical guide that will teach you how to build intelligent applications that can revolutionize the world of artificial intelligence? The Applied AI and NLP Workshop will take you on a practical journey where you will learn how to build Artificial Intelligence (AI) and Natural Language Processing (NLP) applications with Amazon Web Services (AWS).
Starting with an introduction to AI and machine learning, this book will explain how Amazon S3, or Amazon Simple Storage Service, works. You'll then integrate AI with AWS to build serverless services and use Amazon's NLP service Comprehend to perform text analysis on a document. As you advance, the book will help you get to grips with topic modeling to extract and analyze common themes on a set of documents with unknown topics. You'll also work with Amazon Lex to create and customize a chatbot for task automation and use Amazon Rekognition for detecting objects, scenes, and text in images.
By the end of The Applied AI and NLP Workshop, you'll be equipped with the knowledge and skills needed to build scalable intelligent applications with AWS.
Audience
If you are a machine learning enthusiast, data scientist, or programmer who wants to explore AWS's artificial intelligence and machine learning capabilities, this book is for you. Although not necessary, a basic understanding of AI and NLP will assist with grasping key topics quickly.
About the Chapters
Chapter 1, An Introduction to AWS, introduces you to the AWS interface. You will learn how to use Amazon's Simple Storage Service as well as test the NLP interface with the Amazon Comprehend API.
Chapter 2, Analyzing Documents and Text with Natural Language Processing, introduces the set of AWS AI services and the emerging computing paradigm that is serverless computing. You will then apply NLP and the Amazon Comprehend service to
analyze documents.
Chapter 3, Topic Modeling and Theme Extraction, describes the basics of topic modeling analysis and you will learn how to extract and analyze common themes using topic modeling with Amazon Comprehend.
Chapter 4, Conversational Artificial Intelligence, talks about the best practices in the design of conversational AI and then proceeds to show you how to develop bots using Amazon Lex.
Chapter 5, Using Speech with the Chatbot, teaches you the basics of Amazon Connect. You will program for voice interaction with a chatbot as well as create a personal
call center using Amazon Connect and your own phone number to interact with
your bots.
Chapter 6, Computer Vision and Image Processing, introduces you to the Rekognition service for image analysis using computer vision. You will learn how to analyze faces and recognize celebrities in images. You will also be able to compare faces in different images to see how closely they match each other.
Conventions
Code words in text, database table names, folder names, filenames, file extensions, pathnames, dummy URLs, user input, and Twitter handles are shown as follows: "Here, the selected bucket name is known-tm-analysis, but you will need to create a unique name."
A block of code is set as follows:
filename = str(text_file_obj['s3']['object']['key'])
print("filename: ", filename)
Words that you see on the screen, for example, in menus or dialog boxes, also appear in the text like this: "From the menu panel on the left-hand side of the screen, select the Routing menu."
New terms and important words are shown like this: "The machine learning algorithm that Amazon Comprehend uses to perform topic modeling is called Latent Dirichlet Allocation (LDA)."
Code Presentation
Lines of code that span multiple lines are split using a backslash ( \ ). When the code is executed, Python will ignore the backslash, and treat the code on the next line as a direct continuation of the current line.
For example:
history = model.fit(X, y, epochs=100, batch_size=5, verbose=1, \
                    validation_split=0.2, shuffle=False)
Comments are added into code to help explain specific bits of logic. Single-line comments are denoted using the # symbol, as follows:
# Print the sizes of the dataset
print("Number of Examples in the Dataset = ", X.shape[0])
print("Number of Features for each example = ", X.shape[1])
Multi-line comments are enclosed by triple quotes, as shown below:
"""
Define a seed for the random number generator to ensure the
result will be reproducible
"""
seed = 1
np.random.seed(seed)
random.set_seed(seed)
Setting up Your Environment
Before we explore the book in detail, we need to set up specific software and tools. In the following section, we shall see how to do that.
Software Requirements
You'll also need the following software installed in advance:
- OS: Windows 7 SP1 64-bit, Windows 8.1 64-bit or Windows 10 64-bit, macOS,
or Linux - Browser: Google Chrome, latest version
- An AWS Free Tier account
- Python 3.6 or above
- Jupyter Notebook
Installation and Setup
Before you start this book, you will need an AWS account. You will also need to set up the AWS command-line interface (CLI), the steps for which can be found below. You will also need Python 3.6 or above, pip, and an AWS Rekognition account for the book.
AWS Account
For an AWS Free Tier account, you will need a personal email address, a credit or debit card, and a cell phone that can receive a text message so that you can verify your account. To create a new account, follow this link: https://aws.amazon.com/free/.
A Word about AWS Regions
AWS servers are distributed across the globe in what AWS calls Regions. The number of Regions has grown since AWS first started, and you can find a list of them all at https://aws.amazon.com/about-aws/global-infrastructure/regions_az/. When you create an AWS account, you will also need to choose a Region. You can find your Region by going to aws.amazon.com and selecting AWS Management Console:
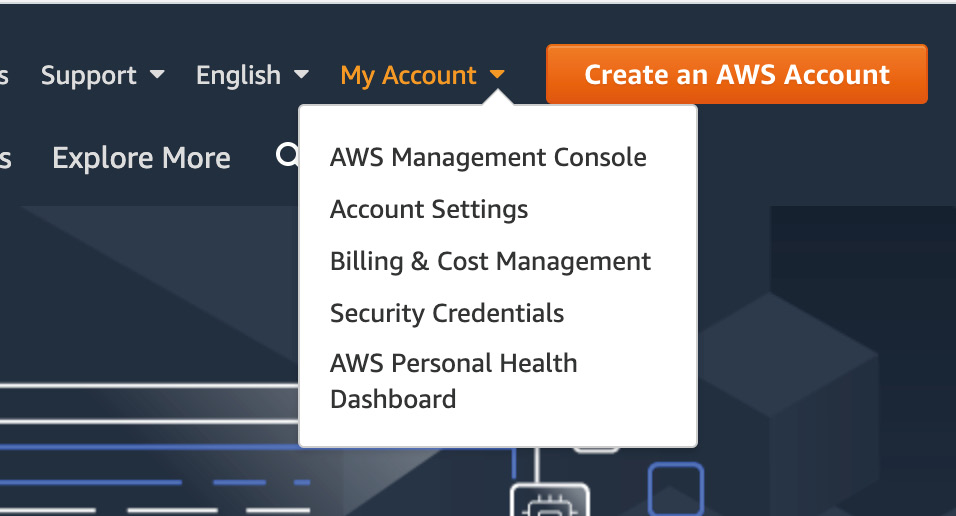
Figure 0.1: My Account dropdown
In the AWS Management Console, your Region will be displayed in the top right-hand corner. You can click on it and change the Region:
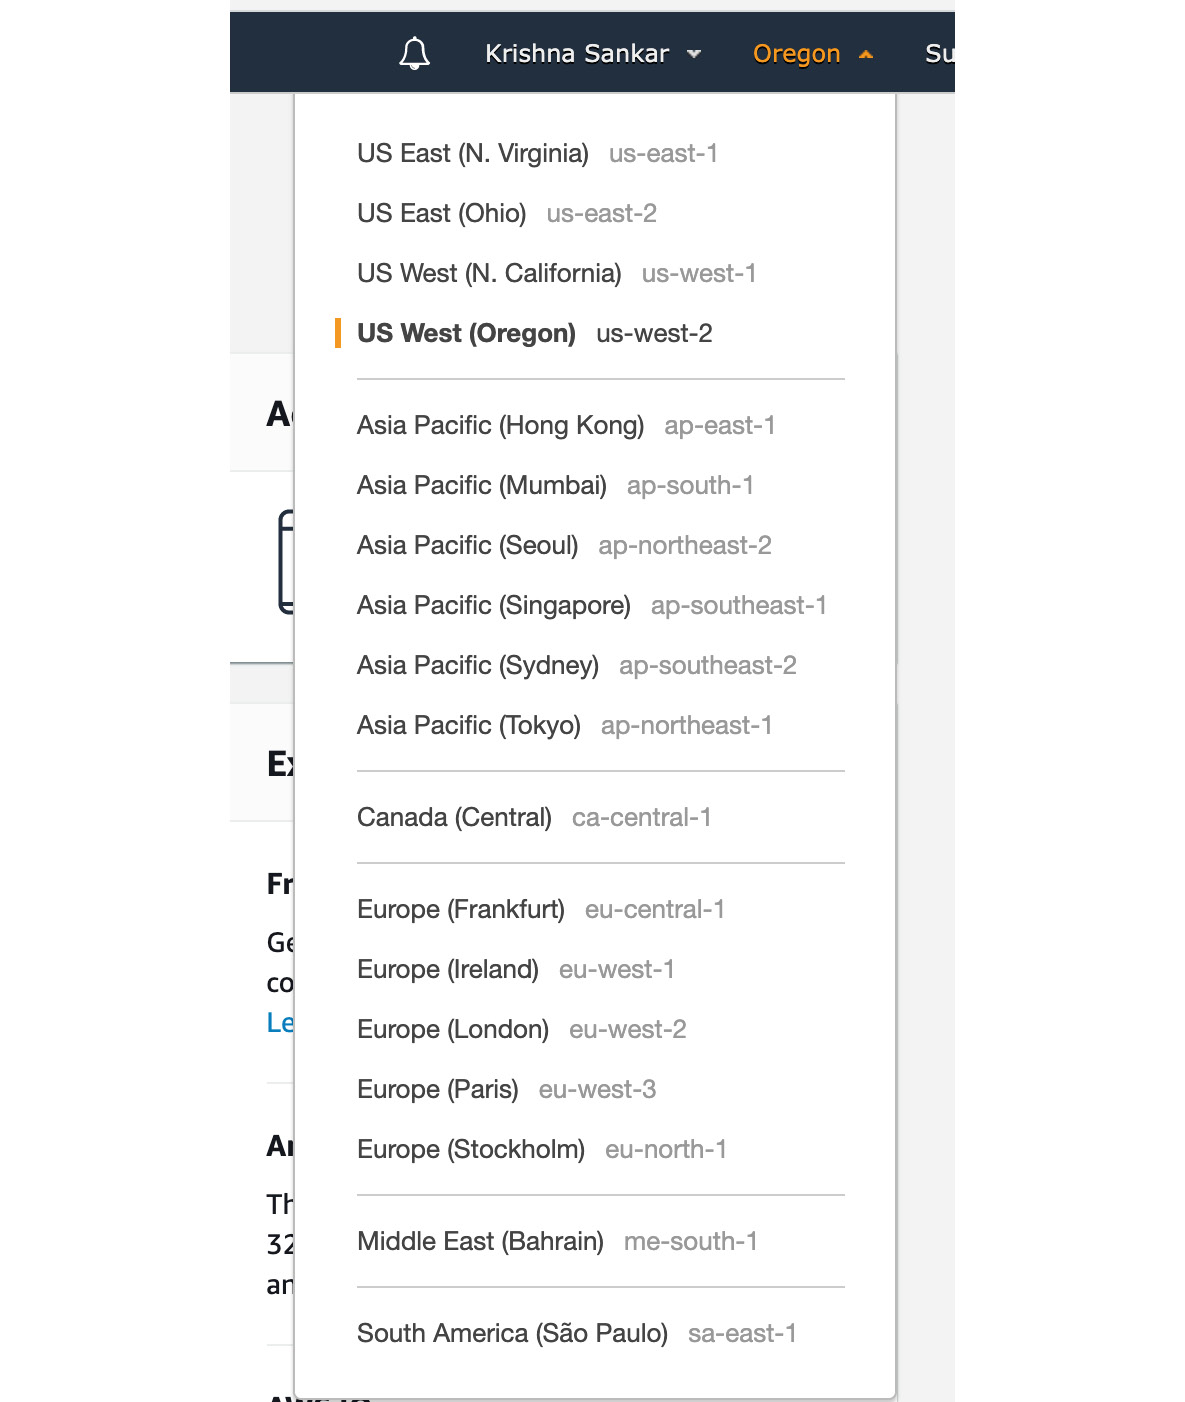
Figure 0.2: AWS Region list
One reason for changing the Region is that not all AWS services are available in all Regions. The Region table at https://aws.amazon.com/about-aws/global-infrastructure/regional-product-services/ has the current list of services available in each Region. So, if a service that you want to access is not available in your Region, you can change your Region. But be aware of the differences in the charges (if any) between Regions. Also, the artifacts that you create in one Region may not be available in another Region, for example, S3 buckets. In case you are wondering, one reason for Amazon not automatically making S3 data available across Regions is compliance and regulations. You will have to explicitly copy or recreate S3 buckets and files. While managing AWS services and Regions might look tedious at first, it is easy to get used to. As we have mentioned, there are reasons for Amazon doing things this way.
Note
Depending upon where you are, it might not be possible to access an AWS service just by changing the Region. For example, Amazon Connect is not available everywhere, and just changing the Region from the dropdown doesn't let us use Amazon Connect because of the local number assignment. In order to use Amazon Connect, we need to mention the address where Amazon Connect is available while signing up for AWS. At the time of writing this book (April 2020), Amazon Connect is available in the US, UK, Australia, Japan, Germany, and Singapore. But the good news is that Amazon is constantly expanding its services. So, by the time you read this book, Amazon Connect might be available where you are.
AWS CLI Setup
Install the AWS CLI (version 2) as described at this URL: https://docs.aws.amazon.com/cli/latest/userguide/cli-chap-install.html. The AWS documentation describes how to install the CLI on various operating systems. To verify that installation was successful, open a command prompt and type aws --version.
Configuration and Credential files for the AWS CLI
The AWS CLI documentation clearly describes the configuration and credential file settings. For more information, go to https://docs.aws.amazon.com/cli/latest/userguide/cli-config-files.html.
Amazon Rekognition Account
You will need to create a new Amazon Rekognition Free Tier account, using which customers can analyze up to 5,000 images for free every month for the first 12 months. To create the free account, go to https://aws.amazon.com/rekognition/.
Note
The interfaces and results might vary a little from the images shown in the chapters as Amazon periodically updates and streamlines its interfaces and retrains models.
Installing Python and Anaconda
The following section will help you to install Python and Anaconda on Windows, macOS and Linux systems.
Installing Python and Anaconda on Windows
Installing Python on Windows is done as follows:
- Find your desired version of Anaconda on the official installation page
at https://www.anaconda.com/distribution/#windows. - Ensure you select Python 3.7 from the download page.
- Ensure that you install the correct architecture for your computer system; that is, either 32-bit or 64-bit. You can find out this information in the System Properties window of your OS.
- After you download the installer, simply double-click the file and follow the user-friendly prompts on-screen.
Installing Python and Anaconda on Linux
To install Python on Linux, you have a couple of good options:
- Open Command Prompt and verify that
Python 3is not already installed by runningpython3 --version. - To install Python 3, run this:
sudo apt-get update
sudo apt-get install python3.7
- If you encounter problems, there are numerous sources online that can help you troubleshoot the issue.
- You can also install Python using Anaconda. Install Anaconda for Linux by downloading the installer from https://www.anaconda.com/distribution/#linux and following the instructions.
Installing Python and Anaconda on macOS
Similar to Linux, you have a couple of methods for installing Python on a Mac. To install Python on macOS, do the following:
- Open the Terminal for Mac by pressing CMD + Spacebar, type
terminalin the open search box, and hit Enter. - Install Xcode through the command line by running
xcode-select --install. - The easiest way to install Python 3 is using Homebrew, which is installed through the command line by running
ruby -e "$(curl -fsSL https://raw.githubusercontent.com/Homebrew/install/master/install)". - Add Homebrew to your
$PATHenvironment variable. Open your profile in the command line by runningsudo nano ~/.profileand insertingexport PATH="/usr/local/opt/python/libexec/bin:$PATH"at the bottom. - The final step is to install Python. In the command line, run
brew install python. - Again, you can also install Python via the Anaconda installer, available from https://www.anaconda.com/distribution/#macos.
Project Jupyter
Project Jupyter is open source, free software that gives you the ability to run code written in Python and some other languages interactively from a special notebook, similar to a browser interface. It was born in 2014 from the IPython project and has since become the default choice for the entire data science workforce.
To install the Jupyter Notebook, go here: https://jupyter.org/install.
At https://jupyterlab.readthedocs.io/en/stable/getting_started/starting.html, you will find all the details you need to know to start the Jupyter Notebook server. In this book, we use the classic notebook interface.
Usually, we start a notebook from the command line with the jupyter notebook command.
Start the notebook from the directory where you download the code files to in the following Installing the Code Bundle section.
For example, in our case, we have installed the files in the following directory /Users/ksankar/Documents/aws_book/Artificial-Intelligence-and-Natural-Language-Processing-with-AWS.
In the CLI, type cd /Users/ksankar/Documents/aws_book/Artificial-Intelligence-and-Natural-Language-Processing-with-AWS and then type the jupyter notebook command. The Jupyter server will start and you will see the Jupyter browser console:
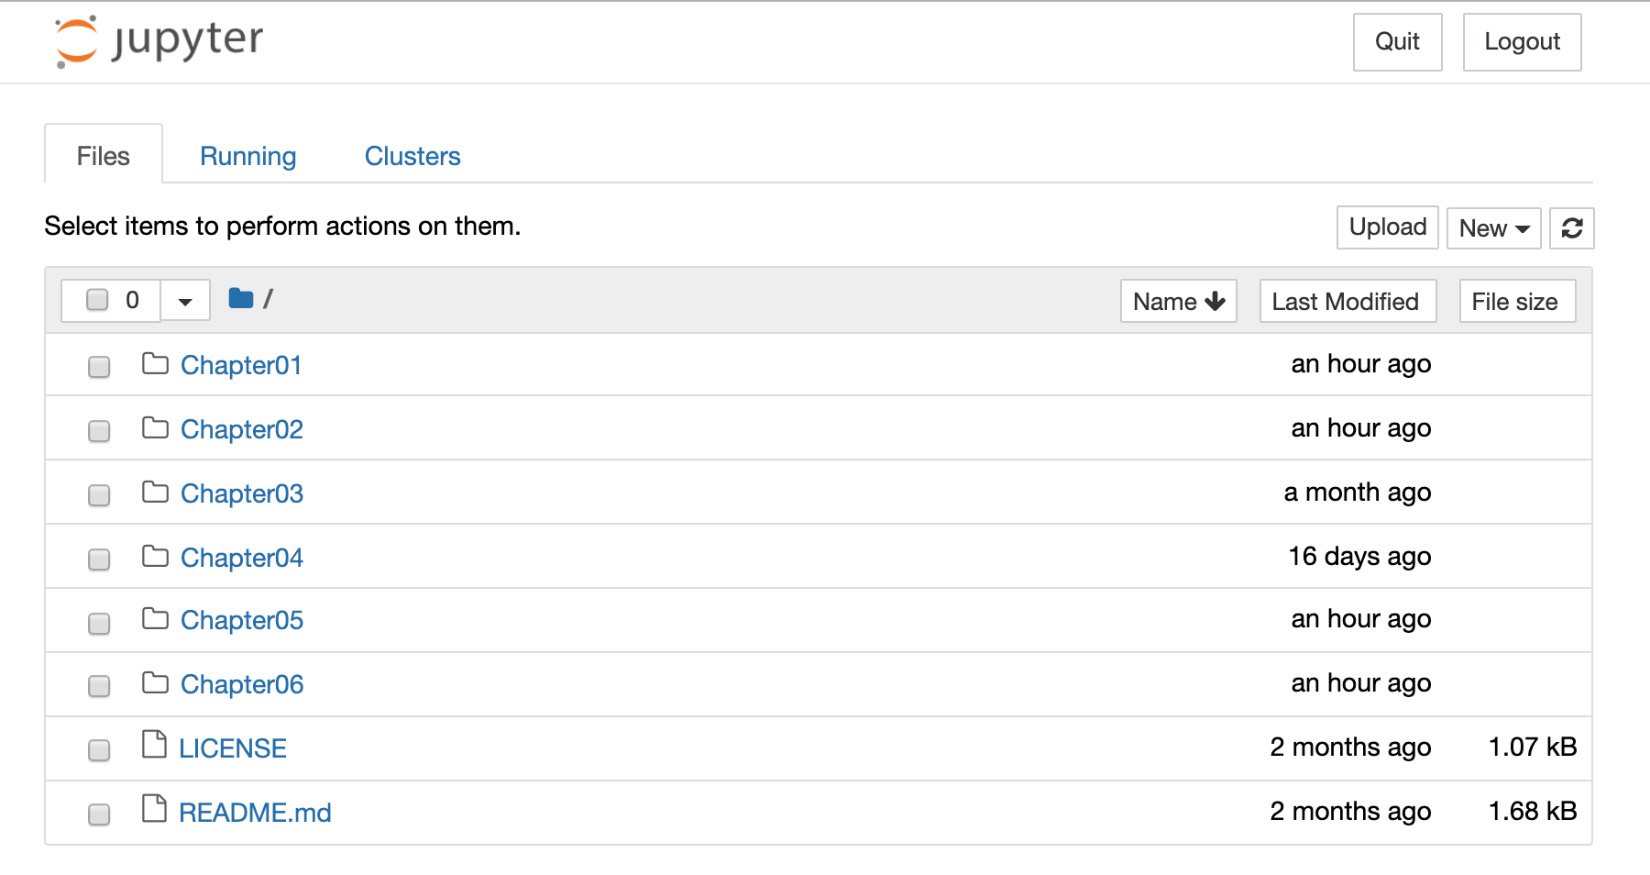
Figure 0.3: Jupyter browser console
Once you are running the Jupyter server, click New and choose Python 3. A new browser tab will open with a new and empty notebook. Rename the Jupyter file:
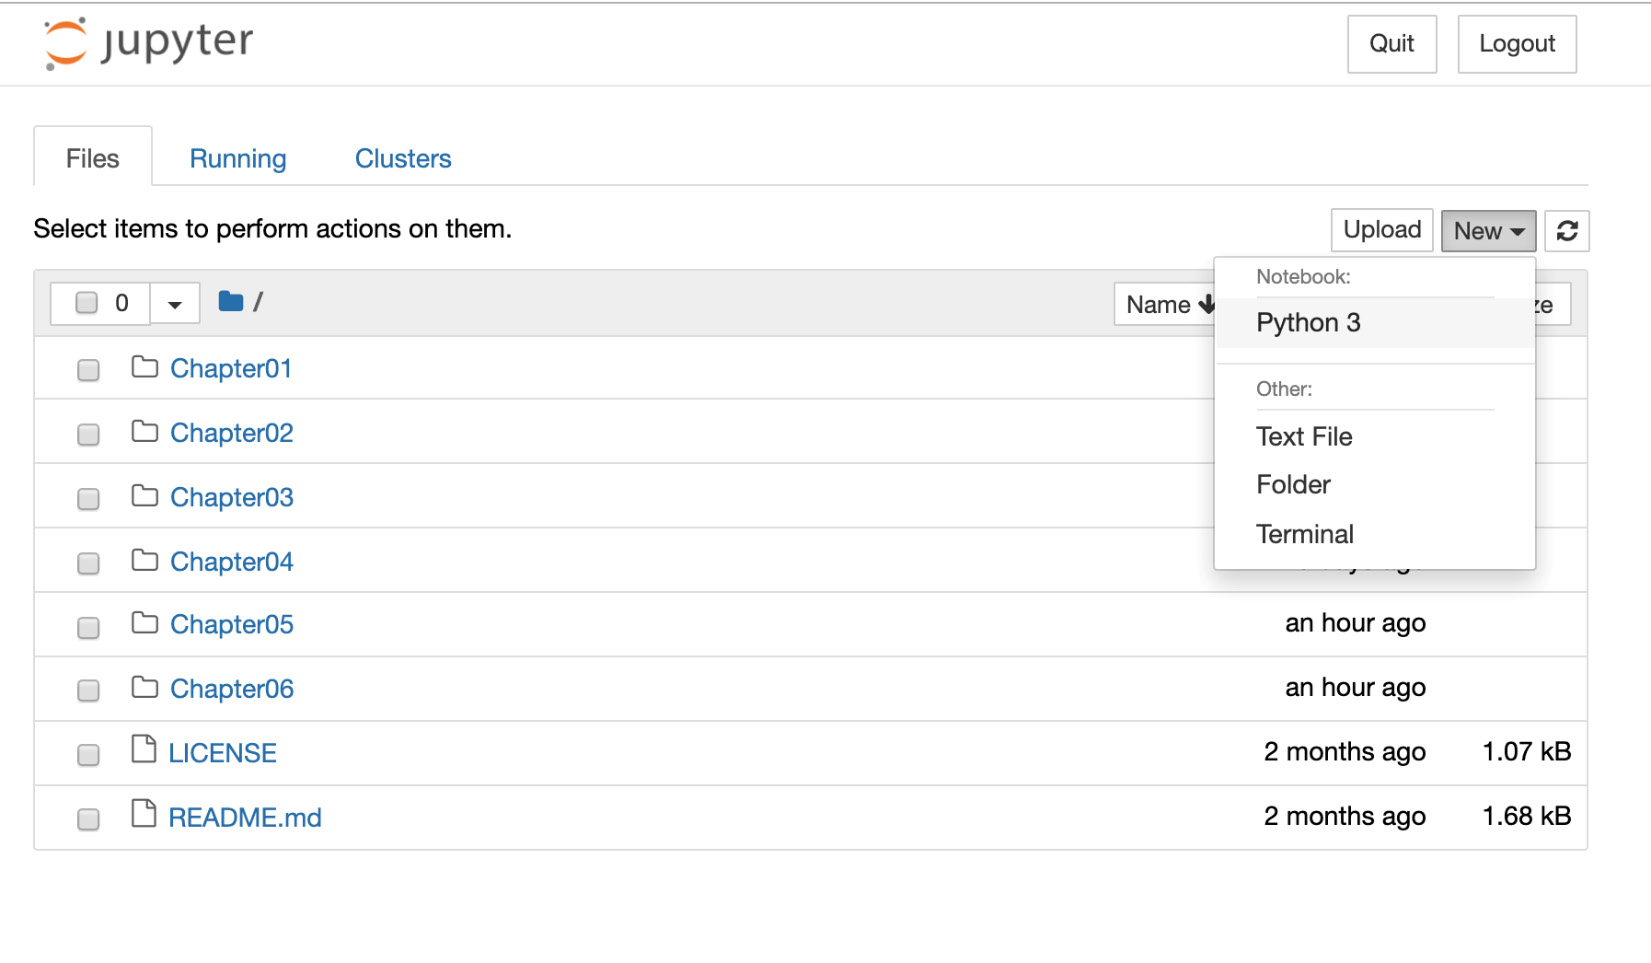
Figure 0.4: Jupyter server interface
The main building blocks of Jupyter notebooks are cells. There are two types of cells: In (short for input) and Out (short for output). You can write code, normal text, and Markdown in In cells, press Shift + Enter (or Shift + Return), and the code written in that particular In cell will be executed. The result will be shown in an Out cell, and you will land in a new In cell, ready for the next block of code. Once you get used to this interface, you will slowly discover the power and flexibility it offers.
When you start a new cell, by default, it is assumed that you will write code in it. However, if you want to write text, then you have to change the type. You can do that using the following sequence of keys: Esc | M | Enter:
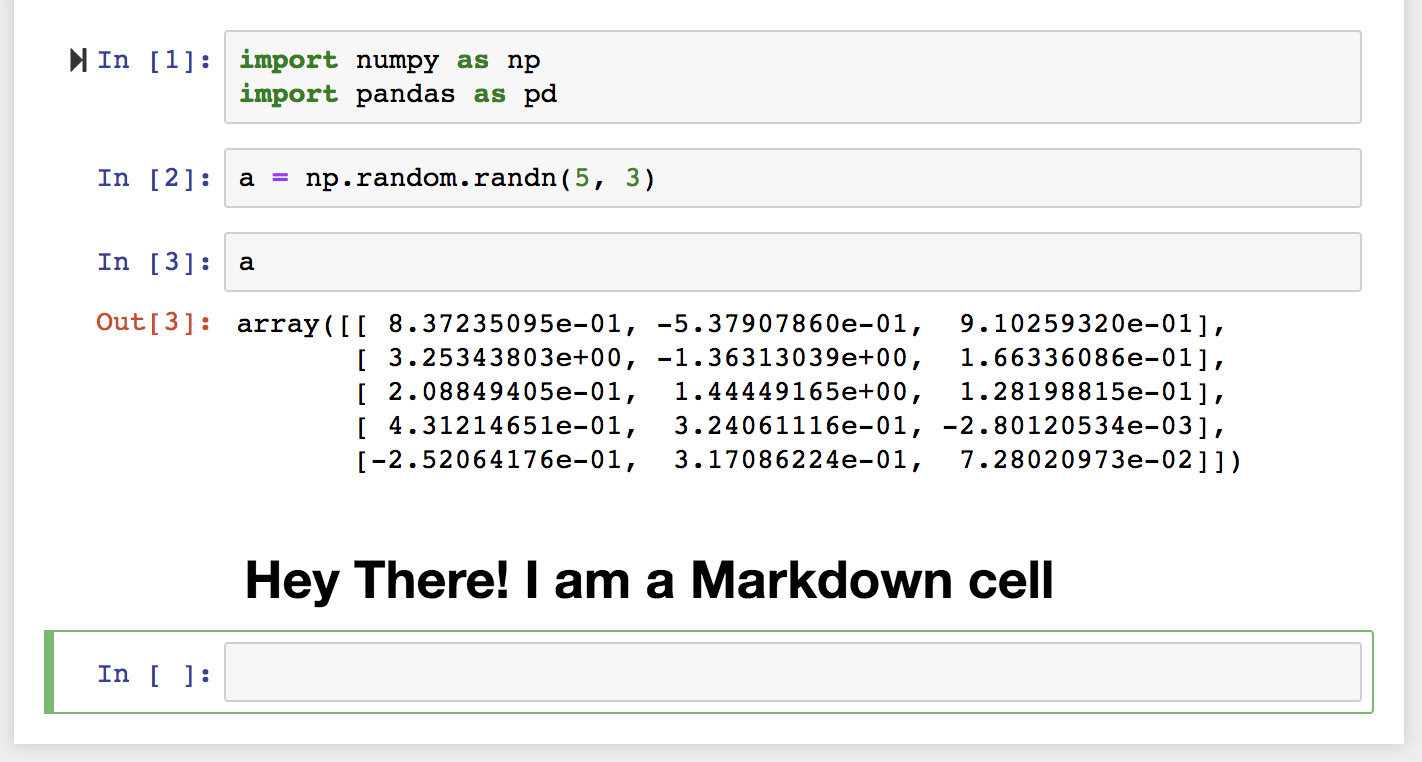
Figure 0.5: Jupyter Notebook
When you are done with writing some text, execute it using Shift + Enter. Unlike the case with code cells, the result of the compiled Markdown will be shown in the same place as the In cell.
To get a "cheat sheet" of all the handy key shortcuts in Jupyter, go to https://gist.github.com/kidpixo/f4318f8c8143adee5b40. With this basic introduction, we are ready to embark on an exciting and enlightening journey.
Installing Libraries
pip comes pre-installed with Anaconda. Once Anaconda is installed on your machine, all the required libraries can be installed using pip, for example, pip install numpy. Alternatively, you can install all the required libraries using pip install –r requirements.txt. You can find the requirements.txt file at https://packt.live/30ddspf.
The exercises and activities will be executed in Jupyter Notebooks. Jupyter is a Python library and can be installed in the same way as the other Python libraries – that is, with pip install jupyter, but fortunately, it comes pre-installed with Anaconda. To open a notebook, simply run the command jupyter notebook in the Terminal or Command Prompt.
Accessing the Code Files
You can find the complete code files of this book at https://packt.live/2O67hxH.
If you have any issues or questions about installation, please email us
at [email protected].


