Microsoft Dynamics NAV PowerShell
PowerShell is a very strong tool. It's useful in managing Microsoft dynamics NAV over Azure and Dynamics 365. It is also very useful for some out-of-the box installations such as Multitenant configuration. Moreover, it helps in carrying out major processes with just a few lines of code, and is often very fast. It fortifies our skills in administering Microsoft Dynamics NAV.
Dynamics NAV tools
The following are the tools that we use for development, administration, and object management purposes. As you can see, PowerShell can be used in all the areas, and so, this is the time when we should take PowerShell more seriously. Let's dive deep into PowerShell:
|
Development |
Administration |
Object Management/ Source control |
|
C/Side |
Administration Console (MMC) |
Team Foundation Server (TFS) |
|
Visual Studio
Add Ins
Extensibility
Report Design
|
Role Tailored Client(RTC) |
iFactor ReVision |
|
Word
Report Design
|
OMA | |
|
SQL Report Builder |
Merge tool | |
|
PowerShell |
PowerShell |
PowerShell |
Where in NAV are we with PowerShell?
With PowerShell, we are on the tooling side of NAV. For example, we have the report design (Visual Studio-SQL Report builder) tool and the MS Dynamics NAV Administrator tools.
Using PowerShell
Most of the Microsoft products are either already using or will be using PowerShell, and in the context of NAV, it is a growing trend to use PowerShell to make life easier for Administrators and Developers. In spite of that, we cannot do everything using a GUI, and so, Microsoft has provided backdoor processes using PowerShell command lines.
Getting started with PowerShell
The PowerShell works on objects so it is extremely useful. It can be useful while working with .NET Framework as well.
PowerShell ISE (Integrated Scripting Environment) can be taken as the development environment of PowerShell; it helps PowerShell look developer-friendly. It allows multiline editing, selective execution, context-sensitive help, debugging, command-exploration, snippets, and many more advanced functionalities, which makes it more than just a command shell.
Let's start with an example.
Let us assume that PowerShell is installed onto our system along with Microsoft Dynamics NAV.
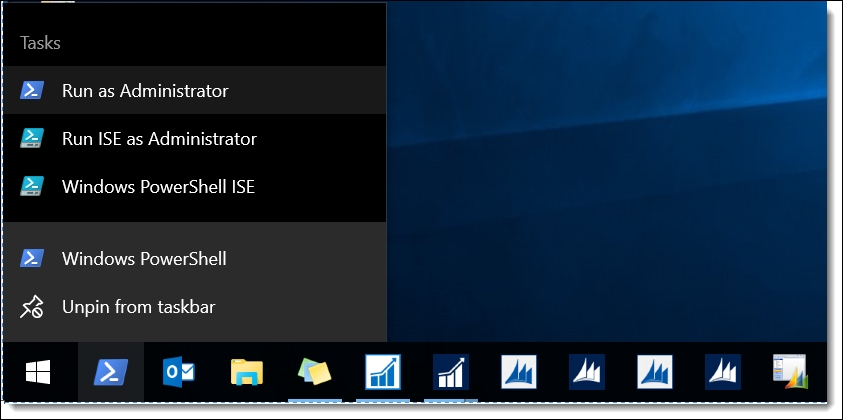
There are three options [on right-click] to open it as one of the different authorities, as shown in the following screenshot:

Generally, when we are coding, we might like to use the Windows PowerShell ISE option. This is because, if we create some file in the administrator mode, and if we want to edit the file later, we would have to open it with the administrator authority.
We will take an example of the Windows PowerShell ISE, which is the most common environment, just to make things simple:

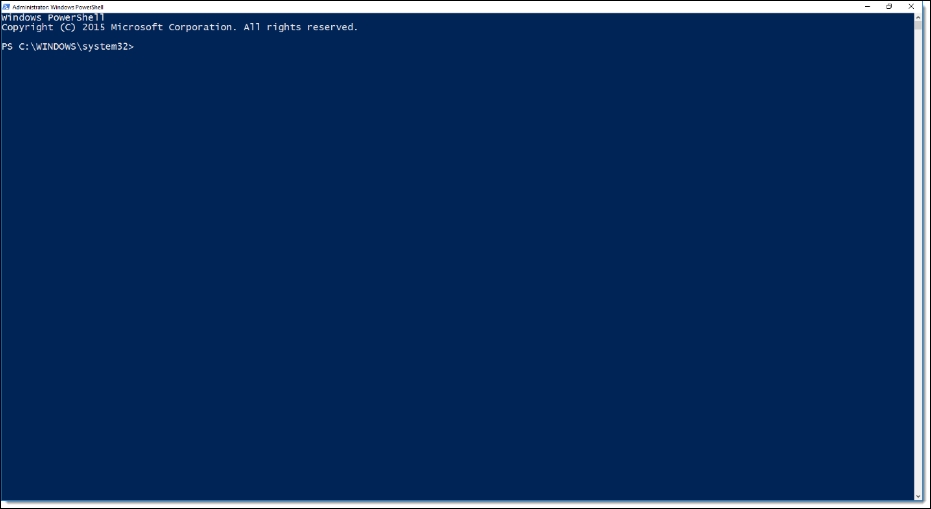
For administrative operations, we use the administrative mode. The following window does not have one:

Dynamics NAV PowerShell has the following two modulus/snap-ins in particular:
Microsoft.Dynamics.NAV.Management:import-module "${env:ProgramFiles}Microsoft Dynamics NAV90ServiceNAVAdminTool.ps1"
Note
This script is used to manage the service; it is a part of the Server management tool.
Microsoft.Dynamics.NAV.Model.Tools:import-module "${env:ProgramFiles(x86)}Microsoft DynamicsNAV90RoleTailoredClientMicrosoft.Dynamics.NAV.Model.Tools.psd1"
Note
This tool can be used to work with the text object of NAV objects such as merging objects, comparing, creating Delta, creating objects, joining it, working with languages, and many more.
So, in general, we can take these snap-ins as the tools to hook NAV with PowerShell.
Patterns of scripting
It is essential for you to understand how different cmdlets function in order to harvest their full potential. Here in this section we are going to understand how cmdlets are written and we will also be examining some of the most useful cmdlets.
Understanding the PowerShell cmdlets
We can categorize the PowerShell commands into five major categories of use:
- Commands for server administrators
- Command for implementers for company management
- Commands for administrators for upgrades
- Commands for administrator for security
- Commands for developers
Commands for server administrators
The first category contains commands that can be used for administrative operations such as create, save, remove, get, import, export, set, and the so on as given in the following table:
|
|
|
|
|
|
|
|
|
|
|
|
|
|
|
|
|
|
|
|
|
|
|
|
|
|
|
|
|
|
|
|
|
|
|
Note
We can set up web server instances, change configurations, and create a multitenant environment; we can only use PowerShell for a multitenant environment.
Commands for implementers for company management
The second category of commands can be used by implementers, in particular, for operations related to installation and configuration of the system. The following are a few examples of this category of commands:
|
|
|
|
|
|
|
|
|
|
Commands for administrators for upgrades
The third category is a special category for administrators, which is related to upgradation of operations.
|
|
|
|
|
|
|
|
Note
The third category of commands can be useful along with the upgrade toolkit.
Commands for administrator for security
This is one of the most important categories, which is related to the backend of the system. The commands in this category grant the power of accessibility and permission to the administrators. I strongly recommend these make-life-easy commands if you are working on security operations. Commands in this category include the following:
|
|
|
|
|
|
|
|
|
|
|
|
|
|
|
|
|
|
|
|
Note
These commands can be used basically to add users, and for permission set.
Commands for developers
The last, but not the least, treasure of commands is dedicated to developers, and is one of my most-used commands. It covers a wide range of commands, and should be included in your daily work. This set of commands includes the following:
|
|
|
|
|
|
|
|
|
|
|
|
|
|
|
|
|
|
|
|
|
|
|
|
|
|
Note
This preceding category of commands can be used to manage web services, invoke codeunits, work with object files, and work with languages.
Practice with PowerShell
Here, in this section, I will break down the basic syntax of PowerShell Script, and explain how it functions:
Syntax: get-service -name "*net*"
The preceding syntax can be broken down into four essential parts. The first part, that is, GET, is a function, which is generally used as a verb that signifies the main action of the code. The second part is generally a noun, which defines the operation. Part one and part two combine to form a command, leaving part three and four to be the name and argument, which combine to form a parameter. This is better explained as follows:
|
Verb |
Noun |
Name |
Argument |
|
Get |
Service |
Name |
Net |
|
Command |
Parameter |
I have drawn the following simple figure just to explain the process for a better understanding of the PowerShell Script. Every PowerShell Script can be understood by this method, and it's even easy to memorize and manipulate it if you can understand the structure of the scripts:


