From the previous recipes, we've understood the basics of IIS 10.0. Now we will go install IIS 10.0 on Windows Server 2016. We are already aware of the requirements. We will use GUI-mode installation, which will show you how to install and which options you need to select.
Installing IIS 10.0 on Windows Server 2016
Getting ready
To step through this recipe, you will need a running Windows Server 2016 instance and installation media. You should have administrative privileges.
How to do it…
- Log in to Windows Server 2016 with an account with administrative privileges.
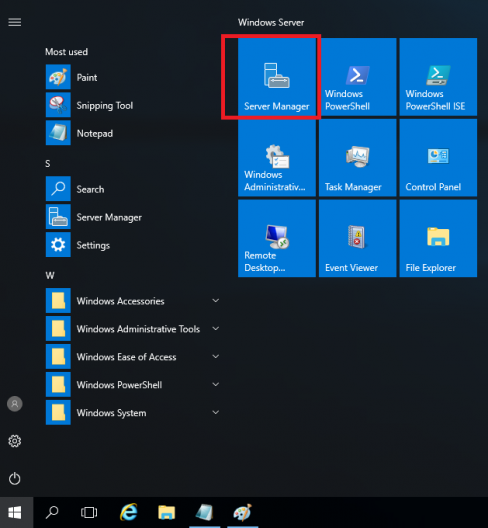
- Open Server Manager from the Start menu or use the search window to find it.
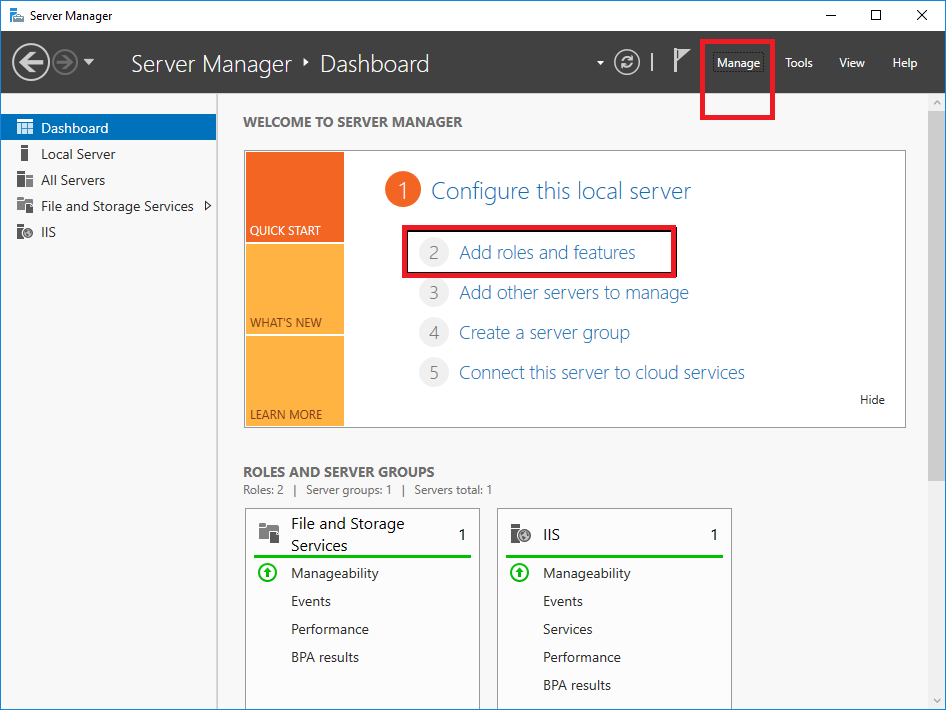
- You have to click on Add roles and features, or you can find the same option in top Manage menu.
- On the Before you begin wizard, simply click on the Next button. This window is just for information about installation prerequisites.
- On the Select installation type wizard, leave the default option Role-based or feature-based installation selected and click on Next.
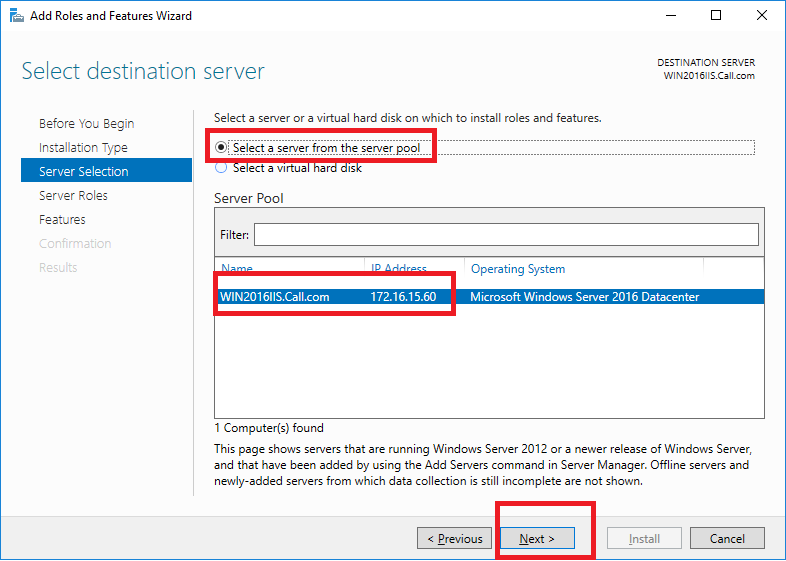
- Now we have to select which server we have to install IIS 10.0 on. We are installing to our local machine, so leave Select a server from the server pool with the current machine selected and click on Next. Alternatively, you can select another server that you are managing from here. You can figure it out in the following diagram:
- Now we have to select the role from the Select server roles wizard. Check the box next to Web Server (IIS). Doing this may open up a new pop-up window advising that additional features are required; simply click on the Add Features button to install them as well. Click on Next on the Select server roles menu once this is complete.
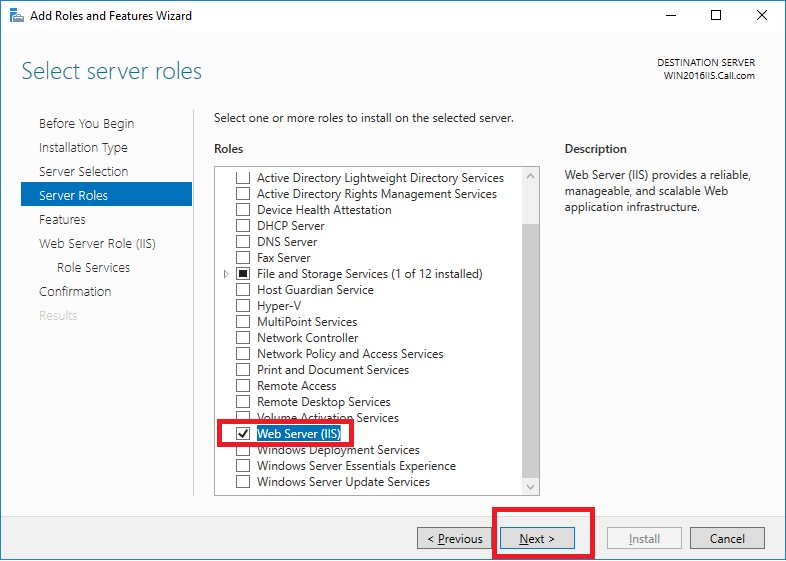
- Once we have selected Web Server (IIS), we will get a list of additional features, which we can select from. At this stage, we are not going to select any features, so simply click on Next in the Select features wizard.
- Click Next on the Web Server Role (IIS) wizard after reading the information provided.
- The next window in the Select role services wizard allows you to install additional services for IIS, if required. You can always come back and add more later, so just click on Next for now to install the defaults.
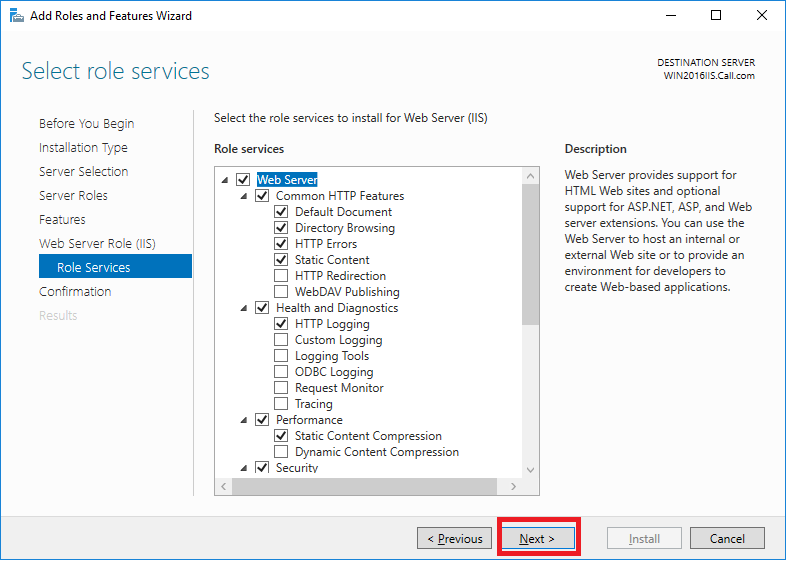
- Now we are on the Confirm installation selections wizard, so review the items that are to be installed and click on Install to proceed with installing the IIS 10.0 web server on Windows Server 2016.
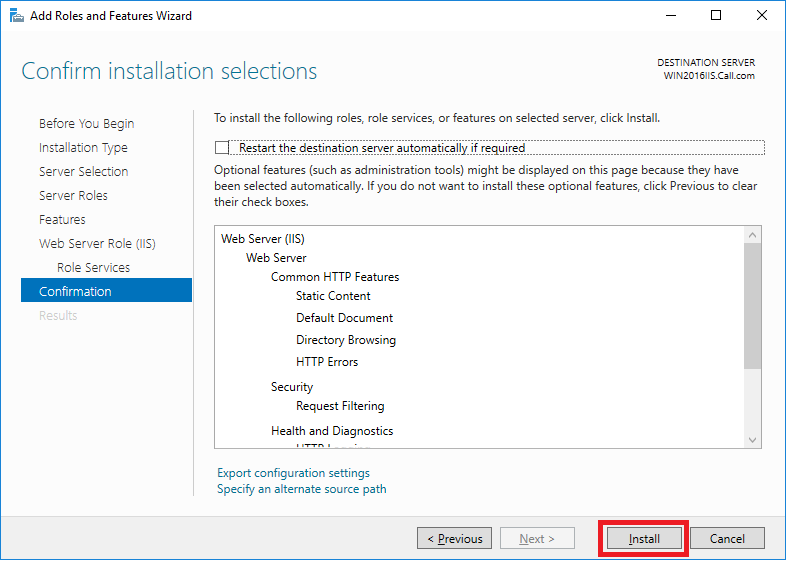
- Here, you can see the restart checkbox. No need to mark it for a normal IIS 10.0 installation--only when you uninstall something from the server or install an additional component that requires restarting the server do you need to reboot the system.
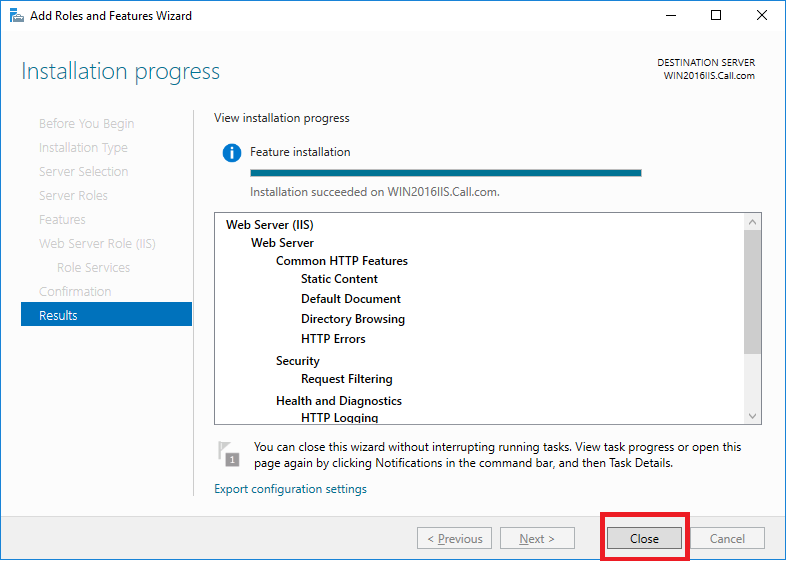
- Once the installation has succeeded, you can click on the close button. IIS 10.0 by default runs on port 80. It will auto-enable the World Wide Web Services (HTTP Traffic-In) firewall rule in Windows Firewall.
How it works...
When your are running your web server, it will process the request through the default http port, which has a numeric value of 80. The firewall rule was already enabled in the installation process. Now we need to know whether it's working fine.
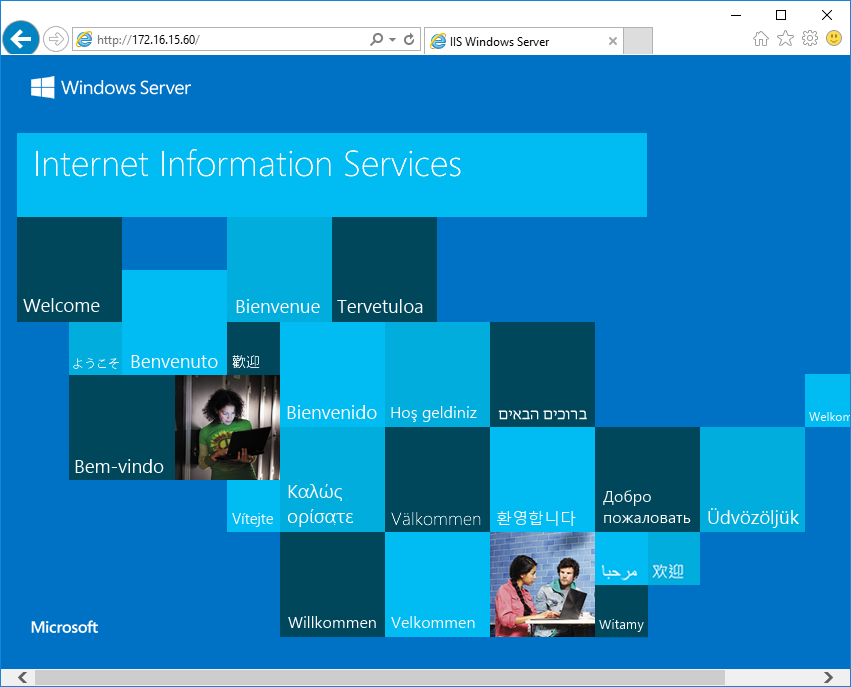
We will perform a simple test by opening a web browser such as Internet Explorer and type the server IP address, http://127.0.0.1/, or http://localhost/ in the browser address bar and hit Enter to run the application. You will see the default IIS welcome page.
Look at this screenshot, which shows IIS 10.0 running on Server 2016.
