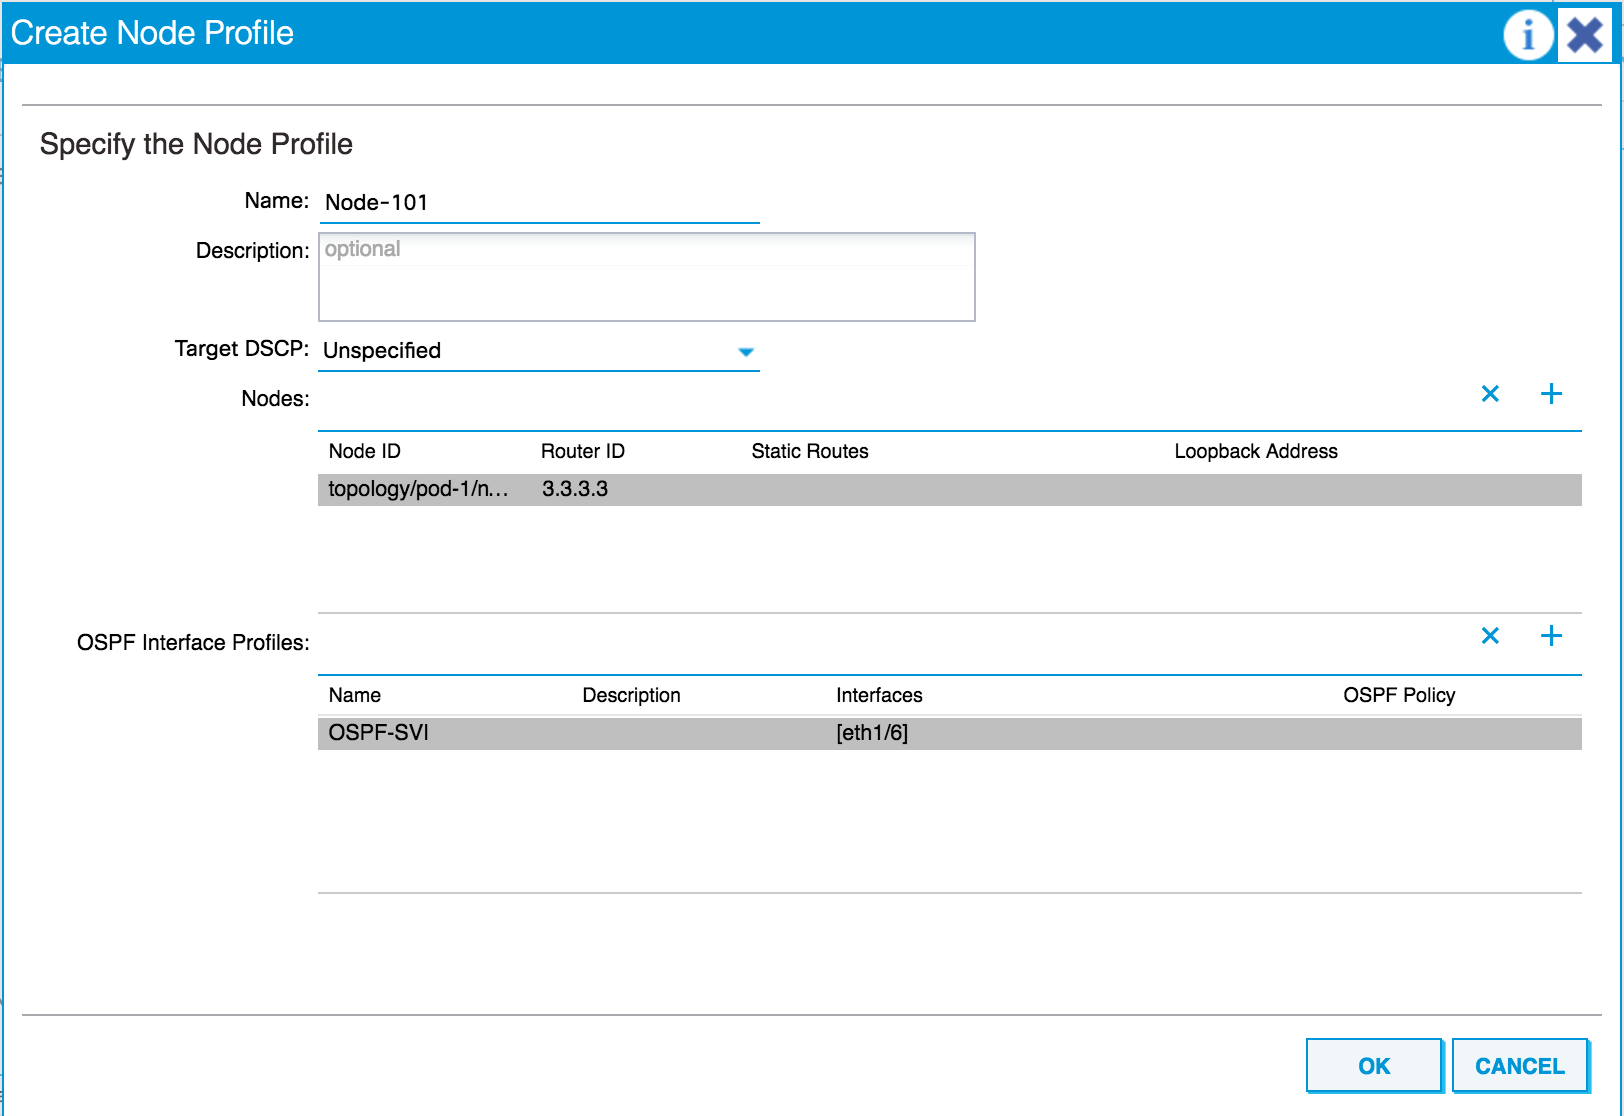
Search icon CANCEL
Subscription
0
Cart icon
Your Cart (0 item)
Close icon
You have no products in your basket yet
Arrow left icon
Explore Products
Best Sellers
New Releases
Books
Videos
Audiobooks
Learning Hub
Free Learning
Arrow right icon
Arrow up icon
GO TO TOP
Cisco ACI Cookbook

You're reading from   Cisco ACI Cookbook A Practical Guide to Maximize Automated Solutions and Policy-Drive Application Profiles

Arrow left icon
Product type Paperback
Published in May 2017
Publisher
ISBN-13 9781787129214
Length 424 pages
Edition 1st Edition
Tools
Concepts
Arrow right icon
Author (1):
Arrow left icon
Stuart Fordham Stuart Fordham
Author Profile Icon Stuart Fordham
Stuart Fordham
Arrow right icon
View More author details
Toc

Table of Contents (11) Chapters Close

Preface 1. Understanding Components and the ACI Fabric FREE CHAPTER 2. Configuring Policies and Tenants 3. Hypervisor Integration (and Other Third Parties) 4. Routing in ACI 5. ACI Security 6. Implementing Quality of Service in ACI 7. Network Programmability with ACI 8. Monitoring ACI 9. Troubleshooting ACI 10. An End-to-End Example Using the NX-OS CLI

Routing with OSPF


In this recipe, we will cover routing with OSPF, including configuring an OSPF interface policy and profile.

How to do it...

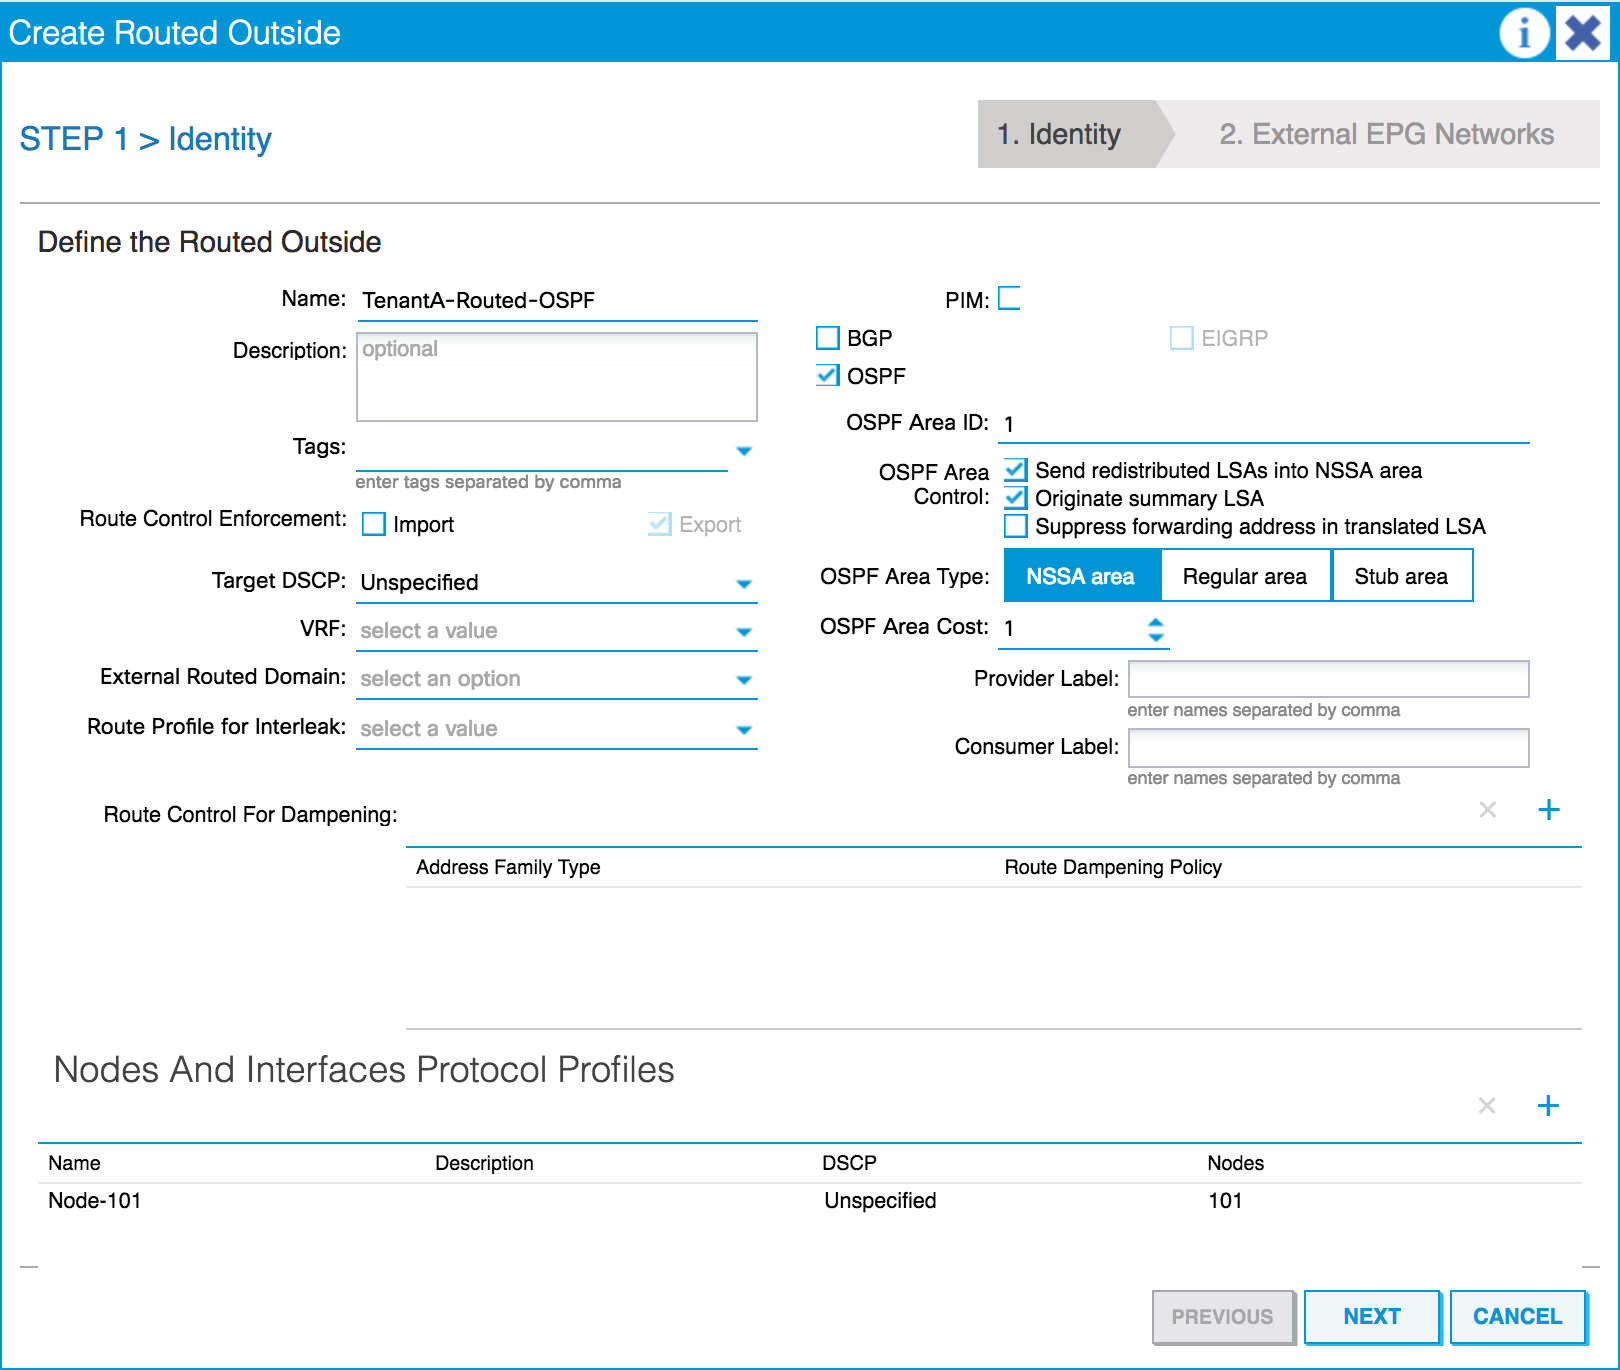
  1. Start by creating an external routed network. Navigate to Tenants | TenantA | Networking | External Routed Networks. Right-click on this and select Create Routed Outside.
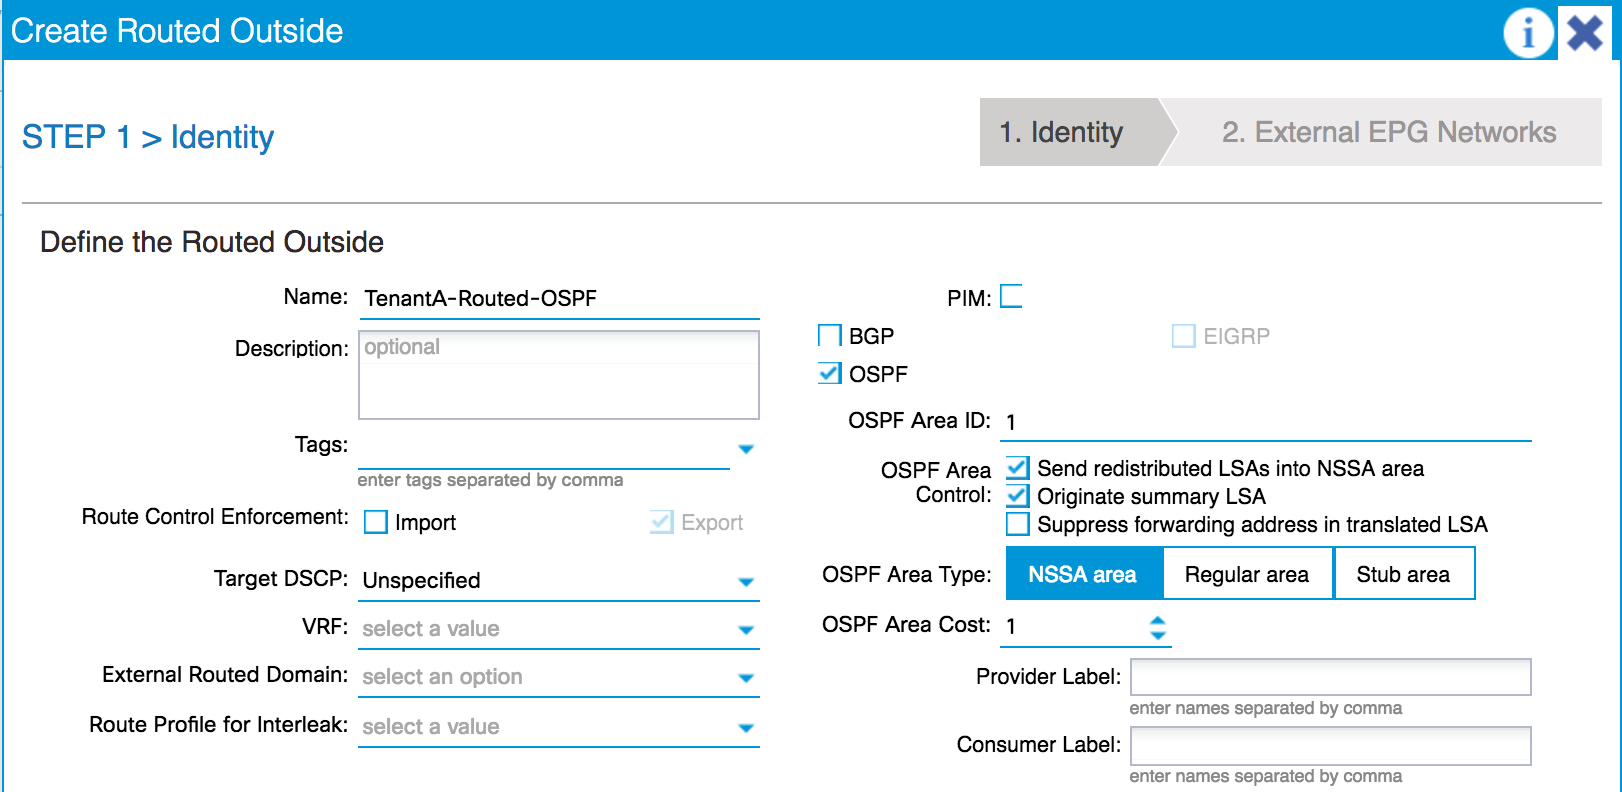
  2. Name it, choose OSPF, and set the OSPF Area ID.  Cisco ACI supports NSSA, regular areas, and stub areas.
  1. Click on the plus sign next to Nodes And Interfaces Protocol Policies.
  2. Name the policy.
  1. Click on the plus sign next to Nodes.
  2. Select the node and set a router ID.
  3. Set any static routes that may be required.
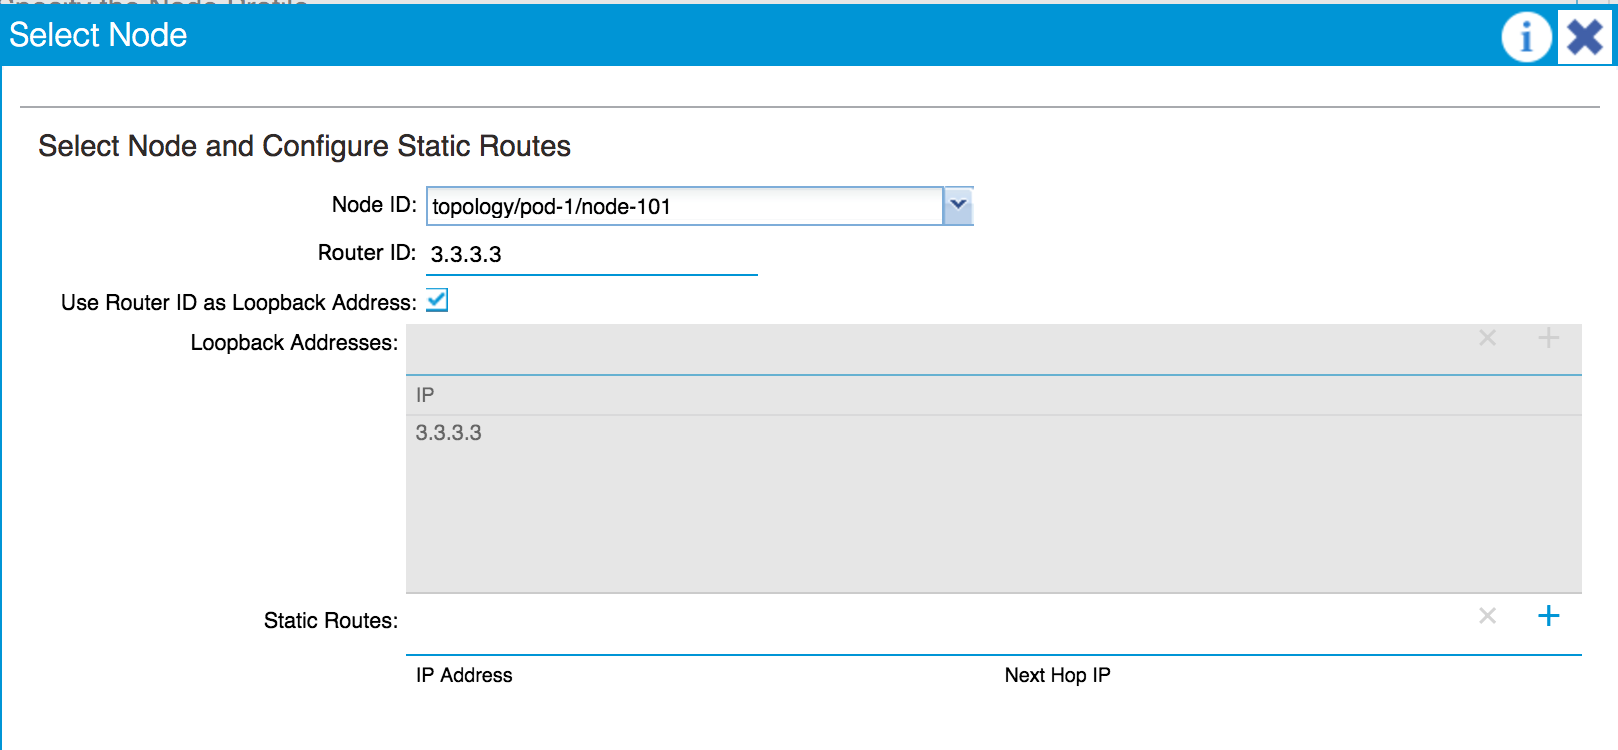
  1. Click on OK.
  2. Click on the plus sign next to OSPF Interface Profiles.
  3. Name the profile and set any authentication settings and BFD (BiForwarding Detection) configurations.
  4. Configure the interface type (again, choosing from Routed, SVI or Routed Sub-Interface).
  5. Click on the plus sign to create the interface.


  1. Click on OK.


  1. Click on OK again.
  1. Click on NEXT.
  2. On the Configure External EPG Networks...
lock icon The rest of the chapter is locked
Register for a free Packt account to unlock a world of extra content!
A free Packt account unlocks extra newsletters, articles, discounted offers, and much more. Start advancing your knowledge today.
Unlock this book and the full library FREE for 7 days
Get unlimited access to 7000+ expert-authored eBooks and videos courses covering every tech area you can think of
Renews at $19.99/month. Cancel anytime
Banner background image