Creating a compute for writing code
In this section, you will create a compute instance to begin your development. Each subsection will demonstrate how to create these resources in your AMLS workspace following different methods.
Creating a compute instance through the AMLS GUI
The most straightforward way to create a compute instance is through AMLS. Compute instances come in many sizes and you should adjust them to accommodate the size of your data. A good rule of thumb is that you should have 20 times the amount of RAM as the size of your data in CSV format, or 2 times the amount of RAM as the size of your data in a pandas DataFrame, the most popular Python data structure for data science. This is because, when you read in a CSV file as a pandas DataFrame, it expands the data by up to a factor of 10.
The compute name must be unique within a given Azure region, so you will need to make sure that the name of your compute resources is unique or the deployment will fail.
Now, let’s create a compute instance – a single VM-type compute that can be used for development. Each compute instance is assigned to a single user in the workspace for them to develop.
To create a compute instance, follow these steps:
- Log in to the AMLS workspace.
- Click on Compute in the left-hand menu.
- Click on New.
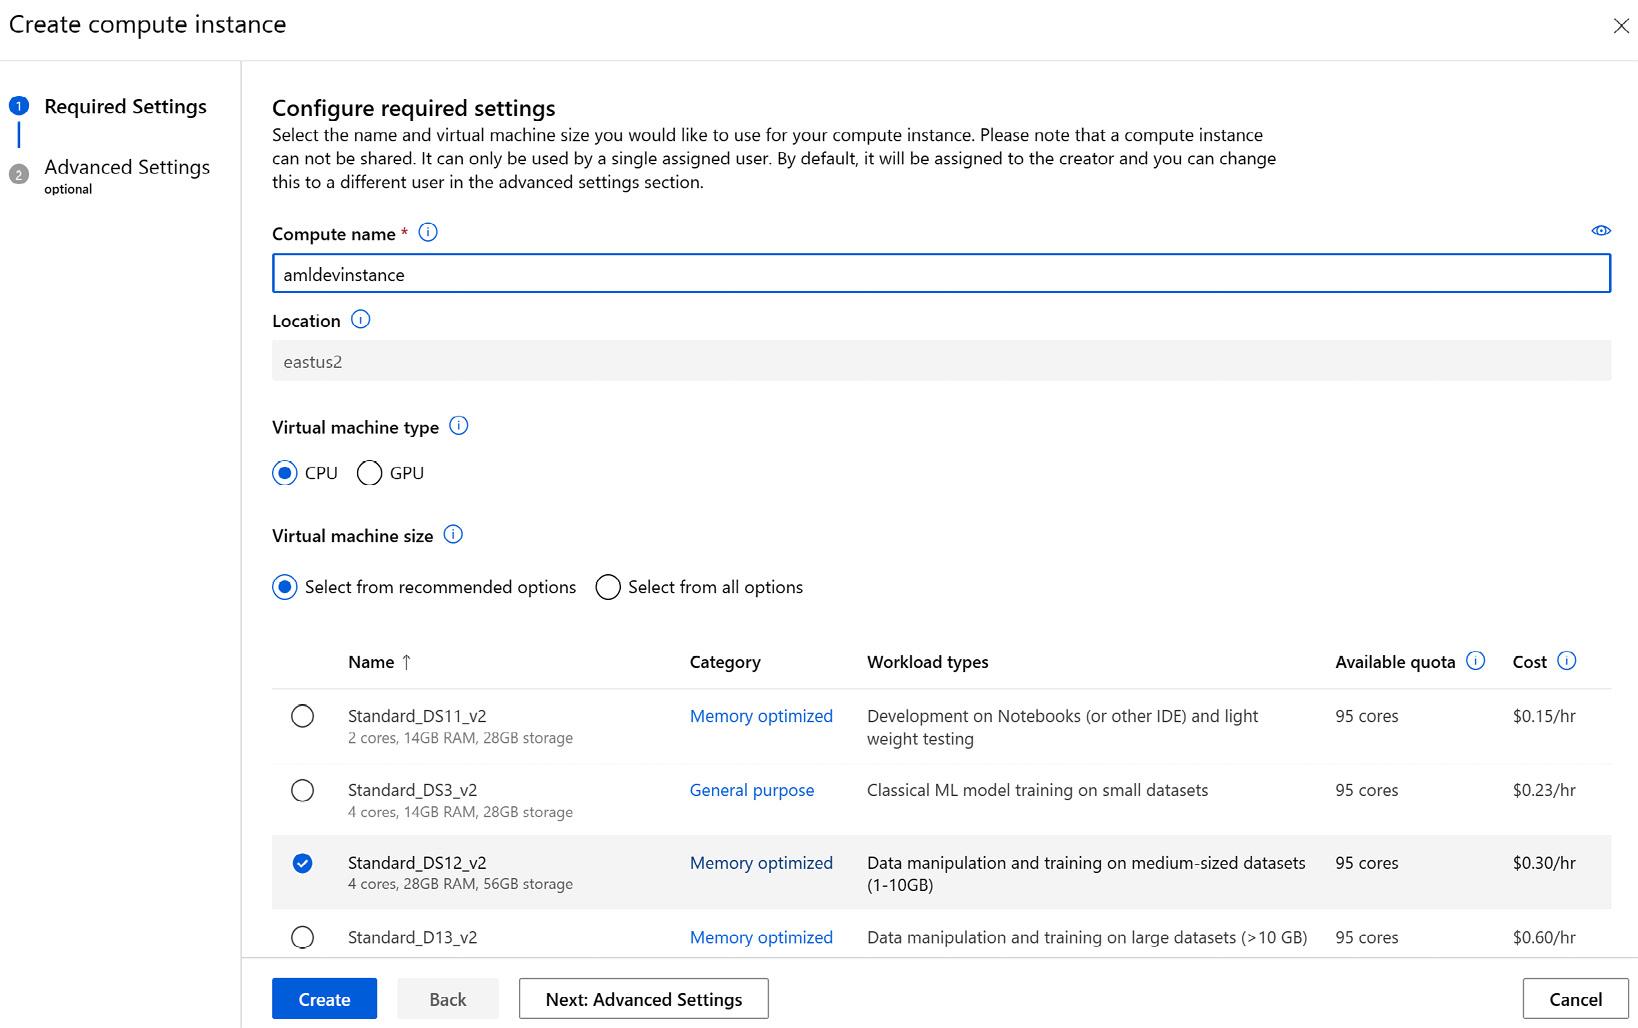
A new tab will open to configure our compute instance. The following screenshot showcases the creation of a compute instance:

Figure 1.28 – Selecting the VM type and region
Under Configure required settings, shown in Figure 1.28, let’s execute the following steps:
- You need to provide a name for your compute instance. Let’s name the compute instance
amldevinstance. Note that the name of the compute instance will need to be unique for a given Azure region. Given that this name will likely already be used, in practice, you can provide a prefix or suffix to your compute name to ensure its uniqueness. - Set Virtual machine type to CPU. GPU can also be selected for high-power deep learning models. Now, set Virtual machine size. The size allocation will display the nodes based on the quota available.
- Pick a VM size from the list of available CPUs.
- Click on Next: Advanced Settings.
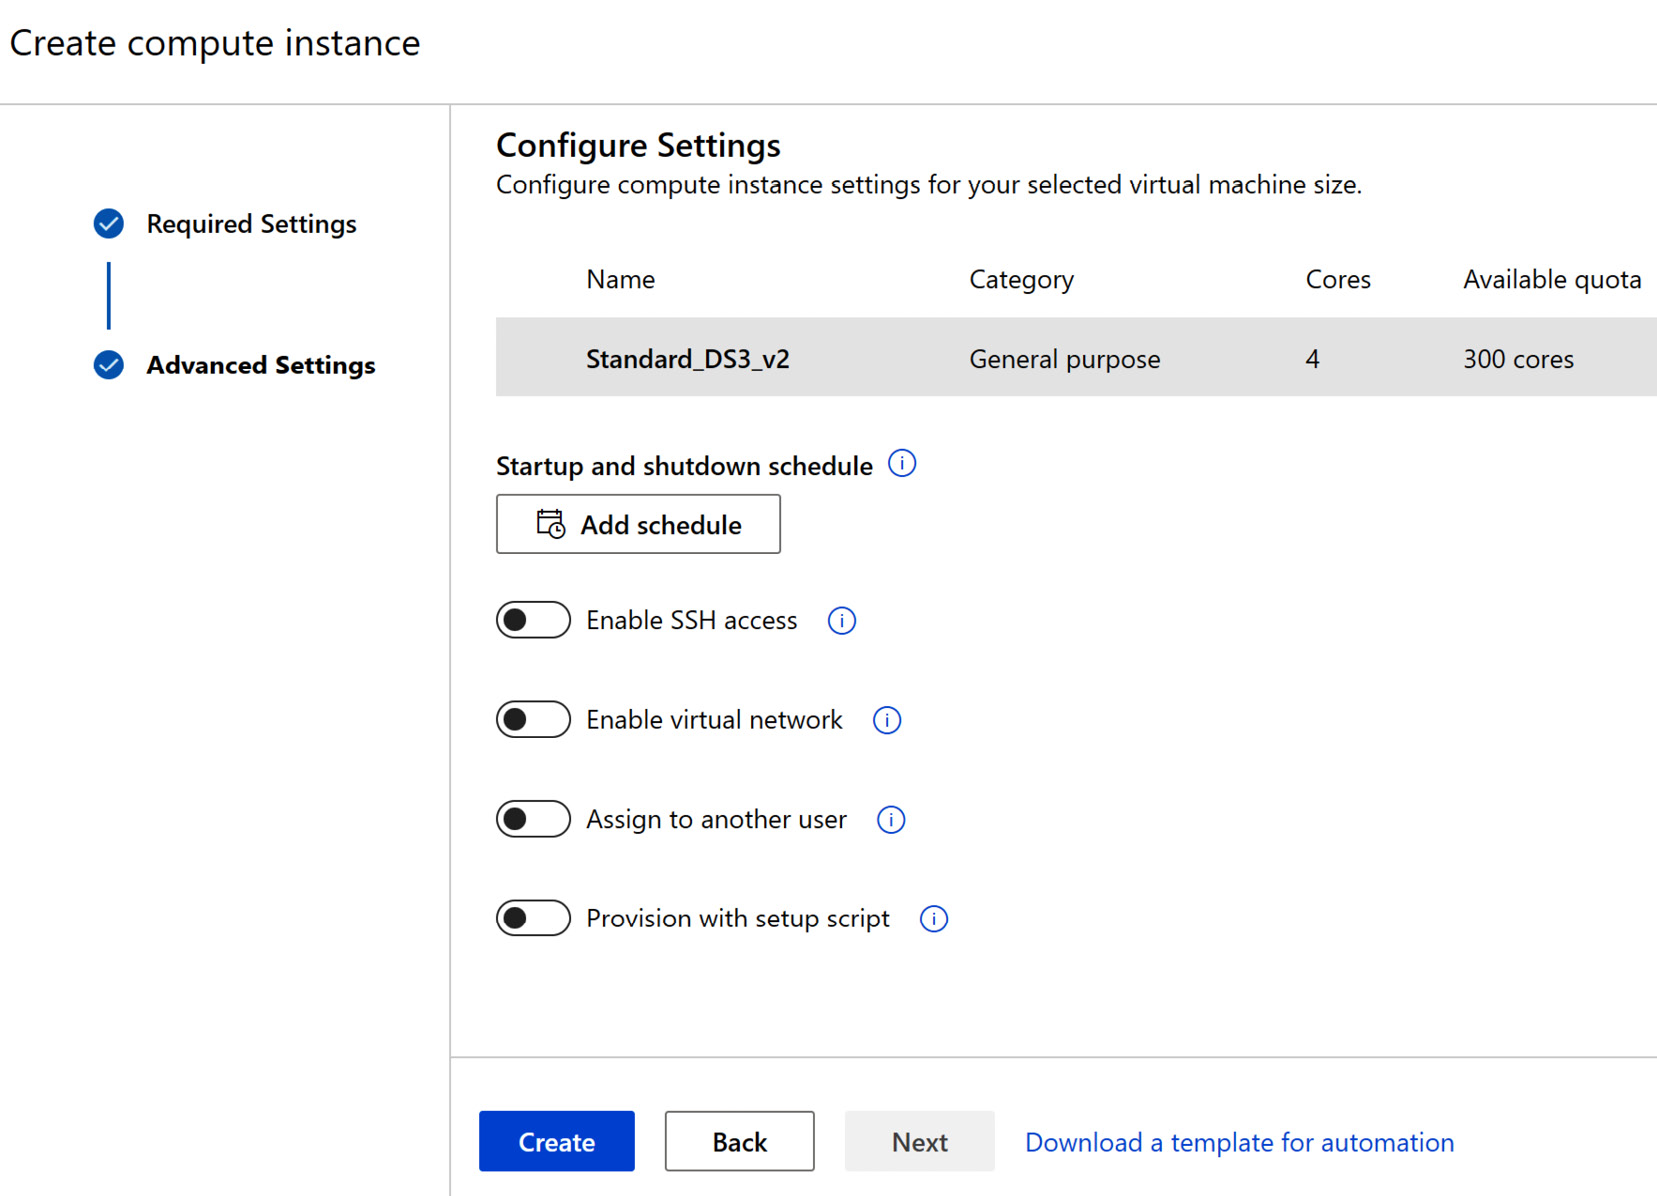
- Turn on Enable SSH access if you want to use the compute instance from a remote machine. The Enable virtual network option is available to connect to a private network connected to a corporate network. An option to assign the compute to another user (Assign to another user) is also available. If there is any shell script to provision in the startup, please use the Provision with setup script option:

Figure 1.29 – Configure Settings
Now that we have the basic configurations provided for the compute, we can move to the next section on scheduling a time at which to shut down the instance to save money.
Adding a schedule to a compute instance
In the previous version of the AML service, data scientists had to manually spin up and shut down compute instances. Unsurprisingly, this led users to incur large bills when they forgot to shut them down over weekends and vacations. Microsoft added the ability to automatically start up and shut down compute instances in order to alleviate this problem. We recommend setting the shutdown schedule to just after your normal working hours conclude.
From Figure 1.29, click on the Add Schedule button to bring up the ability to set a start-up or shutdown automatic schedule.
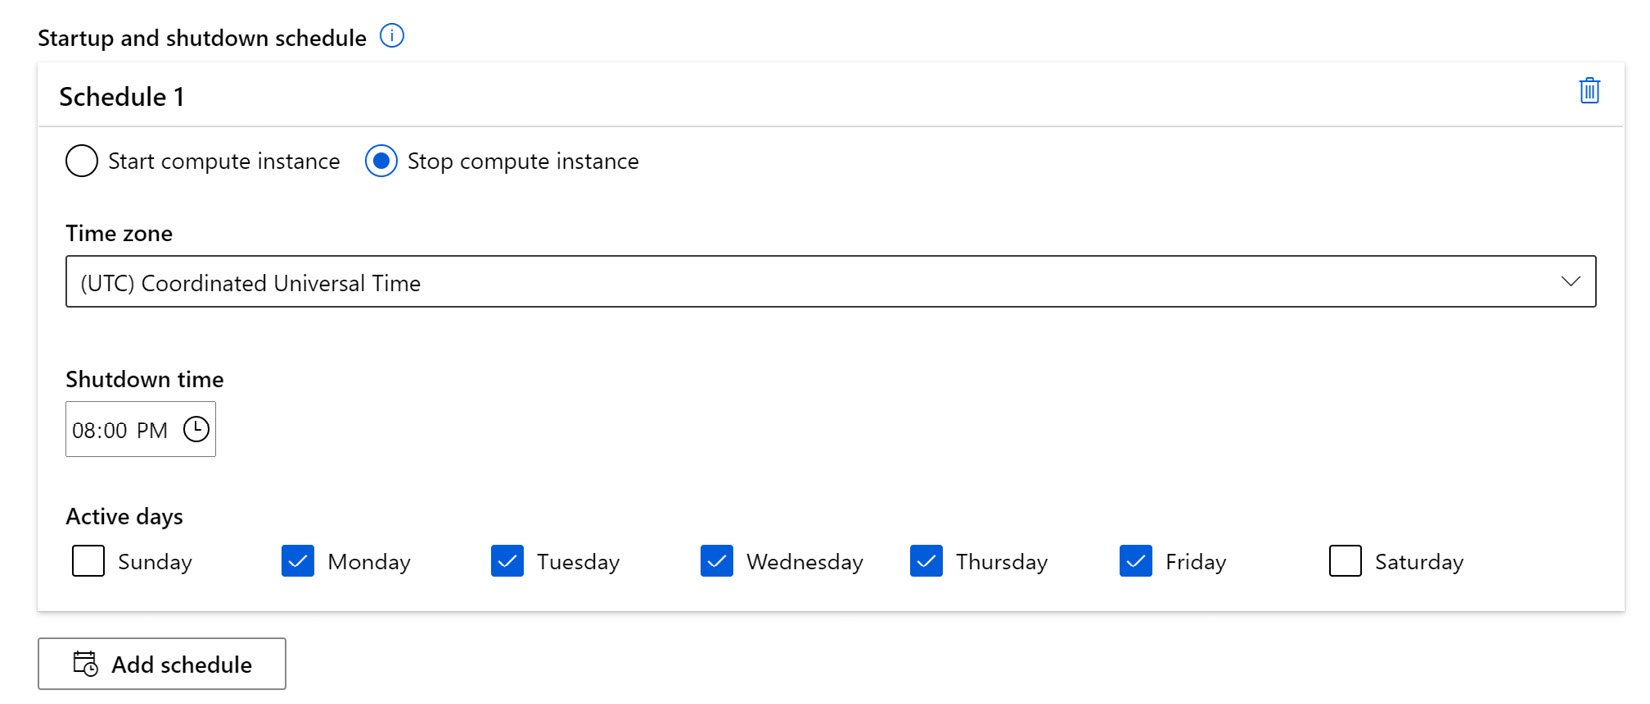
Here’s the Startup and shutdown schedule window for the compute instance:

Figure 1.30 – Scheduling a shutdown for the compute instance
As shown in Figure 1.30, setting a schedule for the automatic shutdown of the compute will save on cost. Once scheduled, the system will automatically shut down to save money.
After setting your schedule, click on Create and wait for the instance to create. Once the instance has been created, it will automatically start and the compute instance page will be displayed.
Creating a compute instance through the Azure CLI
One major advantage of creating a compute instance with code is the ability to save your configuration file for later use.
Launch your command-line interpreter based on your OS (for example, CMD or Windows PS), connect the Azure CLI to your Azure subscription, and create a compute instance noting the name of the compute instance must be unique within an Azure Region by running the following commands:
az login
az ml compute create --name computeinstance01 --size STANDARD_D3_V2 --type ComputeInstance--resource-group my-resource-group --workspace-name my-workspace
Just as you created an AMLS workspace through the Azure CLI, you have now used it to create a compute instance. The next section will cover details on how to use ARM templates to create a compute instance.
Creating a compute instance with ARM templates
Upon creating your AMLS workspace with an ARM template, you can also instantiate compute instances at the same time, specifying their type, size, and schedule. This is an excellent strategy for large organizations that want to tightly control their compute instance configurations. It’s also great for teams who are looking to create multiple compute instances in one step. In order to do so, follow these steps:
- The ARM template can be downloaded from GitHub and is found here: https://github.com/Azure/azure-quickstart-templates/blob/master/quickstarts/microsoft.machinelearningservices/machine-learning-compute-create-computeinstance/azuredeploy.json.
The template creates a compute instance for you.
The example template has three required parameters:
workspaceName, which is the deployment location.computeName, which is the name of the compute instance to create.objectId, which is the object ID of the person to which to assign the compute instance. In your case, it will be yourself.
To get your object ID, you can run the following command:
az ad signed-in-user show
- To deploy your template, you must deploy it into a workspace that has already been created in a resource group that already exists. Be sure to replace
objectIdwith the object ID you found using theaz ad signed-in-user showcommand. Make sure your command prompt is in the location at which you downloaded theazuredeploy.jsonfile, and run the following command:az deployment group create --name "exampledeployment" --resource-group "aml-dev-rg" --template-file "azuredeploy.json" --parameters workspaceName="aml-ws" computeName="devamlcompute" objectId="XXXXXXXX-XXXX-XXXX-XXXX-XXXXXXXXXXXX" schedules="{'computeStartStop': [{'action': 'Stop','triggerType': 'Cron','cron': {'startTime': '2022-07-06T23:41:45','timeZone': 'Central Standard Time','expression': '00 20 * * 1,2,3,4,5'}}]}"
Tip
In order to create compute instances for users other than yourself, use the create on behalf option and specify a user ID.
Now you know how to create compute instances using the GUI, the Azure CLI, and ARM templates. You also know how to schedule startup and shutdown times for your compute instance, and are ready to use it to develop code, which will be the focus of the next section.


