Search icon CANCEL
Subscription
0
Cart icon
Your Cart (0 item)
Close icon
You have no products in your basket yet
Arrow left icon
Explore Products
Best Sellers
New Releases
Books
Videos
Audiobooks
Learning Hub
Free Learning
Arrow right icon
Arrow up icon
GO TO TOP
Hands-On GPU Computing with Python

You're reading from   Hands-On GPU Computing with Python Explore the capabilities of GPUs for solving high performance computational problems

Arrow left icon
Product type Paperback
Published in May 2019
Publisher Packt
ISBN-13 9781789341072
Length 452 pages
Edition 1st Edition
Languages
Tools
Arrow right icon
Author (1):
Arrow left icon
Avimanyu Bandyopadhyay Avimanyu Bandyopadhyay
Author Profile Icon Avimanyu Bandyopadhyay
Avimanyu Bandyopadhyay
Arrow right icon
View More author details
Toc

Table of Contents (17) Chapters Close

Preface 1. Section 1: Computing with GPUs Introduction, Fundamental Concepts, and Hardware
2. Introducing GPU Computing FREE CHAPTER 3. Designing a GPU Computing Strategy 4. Setting Up a GPU Computing Platform with NVIDIA and AMD 5. Section 2: Hands-On Development with GPU Programming
6. Fundamentals of GPU Programming 7. Setting Up Your Environment for GPU Programming 8. Working with CUDA and PyCUDA 9. Working with ROCm and PyOpenCL 10. Working with Anaconda, CuPy, and Numba for GPUs 11. Section 3: Containerization and Machine Learning with GPU-Powered Python
12. Containerization on GPU-Enabled Platforms 13. Accelerated Machine Learning on GPUs 14. GPU Acceleration for Scientific Applications Using DeepChem 15. Other Books You May Enjoy Appendix A

Configuring Numba on your Python IDE

You can use the following steps as a reference for setting up Numba, because the procedure is very similar. To configure Numba with PyCharm, we again focus on our Conda-based installation:

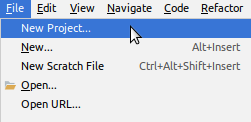
  1. First, let's create a virtual environment with Conda as a new PyCharm pure-Python project. Choose New Project... from the PyCharm main menu, as shown in the following screenshot:
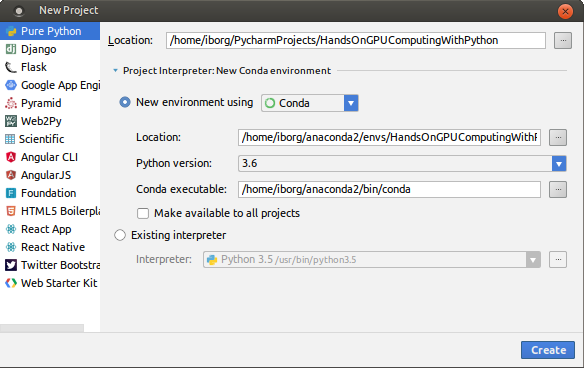
  1. Create a Pure Python project within a new local Conda environment. Skip this step if you have already created one:
  1. Wait for the environment to be created, as shown here:

  1. After creating the Conda environment, you will have a ready-to-use Numba development environment, as shown in the following screenshot:
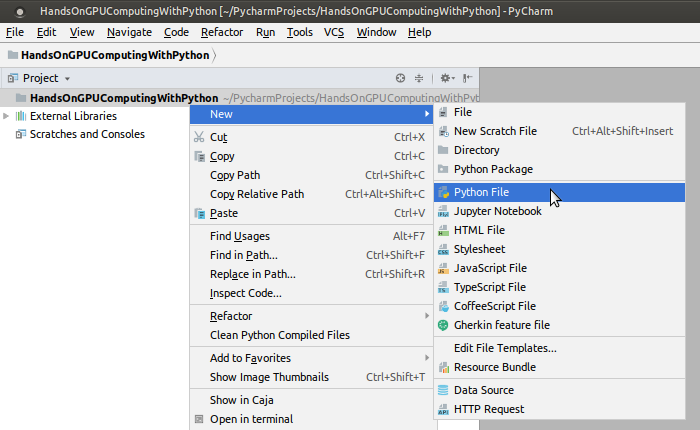
Now you can import numba within your Python programs.

As you can see below, PyCharm Edu detects and recommends this as you begin to type import numba:

The following...

lock icon The rest of the chapter is locked
Register for a free Packt account to unlock a world of extra content!
A free Packt account unlocks extra newsletters, articles, discounted offers, and much more. Start advancing your knowledge today.
Unlock this book and the full library FREE for 7 days
Get unlimited access to 7000+ expert-authored eBooks and videos courses covering every tech area you can think of
Renews at $19.99/month. Cancel anytime
Banner background image