Recording the total coin count
The coin collection game wouldn't be much of a game if there were only one coin. The central idea is that a level should feature many coins, all of which the player should collect before a timer expires. To know when all the coins have been collected, we'll need to know how many coins there are in the scene. After all, if we don't know how many coins there are, then we can't know whether we've collected them all. We'll configure the Coin class to keep track of the total number of coins in the scene at any moment. Consider Code Sample 2.3, which adapts the Coin class to achieve this:
public class Coin : MonoBehaviour
{
  //Keeps track of total coin count in scene
  public static int CoinCount = 0;
   void Start ()
   {
      //Object created, increment coin count
      ++Coin.CoinCount;
   }
   //Called when object is destroyed
   void OnDestroy()
   {
      --Coin.CoinCount;
      if(Coin.CoinCount <= 0)
      {
         //We have won
      }
   }
}
Let's summarize the preceding code:
- The
Coinclass maintains a static member variable,CoinCount, which, being static, is shared across all instances of the class. This variable keeps a count of the total number of coins in the scene, and each instance has access to it. - The
Startfunction is called once perCoininstance when the object is created in the scene. For coins that are present when the scene begins, theStartevent is called at scene startup. This function increments theCoinCountvariable by one per instance, thus keeping count of all coins. - The
OnDestroyfunction is called once per instance when the object is destroyed. This decrements theCoinCountvariable, reducing the count for each coin destroyed.
Being able to keep track of the number of coins is a great start, but the player cannot currently collect the coins, so the coin count will never decrement. Let's fix that now.
Collecting coins
Thinking carefully, we know that a coin is considered collected whenever the player walks into it. We can say a coin is obtained when the player and the coin intersect or collide. To determine when a collision occurs, we must approximate the volume of both objects (coin and player) and then have some way of knowing when the two volumes overlap in space. This is achieved in Unity through colliders, which are special physics components attached to objects that can tell us when two GameObjects intersect. When two objects with colliders intersect, a function will be called in our script. In this section, I will walk you step by step through this process, starting with an overview of the colliders that are already present in our scene.
Introducing colliders
The FPSController object (first-person controller) already has a collider on it, included as part of the Character Controller component. This can be confirmed by selecting the FPSController object in the scene and examining the green wireframe cage. It is capsule-shaped and approximates the physical body of a generic person, as shown in Figure 2.14:
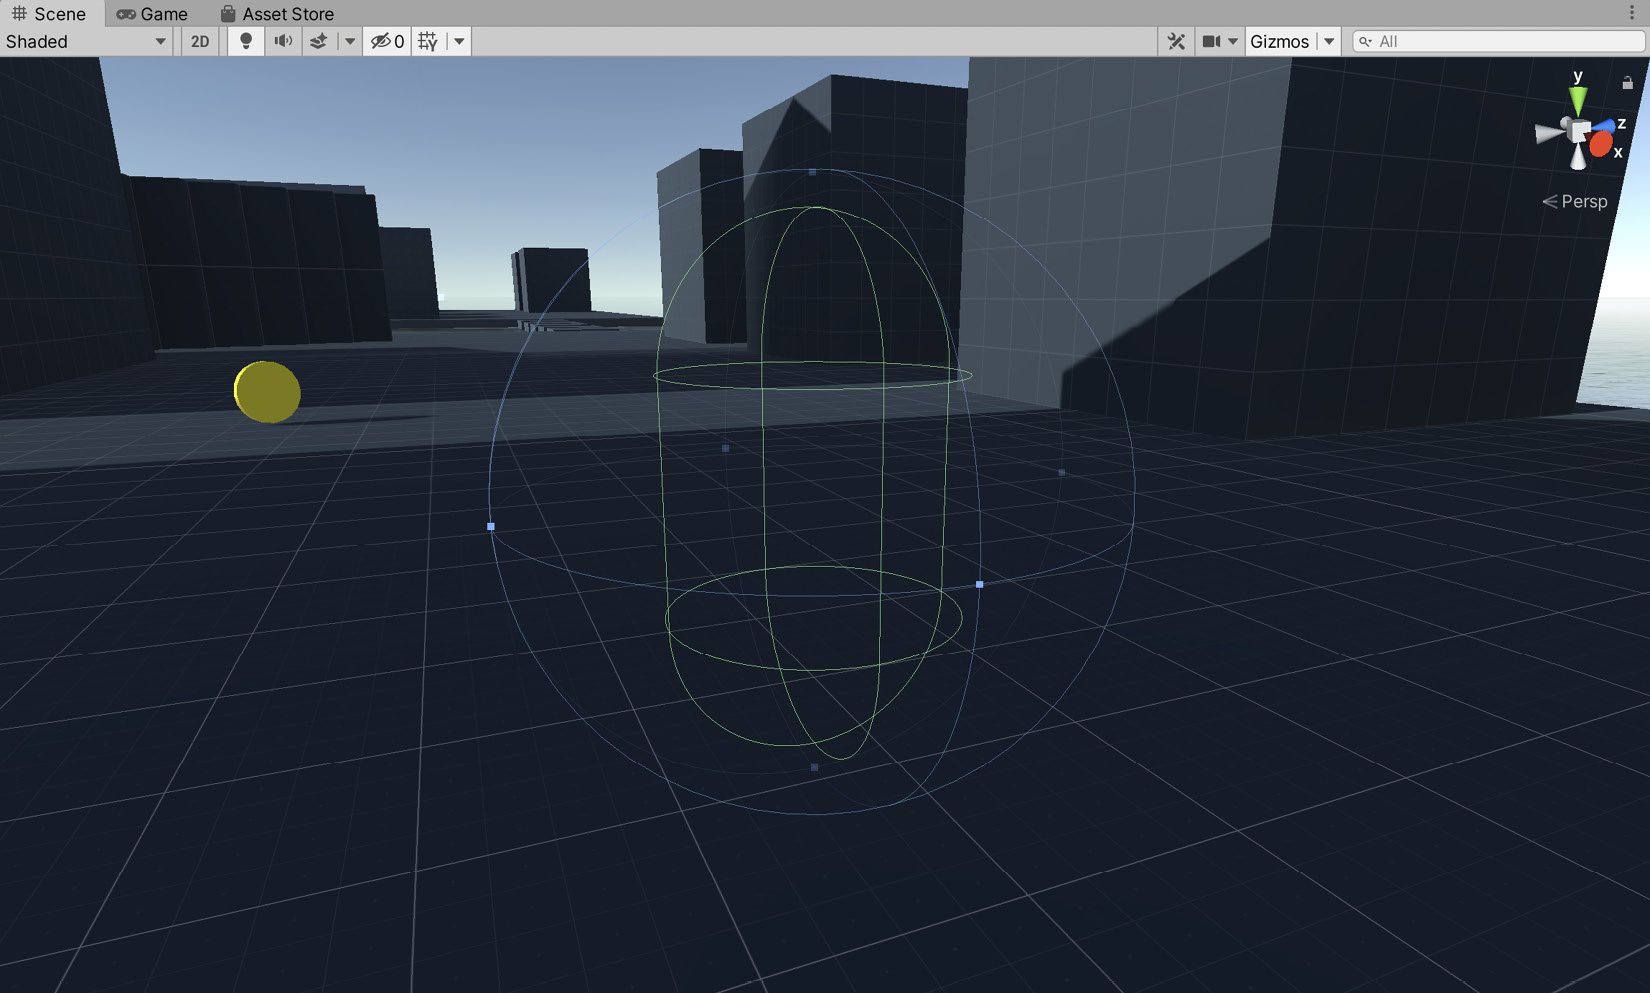
Figure 2.14 – The Character Controller component features a collider to approximate the player's body
Important note
The Character Controller inherits from Collider and provides specialized movement behavior on top of the functionality offered by the Collider component. It is more common (and better practice) to add a collider as a component and then write a script that interacts with the Collider component but doesn't inherit from it. We'll follow this pattern when we create the movement for the player's ship in Chapter 3, Creating a Space Shooter.
FPSController has a Character Controller component attached, which is configured by default with a radius, height, and center. These settings define the physical extents of the character in the scene. These settings can be left unchanged for our game:
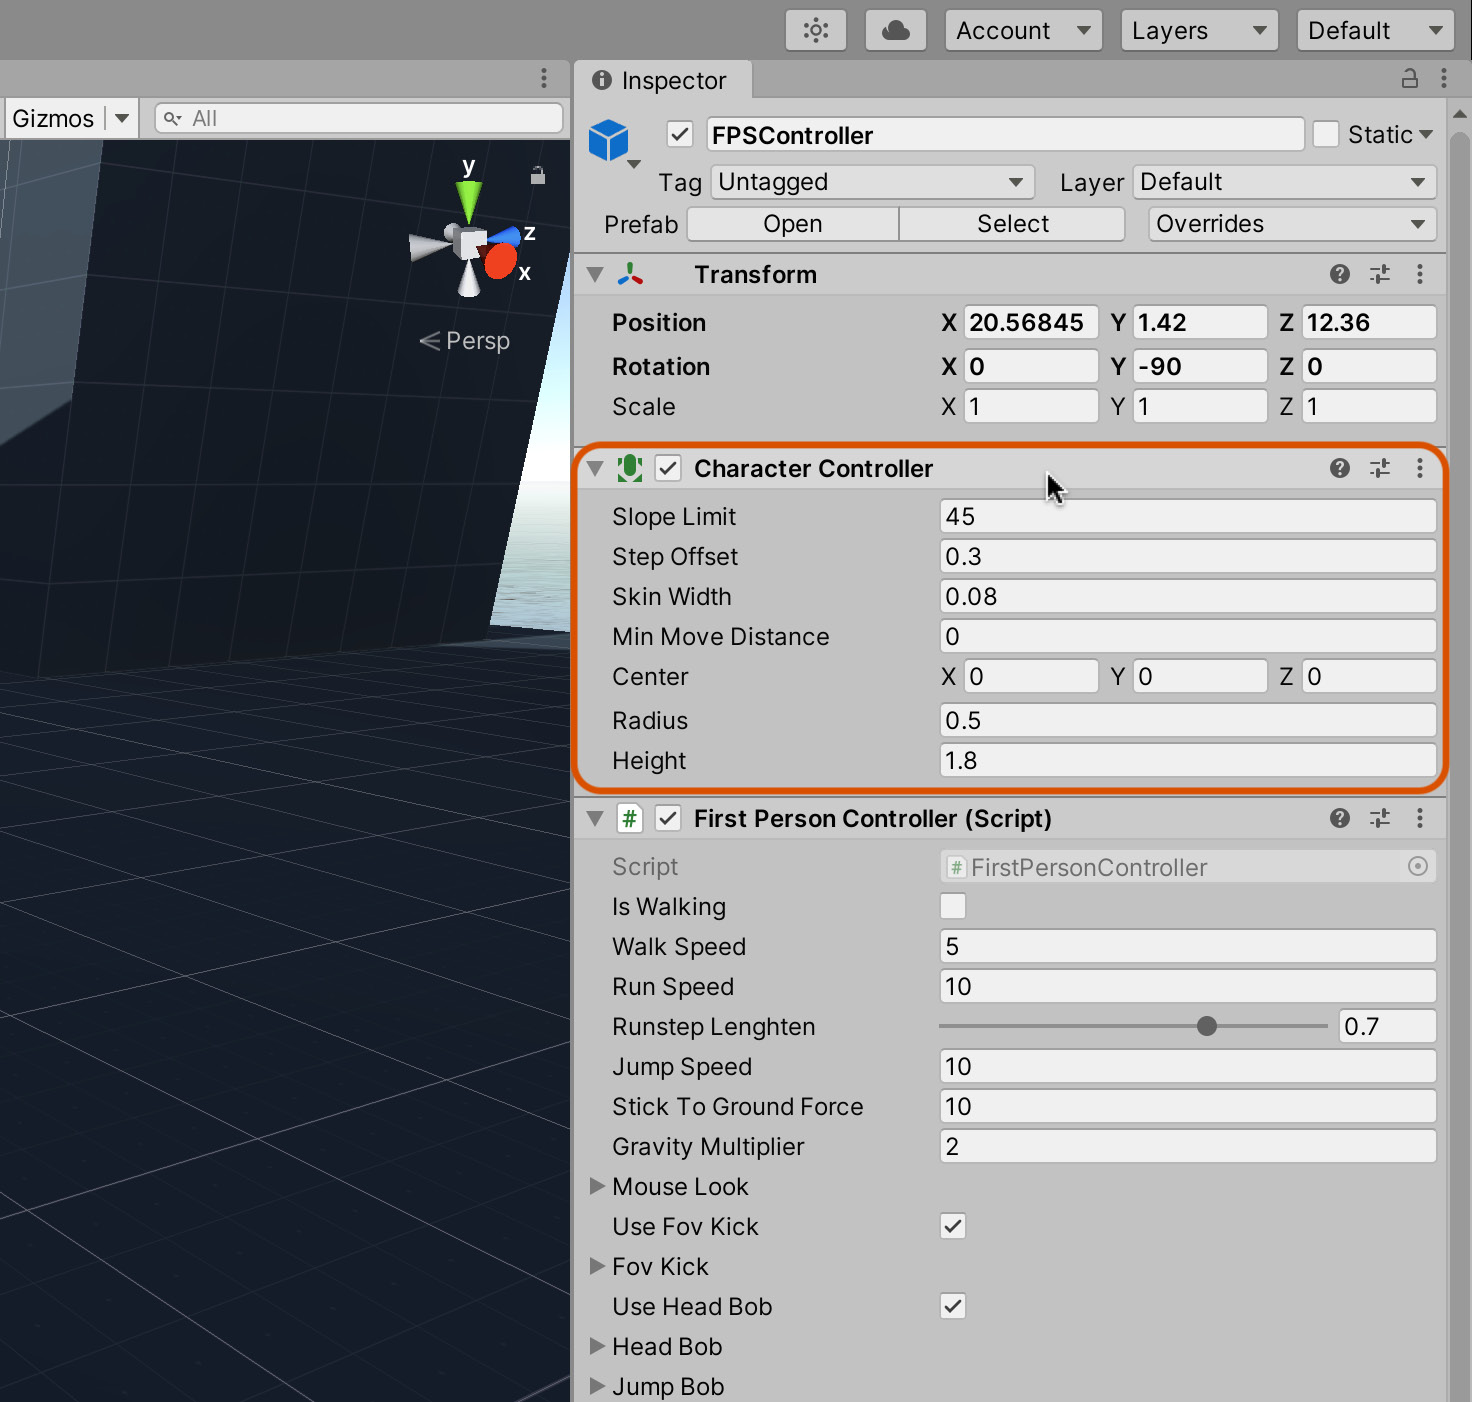
Figure 2.15 – FPSController features a Character Controller component
The Coin object, in contrast, features only a Capsule Collider component, which was automatically added when we created the cylinder primitive earlier. This collider approximates the coin's physical volume in the scene without adding any additional features specific to characters and motion. This is perfect for our needs as the coin is a static object, not a moving and dynamic object like the FPSController. The Capsule Collider is shown in Figure 2.16:
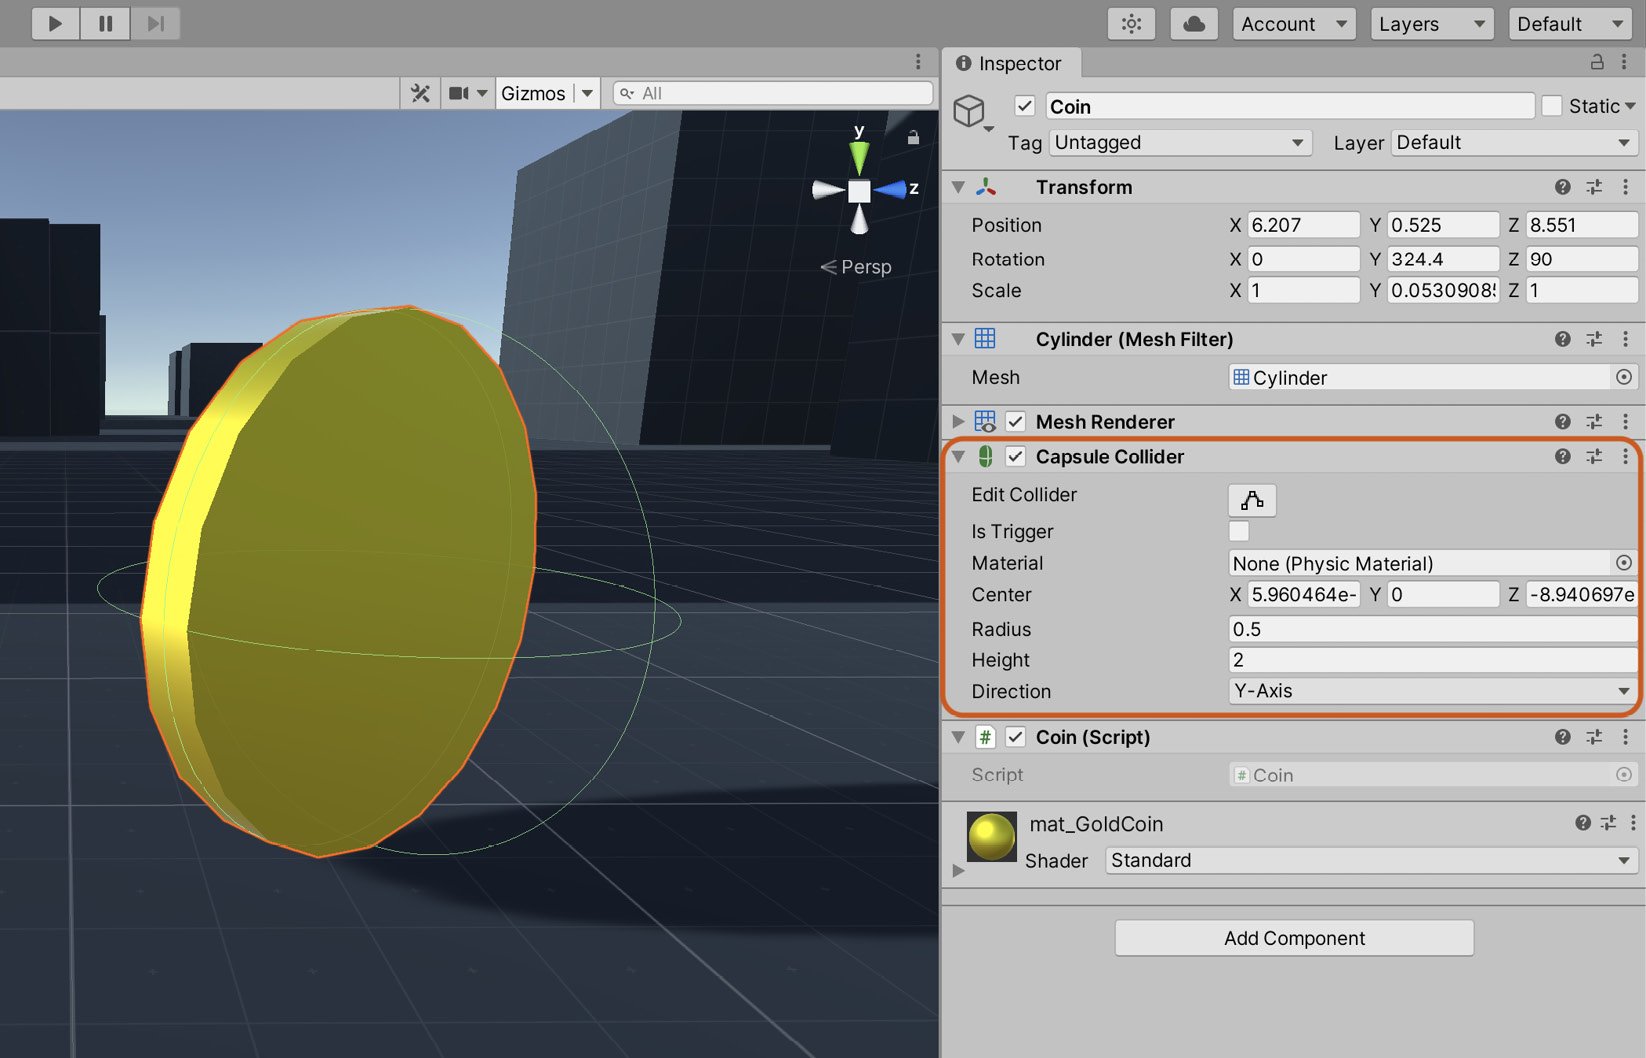
Figure 2.16 – Cylinder primitives feature a Capsule Collider component
For this project, we'll continue to use a Capsule Collider component for the Coin object. If you want to change the attached collider to a different shape instead, you can do this by doing the following:
- Click on the cog icon of the component in the Inspector.
- Select Remove Component from the context menu, as shown in Figure 2.17:
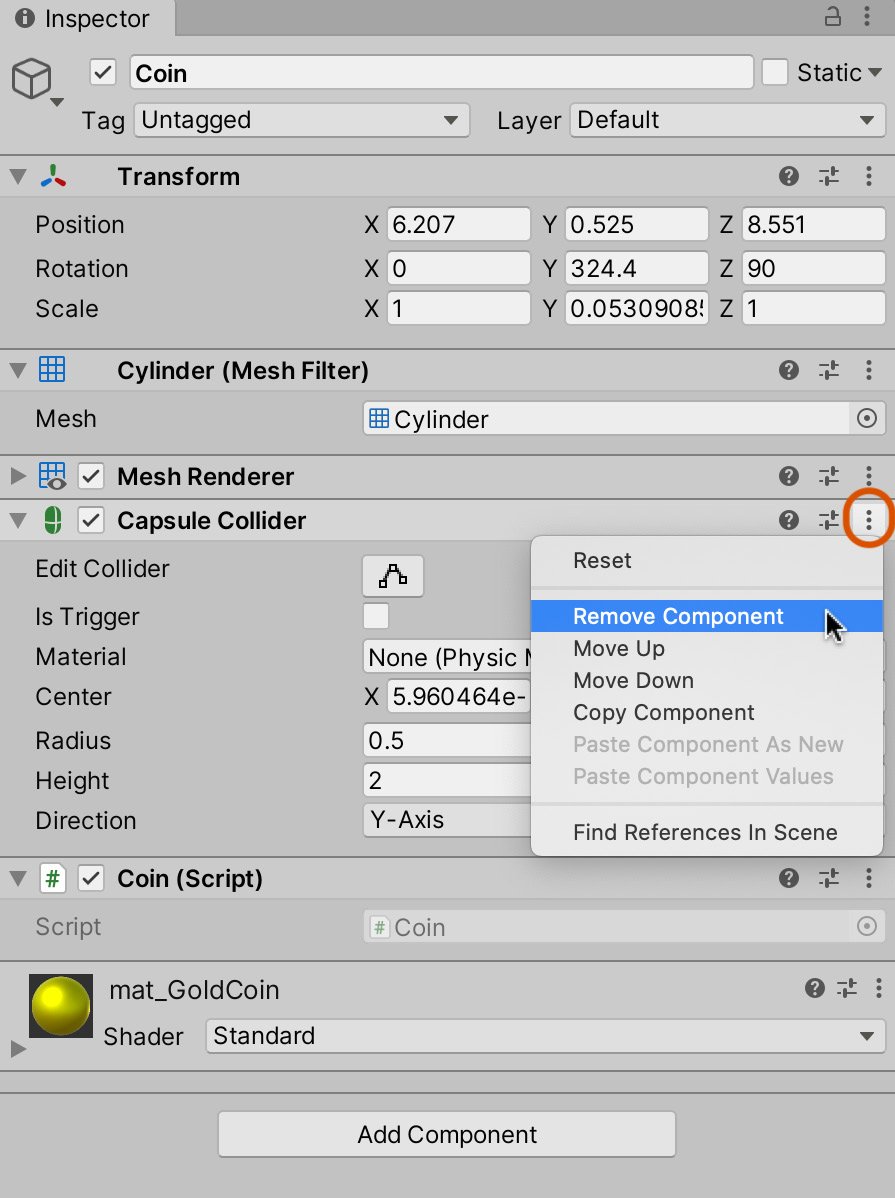
Figure 2.17 – Removing a component from an object
Add a new collider component to the selected object by choosing Component | Physics from the application menu and choosing a suitably shaped collider:
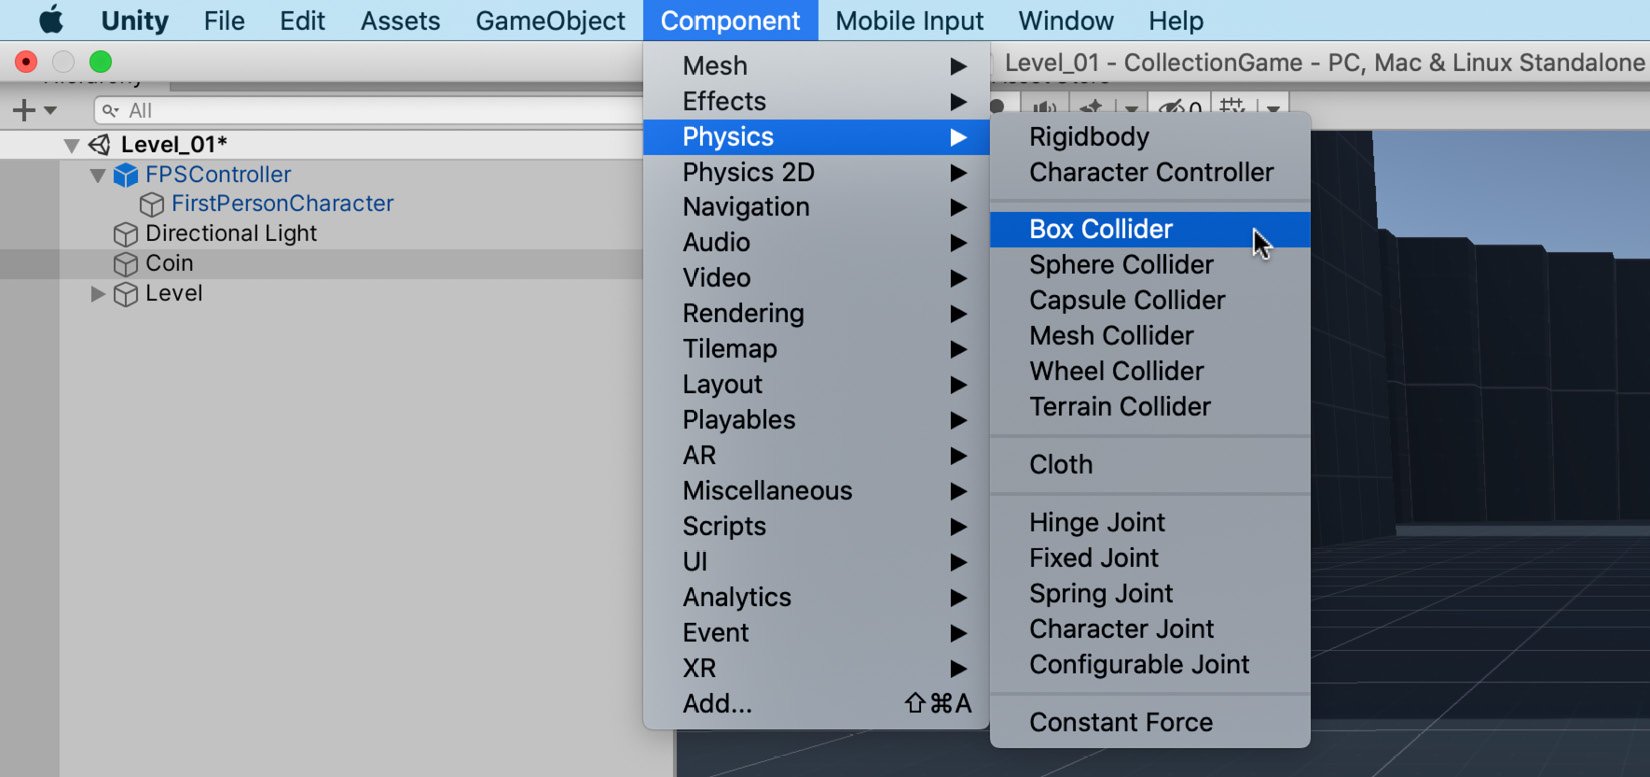
Figure 2.18 – Adding a component to the selected object
Regardless of the collider type used, there's a minor problem. If you play the game now and try to run through the coin, it'll block your path. The coin acts as a solid, physical object through which the FPSController cannot pass. However, for our purposes, this isn't how the coin should behave. It's supposed to be a collectible object—one that we can walk through. To fix this, take the following steps:
- Select the Coin object.
- Enable the Is Trigger checkbox on the Capsule Collider component in the Inspector:
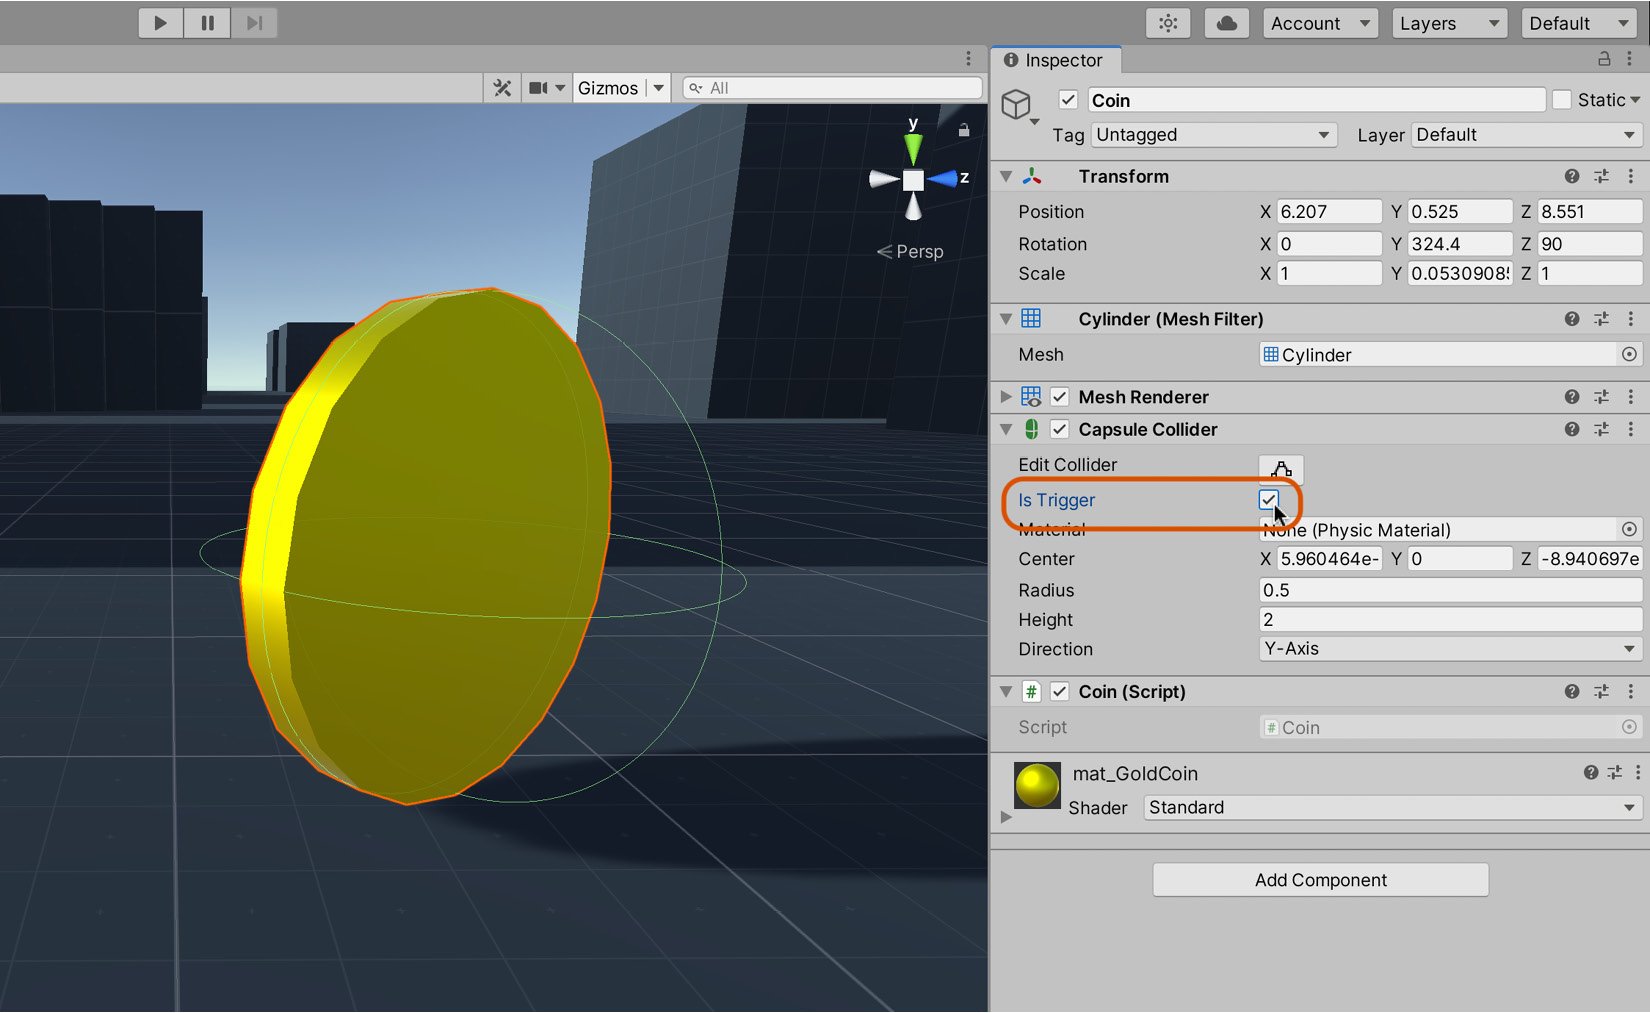
Figure 2.19 – The Is Trigger setting allows objects to pass through colliders
The Is Trigger setting appears for almost all collider types. It lets us detect collisions and intersections with other colliders while allowing them to pass through. With the collider attached, and properly configured, we can update the Coin.cs script to count the number of coins collected.
Counting coins
If you play the game now, the FPSController will be able to walk through the coin objects in the scene. However, the coins don't disappear when touched; they still don't get collected. To achieve this, we'll need to add additional code to the Coin.cs file. Specifically, we'll add an OnTriggerEnter function. This function is automatically called when an object, like the player, enters a collider. For now, we'll add a Debug.Log statement to print a debug message when the player enters the collider for test purposes:
public class Coin : MonoBehaviour
{
…
    void OnTriggerEnter(Collider Col)
    {
        Debug.Log ("Entered Collider");
    }
}
Tip
More information on the style function can be found in the online Unity documentation here: https://docs.unity3d.com/ScriptReference/MonoBehaviour.OnTriggerEnter.html.
Test Code Sample 2.4 by pressing play on the toolbar. When you run into a coin, the OnTriggerEnter function will be executed and the message will be displayed. However, the question remains as to what object initiated this function in the first place. Something indeed collided with the coin, but what exactly? Was it the player, an enemy, a falling brick, or something else? To check this, we'll use a feature in Unity called Tags.
Working with Tags
The Tag attribute lets you mark specific objects in the scene with a label. We can then use this label in our code to identify which object is colliding with the coin. After all, it should only be the player that can collect coins. So, firstly, we'll assign the player object a Tag called Player:
- Select the FPSController object in the scene.
- Click on the Tag drop-down box in the Inspector.
- Select the Player Tag:
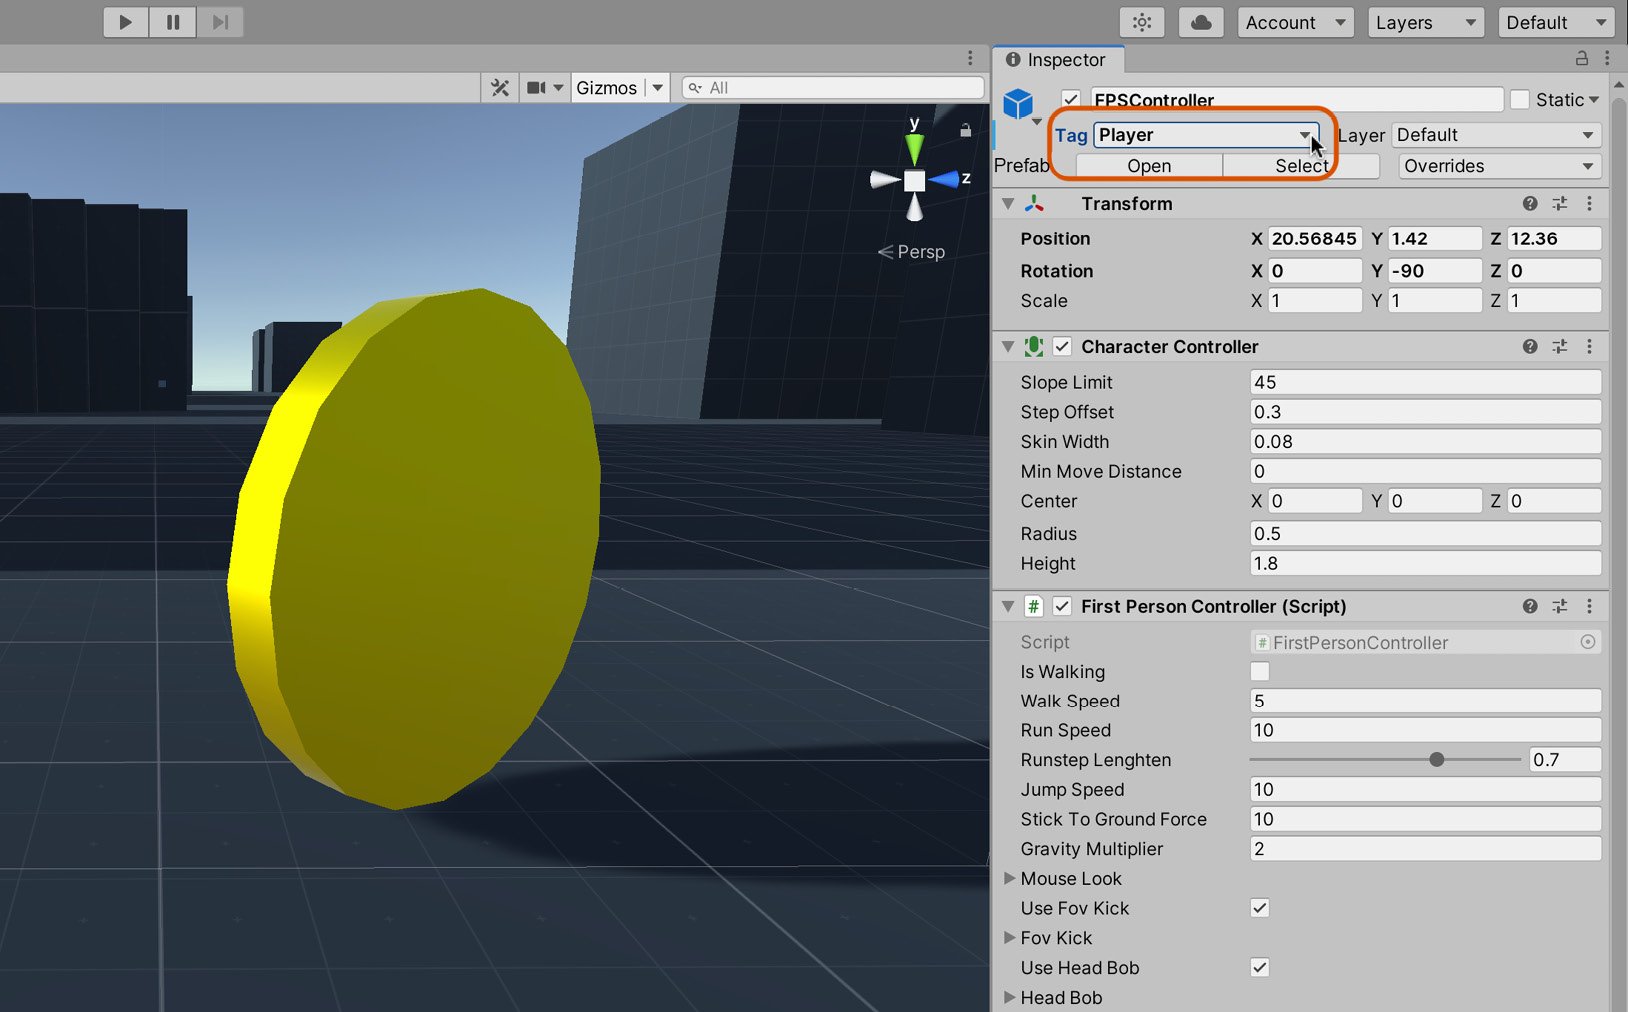
Figure 2.20 – Tagging FPSController as Player
With FPSController now tagged as Player, we can refine the Coin.cs file, as shown in Code Sample 2.5. This change handles coin collection, making coins disappear on touch and decreasing the coin count:
using UnityEngine;
using System.Collections;
public class Coin : MonoBehaviour
{
   …
   void OnTriggerEnter(Collider Col)
   {
      //If player collected coin, then destroy object       if(Col.CompareTag("Player"))
      {
          Destroy(gameObject);
      }
   }
}
The following points summarize the code sample:
OnTriggerEnteris called once automatically by Unity each time an object intersects theCoinobject.- When
OnTriggerEnteris called, theColargument contains information about the object that entered the collider on this occasion. - The
CompareTagfunction determines whether the colliding object is thePlayeras opposed to a different object. - The
Destroyfunction is called to destroy theCoinobject itself, represented internally by the inherited member variable,gameObject. This call removes the coin from the game. - When the
Destroyfunction is called, theOnDestroyevent is invoked automatically, which decrements the coin count.
When two objects with colliders intersect, several different script events can be called. Factors that affect which (if any) event function is called include the following:
- Does the object have a Rigidbody component attached?
- Is the collider set as a trigger?
- Is the Rigidbody component kinematic or not?
- Is the collider 2D or 3D?
We will discuss these combinations and which events they call in more detail as we progress through the book. For now, it's enough to know that because we've haven't added a Rigidbody component to our coin object, and the collider is a Trigger, the object has a static trigger collider. When an object has a static trigger collider, the OnTriggerEnter function will be called when colliding with any object that has a 3D Rigidbody and a 3D Collider component attached, such as the Character Controller.
Tip
You can find the complete collision action matrix here: https://docs.unity3d.com/Manual/CollidersOverview.html.
Excellent work! You've just created your first working coin. The player can now run into the coin, collect it, and remove it from the scene. Next up: adding additional coins to the scene. We could duplicate the existing coin many times and reposition each duplicate. However, there's a better way, as we'll see shortly.


