Exploring ns-3 code easily using the Code::Blocks editor
After installing ns-3, the most exciting task is writing the first simulation program. Thanks to ns-3 for providing various tutorials and example programs in various modules. We strongly recommend ns-3 beginners start by copying the example programs and understanding their source code using editors such as Code::Blocks and Visual Studio. This will help users to understand key packages, classes, fields, and member functions used in various programs. Moreover, while writing or editing programs, the IntelliSense features of the editors will help users to learn all the basic and unique features supported by ns-3 classes such as fields, constructors, member functions, attributes, callbacks, and trace sources. Hence, users can write their simulation programs easily and quickly by using the IntelliSense and auto-completion features of the editors. It saves a lot of time for users as they can use classes and all its features without searching the internet, ns-3 documentation, and example programs thoroughly. ns-3 offers support for the following editors, based on operating system: Code::Blocks for Ubuntu and Visual Studio for Windows. In this book, we use the Code::Blocks editor.
Installing and configuring Code::Blocks for ns-3
Let’s start by installing Code::Blocks and creating an ns-3 Code::Blocks project:
$ apt-get install codeblocks
By default, the Code::Blocks editor does not support ns-3 projects. Hence, it is necessary to create a ns-3 Code::Blocks project using the following command from the ns-3 installed directory (ns-allinone3.36/ns-3.36):
$./ns3 configure -G"CodeBlocks - Unix Makefiles" --enable-examples
The preceding command creates an NS3.cbp Code::Blocks project file inside cmake-cache. This is a Code::Blocks project file that can be opened by the IDE. Now, open the Code::Blocks editor. Then, move to File | Open | ns-allinone3.36 | ns-3.36 | cmake-cache and select the NS3.cbp file. It opens the NS3 project, as shown in Figure 1.5:
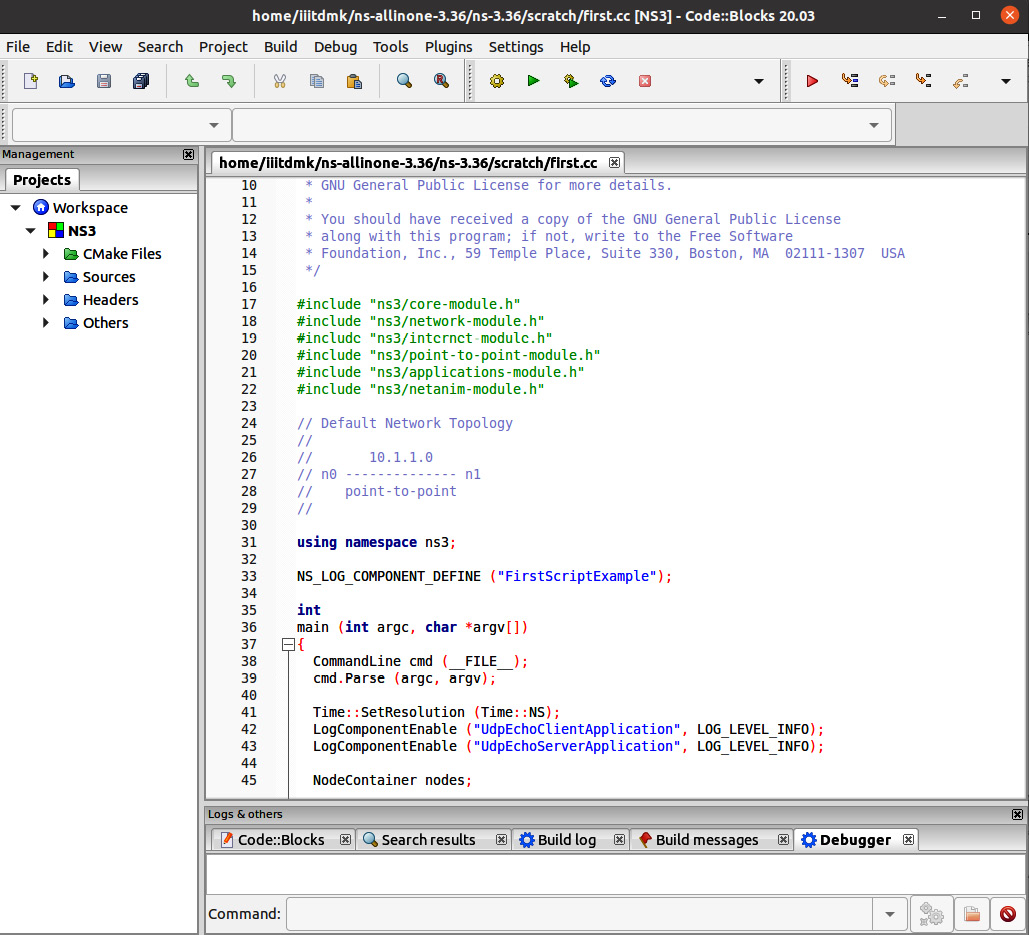
Figure 1.5 – The ns-3 project opens in the Code::Blocks editor
Next, quickly check the project properties to run a sample first simulation. It opens the window shown in Figure 1.6. In the window, no project settings need to be changed but make sure you check the Build targets tab. Under the selected Build targets options panel, select the Type drop-down menu, then select Console application and click OK.
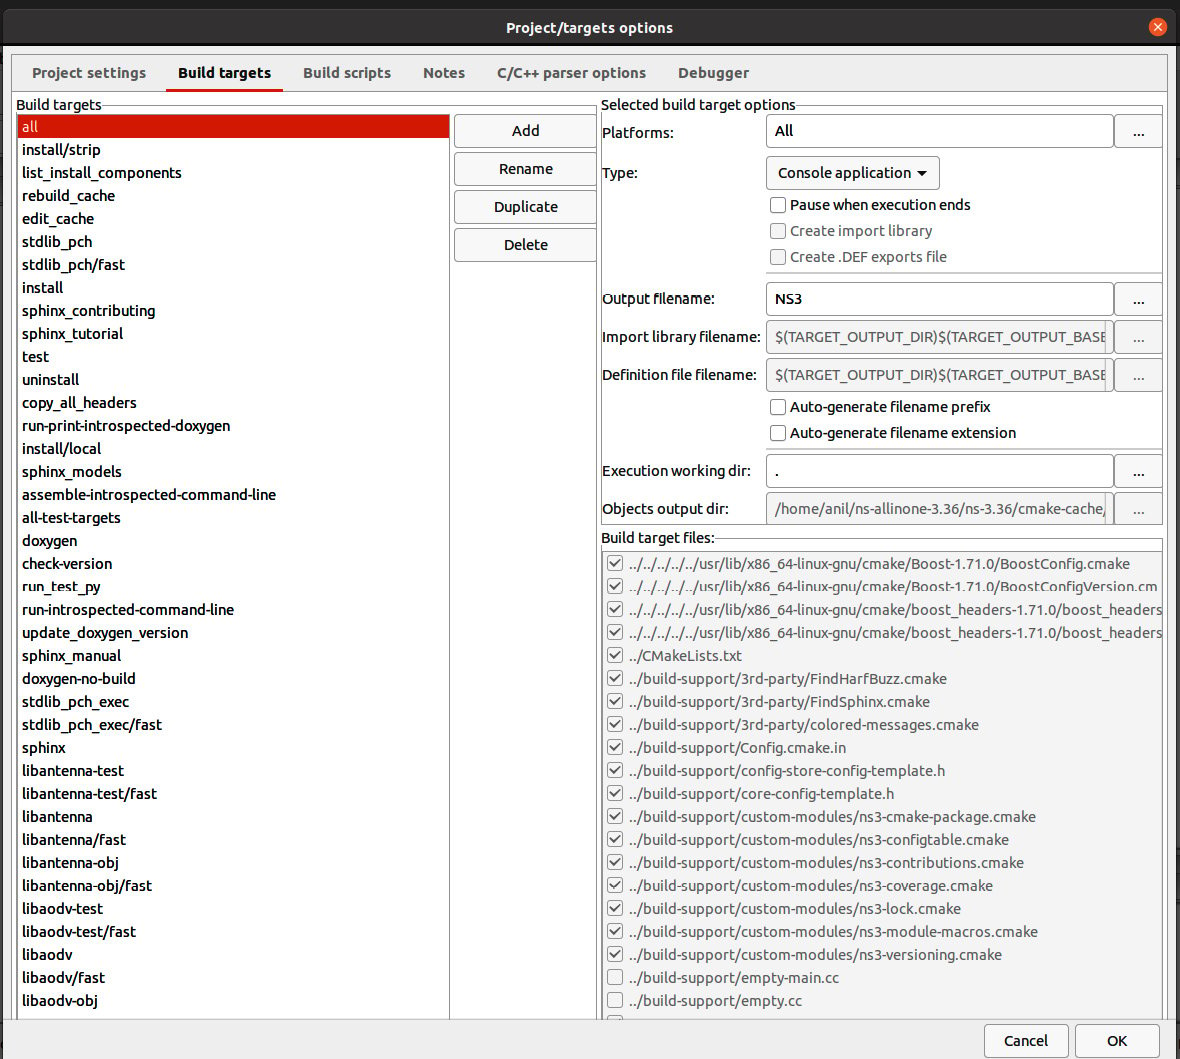
Figure 1.6 – The Code::Blocks project properties window
Next, execute a first.cc simulation. Go to the Build menu, then Select target. It opens the following window (refer to Figure 1.7). Type scrach_first to run your first simulation. Select the Run button from the editor to execute the first simulation:
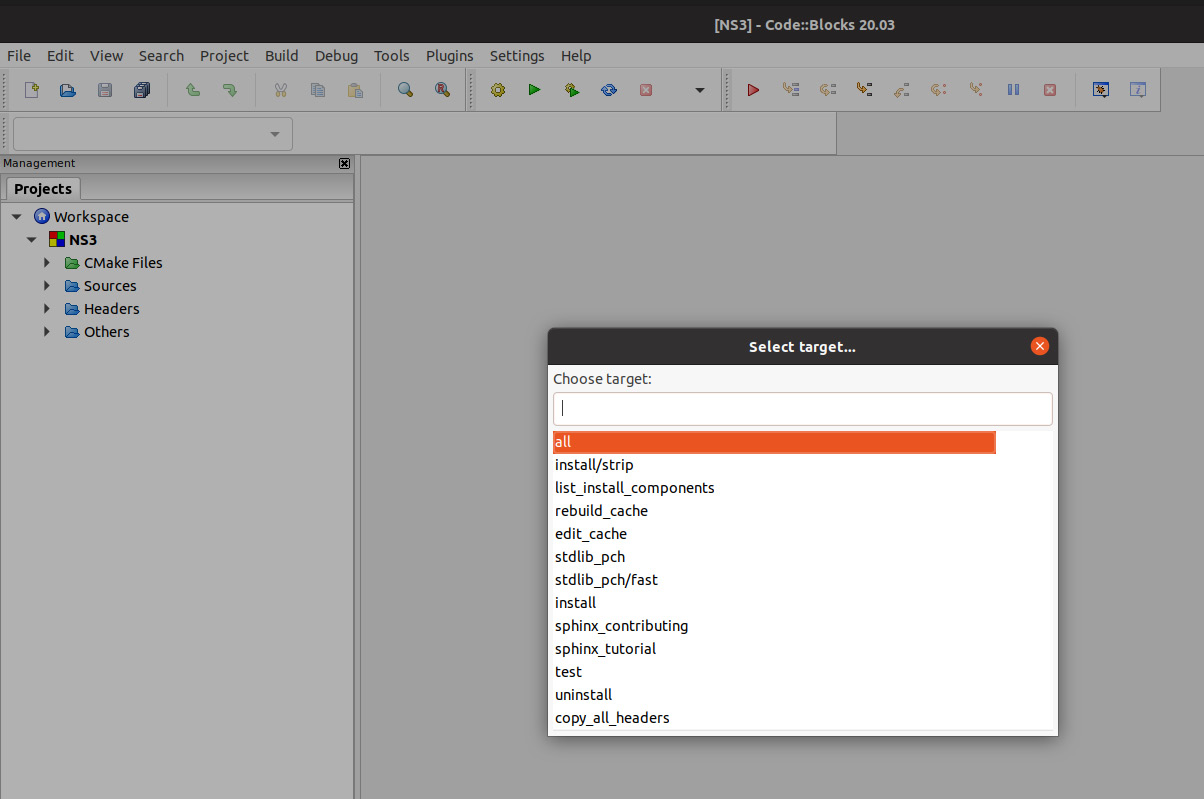
Figure 1.7 – The Code::Blocks window to select a target for execution
By clicking on the Run button, it successfully executes the first simulation, as shown in Figure 1.8. It displays output in a new window. This was just a demonstration of how to select a simulation program from the Code::Blocks editor and execute it:
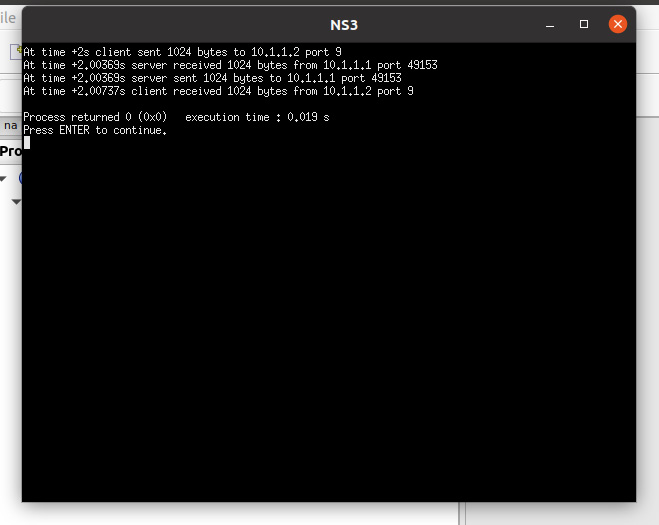
Figure 1.8 – The first.cc simulation execution results
Next, we are going to explore the ns-3 module’s source code using the Code::Blocks editor.
Exploring various ns-3 modules’ source code
Under the Code::Blocks editor Workspace, you can see NS3 project folders (refer to Figure 1.9). Select Sources and traverse to the src folder. Then, you can see the following ns-3 modules list, including antenna, aodv, and applications:
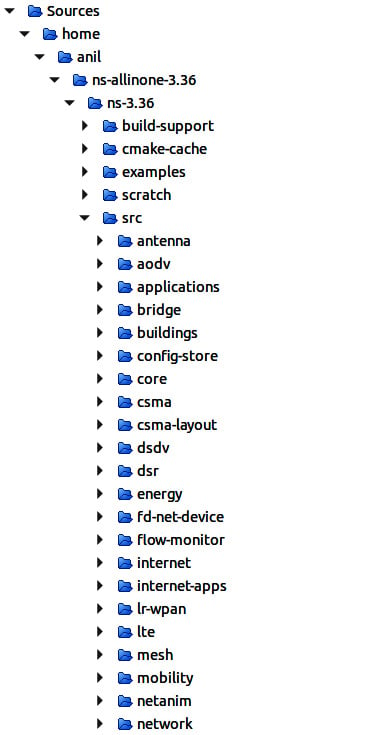
Figure 1.9 – The Code::Blocks editor Workspace
In ns-3, every module implementation follows a hierarchy. For an example, we will explore the lte module and its underlying folders (refer to Figure 1.10):
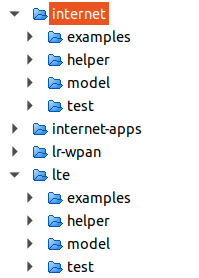
Figure 1.10 – An ns-3 example module (lte) and its common folders
As we can observe, there are four folder names – examples, helper, model, and test:
- The model folder contains all LTE protocols’, architecture’s, interfaces’, and algorithms’ source code. Developers can explore the model folder and its source files to make changes in LTE core-level source code. For example, developers use
lte-enb-mac.ccto change any LTE base station (BS)’s medium access control (MAC) protocol changes. - The examples folder contains sample LTE simulation programs, which can be used by end users to understand how to write LTE simulations. For example, users can explore
lena-x2-handover.ccto understand how to write a mobility scenario in LTE networks. - The helper folder contains source code useful for setting up simulation programs. To set up LTE network simulation, end users use helper classes of
lte-helper.ccandepc-helper.cc. Usually, the helper folder contains all helper classes for setting up network architectures, interfaces, and protocols. - The test folder contains the source code of various unit test cases for the module. For example, the lte test folder contains all of the various test programs for checking LTE nodes’ behavior, protocols, interfaces, and algorithms.
All ns-3 modules follow the same folder hierarchy. Hence, it is important for developers and users to understand its hierarchy to make any changes.
Next, we’ll see how the Code::Blocks editor is useful for writing ns-3 simulation programs. The Code::Blocks IntelliSense and auto-completion features are also available for ns-3 programs as they are for C++ programs. Let’s open first.cc and see how useful the Code::Blocks editor is for making any changes or writing new lines of code. As we are new to ns-3 programming, it is important to understand and remember various classes’ syntax and semantics. Using a regular editor will not help you in terms of auto code completion and IntelliSense features. As ns-3 is configured as a Code::Blocks project, it is possible to use Code::Blocks editor features to write ns-3 programs like C or C++ programs.
You can use the auto code completion feature by typing the first few characters of an ns-3 class, field, or member function. For example, if you type NodeC, the editor will suggest the NodeContainer class. More importantly, due to the IntelliSense feature, we can view a complete description of any class (refer to Figure 1.11), field, or member function before including it in our code:
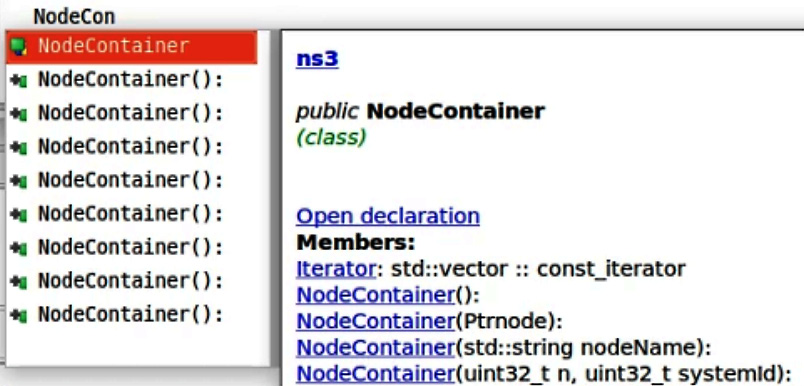
Figure 1.11 – Inspect the ns-3 NodeContainer class
For example, while typing NodeC, it opens a class description in a window. We can click Open declaration to see the entire class definition or we can scroll down the window to see its members, fields, iterators, constructors, attributes, and so on. As a beginner, it is difficult to write an ns-3 program from scratch, hence we recommend that you use example programs, understand them, and modify them using Code::Blocks or any ns-3-supported editor.
That’s great. We have learned how to integrate ns-3 as a Code::Blocks project and explored ns-3 modules’ source code structure. In the next section, we will start understanding an ns-3 simulation program’s structure to write simulation programs.


