Evaluating your efficiency
Remember – inefficiency does not mean that the method is inaccurate or wrong. Your output may be correct, but there is a better, faster, smarter way to do the job. If you knew about the better way, you could have saved time and used it somewhere else to your advantage.
The question is, who is going to tell you that? Is anybody checking how you work using Office tools? Most probably not. You must do it yourself.
Sounds complicated? Not at all. Let's do some quick tests.
Before we go ahead, let's learn exactly what inefficiency means and how much difference efficiency makes. We will take three examples: one with Word, one with Excel, and one with PowerPoint. You can choose which one you want to try.
Fitting a table in a Word doc
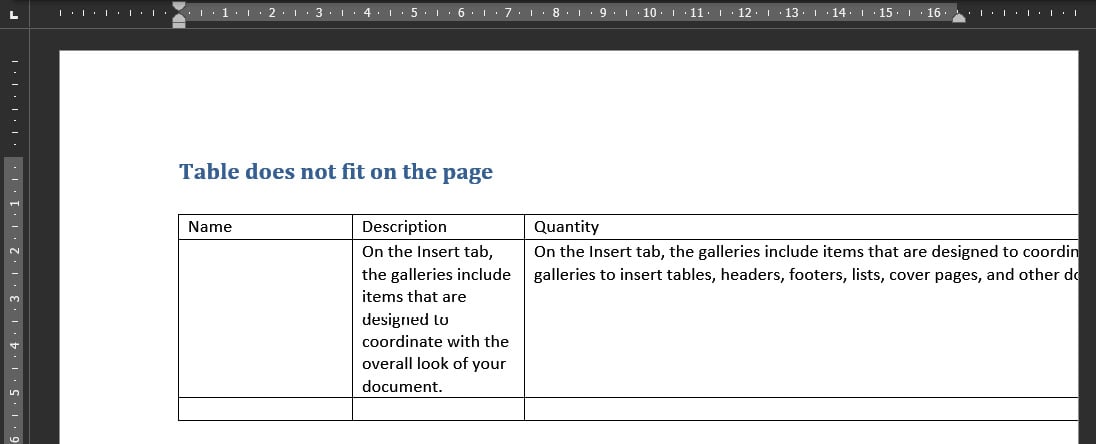
When we copy and paste a table from Excel or a web page, it often goes beyond the Word page boundary, like this:

Figure 1.1 – Table exceeding document width
This is a frequent problem. Do you know how to adjust it to fit on the page? Of course, you do. But what process did you use? Think about it.
Use the Ch1 - Table not fitting in page.docx file from the Chapter 01 folder in the sample files.
Here is the efficient method:
- Click anywhere inside the table. There's no need to select the table, just click inside it.
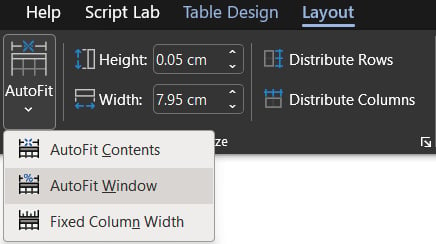
- Open the Layout tab and choose AutoFit | AutoFit Window:

Figure 1.2 – Adjust your table width efficiently
Compare this with your method, and you will know the difference.
Editing formulas in Excel
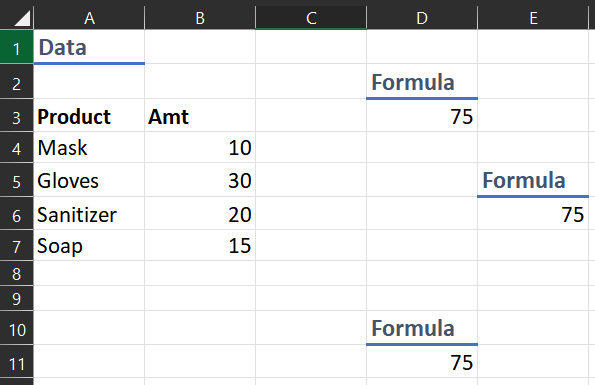
Every time we add data in Excel, we need to change the formulas that depend upon that range. This is repetitive work. We may not even know how many formulas we need to update. But we have to do this every time data is added. Is that really my job? Am I supposed to help Excel? Or is it the other way around?
Use the sample Ch 1 – Data and Formulas.xlsx to get the answer of the above question.
Note
There is a Trace Dependents option, but most of us do not know about it or use it regularly.

Figure 1.3 – Data and formulas
Now try this. After adding the data, create a table and then add formulas. Now add more data; the formulas will update automatically. Watch this video and see for yourself how easy it becomes:

Why a video? Why not just write the steps here with screenshots? Well, watching a video shows the real, practical way to do it. You learn faster and you can even practice it yourself. Short, fast, and effective.
Tip
Always use Excel tables. It saves time and promotes accuracy.
Using the Send to Back option in PowerPoint
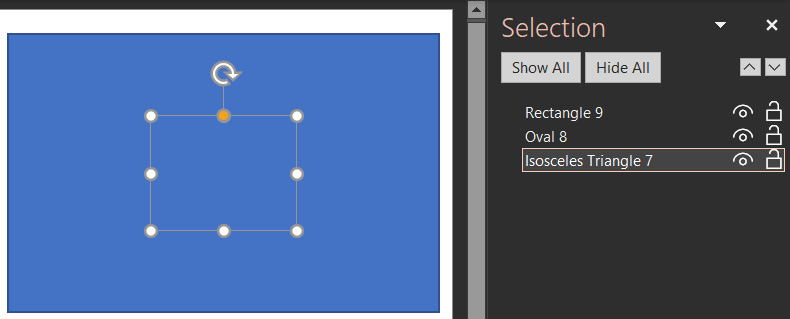
In this presentation, we have three objects on top of each other. The object in front is easy to edit. But how do we quickly edit the shapes that are behind others? Think about what you would do… manually move them around to remove overlap, or struggle with Send to Back?
Use the sample Ch1 - Send to back.pptx file from the Chapter 01 folder.
Of course, there is a better way. Go to the Home tab | Select | Selection Pane.... Now you can see all the items as a list. Select the one you want and edit it. You can edit it even if you cannot see it.
Tip
Always keep the Selection Pane open. PowerPoint editing will become much simpler and faster.

Figure 1.4 – Selection Pane – your best friend in PowerPoint
Now that we are aware of inefficiency, let's see how we can identify it.


