Creating an AWS Account
In later chapters in this book, you will be able to complete hands-on labs using the AWS tools and services. To complete these labs, you will need an AWS account.
Creating and setting up an AWS account, generating access keys, and installing the AWS CLI involves several steps. Here is a detailed guide to walk you through the process:
- Go to the AWS home page: https://aws.amazon.com/.
- Click on
Create an AWS Account, as shown in Figure 1.8:

Figure 1.8: Creating an AWS account
- Fill in your email address, password, and account name.
- Choose
PersonalorProfessionaland provide the necessary contact information. - Enter your credit card details. AWS will make a small charge to verify the card, which is later refunded.
- Confirm your identity via a phone call and by entering the PIN displayed on the screen.
- Select an appropriate support plan. The basic plan is free.
- Once the account is created, sign into your new AWS account.
Creating an IAM User and Access Keys
You can follow the given instructions to create an IAM User and Access Keys:
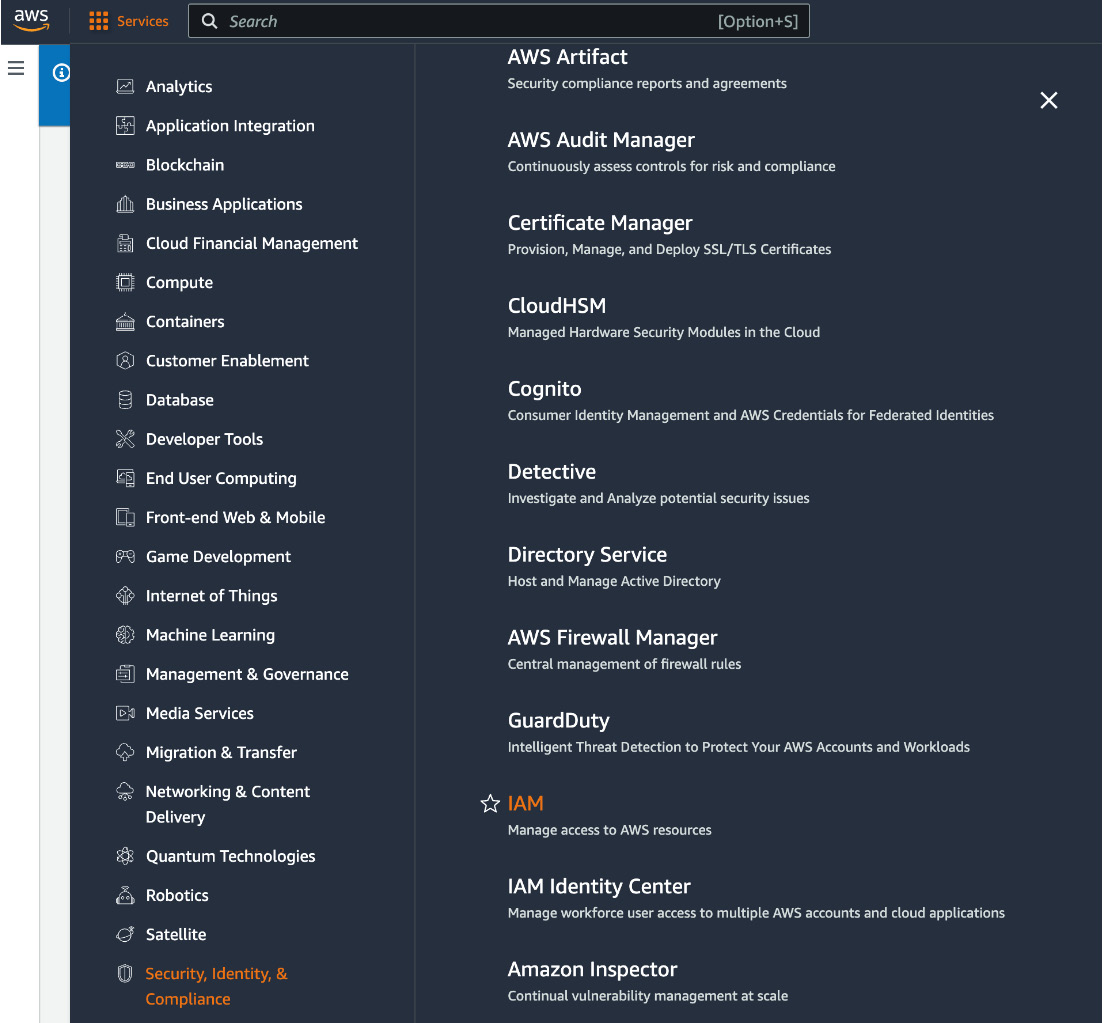
- In the AWS Management Console, go to
Servicesand selectIAMas shown in Figure 1.9:

Figure 1.9: Navigate to IAM
- Click on
Usersand thenAdd user. - Enter a username and select
Programmatic accessfor the AWS Management Console access type. - Attach existing policies directly and select
Administrator Accessfor full access. Alternatively, choose specific permissions based on your needs. - Review the details and create the user.
- Once the user is created, download the
.csvfile or store the access key ID and secret access key. This is needed to use the AWS CLI.
Installing the AWS CLI
To install the AWS CLI for Windows, follow these steps:
- Go to the AWS CLI installation page and download the appropriate version for Windows.
- Open the downloaded MSI installer and follow the installation prompts.
- Open the Command Prompt and type
aws—versionto ensure that it’s installed.
To install the AWS CLI for macOS/Linux, follow these steps:
- In your Terminal, use the following command:
curl "https://awscli.amazonaws.com/AWSCLIV2.pkg" -o "AWSCLIV2.pkg"sudo installer -pkg AWSCLIV2.pkg -target /
- Type
aws—versionin the Terminal.
Configuring the AWS CLI
You can follow the given instructions to configure AWS CLI:
- On Windows, use Command Prompt or PowerShell. On macOS/Linux, use the Terminal.
- Type
aws configureand pressEnter. - Input your access key ID and secret access key.
- Enter your preferred AWS region (e.g.,
us-west-2). - Enter the desired output format (e.g., JSON).
Verify the Configuration
Run a simple AWS CLI command to list all the S3 buckets as a test – aws s3 ls.
If configured correctly, this should display a list of S3 buckets (if any exist) or return nothing without errors.
You now have an AWS account set up with an IAM user, and the AWS CLI is installed and configured on your machine, ready for use. Remember to handle your credentials securely and adhere to AWS’s best practices for IAM users and permissions.


