Creating a new project
It’s time to create your first project. To do that, you have two options:
- Click on the Launch button on a specific Engine version inside the Library tab. This will create a project running with this specific Engine version.
- Click on the Launch button on the top right of the Epic Games Launcher window. This will create a new project running with the version set as current.
If you have installed the Engine for the first time, you probably have only one version of the Engine. In this case, both options are identical.
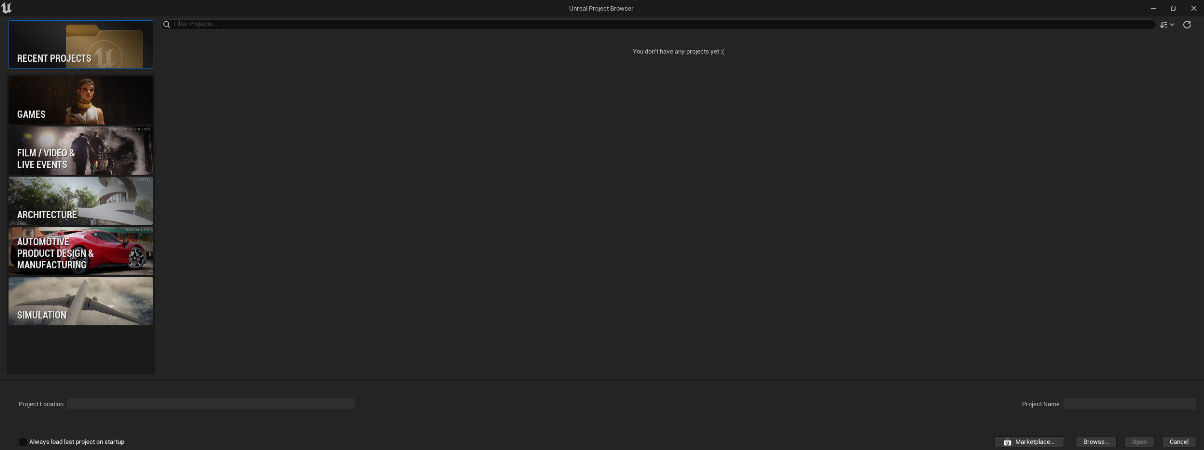
When you click on the Launch button, the Epic Games Launcher will be closed. It will take a while and then the Unreal Project Browser window will appear.

Figure 1.22 – The Unreal Project Browser window will open, showing the RECENT PROJECTS tab
You can open a project that was created in your library and if you don’t have any projects yet, this tab will be empty.
To create a new project, you need to browse one of the tabs on the left. Each of these tabs allows you to either create a blank project or create a project starting from a template.
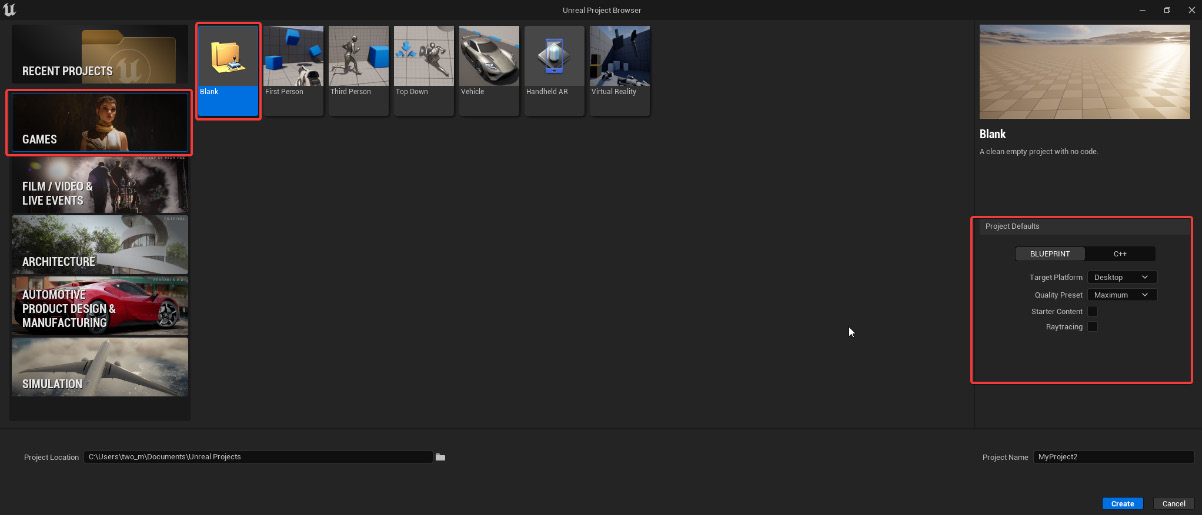
Let’s start with creating a blank game project:
- Click on the GAMES tab.
- Select the Blank project preset.
- Once you click on the GAMES tab, take a look at the Project Defaults section on the right.

Figure 1.23 – The Unreal Project Browser’s Games preset tab
Let’s go over the various options in this menu:
- Blueprint/C++: Here, you can choose whether you want to create a project based on Blueprint or a C++ project. For all the things we are going to create in this book, you will always need a Blueprint project.
Note:
Blueprints are a visual scripting system with a node-based interface. As with many common scripting languages, it is used to define object-oriented classes or objects in the Engine. It’s a very intuitive way to add complex code lines to your project as gameplay mechanics without the need to write code but it still is a code language that has to be learned. C++ is the most common scripting language in the game industry. To create a C++-based project, you need to compile the Engine from the source.
- Target platform: Here, you can choose the target platform for your project. You can choose between Desktop and Mobile. Desktop creates a project suitable for desktop platforms and consoles. Mobile creates a project that is already set to be playable on a mobile device. This means that the project will be created with different project settings according to your choice. You can choose Desktop.
- Quality preset: This is the quality setting of your project. You can choose between Maximum and Scalable. Maximum will set any options at the maximum value available for the target platform. Scalable will disable some complex features in favor of performances. You can choose Maximum. You can change these settings at any time directly inside the Engine.
- Starter content: If this option is checked, you will find a lot of interesting assets loaded inside your projects. This can be very useful at the beginning for study and test purposes and time saving for specific types of assets such as Niagara samples and shaders. You can use a project with starter content to follow the book’s first section.
- Raytracing: If this option is checked, the project will be set for using real-time Raytracing. We will learn how to use Raytracing and Lumen in Chapter 7. If you have the recommended system requirement, you can check this box.
Note
Real-time Raytracing has an impact on performance but also on final quality. You can also follow this book with a project without real-time Raytracing but you can’t use some explained features.
- Choose the location of your project from the Project Location option and name your project in the Project Name box. These options can be found at the bottom of the window:

Figure 1.24 – Here, you can choose the project location and name
Note
Unreal Engine projects are very heavy on local drive, in terms of both heaviness and loading time. Creating your project on a fast SSD disk is the best solution. Speaking about the name, spaces aren’t allowed. Unreal Engine also doesn’t like very long names (the maximum limit is 20 characters).
- When you’ve set everything, click on Create.
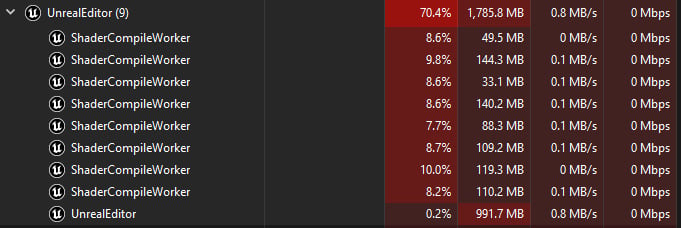
When you create a project or open a project for the first time, Unreal Engine will take some time to create everything it needs and compile all the shaders. If the loading seems to be stuck at 45%, don’t worry – it’s normal! You can check this in the Task Manager. Search for the UnrealEditor process and click on the left arrow near the process name to expand the UnrealEditor process. Here, you will find the shader compiler. It can take several minutes.

Figure 1.25 – You can check the Unreal Engine’s loading status inside Windows Task Manager
Now that we know how to create a new project from a draft, in the next section, we will learn how new project templates work and how to use them to create a new project.


