Setting up the SD card on Windows
This recipe will explain how to set up the SD card using a Windows operating system.
Getting ready
To prepare your image and the SD card on Windows, you will usually need the following software ingredients:
- A downloaded image from the previous recipe
- 7-Zip
- SD Formatter
- Win32 Disk Imager to write Linux-based operating systems
- PhoenixCard to write the Android operating system
Note
The upcoming screenshots are showing image files for the Banana Pro. If you are using the Banana Pi, make sure to download and burn the image files for the Banana Pi.
How to do it…
In the upcoming steps, we will unpack the archive containing the operating system image for the Banana Pi and write the image to the SD card:
- Open the downloaded archive with 7-Zip. The following screenshot shows the 7-Zip application opening a compressed
.tgzarchive: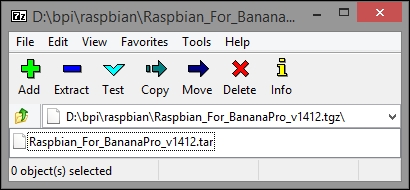
- Unpack the archive to a directory until you get a file with the file extension
.img. If it is.tgzor.tar.gzfile, you will need to unpack the archive twice. The following screenshot shows the final image file with the file extension.imgand the unpacked and compressed.tgzarchive: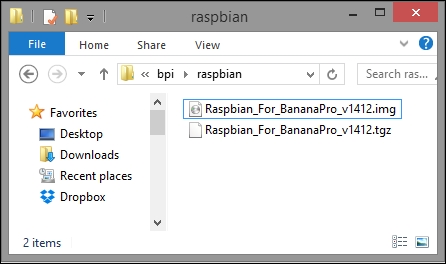
- Create a backup of the contents of the SD card as everything on the SD card is going to be erased unrecoverablely.
- Open SD Formatter and check the disk letter (E:\ in the following screenshot).
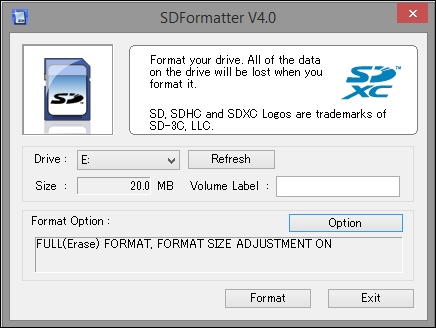
- Choose Option to open the Option Setting window and choose:
- FORMAT TYPE: FULL (Erase)
- FORMAT SIZE ADJUSTMENT: ON
- When everything is configured correctly, check again to see whether you are using the correct disk and click Format to start the formatting process.
Writing an Android image to the SD card on Windows
In the following steps, we are writing an Android image to the SD card using Windows:
- Execute
PhoenixCard.exe. - Choose the Android image file by clicking on Img File.
- Choose the write mode Startup and click on Format to Normal.
- You will see a message, that the formatting was successful.
- After the formatting, click on Burn while leaving the write mode as Startup. After a few minutes, your SD card should be ready to boot up Android on the Banana Pi.
The following screenshot shows the PhoenixCard application where the image has been successfully written:
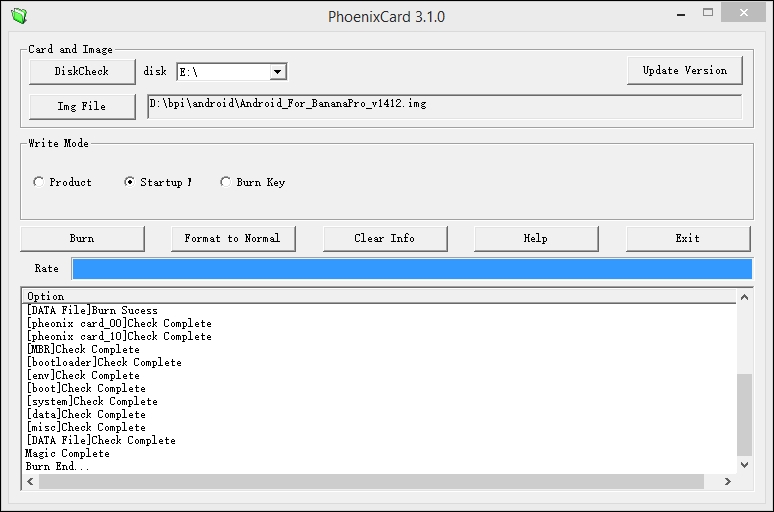
Now you can insert the SD card into your Banana Pi and power it up. After the booting process, you will see the Android operating system.
Writing a Linux distribution image to the SD card on Windows
The following steps explain how to write a Linux-based distribution to the SD card on Windows:
- Format the SD card using SD Formatter, which we covered in the previous section.
- Open the Win32 Disk Imager.
- Choose the image file by clicking on the directory button.
- Check, whether you are going to write to the correct disk and then click on Write. The next screenshot shows the writing operation of Win32 Disk Imager:
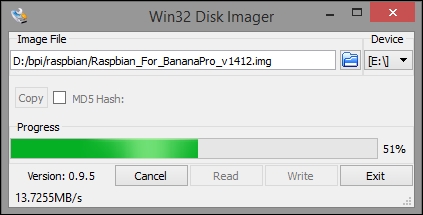
Once the burning process is done, you are ready to insert the freshly prepared SD card containing your Linux operating system into the Banana Pi and boot it up for the first time.
How it works…
Some images are archived using Linux archive formats, which Windows may be unable to unpack natively. Therefore, it might be necessary to install a tool which is capable of unpacking the archive. In this recipe, we use 7-Zip to unpack the archives, which is open source software and is easy to use. Some images are also available as ZIP files, which can also be unpacked using 7-Zip or Windows Explorer. To extract the image from a ZIP file using the Windows Explorer, right-click on the ZIP file and select Extract all.
Linux archives usually have to be unpacked twice. Firstly, to uncompress the archive (.tar.gz or .tgz) and secondly, to unpack the actual tar archive (which is used to collect files into one uncompressed file). On Linux, you will be able to unpack the packed archives, and uncompress the compressed archives with one command.
After unpacking the image file and formatting your SD card, you need software to burn the image to the SD card. For Android, you will need the software PhoenixCard, for any other image based on Linux, the software Win32 Disk Imager is required.
See also
- SD Formatter is free downloadable software by the SD Association to reformat SD cards efficiently and safely. You can get it for the Windows platform at https://www.sdcard.org/downloads/formatter_4/
- PhoenixCard is a specialized tool used to write Android images to the SD card. You can get it for the Windows platform at https://drive.google.com/file/d/0B_VynIqhAcB7NTg2UkRDdHRWX2s/edit?usp=sharing or alternatively at http://download.eldajani.net/bananapi/phoenixcard.zip
- Win32 Disk Imager is an open source tool we use to write the operating system images to SD cards. You can get it for the Windows platform at http://sourceforge.net/projects/win32diskimager/


