Search icon CANCEL
Subscription
0
Cart icon
Your Cart (0 item)
Close icon
You have no products in your basket yet
Arrow left icon
Explore Products
Best Sellers
New Releases
Books
Videos
Audiobooks
Learning Hub
Free Learning
Arrow right icon
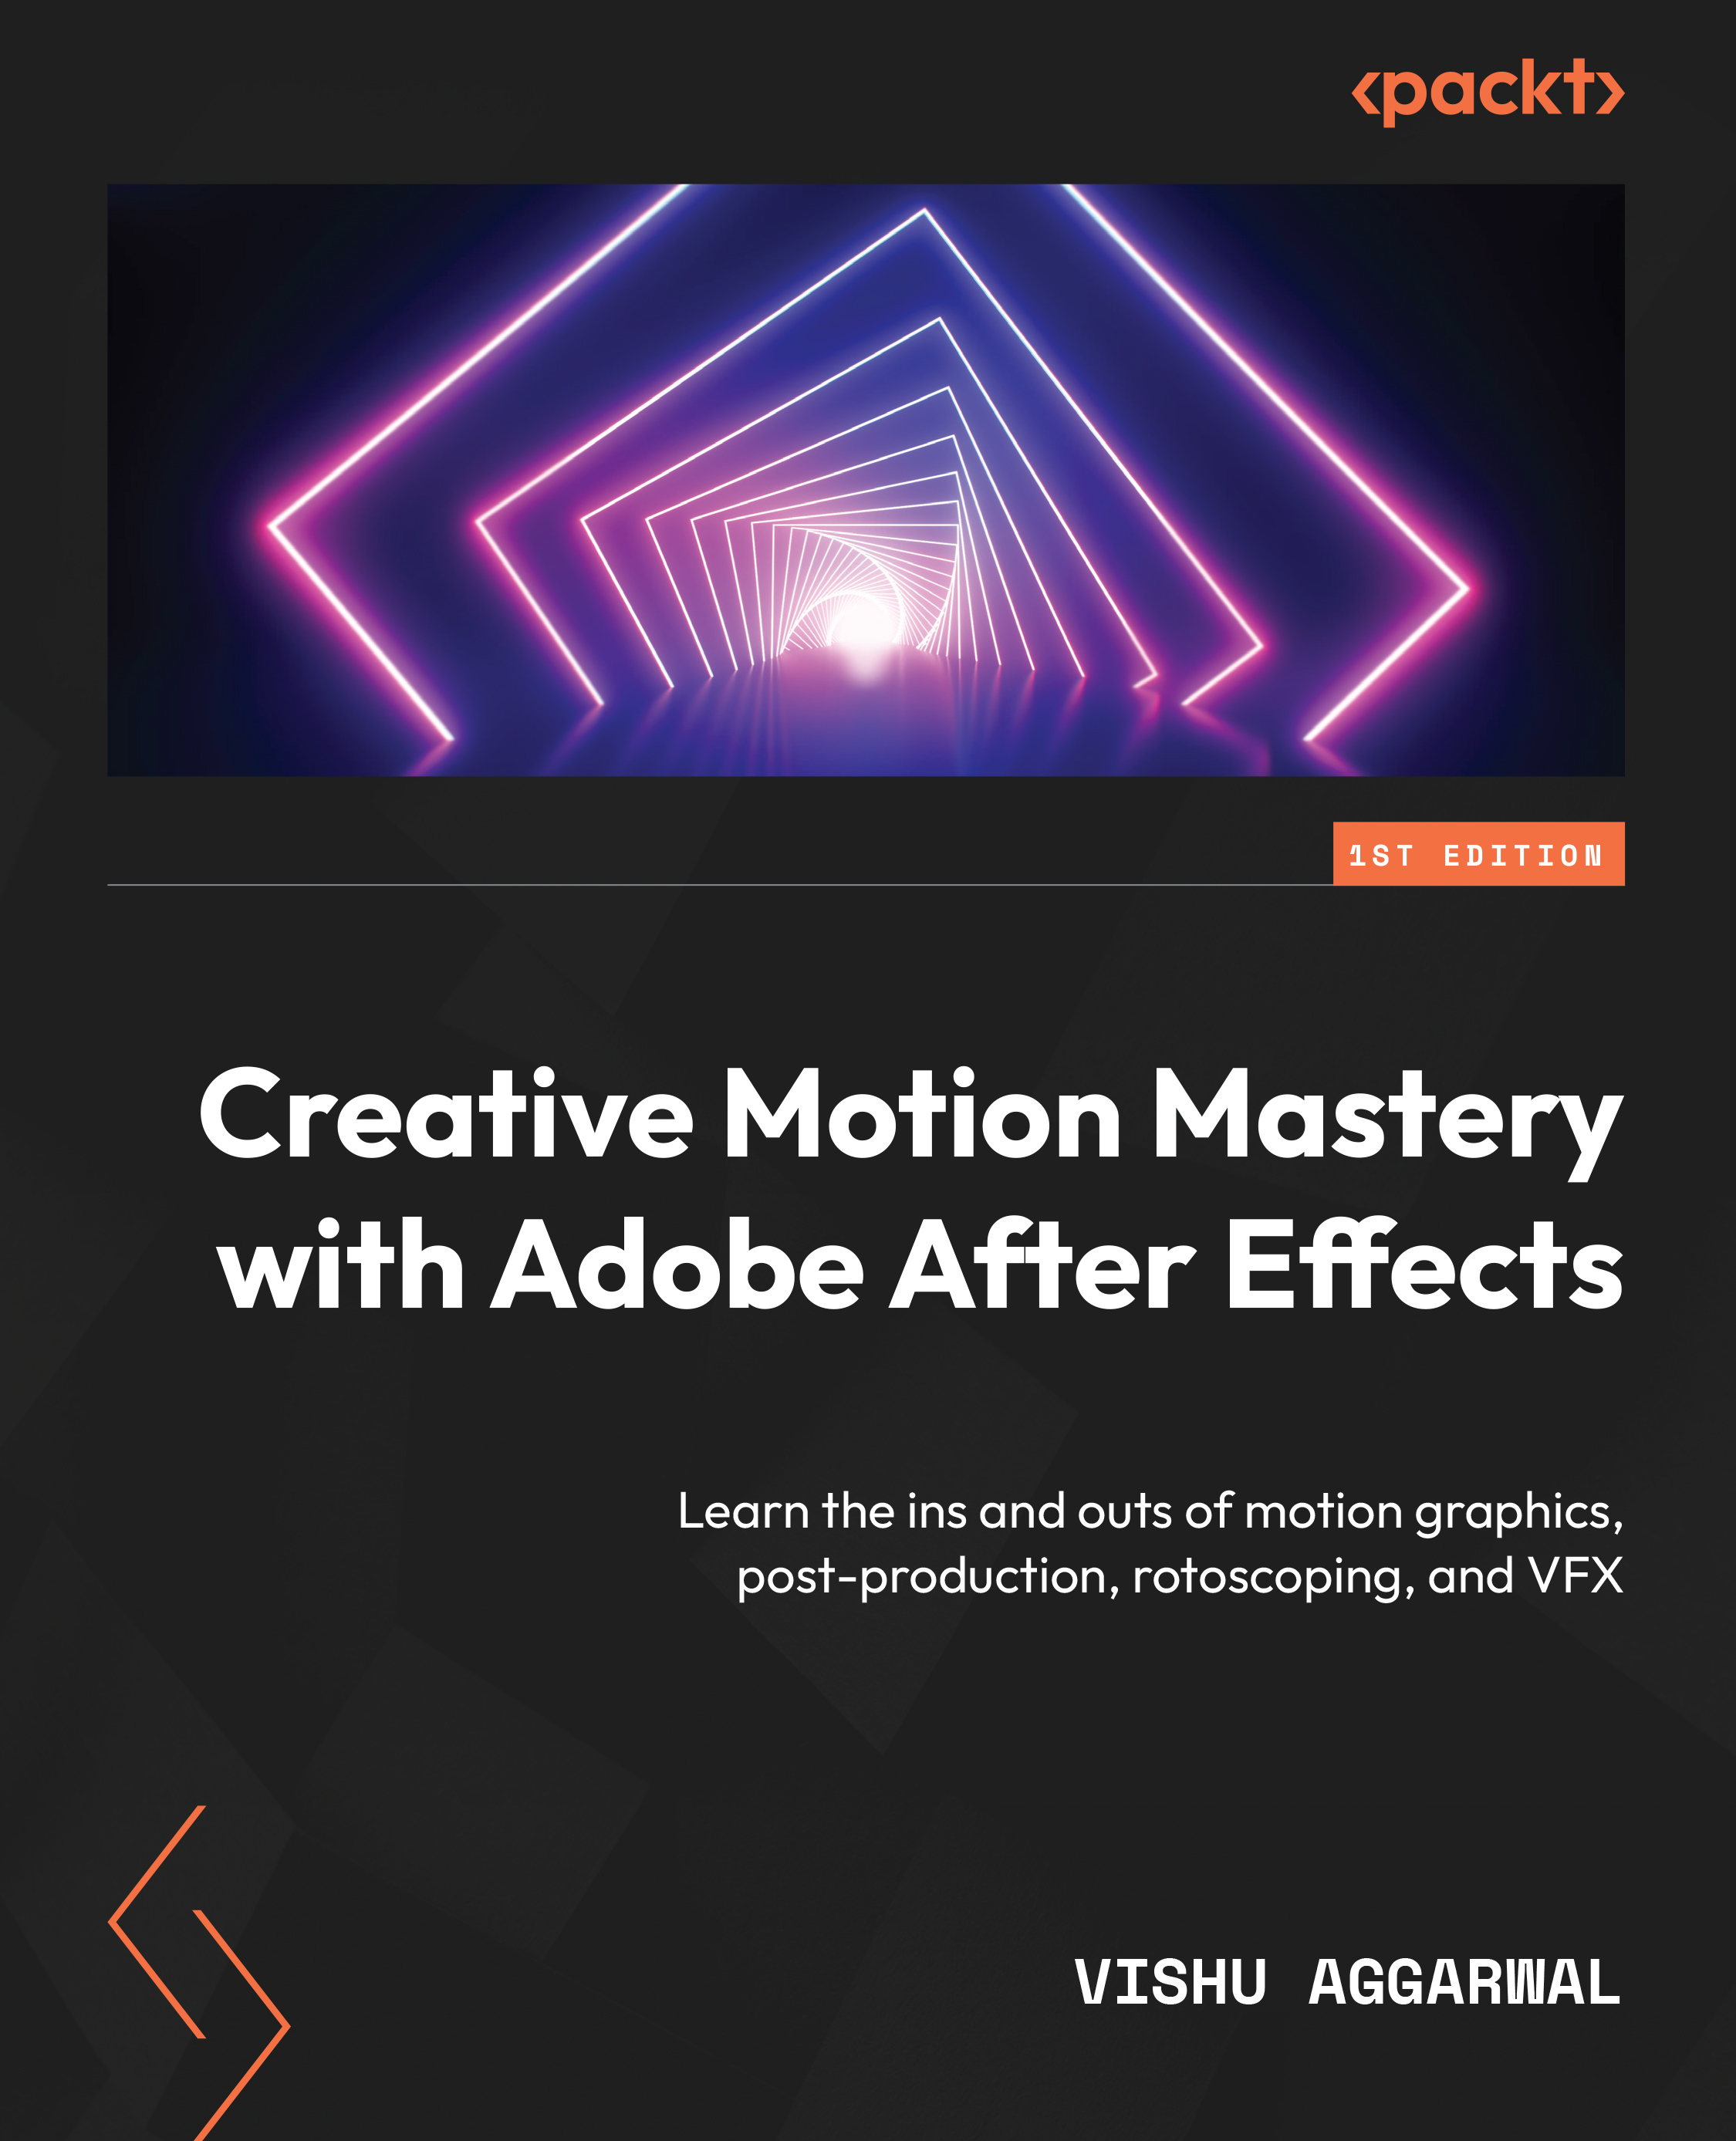
Creative Motion Mastery with Adobe After Effects

Creative Motion Mastery with Adobe After Effects: Learn the ins and outs of motion graphics, post-production, rotoscoping, and VFX

Arrow left icon
Profile Icon Aggarwal Profile Icon Vishu Aggarwal
Arrow right icon
NZ$36.99 NZ$52.99
Full star icon Full star icon Full star icon Full star icon Half star icon 4.8 (4 Ratings)
eBook Feb 2024 332 pages 1st Edition
eBook
NZ$36.99 NZ$52.99
Paperback
NZ$65.99
Subscription
Free Trial
Arrow left icon
Profile Icon Aggarwal Profile Icon Vishu Aggarwal
Arrow right icon
NZ$36.99 NZ$52.99
Full star icon Full star icon Full star icon Full star icon Half star icon 4.8 (4 Ratings)
eBook Feb 2024 332 pages 1st Edition
eBook
NZ$36.99 NZ$52.99
Paperback
NZ$65.99
Subscription
Free Trial
eBook
NZ$36.99 NZ$52.99
Paperback
NZ$65.99
Subscription
Free Trial

What do you get with eBook?

Product feature icon Instant access to your Digital eBook purchase
Product feature icon Download this book in EPUB and PDF formats
Product feature icon Access this title in our online reader with advanced features
Product feature icon DRM FREE - Read whenever, wherever and however you want
Product feature icon AI Assistant (beta) to help accelerate your learning
OR
Modal Close icon
Payment Processing...
tick Completed

Billing Address

Table of content icon View table of contents Preview book icon Preview Book

Creative Motion Mastery with Adobe After Effects

Getting to Know the User Interface and Workflow

This chapter is an overview of the Adobe After Effects user interface. Here, you will learn about the workspace as well as the basic operations performed in the user interface.

You will also learn how to import media files, image sequences, video files, and other formats. This chapter describes how to follow best practices when importing media files.

Furthermore, you will learn how to create keyframes in the timeline and set up preferences to suit your needs. Along with the basic operations of adjusting and creating a composition in After Effects, further details about composition creation will be elucidated.

The main topics we’ll cover in this chapter are as follows:

  • Customizing the user interface
  • Importing media files
  • Creating compositions and keyframes
  • Rendering compositions using the render queue
  • Optimizing After Effects’ performance

Technical requirements

The lesson files for this chapter can be found at https://packt.link/gbz/9781804617281.

Before starting the chapter, it would be good to preview the final output and end project file provided with the Chapter 1 | Lesson 1 exercise files. By doing so, you can gain a clear understanding of the desired outcome and have a visual representation of what you will be working towards throughout the chapter.

Previewing the final output allows you to see the completed project, demonstrating how the various elements, effects, and animations come together. You can observe the overall look and feel, the arrangement of the different components, and how they interact with each other. This preview serves as a reference point, giving you a target to aim for as you progress through the chapter.

Customizing the user interface

Let’s start with the Adobe After Effects user interface. The first time you launch it, you’ll see the basic user interface of the After Effects window. This interface is called the default workspace. The default workspace gives you access to the following:

  • The Project panel
  • The Effects panel
  • The Composition panel
  • The Layers panel
  • The Footage panel
  • The Timeline panel
  • Render Queue
  • Many other panels on the right

At the top is the Tools panel. After Effects has different types of tools that can be used for different purposes. As you read this book, you’ll learn how to use the different tools used in After Effects.

Figure 1.1: The After Effects interface

Figure 1.1: The After Effects interface

Next, let us see how to customize the default user interface to suit your needs and preferences. You can freely switch between the available tab groups and panel positions.

To do this, follow these steps:

  1. Move the cursor to any panel whose position you want to change and then click and drag.
  2. When you do this, you’ll see a box with a ghost purple fill. For example, in the following figure, I am dragging the Project panel.
  3. The panel will be placed when you release the mouse button.
Figure 1.2: Customizing the Interface

Figure 1.2: Customizing the Interface

You can easily move any entity in the interface by dragging the window or panel to the desired position.

  1. Once you have customized the workspace area and are satisfied with the look and feel of the panels, you can save it as a workspace preset. Go to Workspace | Save as New Workspace, name the preset, and then save.

Adobe After Effects provides a variety of preset workspaces based on the user’s requirements. Go to Window | Workspaces to see these options:

  • All Panels
  • Animation
  • Color
  • Default
  • Effects
  • Essential Graphics
  • Learn
  • Libraries
  • Minimal
  • Motion Tracking
  • Paint
  • Small Screen
  • Standard
  • Text
  • Undocked Panels

You can use any of these pre-configured workspaces for your work.

If you wish to reset the default workspace after customizing it, simply select the reset option from the list-down menu in the Workspaces list as follows:

  1. Go to Window | Workspaces.
  2. Reset Default in Saved Layout.

We can also alter the appearance of the complete workspace window in Adobe After Effects. The Preferences menu provides access to these features. You can access the preferences as follows:

  • macOS: After Effects | Preferences
  • Windows: Edit | Preferences

In the Preferences menu, you can set the preferences for your desired operations as well as the general customization options. These options include setting up the following tabs, among others:

  • The General tab
  • The Previews tab
  • The Display tab
  • The Import tab
  • The Appearance tab
  • The Output preferences tab
  • The Grids & Guides tab
  • The Labels tab
  • The Video Preview tab

Let’s look at how the preferences can be used to alter the workspace’s appearance.

Go to Preferences | Appearance:

Figure 1.3: The Preferences window

Figure 1.3: The Preferences window

Here you’ll find a list of Adobe After Effects’ numerous options. The brightness of the default workspace background can be adjusted, ranging from completely dark to gradually becoming brighter. Simply move the slider to your preferred brightness setting to accomplish this. You can also customize the look of the interactive controls and focus indicators.

In the next section, let us see how to save your After Effects project.

Saving an After Effects project

Before we proceed further, let’s save our After Effects project; even though After Effects auto-saves newly created projects, it is a best practice to save any project in your preferred location in your system. Follow these steps to save the file:

  1. Click on File: In the menu bar at the top of the After Effects window, click on File.
  2. Select Save As: From the drop-down menu that appears when you click on File, select Save As.
Figure 1.4: The Save As option in the File menu

Figure 1.4: The Save As option in the File menu

  1. Choose the location: After clicking Save As, a dialog box will appear. Choose the location on your computer where you want to save the project file.
  2. Enter a filename: In the dialog box, enter a name for your project file. Choose a descriptive and recognizable name so that you can easily identify the project later.
  3. Click Save: After entering the filename and choosing a location, click the Save button in the dialog box.
Figure 1.5: The Save As dialog box in After Effects

Figure 1.5: The Save As dialog box in After Effects

Your After Effects project is now saved to the specified location on your computer.

It’s a good practice to save your project frequently to prevent any loss of data in the case of unexpected software crashes or power outages. You can use the same steps to save your project again after making significant changes.

Now, you have learned the basics of the Adobe After Effects interface, how to customize the interface for your convenience and workflow, how to set up interface preferences, and how to save projects. In the next section, we will cover the first step with After Effects, that is, importing the necessary files for a project.

Importing media files

Let’s have a look at how we can import image sequences, video files, and other types of files. This importing activity can be done in a variety of ways:

  • Go to File | Import. You can import a single file, multiple files, or an existing Adobe After Effects project.
  • The alternative option is to just double-click in the Project tab group area to open the Import panel.
  • Drag-and-drop files in the Project panel to import the media files.
  • You can use the Cmd + I (Mac) or Ctrl + I (Windows) shortcut.

Now open the Import window to import an image sequence:

  1. In the Project panel, which is usually located in the upper-left corner of the interface, right-click anywhere and choose Import | File from the drop-down menu.
  2. Locate the fire image sequence: Go to the Image Sequence folder in the (footage) folder of Lesson_01 and select the first image in the sequence, which should be named fire_00000.jpg. Make sure the Image Sequence option is checked.

We’re importing the provided fire image sequence, which has 24 frames per second (FPS). However, Adobe After Effects imports this sequence using the default FPS value set in your preferences. In the Project window, at the top, you can find the information about the imported file’s frame rate.

What is FPS?

FPS in After Effects refers to the number of individual frames or images displayed per second in a composition. It determines how smooth the motion appears in your animation or video project.

When you create a composition in After Effects, you can set the frame rate to a specific value. Common frame rates used in video production include 24, 30, and 60 FPS. The frame rate you choose depends on the standard you’re working with (such as film or television standards) and the desired look and feel of your project.

A higher frame rate, such as 60 FPS, results in smoother motion but can require more computational resources. A lower frame rate, such as 24 FPS, is often used for a cinematic look and is a standard frame rate for film.

As you can see in the following figure, the image sequence has been imported as 30 FPS because that’s the default frame rate in After Effects:

Figure 1.6: The Project panel with the imported fire image sequence

Figure 1.6: The Project panel with the imported fire image sequence

Now, we have two options for setting the frame rate of the imported sequence: one is to utilize the Interpret Footage option, and the other is to customize Preferences. The alternative approach can be used to select the preferred import settings, which includes the default frame rate for importing files.

Here’s the first method:

  1. Right-click on the file or sequence you want to interpret.
  2. Select Interpret Footage | Main.
  3. Here, by altering the input value of Assume the frame rate option to your preferred FPS, you can change the image sequence’s frame rate.
  4. Click OK, and you’ll notice that the file’s frame rate has changed.
Figure 1.7: The Interpret Footage dialog box of the Fire image sequence

Figure 1.7: The Interpret Footage dialog box of the Fire image sequence

The second technique to accomplish the same task is to use Preferences. This method is particularly useful if you want to import files at a specific frame rate on a regular basis:

  1. Go to Preferences | Import | Sequence Footage.
  2. You can set the chosen frame rate for your importing option to any value that you require. This ensures that every file sequence you import is imported at the frame rate that the user specifies for future imports.
Figure 1.8: The Preferences window, specifically the Import settings

Figure 1.8: The Preferences window, specifically the Import settings

Now delete the previously imported fire image sequence and re-import the fire image sequence again in After Effects. Now, it should import the image sequence at 24 FPS instead of 30 FPS.

Before we jump into the next section, import earth.mp4 from the (footage) folder given in Lesson_01.

In the next section, we will cover working with compositions and how to add keyframes in the timeline.

Creating compositions and keyframes

A composition is like a container that can contain and bring multiple files together as layers to create a composite. A composition can have different kinds of layers, such as these:

  • Video and audio layers
  • Image layers
  • Text layers
  • Shape layers
  • Solid layers
  • Light layers
  • Camera layers

While creating a composition, the following key parameters should be defined:

  • Resolution: Determines the width and height of the composition in pixels. You can set a custom resolution or choose from presets such as HD and 4K.
  • Duration: Specifies the length of the composition. You can set the duration in seconds, minutes, hours, or frames, depending on your preference.

    After Effects uses different formats to display the timecode, such as HH:MM:SS:Frames or just frames (the number of frames elapsed since the start of the composition):

    • HH:MM:SS:Frames: 01:23:45:10 represents 1 hour, 23 minutes, 45 seconds, and 10 frames.
    • Frames: This format simply counts the number of frames from the beginning of the composition.
  • Frame rate (FPS): Sets the number of frames displayed per second in the composition. Common frame rates include 24, 30, and 60 FPS, but you can choose custom frame rates based on your project requirements.
  • Pixel Aspect Ratio (PAR): Defines the shape of pixels in the composition. Most modern video uses square pixels (1.0 PAR), but certain formats, especially older ones, might use non-square pixels. After Effects allows you to adjust the PAR to match the specific requirements of your project.
  • Background color: Specifies the color of the background in the composition. You can choose a specific color or set it to transparent if you want to create visual elements with transparent backgrounds (alpha channels).

In this section, we will learn how to create a new composition in After Effects using video files. Then, we will learn how to enable animations in the timeline and add keyframes to create animations for the layers.

Let’s begin with creating new compositions in After Effects:

  1. Simply drag the earth.mp4 file from the Project panel to the composition icon in the Project window. This action will create a composition based on the properties of the media and its duration.
Figure 1.9: Using the Project panel to create new compositions

Figure 1.9: Using the Project panel to create new compositions

Files can also be dragged and dropped into the new composition window group. However, this option can only be used when there is no pre-existing composition in the workspace.

Figure 1.10: Using the Composition panel to create a new composition

Figure 1.10: Using the Composition panel to create a new composition

Alternatively, you can also create a new composition by going to Composition | New compositions or using the Ctrl + N (Windows) or Cmd + N (macOS) keyboard shortcut.

Figure 1.11: Using the Composition menu to create new compositions

Figure 1.11: Using the Composition menu to create new compositions

  1. You can adjust the composition settings while creating the blank composition. If you would like to modify the settings of the composition created by the drag-and-drop process, then go to Composition | Composition Settings.
  2. You can alter the composition name, as well as the composition’s height and width, frame rate, and resolution in Composition Settings.

    Note that the resolution used here is just for previewing reasons and has no effect on the project’s render resolution.

Figure 1.12: The Composition Settings window

Figure 1.12: The Composition Settings window

  1. To alter the composition’s background color, click on the Background Color box, choose the appropriate color for the backdrop, and then click OK. Your personalized composition is now complete.

Let’s take a look at the composition’s layer properties.

Working with the Timeline panel and layer properties

To examine the layer properties, navigate to the drop-down menu next to the layer. The only property in our example earth.mp4 layer is Transform, and the Transform property includes sub-properties such as Anchor Point, Position, Rotation, and Opacity. We may also use shortcuts to access these attributes, and we can view them individually or as a group of properties. To do so, first, click on the layer.

The following shortcuts can be used to access the layer’s properties:

  • P for Position
  • S for Scale
  • A for Anchor point
  • R for Rotation
  • T for Opacity

The following figure lists all the Transform properties of the earth.mp4 layer in the Timeline panel.

Figure 1.13: The Timeline panel with the layer transform properties listed

Figure 1.13: The Timeline panel with the layer transform properties listed

You can use the preceding shortcuts with the Shift key to see multiple layer properties at the same time. For a better understanding, let’s add another layer.

Drag the fire footage from the Project window to the earth layer in the composition.

If you want to get a preview of your animation or media, use the spacebar at any time. The fire layer has become the foreground in our case, while the earth layer has become the background. The preview of our earth layer is hidden due to the black background of our fire layer.

We must now adjust this layer in order to blend the fire layer over the earth layer in the composition. We may use the various blending modes for the fire layer to accomplish this. You can change the blending mode of the layer as follows:

  1. Click the toggle switch just below the layers panel to see the blending modes.
Figure 1.14: The Timeline panel with the toggle switches/modes highlighted

Figure 1.14: The Timeline panel with the toggle switches/modes highlighted

We can set the fire layer blend mode to Normal, as shown in Figure 1.15:

Figure 1.15: The fire layer blend mode is Normal

Figure 1.15: The fire layer blend mode is Normal

  1. Now we can change the appropriate blending mode for the fire layer from Normal mode to Screen mode to see the earth layer beneath the fire layer (foreground).
Figure 1.16: The fire layer blend mode is now Screen

Figure 1.16: The fire layer blend mode is now Screen

After Effects accomplishes the effect in Figure 1.16 by removing the fire layer’s darker hues.

Note

Blend modes, also known as blending modes or composite modes, are features found in image editing and compositing software, including Adobe Photoshop, Adobe After Effects, and other similar programs. Blend modes determine how two layers or elements blend or interact with each other visually when they are combined.

Blend modes work by mathematically combining the pixel values of two layers to produce a new resulting color. Each blend mode has a specific algorithm that determines how the pixel values of the layers are combined. The resulting color is then displayed based on this combination.

Having used the blend mode for the layers, we have successfully blended the fire and earth layers. Next, we will explore how to trim the composition duration to match the duration of the fire footage layer within the composition.

Trimming composition duration

The composition duration is 13 seconds. We need to cut the composition duration down to roughly 6 seconds to fit the duration of the fire layer. This can be done by following these steps:

  1. Set the timeline in and out points to the desired time duration as follows:
Figure 1.17: The Timeline panel indicating the timeline’s work area range

Figure 1.17: The Timeline panel indicating the timeline’s work area range

  1. Press B to trim the start/in point of the composition and N to trim the end/out point, while positioning the playhead at the time you intend to trim to.
  2. Next, right-click on the timeline ruler; the Trim Comp to Work Area option will appear.
Figure 1.18: The Timeline panel (right-clicking between the in and out points to trim the timeline)

Figure 1.18: The Timeline panel (right-clicking between the in and out points to trim the timeline)

This will trim the composition and allow you to see the complete composition on the timeline.

Working with text and animations

The new duration of the composition is six seconds. Let’s now add a text layer to our composition. To do so, follow these steps:

  1. Click the T icon in the tool panel.
Figure 1.19: The text tool

Figure 1.19: The text tool

  1. Now click on the area of the composition where you wish to put the text and write Global Warning.
  2. The Character panel on the right side of the screen can be used to adjust text features such as size, color, character style, and font. If the Character panel isn’t displayed, go to Windows | Character Panel and click on it. Place the text in the desired location on the preview.
Figure 1.20: Using the Character panel to customize the text properties

Figure 1.20: Using the Character panel to customize the text properties

Now let’s animate the text layer property:

  1. Select the text layer and use the shortcut T to reveal the opacity property of the layer. We can now animate this using the stopwatch icon.

    It’s worth noting that only attributes with the stopwatch icon can be animated in After Effects. Keep the play head at the start of our composition.

  2. Click on the stopwatch icon in the Opacity property to set the first keyframe in the timeline to zero seconds; change the value of Opacity to 0 (you will see a diamond-shaped icon in the timeline, which indicates that the keyframe has been added to the timeline).
Figure 1.21: The Timeline panel with the Opacity property

Figure 1.21: The Timeline panel with the Opacity property

  1. Now take the play head at three seconds in the timeline and increase Opacity to 100 percent. As soon as you do so, After Effects will automatically add a keyframe at three seconds.
Figure 1.22: View of the final composite

Figure 1.22: View of the final composite

  1. Now take your play head back to zero seconds and hit the spacebar to preview the timeline and you will notice that the words will fade in as the timeline reaches three seconds, creating an animating effect using the Opacity property of the text layer.

As we have now completed the animation and compositing of this composition, in the next section we will learn how to render the composition to convert it into a video that can be played back in any video player.

Rendering the composition

You’re ready to turn your composition into an output. When we create an output out of a composition, it gets converted into a video that can be previewed in any video player without Adobe After Effects.

To output the earth composition to video, we will take the following steps:

  1. Select the composition you want to output and select Composition | Add to Render Queue.
Figure 1.23: Add to Render Queue

Figure 1.23: Add to Render Queue

The Render Queue panel will now open next to the Composition panel as a tab.

  1. By default, After Effects renders compositions using Best Quality and Full Resolution. Keep these default settings.
  2. Click the blue words Not yet specified next to the Output To field.
Figure 1.24: The Render Queue panel

Figure 1.24: The Render Queue panel

  1. Now the Output Movie window will open. Select the location where you would like to save the video, keep the name of the output video as the default, and click Save.
  2. Click on the Render button in the Render Queue panel, and now After Effects will start rendering the video to the saved location.
Figure 1.25: The Render button in the Render Queue panel

Figure 1.25: The Render button in the Render Queue panel

  1. Once it completes the render, After Effects will issue an audio alert.

Making a video from a composition can take anything from a few seconds to many hours, depending on the composition duration, frame size, video compression and quality, effects used, and hardware specifications.

Optimizing After Effects’ performance

Now let’s look at how we can optimize After Effects’ performance. A dedicated option for the memory and performance of After Effects can be found in After Effects Preferences.

Go to After Effects | Preferences | Memory & Performance (macOS) or Edit | Preferences | Memory & Performance (Windows) to access it.

Figure 1.26: The Memory & Performance options

Figure 1.26: The Memory & Performance options

Figure 1.26 shows the following:

  • You can see both the RAM installed on your device and the RAM allotted to After Effects in this window. You can adjust the RAM allocation to meet your needs.
  • There’s also a feature called multi-framed rendering. This allows us to preview and export several frames at the same time.

After Effects generates a significant amount of disk cache. The Media & Disk Cache option allows you to set a large quantity of storage for the cache folder, which gives you longer playbacks and smooth previews. It is suggested that you clear the disk cache at regular intervals to free up storage space. You can empty the disk cache by going to After Effects | Preferences | Media & Disk Cache (macOS) or Edit | Preferences | Media & Disk Cache (Windows).

Figure 1.27: The Media & Disk Cache options

Figure 1.27: The Media & Disk Cache options

After Effects also saves the project you’re working on automatically. The autosave interval can be customized in the Auto-Save tab. If you select the Next to Project option, the project will be autosaved as a new file in the same folder as your current project. You can additionally choose the number of project versions that can be kept.

Figure 1.28: The Auto-Save options

Figure 1.28: The Auto-Save options

In this section, you have learned how to optimize performance, use auto-save, and manage the disk cache in After Effects. These techniques will help you work efficiently in After Effects while saving disk space. Additionally, the auto-save feature allows you to recover your work in the case of a sudden crash.

Summary

In this chapter, we have looked at how to customize the user interface, import media files, set preferences for After Effects, add the first keyframes in the composition timeline, and output files from After Effects.

By customizing the user interface, you can adjust After Effects to your liking and convenience so that you can get the most out of it. Now you should be confident about importing media files into After Effects and creating compositions using media files in the Project panel.

Learning about layer properties and adding keyframes in the timeline should have given you an understanding of animating layers in the Timeline panel, how to use the stopwatch with the playhead option to achieve the motion needed for the project, and how to output the final project into a video format using Render Queue. Don’t forget to customize your After Effects preferences for optimal performance.

In the next chapter, we will talk about how to use effects and built-in presets to quickly create animated motion graphics.

Left arrow icon Right arrow icon

Key benefits

  • Master After Effects through hands-on engagement with small projects, following the best practices
  • Leverage the settings and uncover hidden options in After Effects to optimize your workflow
  • Acquire skills and techniques that will set you apart from other graphic designers
  • Purchase of the print or Kindle book includes a free PDF eBook

Description

Visual effects and motion graphics are everywhere, shaping the film, TV, games, websites, and application landscape. Navigating a field this complex and ever-expanding demands more than mere familiarity with tools; you need to stand out to get ahead. Creative Motion Mastery with Adobe After Effects is the definitive guide that not only equips you with the essential skills to distinguish yourself, but also takes you through real projects that you can add to your portfolio. Guided by a hands-on learning approach, you'll master the UI, workflow, and diverse projects such as text animation, shape layers, and rotoscoping. With this newfound knowledge, you’ll take your graphic design and post-production skills to the next level using chroma keying, particle simulations, and 2D and 3D tracking. You’ll progress faster than someone taking a formal course in Adobe After Effects! And it’s not all about creating; you’ll import graphics from Illustrator and Photoshop and apply post-production effects to give them a new life. Finally, you’ll discover how seamlessly you can export and manage your projects, ensuring end-to-end coverage of all you need. By the end of the book, you’ll have a thorough understanding of Adobe After Effects, equipped with the skills and practice you need to propel your career in graphic design.

Who is this book for?

This book is for graphic designers, UX and UI designers, e-learning designers, motion graphics artists, video editors, and VFX artists. A fundamental grasp and minimal experience with After Effects will help you follow long the concepts covered in this book. Additionally, familiarity with Illustrator and Photoshop will provide an added advantage.

What you will learn

  • Create and customize text layers, including text animations, using shape layers
  • Enhance projects with audio elements and apply audio effects to shape layers
  • Develop editable motion graphics templates for Premiere Pro
  • Implement color correction and grading techniques to enhance footage in projects
  • Use rotoscoping to remove and mask objects seamlessly
  • Generate realistic effects such as rain, fire, and smoke using particle simulations
  • Master the art of compositing through Chroma Keying
  • Get to grips with 2D and 3D tracking for seamless element integration

Product Details

Country selected
Publication date, Length, Edition, Language, ISBN-13
Publication date : Feb 02, 2024
Length: 332 pages
Edition : 1st
Language : English
ISBN-13 : 9781804610886
Vendor :
Adobe

What do you get with eBook?

Product feature icon Instant access to your Digital eBook purchase
Product feature icon Download this book in EPUB and PDF formats
Product feature icon Access this title in our online reader with advanced features
Product feature icon DRM FREE - Read whenever, wherever and however you want
Product feature icon AI Assistant (beta) to help accelerate your learning
OR
Modal Close icon
Payment Processing...
tick Completed

Billing Address

Product Details

Publication date : Feb 02, 2024
Length: 332 pages
Edition : 1st
Language : English
ISBN-13 : 9781804610886
Vendor :
Adobe

Packt Subscriptions

See our plans and pricing
Modal Close icon
$19.99 billed monthly
Feature tick icon Unlimited access to Packt's library of 7,000+ practical books and videos
Feature tick icon Constantly refreshed with 50+ new titles a month
Feature tick icon Exclusive Early access to books as they're written
Feature tick icon Solve problems while you work with advanced search and reference features
Feature tick icon Offline reading on the mobile app
Feature tick icon Simple pricing, no contract
$199.99 billed annually
Feature tick icon Unlimited access to Packt's library of 7,000+ practical books and videos
Feature tick icon Constantly refreshed with 50+ new titles a month
Feature tick icon Exclusive Early access to books as they're written
Feature tick icon Solve problems while you work with advanced search and reference features
Feature tick icon Offline reading on the mobile app
Feature tick icon Choose a DRM-free eBook or Video every month to keep
Feature tick icon PLUS own as many other DRM-free eBooks or Videos as you like for just NZ$7 each
Feature tick icon Exclusive print discounts
$279.99 billed in 18 months
Feature tick icon Unlimited access to Packt's library of 7,000+ practical books and videos
Feature tick icon Constantly refreshed with 50+ new titles a month
Feature tick icon Exclusive Early access to books as they're written
Feature tick icon Solve problems while you work with advanced search and reference features
Feature tick icon Offline reading on the mobile app
Feature tick icon Choose a DRM-free eBook or Video every month to keep
Feature tick icon PLUS own as many other DRM-free eBooks or Videos as you like for just NZ$7 each
Feature tick icon Exclusive print discounts

Frequently bought together


Stars icon
Total NZ$ 263.97
Mastering Adobe Photoshop 2024
NZ$102.99
Creative Motion Mastery with Adobe After Effects
NZ$65.99
Mastering Adobe Animate 2023
NZ$94.99
Total NZ$ 263.97 Stars icon
Banner background image

Table of Contents

17 Chapters
Part 1: Working with Motion Graphics Chevron down icon Chevron up icon
Chapter 1: Getting to Know the User Interface and Workflow Chevron down icon Chevron up icon
Chapter 2: Applying Effects and Presets to Create Animated Graphics Chevron down icon Chevron up icon
Chapter 3: Deep-Dive into Text Animations Chevron down icon Chevron up icon
Chapter 4: Animating Shape Layers Chevron down icon Chevron up icon
Chapter 5: Adding Motion to Photoshop and Illustrator Graphics Chevron down icon Chevron up icon
Chapter 6: Creating Motion Graphic Templates for Premiere Pro Chevron down icon Chevron up icon
Part 2: Post-Production and Visual Effects Chevron down icon Chevron up icon
Chapter 7: Color Correction and Color Grading Chevron down icon Chevron up icon
Chapter 8: Rotoscoping and Mask Tracking Techniques Chevron down icon Chevron up icon
Chapter 9: Chroma Keying Chevron down icon Chevron up icon
Chapter 10: Working with Particle Simulations Chevron down icon Chevron up icon
Part 3: 2D and 3D Tracking, and Rendering Chevron down icon Chevron up icon
Chapter 11: Working with 2D and 3D Tracking Chevron down icon Chevron up icon
Chapter 12: Exporting and Managing Projects Chevron down icon Chevron up icon
Index Chevron down icon Chevron up icon
Other Books You May Enjoy Chevron down icon Chevron up icon

Customer reviews

Rating distribution
Full star icon Full star icon Full star icon Full star icon Half star icon 4.8
(4 Ratings)
5 star 75%
4 star 25%
3 star 0%
2 star 0%
1 star 0%
Sankar Feb 24, 2024
Full star icon Full star icon Full star icon Full star icon Full star icon 5
This course is a fantastic resource for mastering Adobe After Effects. Whether you're interested in motion graphics, post-production techniques, rotoscoping, or VFX, you'll find everything you need to know here. The content is presented in a clear and straightforward manner, making it easy to understand and apply. Highly recommended for anyone looking to level up their skills in animation and visual effects!
Amazon Verified review Amazon
Olivia Feb 23, 2024
Full star icon Full star icon Full star icon Full star icon Full star icon 5
Overall, I was very impressed with how comprehensive the book is. It goes into all the major areas of After Effects and gives good examples to illustrate the functionality of After Effects, whether it be for Motion Graphics, Text Animation, or Keying and Compositing. Even though I'm very familiar with the program, I still learned something! I had never heard about the 4-Color Gradient Effect before, but it looks very useful!That said, this book is not going to go into every nuance that you might want. For instance, I was hoping to get some more insight into rotoscoping and keying 1K footage, which has given me significant issues due to the resolution restrictions and subsequent color blending that occurs due to having lower resolutions. The example given had a pristine green screen, which does not reflect the average footage a videographer can expect. This also meant that calibrating the Keylight was significantly easier to get a clean green screen removal. It would have been nice to go over an example that is a bit harder, has motion blur, and/or suboptimal lighting conditions on the green screen.It's definitely a nitpick, and would probably be seen as a more advanced example, which may be outside the scope of what this book was trying to accomplish.All that aside, especially if you're just getting into After Effects, this is a must-have resource! It's a great price for a wealth of knowledge! It's also got a great linked Table of Contents, making it easy to navigate to whatever section you want to learn about :)
Amazon Verified review Amazon
Robert Bourgeois Feb 15, 2024
Full star icon Full star icon Full star icon Full star icon Full star icon 5
Recently received a copy of this book and found it to get me from knowing very little about After Effects to being able to use some of the more advanced features. Worth checking out for beginners through intermediate users.
Amazon Verified review Amazon
ankitvohra Apr 10, 2024
Full star icon Full star icon Full star icon Full star icon Empty star icon 4
I am a photographer and graphic designer, interested in learning After Effects to enhance my videos with VFX and create motion graphics. I chose a well-organized book; it begins with the basics and progressively advances to more complex topics. Each chapter includes clear screenshots and detailed explanations, which help beginners understand the fundamentals of After Effects. As the book progresses, it delves into more sophisticated topics like keyframing, animation, and visual effects.I wish the book had also focused on UI design animations.
Amazon Verified review Amazon
Get free access to Packt library with over 7500+ books and video courses for 7 days!
Start Free Trial

FAQs

How do I buy and download an eBook? Chevron down icon Chevron up icon

Where there is an eBook version of a title available, you can buy it from the book details for that title. Add either the standalone eBook or the eBook and print book bundle to your shopping cart. Your eBook will show in your cart as a product on its own. After completing checkout and payment in the normal way, you will receive your receipt on the screen containing a link to a personalised PDF download file. This link will remain active for 30 days. You can download backup copies of the file by logging in to your account at any time.

If you already have Adobe reader installed, then clicking on the link will download and open the PDF file directly. If you don't, then save the PDF file on your machine and download the Reader to view it.

Please Note: Packt eBooks are non-returnable and non-refundable.

Packt eBook and Licensing When you buy an eBook from Packt Publishing, completing your purchase means you accept the terms of our licence agreement. Please read the full text of the agreement. In it we have tried to balance the need for the ebook to be usable for you the reader with our needs to protect the rights of us as Publishers and of our authors. In summary, the agreement says:

  • You may make copies of your eBook for your own use onto any machine
  • You may not pass copies of the eBook on to anyone else
How can I make a purchase on your website? Chevron down icon Chevron up icon

If you want to purchase a video course, eBook or Bundle (Print+eBook) please follow below steps:

  1. Register on our website using your email address and the password.
  2. Search for the title by name or ISBN using the search option.
  3. Select the title you want to purchase.
  4. Choose the format you wish to purchase the title in; if you order the Print Book, you get a free eBook copy of the same title. 
  5. Proceed with the checkout process (payment to be made using Credit Card, Debit Cart, or PayPal)
Where can I access support around an eBook? Chevron down icon Chevron up icon
  • If you experience a problem with using or installing Adobe Reader, the contact Adobe directly.
  • To view the errata for the book, see www.packtpub.com/support and view the pages for the title you have.
  • To view your account details or to download a new copy of the book go to www.packtpub.com/account
  • To contact us directly if a problem is not resolved, use www.packtpub.com/contact-us
What eBook formats do Packt support? Chevron down icon Chevron up icon

Our eBooks are currently available in a variety of formats such as PDF and ePubs. In the future, this may well change with trends and development in technology, but please note that our PDFs are not Adobe eBook Reader format, which has greater restrictions on security.

You will need to use Adobe Reader v9 or later in order to read Packt's PDF eBooks.

What are the benefits of eBooks? Chevron down icon Chevron up icon
  • You can get the information you need immediately
  • You can easily take them with you on a laptop
  • You can download them an unlimited number of times
  • You can print them out
  • They are copy-paste enabled
  • They are searchable
  • There is no password protection
  • They are lower price than print
  • They save resources and space
What is an eBook? Chevron down icon Chevron up icon

Packt eBooks are a complete electronic version of the print edition, available in PDF and ePub formats. Every piece of content down to the page numbering is the same. Because we save the costs of printing and shipping the book to you, we are able to offer eBooks at a lower cost than print editions.

When you have purchased an eBook, simply login to your account and click on the link in Your Download Area. We recommend you saving the file to your hard drive before opening it.

For optimal viewing of our eBooks, we recommend you download and install the free Adobe Reader version 9.