Getting access to Looker
In this recipe, you will discover how to get access to the Looker environment and start working in it. As mentioned in the introduction, we’ll focus on Looker (Google Cloud core), which is available from the Google Cloud console.
How to do it...
The steps for this recipe are as follows:
- Let’s start by going to the Google Cloud website: https://cloud.google.com/?hl=en. Once on the website, check whether you’re connected with your Gmail account by checking your Gmail profile photo in the top-right corner. Make sure that you’re connected with the email account you want to use for your Looker tests. If all is good, in the same top-right corner, click on Console (Figure 1.1).
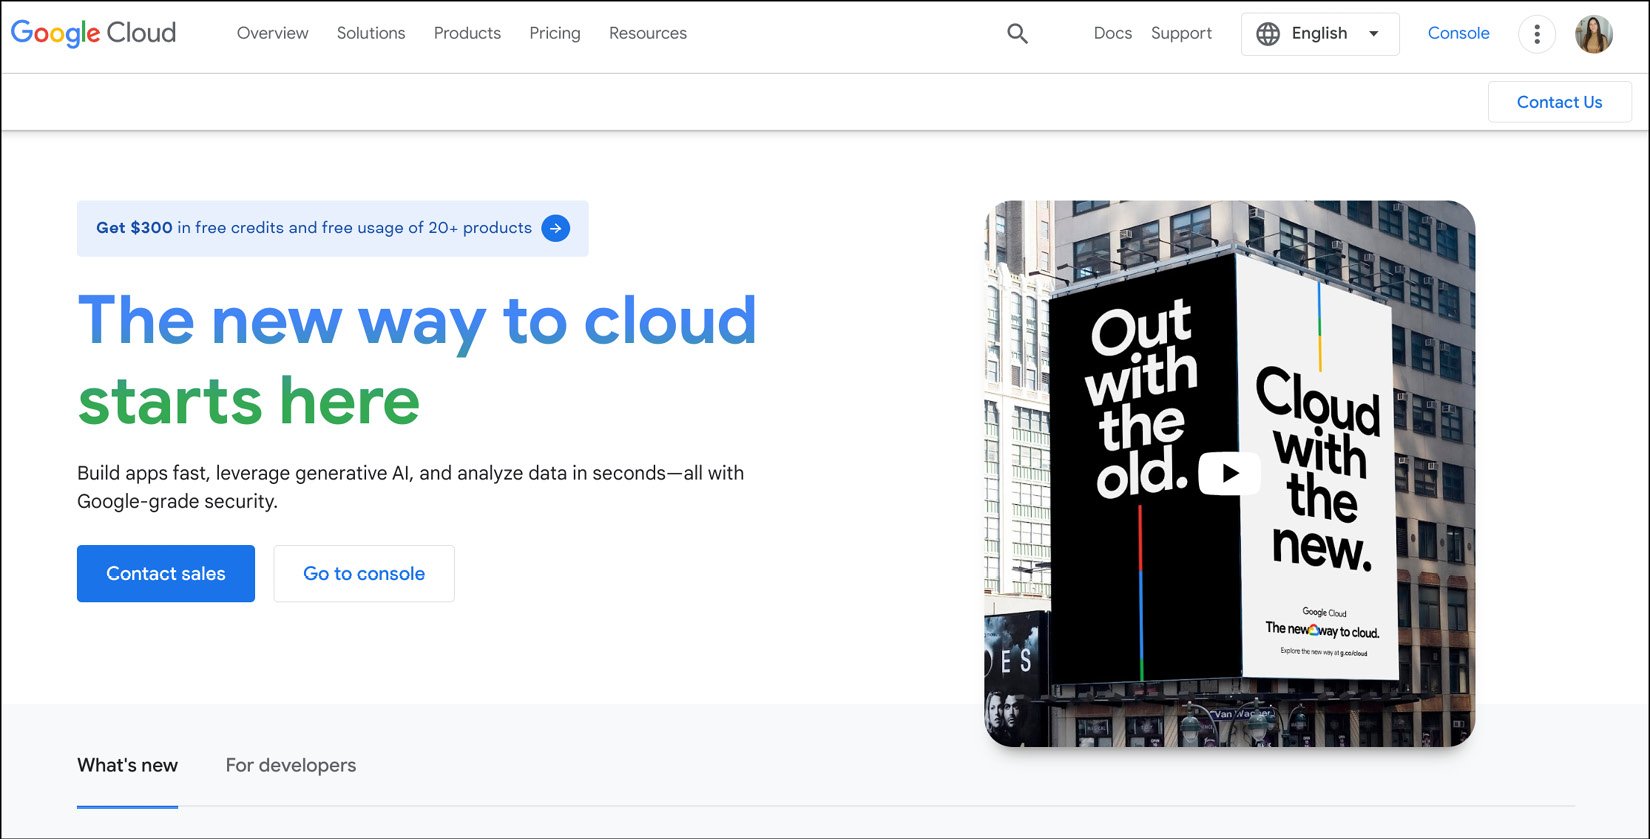
Figure 1.1 – Google Cloud home page
- After clicking on Console, you will be redirected to the Google Cloud environment where you will need to choose your country, read and accept the Terms of Service, and click Agree and Continue.
- Note that you might be redirected to a Console page in a different language (your local language, for example). To follow the book’s guidelines easily, it is preferable to switch to the English version – you can do that in your Google account settings (https://myaccount.google.com/) or, on the first Google Cloud page where you clicked on Console, there was an option to choose the language before going to the console (check the top-right corner in Figure 1.1).
- If it’s your first time working within Google Cloud, you will need to create your first project by clicking on Create Project on the right (on the Google Cloud Welcome window after clicking on Agree and Continue). If you already have projects in your Google Cloud environment, you might still want to create a new one for your Looker experiment.
- After clicking on Create Project, you will need to choose a project name (or keep the default one) and organization, if you have one created – you might have one if you’re using your professional account. If not, keep the default No Organization option. Click CREATE to finalize the project creation (Figure 1.2). A Google Cloud project is a way to organize your resources and applications in Google Cloud Platform (GCP). It is a billing and access control entity. By creating a project, you can group your GCP resources together and control who has access to them. You can always switch between your projects in the top-left corner.
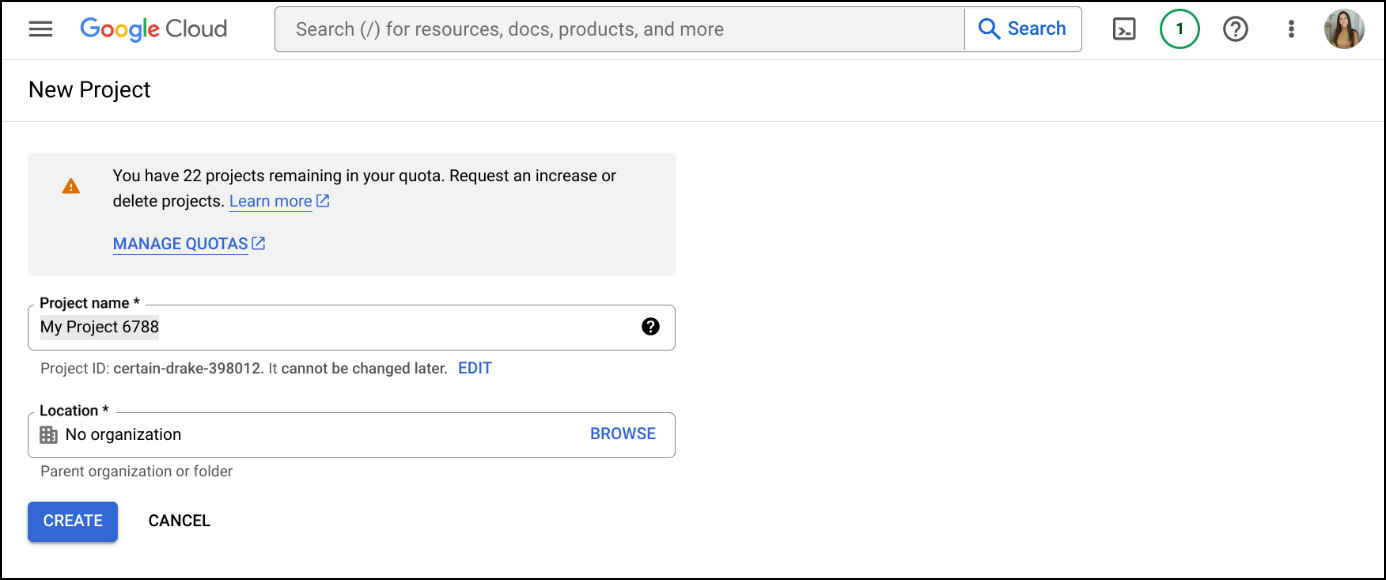
Figure 1.2 – Project creation
- When you’re on the Welcome page with your project chosen in the top-left corner, you can continue the activation of your free trial for your Google Cloud (GC) environment by clicking on START FREE in the top-right corner.
- On the Step 1 of 2 Account Information page (Figure 1.3), choose your country, and your organization or needs (there is an Other option if you don’t know yet), and then read and accept the Terms of Service.

Figure 1.3 – Account information
- On the Step 2 of 2 page (Figure 1.4), you will need to provide your billing information. There is no autocharge after the free trial ends. Google only asks you for your credit card to make sure you are not a robot. If you use a credit or debit card, you won’t be charged unless you manually upgrade to a paid account.
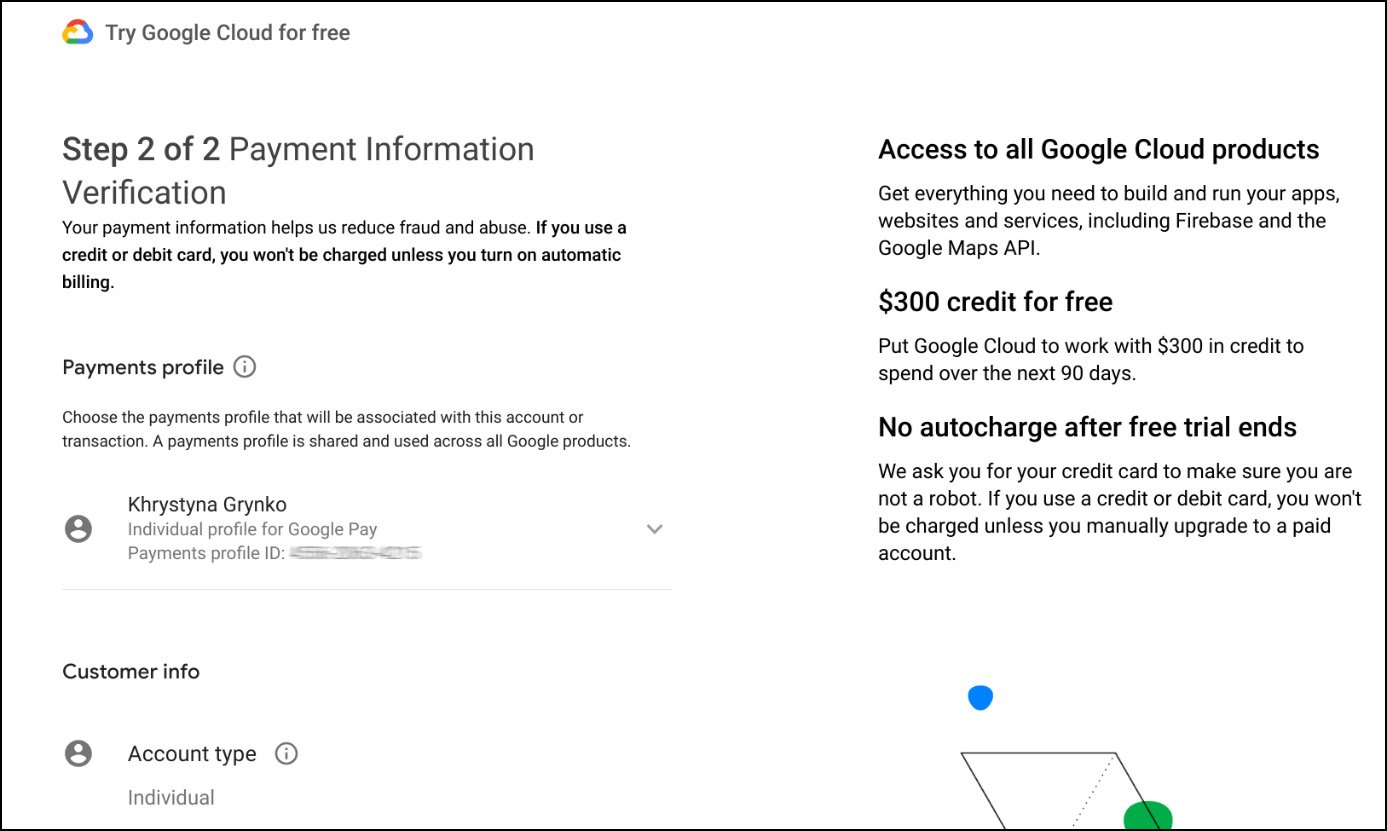
Figure 1.4 – Payment information
- Google will verify your billing information; this is usually done through your banking application.
- Now, you’ll need to fill in a small questionnaire to help GC serve you better.
- Let’s finally get to Looker! Search for
Lookereither in the Search bar or by clicking on the hamburger button on the left (Figure 1.5). You can pin the Looker service in the hamburger menu to have it always at the top of your list.
Important note
Currently, to initiate a Looker free trial within your GC console, you’ll need to contact Looker sales directly. You can do this through the following form: https://cloud.google.com/resources/looker-free-trial.
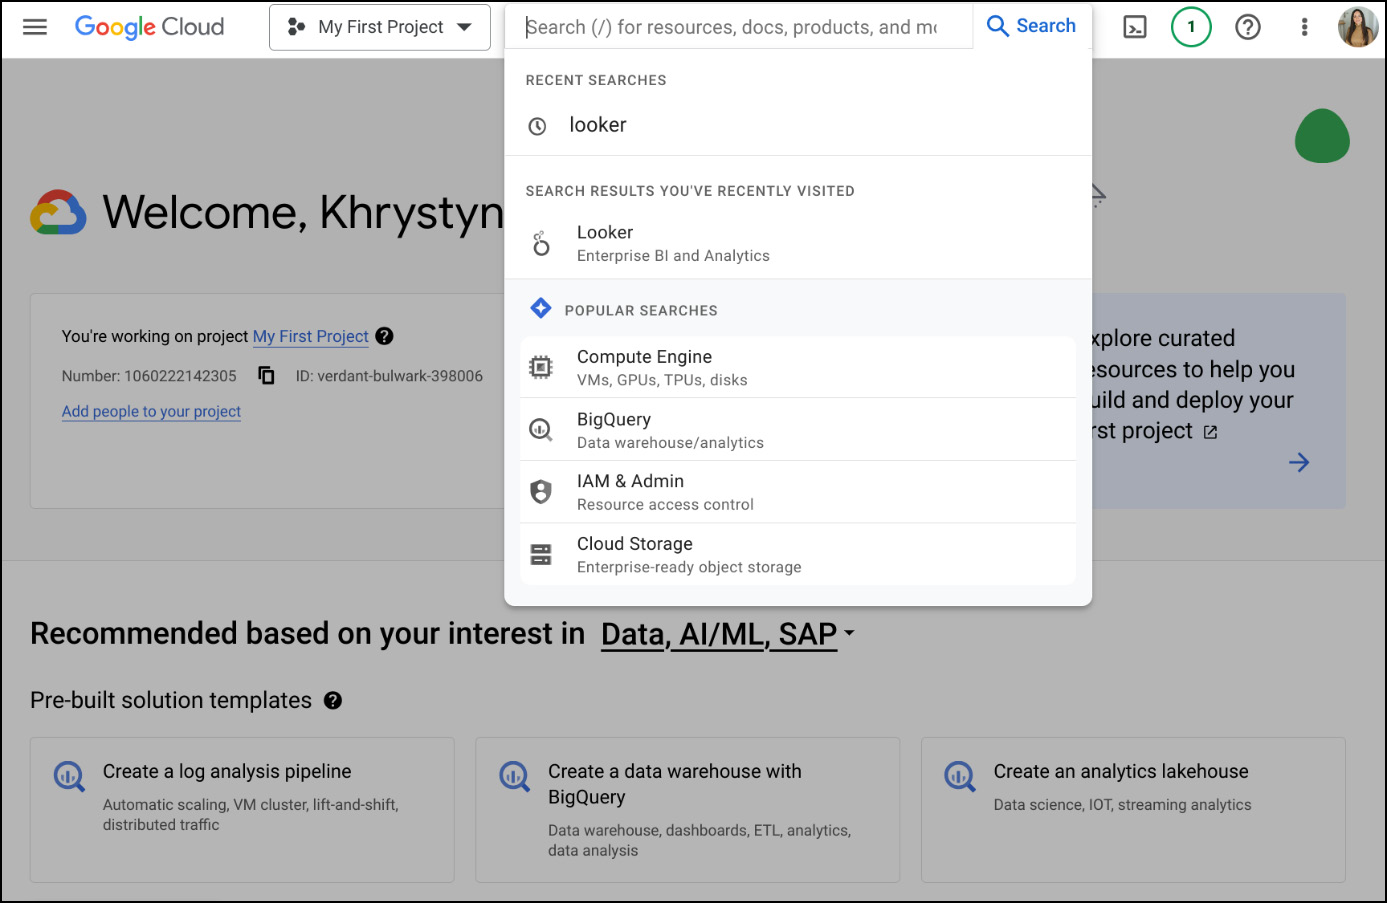
Figure 1.5 – Search bar
- When you are on the Looker Welcome page, click on CREATE AN INSTANCE (Figure 1.6) to create your Looker instance. Important: To avoid any billing surprises, confirm your free Looker trial is active before creating your instance. You can check the trial status by contacting a Looker sales representative. A Looker instance is a dedicated, isolated environment for running Looker. Looker instances allow users to connect to data sources, model data, explore data, visualize data, share data, and embed analytics.
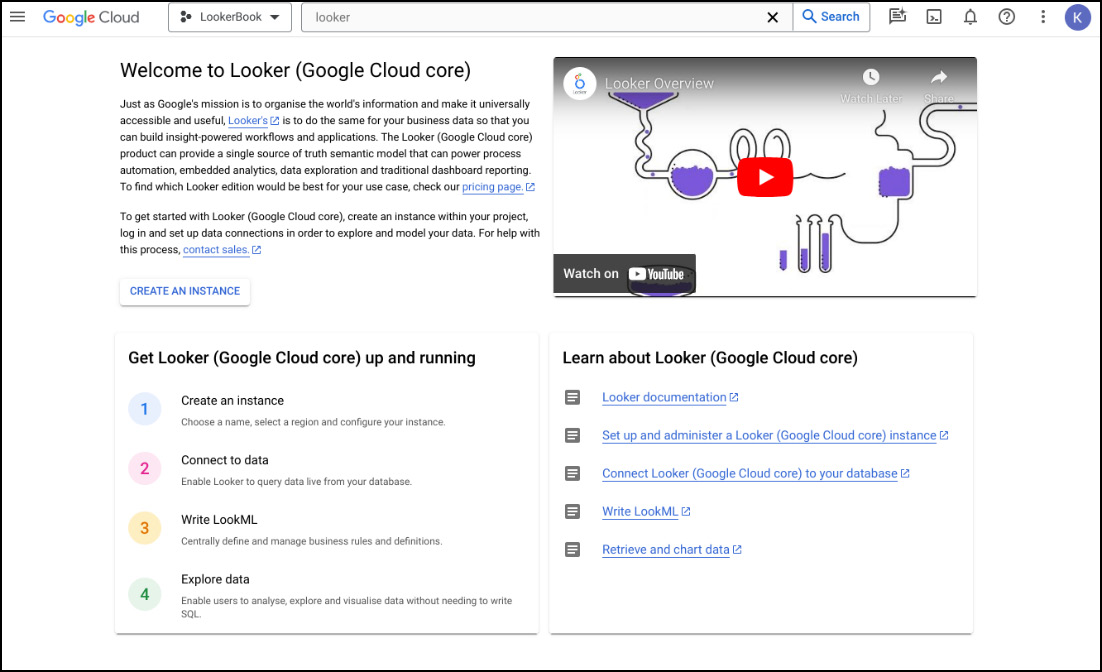
Figure 1.6 – Looker Welcome page
- If you see a popup that says Enable required APIs, click on Enable. The Looker (Google Cloud core) API is a RESTful API that allows you to programmatically interact with your Looker instance.
On the page that will open after you enable the required APIs or after you click on CREATE AN INSTANCE, choose your instance name, then add your OAuth Application Credentials details to access your instance (Figure 1.7). You will need to create your OAuth application credentials in advance. To do this, open a new tab, go to the GC console, click on the menu button in the top - left corner and search for API & Services and click on it ->then click on Credentials -> then click on Create credentials (choose the Web application option) -> then choose OAuth client ID. It might ask you to create an OAuth consent screen where you will need to provide the app name and your email address in the Support and Developer section and keep the default values for the rest.
- Once your client ID is created, go back to your instance creation form and add your newly created credentials there. Finally, choose a region (if you can’t find your country, choose the one that is closer to you geographically) and click CREATE. The creation can take up to 1 hour.
Important note
After the free trial, your instance may be automatically converted to a paid Looker instance. Please confirm this with your Looker sales representative.
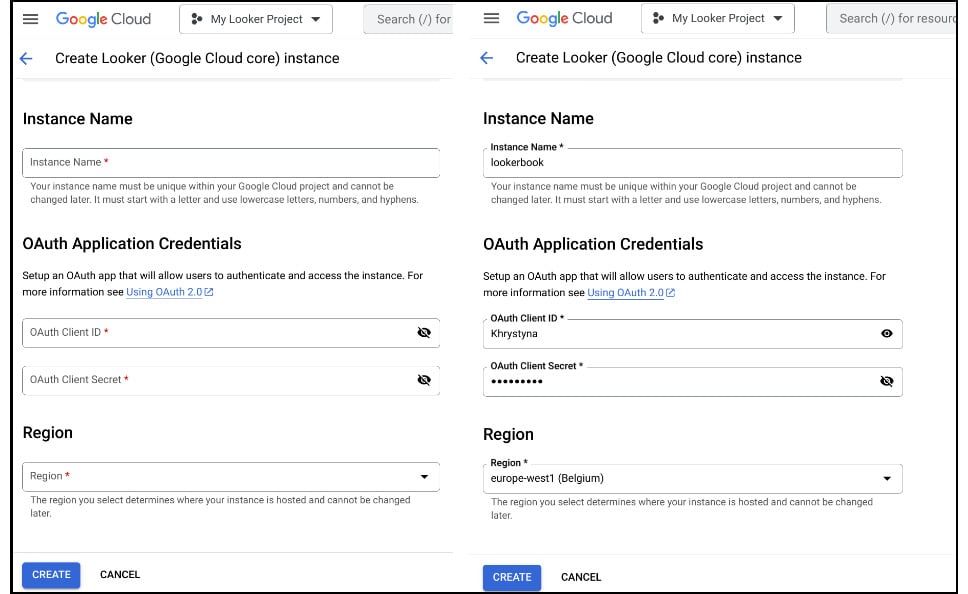
Figure 1.7 – Looker instance creation
- When the instance is created, you will see your Looker instance link in the Instance URL column (Figure 1.8).

Figure 1.8 – Instance URL
Troubleshooting Instance URL Errors
To avoid getting an error when clicking on the instance URL (such as, for example, Error 400: redirect_uri_mismatch), check the following elements:
- You connected with the right Google account (when you’re connected with multiple Gmail accounts, the one that is used when you open the instance URL in the new tab might not be the one that has access to your Looker and GC environment)
- In APIs & Services, make sure you created your OAuth credentials for the Web application
- In APIs & Services, make sure you added your Looker instance URL plus /oauth2callback in Authorized redirect URIs (Figure 1.9)
- In APIs & Services, make sure you added looker.app as the authorized domain on your OAuth consent screen (click Edit App to add it)
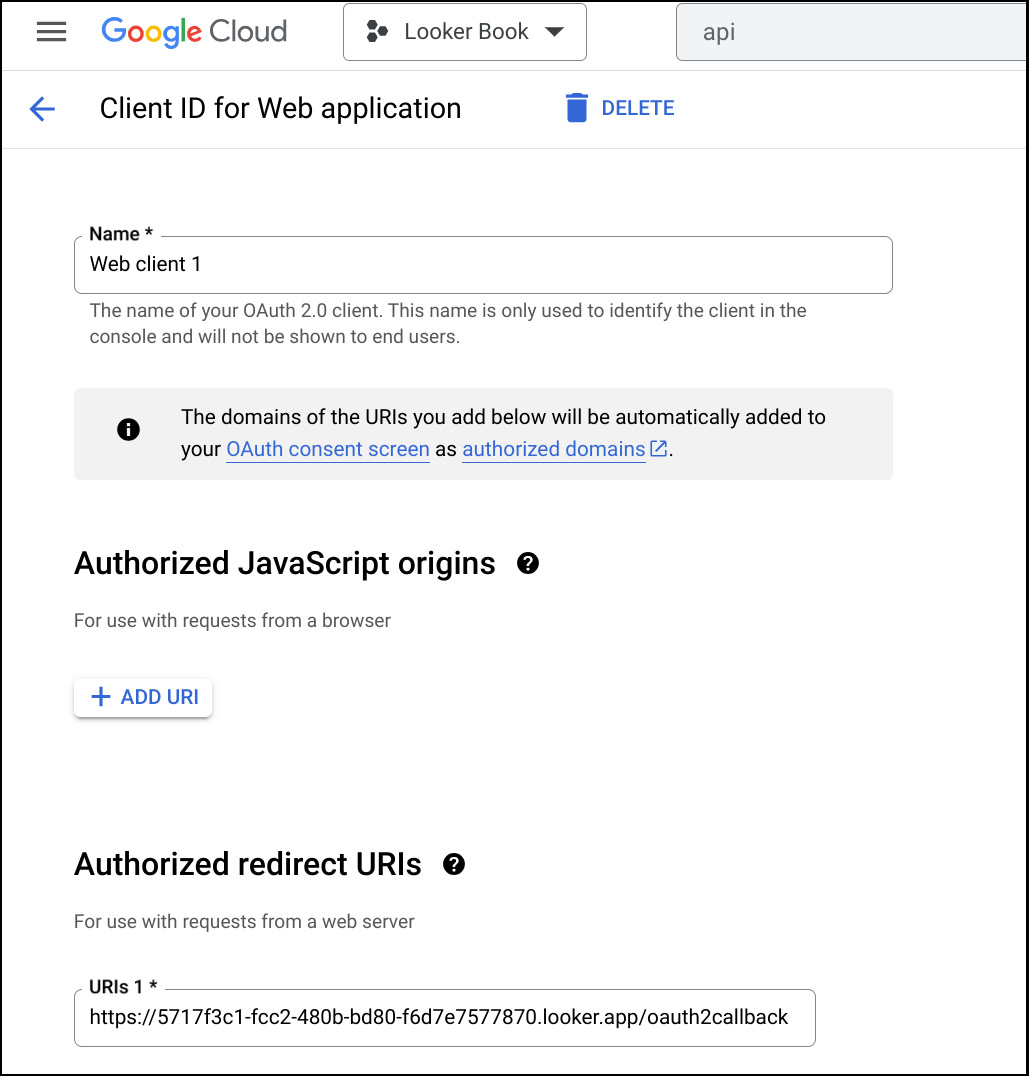
Figure 1.9 – Authorized redirect URIs
There’s more...
It is possible to get access to Looker through labs, as a way to test Looker without creating your own GC environment and without setting up a free trial. You can create an account on the Cloud Skills Boost website (https://www.cloudskillsboost.google/) and find free Looker quests and labs (make sure it is Looker and not Looker Studio). The labs on Cloud Skills Boost give you access to the sandbox environment with the data prepared for you. The labs give you a step-by-step exercise and teach you how to use Looker. The inconvenience is that you have limited time for your exercise. Additionally, you cannot work with your data and with your team on one project in the lab. These labs are only for training purposes and give you a good start in understanding the Looker environment.
For more in-depth exploration, you can combine the lab training and this book.


