Creating the App Logic
In this topic, we will build the actual logic of the application.
We will create the PostModule, which contains all of the code related to displaying the posts that come from our API. Inside this module, we will add various components: a service and two resolvers. The components are used to display the data in the browser. We will go over their use in the next section. The service will be used to retrieve the data from the API. Lastly, we will add resolvers to the app that make sure the data from the service is available at the moment we navigate from one route to another.
Types of Components
In this topic, we will take a look at how we can differentiate our components by making a distinction between the container and presentational components. Sometimes, they are also called smart and dumb components when referred to how much knowledge of the world outside of the components each of them has.
The main difference we can make is this:
- A presentational component is responsible for how things look
- A container component is responsible for how things work
We will dive into more details of why this distinction is important when we create them, but we can give away a few things already.
Presentational components do the following:
- Get their data passed in using the
@Input()decorator. - Any operations are passed up using the
@Output()decorator. - Handle the markup and the styling of the application.
- Mostly just contain other presentational components.
- They have no knowledge (or dependencies) of any routes or services from the app.
Container components do the following:
- Retrieve their data from a service or a resolver
- Handle the operations that they receive from the presentational components
- Have very little markup and styling
- Will often contain both presentational and container components
The Folder Structure
To make this distinction clear in our project, we will use different folders for both types of components:
- The
src/<module>/componentsfolder is where the presentational components live. - The
src/<module>/containersfolder is where the containers components live.
Creating the Module
In this section, we will create a module called Post. The Post module is responsible for retrieving the posts from an API and showing them in the app.
In this chapter, you will generate the PostModule using the ng command and lazy load the PostModule in the AppRoutingModule.
Tip
You can use shortcuts for most ng commands, for example, ng generate module can be shortened to ng g m.
Exercise 15: Generating the PostModule
We will use the ng generate module command to generate the PostModule.
This command has one required parameter name, and we will call this module post. A second optional parameter, --routing, is passed to create a file to hold the routes for this module, that is, the PostRoutingModule. Follow these steps to complete this exercise:
- Open your terminal and navigate to the project directory.
- Run the following command from inside the project directory:
ng g m post --routing
CREATE src/app/post/post-routing.module.ts (247 bytes)
CREATE src/app/post/post.module.spec.ts (259 bytes)
CREATE src/app/post/post.module.ts (271 bytes)
As you can see by the output of the preceding command, the PostModule is generated in the new folder src/app/posts.
Exercise 16: Lazy Loading the PostModule
In contrast to how we load the UiModule by importing it into the AppModule, we will lazy load this module using the AppRoutingModule.
This is an optimization on how the application gets built, and it makes sure that the application has a smaller initial file to download by using a technology called code splitting. This basically bundles each lazy loaded module into its own file, and the browser is instructed to download this file when needed, but not before.
We will add two routes to the main application file. The first route is a route with a blank path property (the default route), and its function is to redirect to the /posts route.
The second route is the /posts route, and it lazy loads the PostModule. If the user navigates to the app, the first route that will be found is the blank redirect route. This will tell the router to navigate to /posts. The router finds the /posts route and navigates the user to that module. Follow these steps to complete this exercise:
- In the editor, open the
src/app/app-routing.module.tsfile. - Locate the existing
routeobject that is defined in theroutesproperty. - Inside the
childrenarray, we will create two routes that look like this:{ path: '', redirectTo: '/posts', pathMatch: 'full', }, { path: 'posts', loadChildren: './post/post.module#PostModule', },Make sure that the complete routes property looks like this:
const routes: Routes = [
{
  path: '',
  component: LayoutComponent,
  children: [
  {
    path: '',
    redirectTo: '/posts',
    pathMatch: 'full',
  },
  {
    path: 'posts',
    loadChildren: './post/post.module#PostModule',
  },
  ],
}
];
We'll now see how this works:
- First, we define that we want to have children to the main route. This makes sure that all of the children get rendered in the
<router-outlet>that is defined in theLayoutComponentin the previous section. - We define the first route to respond to all paths (that's what the empty string does), and we make it redirect to the
/postsroute. - Lastly, we create a
postsroute and we tell it to load its children from the new module. TheloadChildrenproperty is what enables the lazy loading.
When we refresh the page, we can see that nothing changes in the app itself, but we can see that the URL has changed: it has redirected to /posts:
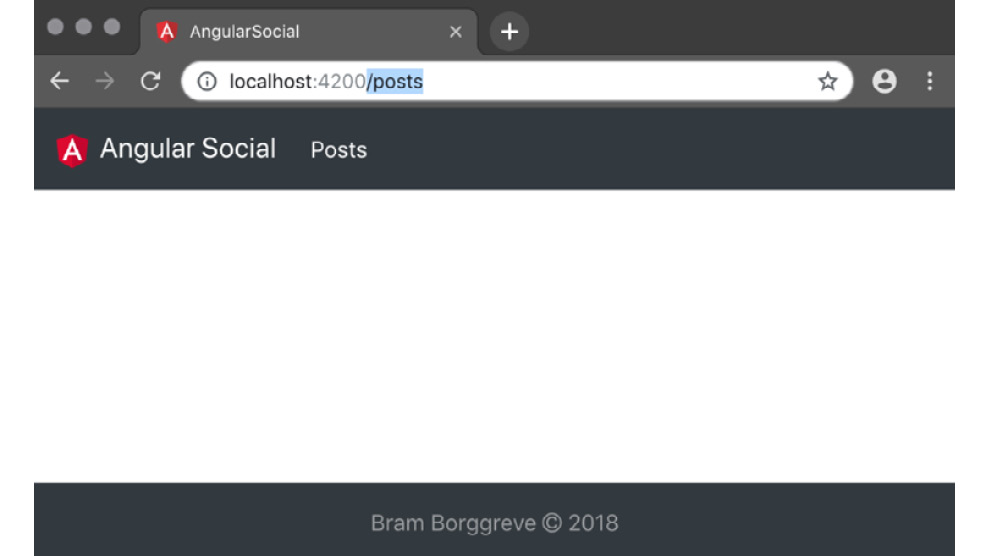
Figure 1.24: The redirected URL
Let's move on to the next topic, where we will create the container components so that we can start seeing data.
Creating the Container Components
In this section, you will use ng generate to create PostListComponent and PostDetailComponent inside the PostModule, add routes to both components, and create TypeScript models for our data objects.
Exercise 17: Generating the PostListComponent
In this exercise, we will be using the ng generate command to create our PostListComponent. This is the component that will eventually list an overview for all our posts. The application route to this component will be /posts. Follow these steps to complete this exercise:
- Open your terminal and navigate to the project directory.
- Run the following command from inside the project directory:
ng g c post/containers/post-list
CREATE src/app/post/containers/post-list/post-list.component.css (0 bytes)
CREATE src/app/post/containers/post-list/post-list.component.html (28 bytes)
CREATE src/app/post/containers/post-list/post-list.component.spec.ts (643 bytes)
CREATE src/app/post/containers/post-list/post-list.component.ts (280 bytes)
UPDATE src/app/post/post.module.ts (368 bytes)
- Open the
src/app/post/post-routing.module.tsfile. - Import the
PostListComponent:import { PostListComponent } from './containers/post-list/post-list.component'; - Add the following route to the
routesarray:{ path: '', component: PostListComponent, },
When we now refresh the page in the app, we should see the text post-list works! between our header and footer:
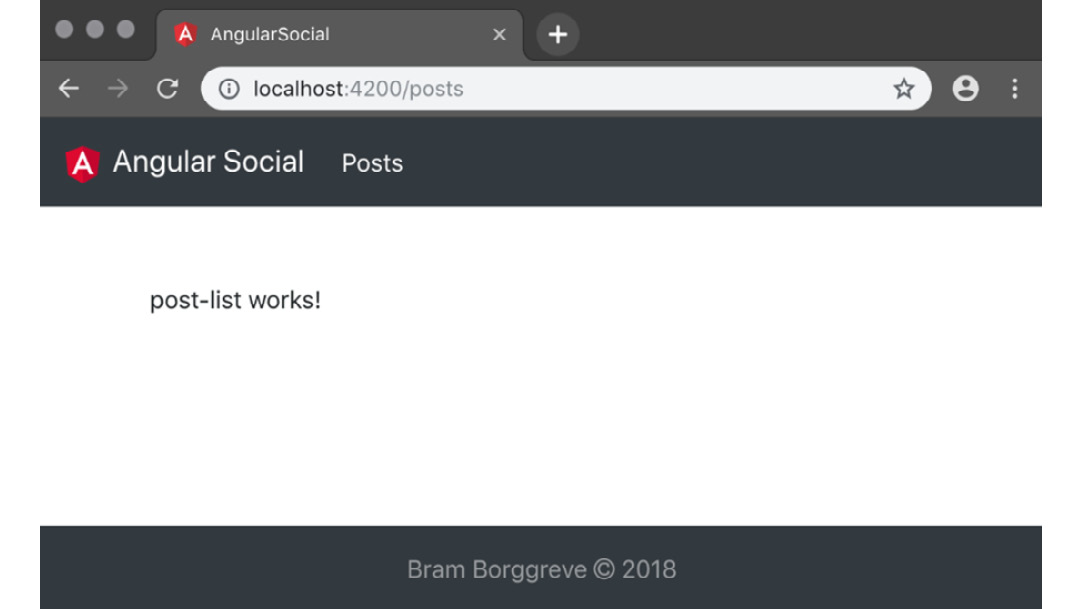
Figure 1.25: The PostListComponent
Exercise 18: Generating the PostDetailComponent
Very similar to the previous exercise, we will create the PostDetailComponent. This is the component that will be responsible for displaying an individual post.
The application route to this component will be /posts/<id>, where <id> is the identifier of the post we want it to display. Follow these steps to complete this exercise:
- Open your terminal and navigate to the project directory.
- Run the following command from inside the project directory:
ng g c post/containers/post-detail
CREATE src/app/post/containers/post-detail/post-detail.component.css (0 bytes)
CREATE src/app/post/containers/post-detail/post-detail.component.html (30 bytes)
CREATE src/app/post/containers/post-detail/post-detail.component.spec.ts (657 bytes)
CREATE src/app/post/containers/post-detail/post-detail.component.ts (288 bytes)
UPDATE src/app/post/post.module.ts (475 bytes)
- Open the
src/app/post/posts-routing.module.tsfile. - Import the
PostDetailComponent:import { PostDetailComponent } from './containers/post-detail/post-detail.component'; - Add the following route to the
routesarray:{ path: ':id', component: PostDetailComponent, },
When the application refreshes and we navigate to http://localhost:4200/posts/42, we should see the text post-detail works!:
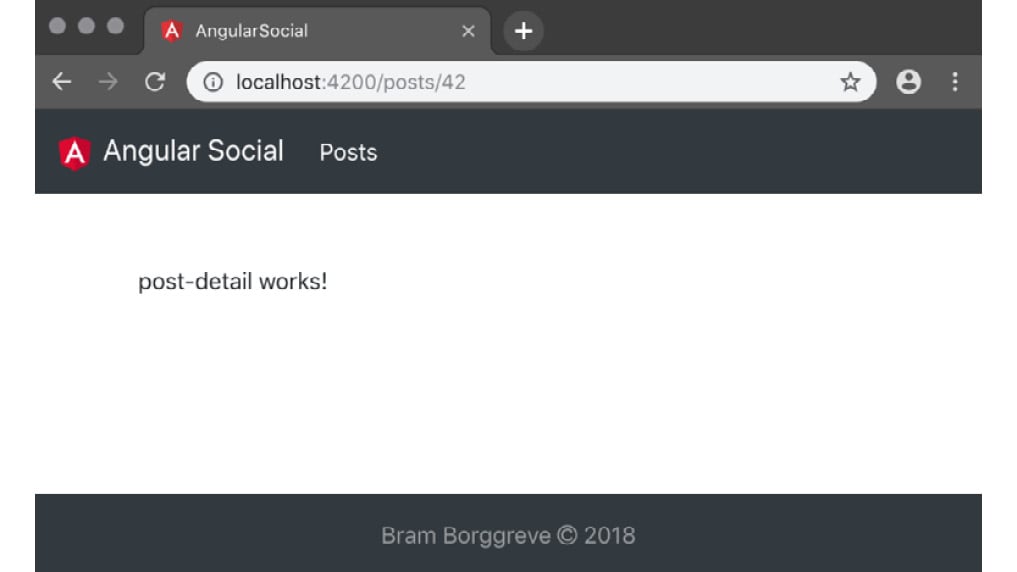
Figure 1.26: The PostDetailComponent
Exercise 19: Defining our Data Model Types
To get the most out of working with TypeScript, we will create some custom types to describe the data we get back from the API. We can use these types throughout the app, and they will help us during development by providing type information. This will, for example, prevent us from trying to access properties that do not exist, and can help with auto completion in the editor.
In this application, we will use a post and profile. Follow these steps to complete this exercise:
- Open your terminal and navigate to the project directory.
- Run the following command from inside the project directory:
ng g class post/model/post
CREATE src/app/post/model/post.ts
- Open the
src/app/post/model/post.tsfile and add the following content:export class Post { id: string; profileId: string; profile: Profile; type: 'text' | 'image'; text: string; date: Date; } - Run the following command from inside the project directory:
ng g class post/model/profile
CREATE src/app/post/model/profile.ts
- Open the
src/app/post/model/profile.tsfile and add the following content:export class Profile { id: string; avatar: string; fullName: string; posts?: Post[]; }We have now defined the two models. The last thing we need to do is import the
Profilemodel from ourPostmodel, and vice versa. - Add
import { Post } from './post';toprofile.ts. - Add
import { Profile } from './profile';topost.ts:
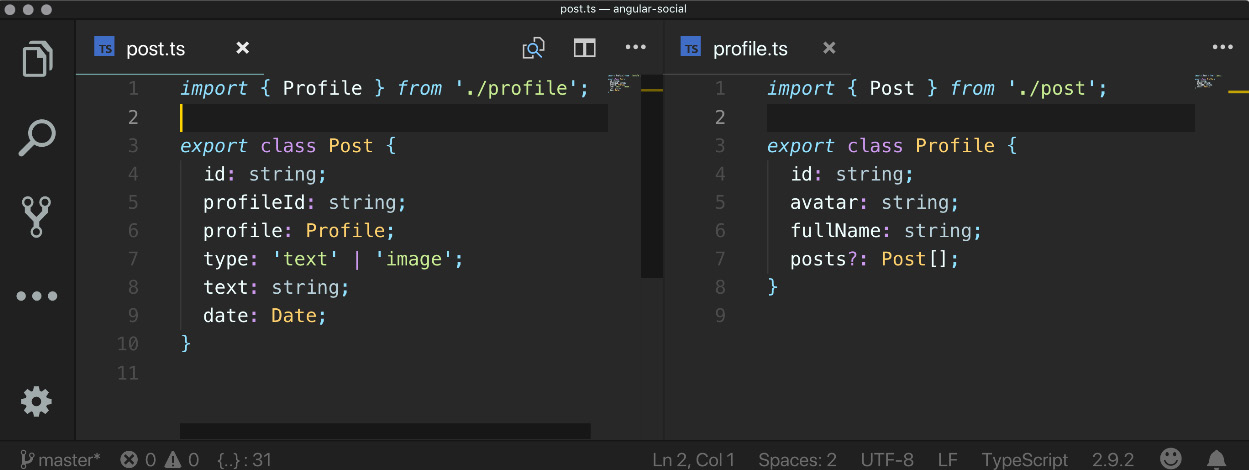
Figure 1.27: Importing our model types
Creating a Service for API Interaction
While you could make a request to an API from a component, the best practice in Angular is to use services for retrieving and sending data from and to the API. The benefits of doing this are that services can be reused throughout multiple components; this keeps the component to its responsibility of displaying an interface.
An additional benefit is that it makes your code easier to test when writing unit tests. You can mock the behavior of a service to make sure that the unit tests are not dependent on the API being online at the moment the tests are run.
Once we have created the service, we can inject it into a component and use it.
Exercise 20: Using the Environment to Store the API Endpoints
In this exercise, we will use the environment of Angular CLI to store the API URL. Using the environment, we can define a different URL for development and production environments.
By default, the application generated with Angular CLI comes with two pre-defined environments. These environments are defined in angular-cli.json in the default project.
Follow these steps to complete this exercise:
- Open the
src/environments/environment.tsfile. - Inside the
environmentvariable, add a key calledapiUrland assign the value to the'http://localhost:3000/api'string, which is the URL to the development API. - Open the
src/environments/environment.prod.tsfile. - Inside the
environmentvariable, add a key calledapiUrland assign the value to the'https://packt-angular-social-api.now.sh/api'string, which is the URL to the production API.
Exercise 21: Generating and Implementing the PostService
In this exercise, we will use the ng generate service command to generate a service that will handle the interaction with the API. Follow these steps to complete this exercise:
- Open your terminal and navigate to the project directory.
- Run the following command from inside the project directory:
ng g s post/services/post
CREATE src/app/post/services/post.service.spec.ts (362 bytes)
CREATE src/app/post/services/post.service.ts (133 bytes)
The next step is to define two public methods in the
PostServiceand make sure that these retrieve the data we need from the API. We will add two methods in thePostService.The first method is the
getPostsmethod, which does not take any arguments and returns anObservableof all the posts from the API. The second method is thegetPostmethod, which takes the ID of type string as an argument. It returns anObservableof the post with the ID that is passed in as an argument, and includes all the posts that are made by that profile. - Open the
src/app/post/services/post.service.tsfile. - Add an
importstatement to import theHttpClientfrom@angular/common/http, a reference to the environment where we have the API URL defined, and thePostmodel:import { HttpClient } from '@angular/common/http'; import { environment } from '../../../environments/environment'; import { Post } from '../model/post'; - Define the
baseUrlanddefaultParamsconstants:const baseUrl = `${environment.apiUrl}/posts/`; const defaultParams = 'filter[include]=profile'; - Update the constructor to inject the
HttpClientand make it available under the privatehttpvariable:constructor(private http: HttpClient) { } - Create a new method called
getPosts() {}and add the following to it:public getPosts(): Observable<Post[]> { const params = `?${defaultParams}&filter[where][type]=text&filter[limit]=20`; return this.http.get<Post[]>(baseUrl + params); } - Create a new method called
getPost(id)and add the following to it:public getPost(id: string): Observable<Post> { const params = `?${defaultParams}`; return this.http.get<Post>(baseUrl + id + params); }
Exercise 22: Using the PostService in the Container Components
In this exercise, we will reference the PostService in both the container components to fetch the data.
We will use the OnInit component lifecycle hook provided by Angular to call into the injected service and invoke the methods from that service. Note that we do the same thing for both the PostListComponent and the PostDetailComponent. Follow these steps to complete this exercise:
- Open the
src/app/post/containers/post-list/post-list.component.tsfile. - Add an
importstatement for the newPostService:import { PostService } from '../../services/post.service'; import { Post } from '../../model/post'; - Add a
publicclass property calledpostsof typePost[]:public posts: Post[];
- Update the constructor to inject the
PostServiceand make it available under theprivate servicevariable:constructor(private service: PostService) {} - Add the following to the
ngOnInitmethod:ngOnInit() { this.service.getPosts() .subscribe( res => this.posts = res, err => console.log('error', err), ) } - Open the
post-list.component.htmlfile and update the content to the following:<pre> {{posts | json}} </pre>Let's do the same for the
PostDetailComponentnow. - Open the
src/app/post/containers/post-detail/post-detail.component.tsfile. - Add an
importstatement for the newPostService:import { ActivatedRoute } from '@angular/router'; import { Observable } from 'rxjs'; import { PostService } from '../../services/post.service'; import { Post } from '../../model/post'; - Add a
publicclass propertypostof typePost:public post: Post;
- Update the constructor to inject the
PostServiceandprivate route: ActivatedRoutedependency:constructor(private route: ActivatedRoute, private service: PostService) {} - Set the contents of the
ngOnInitmethod to the following:this.service.getPost(this.route.snapshot.paramMap.get('id')) .subscribe( res => this.post = res, err => console.log('error' ,err) ) - Open the
post-detail.component.htmlfile and update the content to the following:<pre> {{post | json}} </pre>
Exercise 23: Importing the HttpClientModule to Enable the HttpClient
We are almost done creating the PostService, but there is still one thing we need to fix. When we refresh the application, we can see that we have an error message in the console:
ERROR Error: StaticInjectorError[HttpClient] :
StaticInjectorError[HttpClient] :
NullInjectorError: No provider for HttpClient!
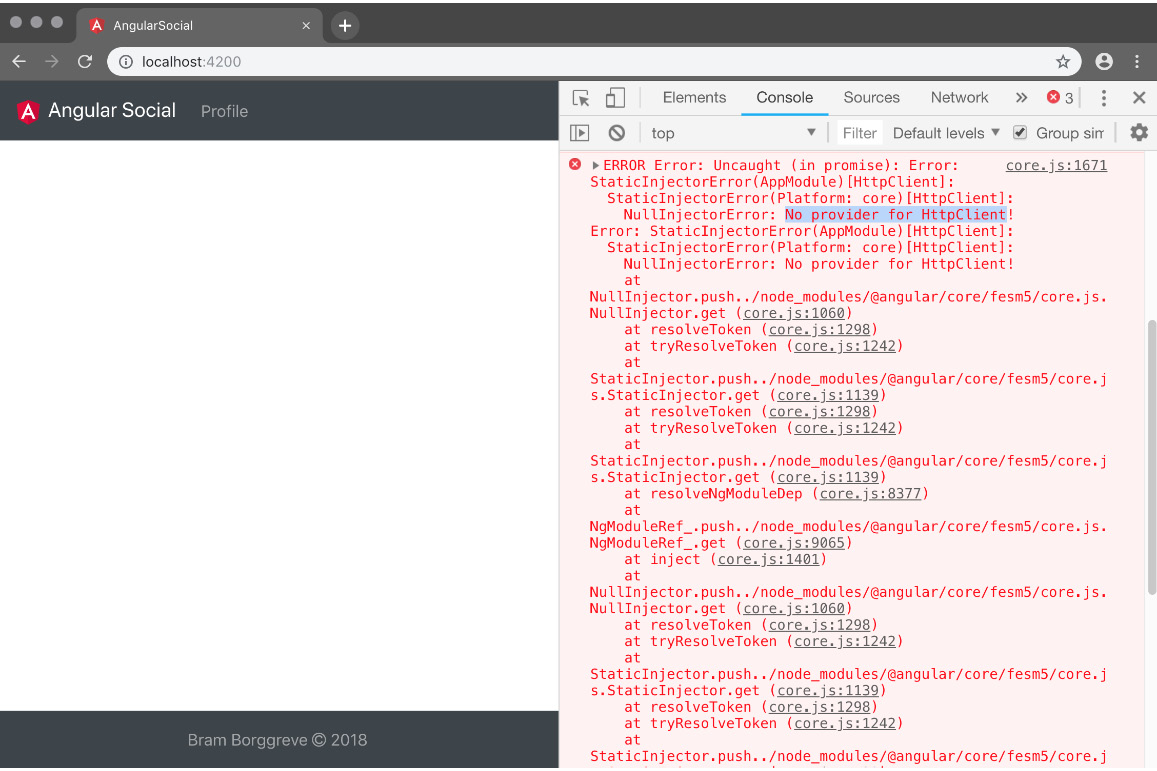
Figure 1.28: The import error
The reason that we get this error is because we have used the HttpClient in the service, but Angular does not know where this module comes from. To fix this, we need to import HttpClientModule in the AppModule. Follow these steps to complete this exercise:
- Open the
src/app/app.module.tsfile. - Add an
importstatement to import theHttpClientModulefrom@angular/common/http:import { HttpClientModule } from '@angular/common/http'; - Update the
importsarray in theNgModuledecorator to importHttpClientModule:@NgModule({ ... imports: [ ... HttpClientModule, ... ], ... })
When we refresh the application, we should see a list of posts retrieved from the API:
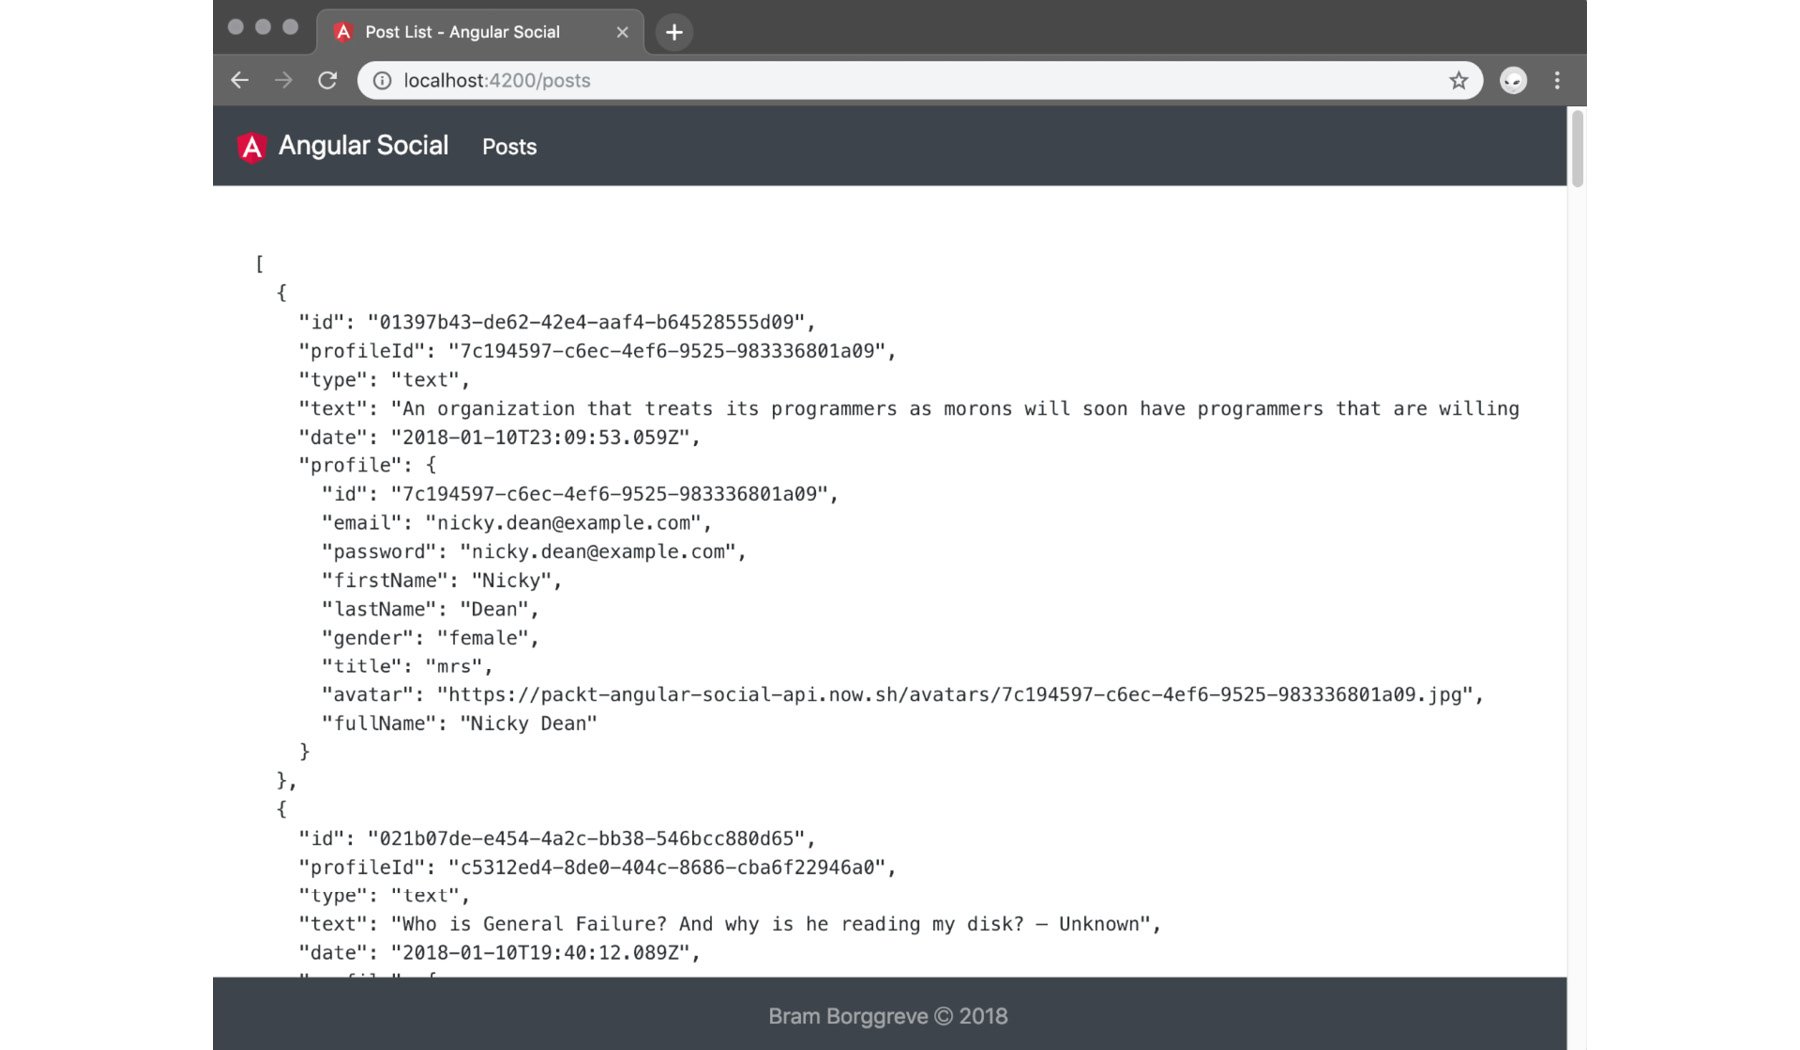
Figure 1.29: List of posts retrieved from the API
Let's continue and add some presentational components to give the posts some style.
Creating the Presentational Components
In this section, you will use ng generate component to create the PostItemComponent and PostProfileComponent inside the PostModule, implement the logic for these components, and use these components in our container components.
The PostItemComponent accepts a single post as its input and displays that post. For displaying the profile that belongs to the post, we use the PostProfileComponent. It takes the profile as input and uses the ng-content component to project the content on top.
Exercise 24: Generating the PostItemComponent
In this exercise, we will use the ng generate command to create our PostItemComponent. Follow these steps to complete this exercise:
- Open your terminal in the project directory and run the following command:
ng g c post/components/post-item
CREATE src/app/post/components/post-item/post-item.component.css (0 bytes)
CREATE src/app/post/components/post-item/post-item.component.html (28 bytes)
CREATE src/app/post/components/post-item/post-item.component.spec.ts (643 bytes)
CREATE src/app/post/components/post-item/post-item.component.ts (280 bytes)
UPDATE src/app/post/post.module.ts (574 bytes)
- Open the
src/app/post/components/post-item/post-item.component.tsfile. - Import
Inputfrom@angular/coreby adding it to the existingimportstatement and add the following:import { Post } from '../../model/post'; - Add the following property in the component class:
@Input() post: Post;
- Update the template to the following:
<div class="card">
  <div class="card-body" *ngIf="post">
    <app-post-profile [profile] ="post.profile">
      <div class="my-2">
        <a [routerLink] ="['/posts', post.id]" class="text-muted">
          {{ post.date | date: 'medium'}}
        </a>
      </div>
      <p>{{post.text}}</p>
    </app-post-profile>
  </div>
</div>
Exercise 25: Generating the PostProfileComponent
In this exercise, we will use the ng generate command to create our PostProfileComponent.
This component will display the avatar and full name of the profile that created the post, and it will use the ng-content component to show the markup that exists inside the <app-post-profile> tags from the previous exercise. Follow these steps to complete this exercise:
- Open the terminal and run the following command from inside the project directory:
ng g c post/components/post-profile
CREATE src/app/post/components/post-profile/post-profile.component.css (0 bytes)
CREATE src/app/post/components/post-profile/post-profile.component.html (31 bytes)
CREATE src/app/post/components/post-profile/post-profile.component.spec.ts (664 bytes)
CREATE src/app/post/components/post-profile/post-profile.component.ts (292 bytes)
UPDATE src/app/post/post.module.ts (685 bytes)
- Open the
src/app/post/components/post-profile/post-profile.component.tsfile. - Import
Inputfrom@angular/coreby adding it to the existingimportstatement and add the following:import { Profile } from '../../model/profile'; - Add the following property to the component class:
@Input() profile: Profile;
- Update the template to the following:
<div class="media" *ngIf="profile"> <img class="avatar mr-3 rounded" [attr.src]="profile.avatar" [attr.alt]="profile.fullName"> <div class="media-body"> <h5> {{profile.fullName}} </h5> <ng-content></ng-content> </div> </div> - Open
src/app/post/components/post-profile/post-profile.component.cssand add the following styles:img.avatar { height: 80px; width: 80px; }
Exercise 26: Using the PostItemComponent
In this exercise, we will use the PostItemComponent. Follow these steps to complete this exercise:
- Open the
src/app/post/containers/post-list/post-list.component.htmlfile. - Update the template to the following:
<div class="row"> <div class="col-md-8 offset-md-2 mb-3" *ngFor="let post of posts"> <app-post-item [post]="post"></app-post-item> </div> </div> - Open the
src/app/post/containers/post-detail/post-detail.component.htmlfile. - Update the template to the following:
<app-post-item [post]="post"></app-post-item>
When we now refresh the application in our browser, we can see that the content is styled and that the navigation still works as expected:
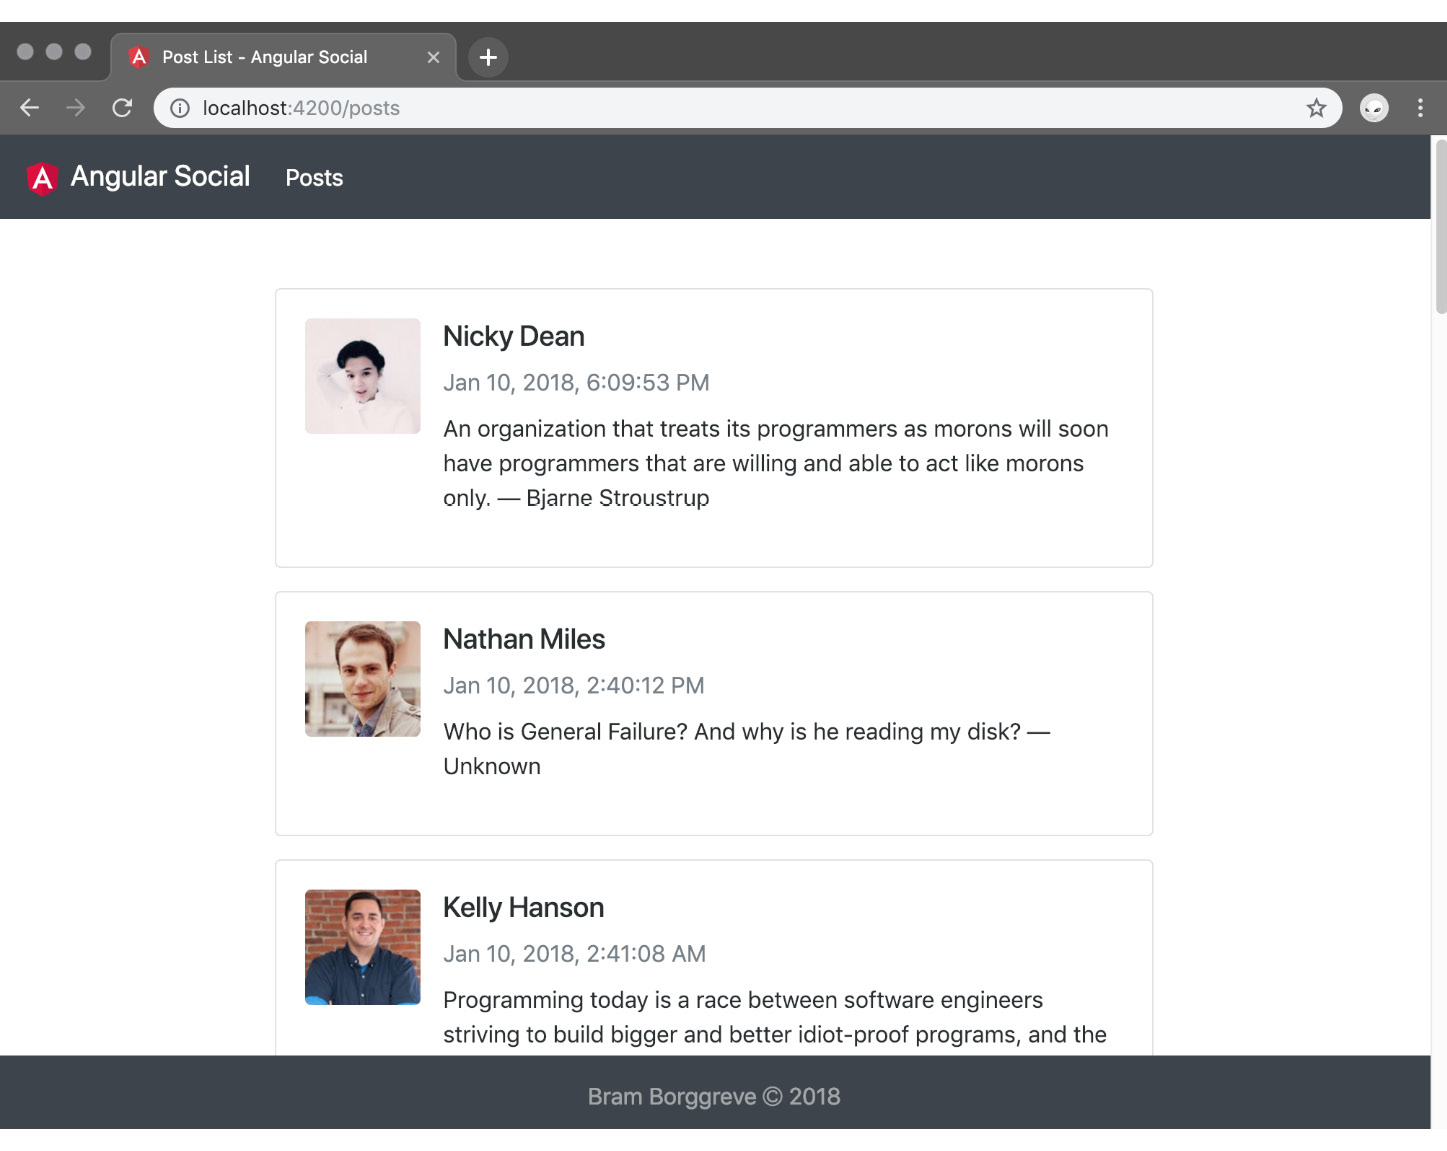
Figure 1.30: List of styled posts
We have successfully separated the concerns of retrieving the data and displaying it.
Resolving Data Using the Router
In this section, you will manually create two injectable classes that act as resolvers, configure the router to use these resolvers, and update the container components to use this resolved data.
A resolver is a class that we can use to fetch the data that we use in the component before the component is displayed. We call the resolvers in the routes where we need the data. In the implementation, the resolvers retrieve the data from the API and return it so that it can be displayed in the components.
Note
More information about resolvers can be found at https://angular.io/guide/router#resolve-pre-fetching-component-data.
Our application is quite neatly structured already, but there is one thing that we can optimize.
To see what the problem is, open Chrome Developer Tools and open the Performance tab. Hit the Cog icon and set Network to Slow 3G. If we now click around in the application, we will see that that the page navigation still works, but we are presented with empty pages.
The reason for this is that while the components are loaded correctly, they still need to retrieve the data after they are loaded. This is because the components call into the PostService from the ngOnInit method.
It would be better if the router could make sure that the component has all the necessary data loaded before entering the page. Fortunately, the Angular router provides a way to handle this by using resolvers. They will resolve the data before entering the route, and in the component, we can just take this resolved data and display it.
The resolvers that we create need the @Injectable() decorator to make sure that they are part of the dependency injection in Angular.
Exercise 27: Creating a Resolver for the getPosts Method
In this exercise, we will create a resolver that invokes the getPosts() method defined in the PostService. Follow these steps to complete this exercise:
- Open a terminal and run the following command:
ng g class post/resolvers/posts-resolver
- Open the
src/app/post/resolvers/posts-resolver.tsfile. - Start the file by defining the necessary imports:
import { Injectable } from '@angular/core'; import { Resolve } from '@angular/router'; import { Post } from '../model/post'; import { PostService } from '../services/post.service'; - Decorate the
PostsResolverclass with the@Injectableoperator:@Injectable({ providedIn: 'root' }) export class PostsResolver {} - Make the class implement
Resolve<Post[]>:@Injectable({ providedIn: 'root' }) export class PostsResolver implements Resolve<Post[]> { } - Inside the class, create a constructor and inject the
PostService:constructor(private service: PostService) {} - Below the constructor, create a class method called
resolveand make it return thegetPosts()method from thePostService:resolve() { return this.service.getPosts(); }
This is the resolver that will be used to retrieve all the posts, just like how we do this currently in the PostListComponent.
Exercise 28: Creating a Resolver for the getPost Method
In this exercise, we will create a resolver that invokes the getPost() method defined in the PostService. We will pass in the ID that we get from the ActivatedRouteSnapshot. Follow these steps to complete this exercise:
- Open a terminal and run the following command:
ng g class post/resolvers/post-resolver
- Open the
src/app/post/resolvers/post-resolver.tsfile. - Start the file by defining the necessary imports:
import { Injectable } from '@angular/core'; import { ActivatedRouteSnapshot, Resolve } from '@angular/router'; import { Post } from '../model/post'; import { PostService } from '../services/post.service'; - Decorate the
PostResolverclass with the@Injectableoperator and pass in an object with theprovidedInkey set toroot:@Injectable({ providedIn: 'root' }) export class PostResolver {} - Make the class implement
Resolve<Post>:@Injectable({ providedIn: 'root' }) export class PostResolver implements Resolve<Post> { } - Inside the class, create a constructor and inject the
PostService:constructor(private service: PostService) {} - Below the constructor, create a class method called
resolve, and pass theroute: ActivatedRouteSnapshotclass into it:resolve(route: ActivatedRouteSnapshot) { } - Inside the
resolvemethod, we return thegetPost()method from thePostServicewhile getting theidparameter from theActivatedRouteSnapshot:resolve(route: ActivatedRouteSnapshot) { return this.service.getPost(route.paramMap.get('id')); }
This is the resolver that will be used to retrieve the posts that we have navigated to in the route.
Exercise 29: Adding the Resolvers to the PostRoutingModule
In this exercise, we will add the two new resolvers to the PostsRoutingModule. We will do this by importing the resolvers and then adding a resolve property to both of the routes. The resolve property takes an object where the key is how the data will be available in the router after it is resolved, and the value is a reference to the imported resolver. Follow these steps to complete this exercise:
- Open the
src/app/post/post-routing.module.tsfile. - Import the two freshly created resolvers:
import { PostsResolver } from './resolvers/posts-resolver'; import { PostResolver } from './resolvers/post-resolver'; - Update both the routes to add a
resolveproperty and call into the resolvers:const routes: Routes = [ { path: '', component: PostListComponent, resolve: { posts: PostsResolver, } }, { path: ':id', component: PostDetailComponent, resolve: { post: PostResolver, } }, ];
If we check the Network tab in Chrome Developer Tools, we can see that we make two requests to the same endpoint. This is because we retrieve the data twice: once in the resolver and once in the component. Let's update the container components and let them use the data resolved by the router.
Exercise 30: Using Resolved Data in the PostListComponent
In this exercise, we will update the PostListComponent to read the data that has been resolved by the router. We will subscribe to the data of the active route and we will map over that data twice. In the first map command, the posts value relates to the object key we used in the resolver object for this route. Follow these steps to complete this exercise:
- Open the
src/app/post/containers/post-list/post-list.component.tsfile. - Import
ActivatedRoutefrom@angular/router:import { ActivatedRoute } from '@angular/router'; import { map } from 'rxjs/operators'; - Remove the
PostServiceimport as we are no longer going to use it here. - Update the constructor to inject only
private route: ActivatedRoute:constructor(private route: ActivatedRoute) { } - Update the
ngOnInit()method and replace the content with the following code:ngOnInit() { this.route.data .pipe( map(data => data['posts']), ) .subscribe( res => this.posts = res, err => console.log('error', err), ); }
Refresh the page and make sure that the data is still loaded.
Exercise 31: Using Resolved Data in the PostDetailComponent
In this exercise, we will update the PostDetailComponent to read the data that has been resolved by the router. We subscribe to the data of the active route and we will map over that data. In the map command, the profile value relates to the object key we used in the resolver object for this route. Follow these steps to complete this exercise:
- Open the
src/app/post/containers/post-detail/post-detail.component.tsfile. - Add the following
importstatement:import {map} from 'rxjs/operators'; - Remove the
PostServiceimport as we are no longer going to use it here. - Update the constructor to only inject
private route: ActivatedRoute:constructor(private route: ActivatedRoute) { } - Update the
ngOnInit()method and replace the content as follows:ngOnInit() { this.route.data .pipe( map(data => data['post']) ) .subscribe( res => this.post = res, err => console.log('error', err), ); }
Refresh the page and make sure that the data is still loaded.
In the following activities, we will introduce the ProfileModule, which is responsible for listing the profiles. The following activities should be performed using the knowledge that you have learned in this chapter.
Activity 5: Creating a ProfileModule
In this activity, you will create a ProfileModule in src/app/profile. Add a menu item in the LayoutModule to link to the new ProfileModule.
The steps are as follows:
- Create a module called
ProfileModule. - Define the
/profiles/route to lazy load this new module inapp-routing.module.ts. - Add a menu item to link to the
/profiles/URL in theheader.component.tsfile created in Activity 3.Note
The solution for this activity can be found on page 113.
Activity 6: Creating Container Components
In this activity, we will create the container components ProfileListComponent and ProfileDetailsComponents. The routes are similar to those in the PostModule.
The steps are as follows:
- Add the
ProfileListComponentandProfileDetailComponentcontainers. - Add routes to the container components in
ProfileRoutingModule.Note
The solution for this activity can be found on page 114.
Activity 7: Creating Service and Resolvers
In this activity, we will create the service and resolvers called ProfileService, ProfilesResolver, and ProfileResolver. The functionality of those services and resolvers is identical to those in the PostModule.
The steps are as follows:
- Add a
ProfileServiceto retrieve the data. - Add a
ProfilesResolverandProfileResolverand use them in theProfileRoutingModule.Note
The solution for this activity can be found on page 115.
Activity 8: Creating Presentational Components
In this activity, we will create the presentational component to display the profile data.
The steps are as follows:
- Use the resolved data in the container components.
- Create the presentational components to display the profile data from the API.
Note
The solution for this activity can be found on page 117.


