Scheduling from the start or finish date
Before you start adding tasks in Microsoft Project, it’s important to decide whether your project will be scheduled from the start date or the finish date. Choose a start date when you know when to begin and plan the tasks in order. If there’s a fixed deadline, such as for an event, start from the finish date and plan backward. This initial step is crucial for organizing your project effectively. Next, we’ll see how this works with two examples: setting up an office from a known start date and planning a product launch with a specific finish date in mind.
Example 1 – scheduling from a start date
For the project of setting up a new office, scheduled to begin on April 1st, you use Microsoft Project to set this as the start date. You then list and schedule tasks such as ordering furniture, hiring staff, and setting up IT infrastructure. These tasks are arranged and linked based on their dependencies, starting from April 1st. As you assign employees and resources to each task, the project’s Gantt chart helps visualize the sequence of activities, which are all aligned to kick off from the set start date.

Figure 1.1: Scheduling a project from a start date
Example 2 – scheduling from a finish date
For planning a product launch event that must occur by December 15th, you would set this date as the project’s finish date in Microsoft Project. Tasks such as developing marketing materials, coordinating venue setup, and sending invitations are put in and linked. Critical tasks are given specific deadlines to ensure alignment with the final event date. The Gantt chart in this case displays the tasks scheduled backward from December 15th, ensuring that all preparations finish on the event day.

Figure 1.2: Scheduling a project from a finish date
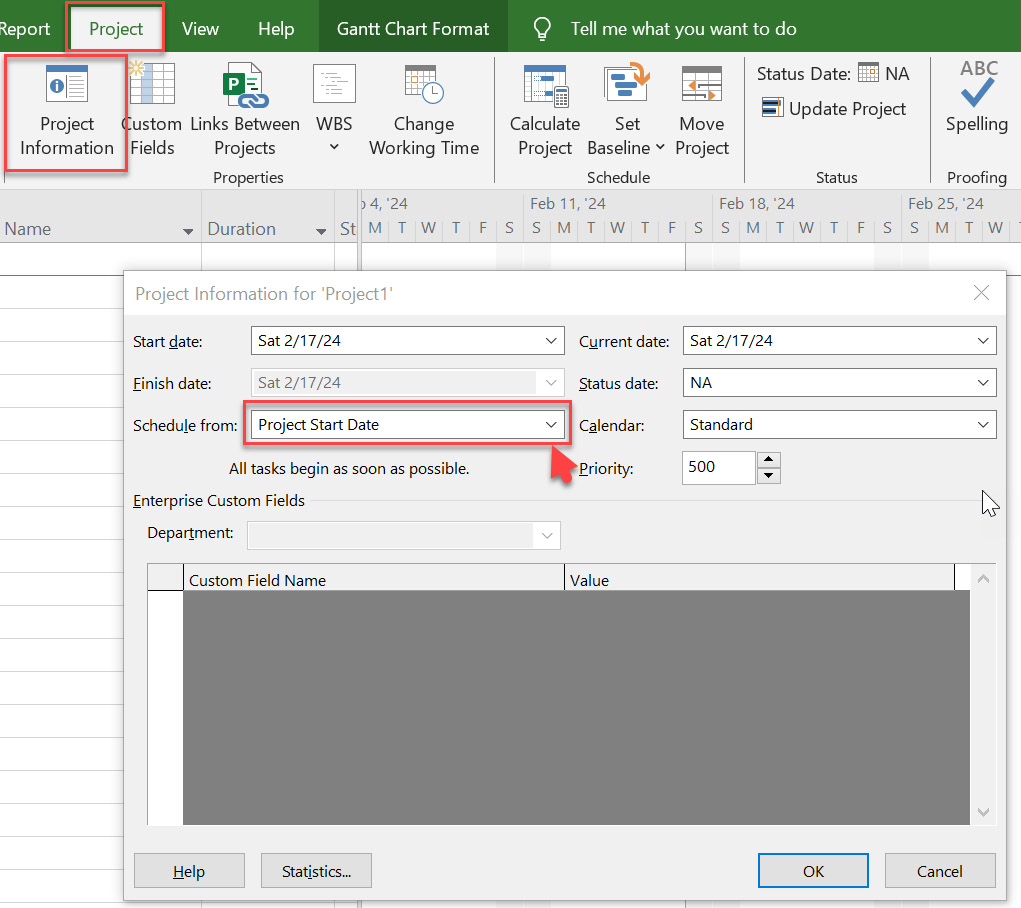
Begin planning your project by establishing a start date or finish date:
- Select Project | Project Information.
- Select your preference for using the start or finish date to schedule your project from.

Figure 1.3: The Project Information dialog box
- Now enter your chosen date in either the Start Date: or the Finish Date: field. Once a date is entered, the scheduling engine in Microsoft Project will take note of this date and auto-populate some fields in your project as necessary. This will eliminate the need for you to do manual data entry into some fields in your file unless you specifically have a need to do so.
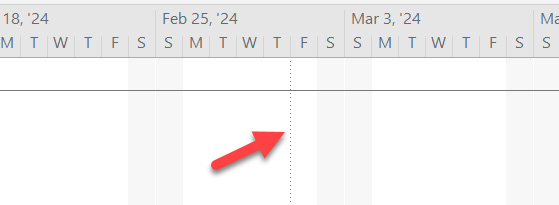
- On the Gantt chart, the start date will be represented by the appropriate date with a vertical dashed line as shown.

Figure 1.4: The start date shown on a Gantt chart for March 1, 2024
Setting up the start or finish date is the first step you should complete when setting up your project file. The start date indicates an automatic task constraint of As Soon As Possible (ASAP) and a finish date indicates As Late As Possible (ALAP), which we will discuss later in Chapter 3, Managing and Defining Tasks.
Scheduling from a start or finish date aids the Gantt chart in being a dynamic tool in Microsoft Project that visually aids in understanding task dependencies, durations, and overlaps.


