Additional panels and shortcuts
In moving forward, let's address those items that you should all have a common knowledge of. In this section, we will review the key panels for assigning attributes and editing them at any time. We will also look at a few powerful methods to keep designs organized as well as a few keyboard shortcuts you will want to know as you become more efficient while using the software.
Appearance panel
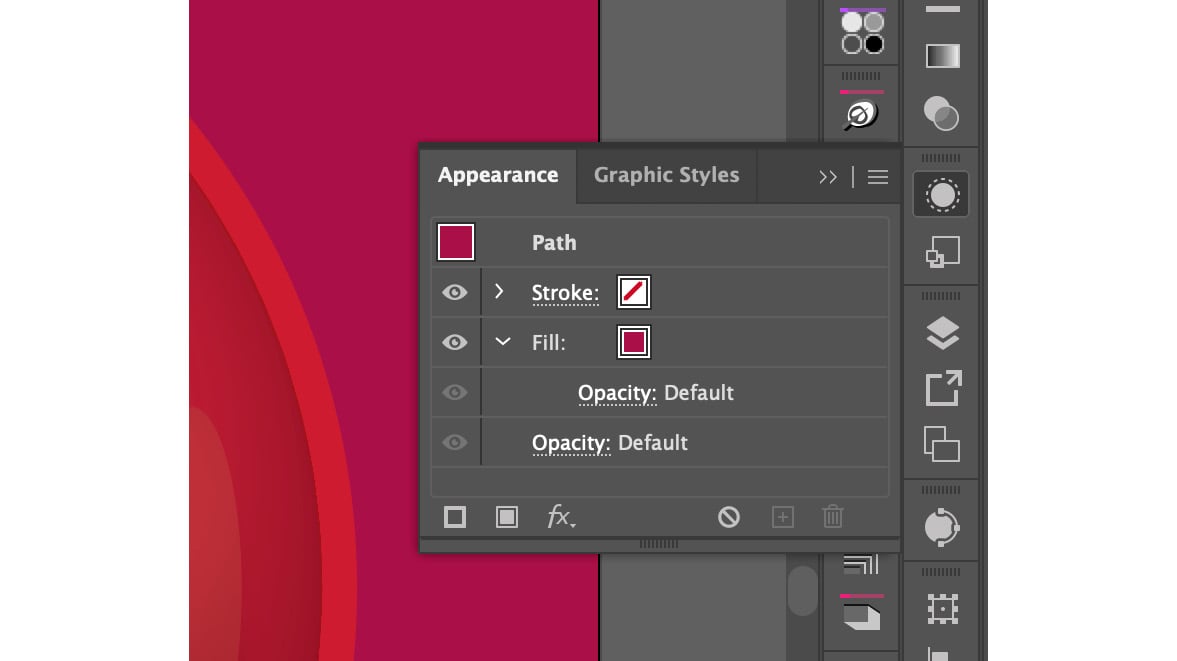
Once an object is selected, you can review and adjust assigned attributes and effects on the object (or similar objects). It will show different information based on what has been selected. If the selected object is a path, then the Fill and Stroke attributes will be displayed. It will also display Opacity and Blending Mode attributes, as well as effects applied to the path. This can also be where you choose to add any or all the aforementioned attributes.
When looking for the Appearance panel, look for an icon that appears to have a circle with a solid white fill and a white dashed line stroke around it, as in Figure 1.12:

Figure 1.12 – Appearance panel showing the properties of the selected object
You may also summon the panel by going to the menu and choosing Window > Appearance. Note that the information within this panel will change each time you select a different object, multiple objects (selecting while holding the Shift key), or groups.
Properties panel
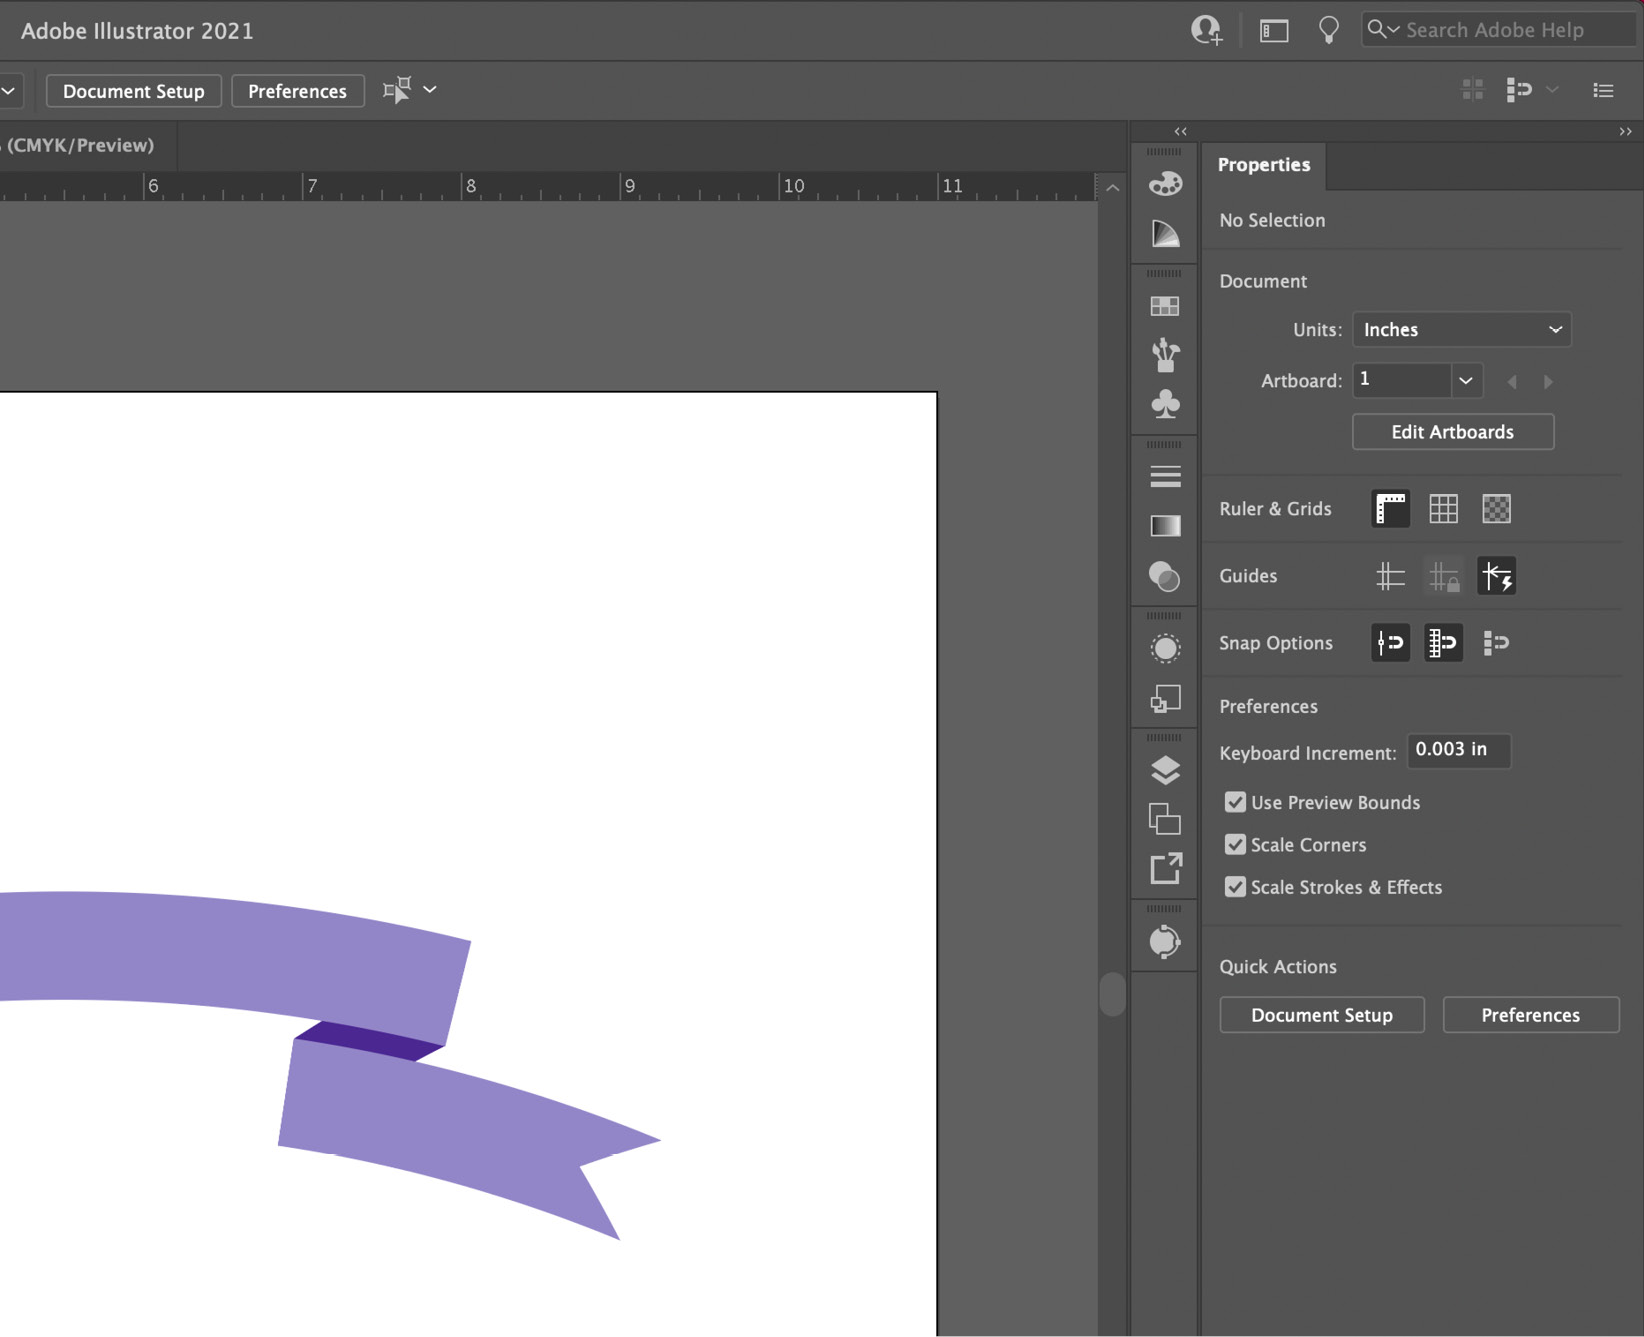
The Properties panel is a bit of a one-stop shop for viewing attributes of a selected object and quickly adding to or modifying it. This Swiss Army knife of a panel allows for Transform adjustments, Appearance adjustments, Alignments, and additional Quick Actions, such as Arrange and Recolor. If there is currently nothing selected, the panel allows you to set up several document and user interface options, such as Ruler & Grids, Snap Options, and Document and Artboard settings:

Figure 1.13 – Document properties
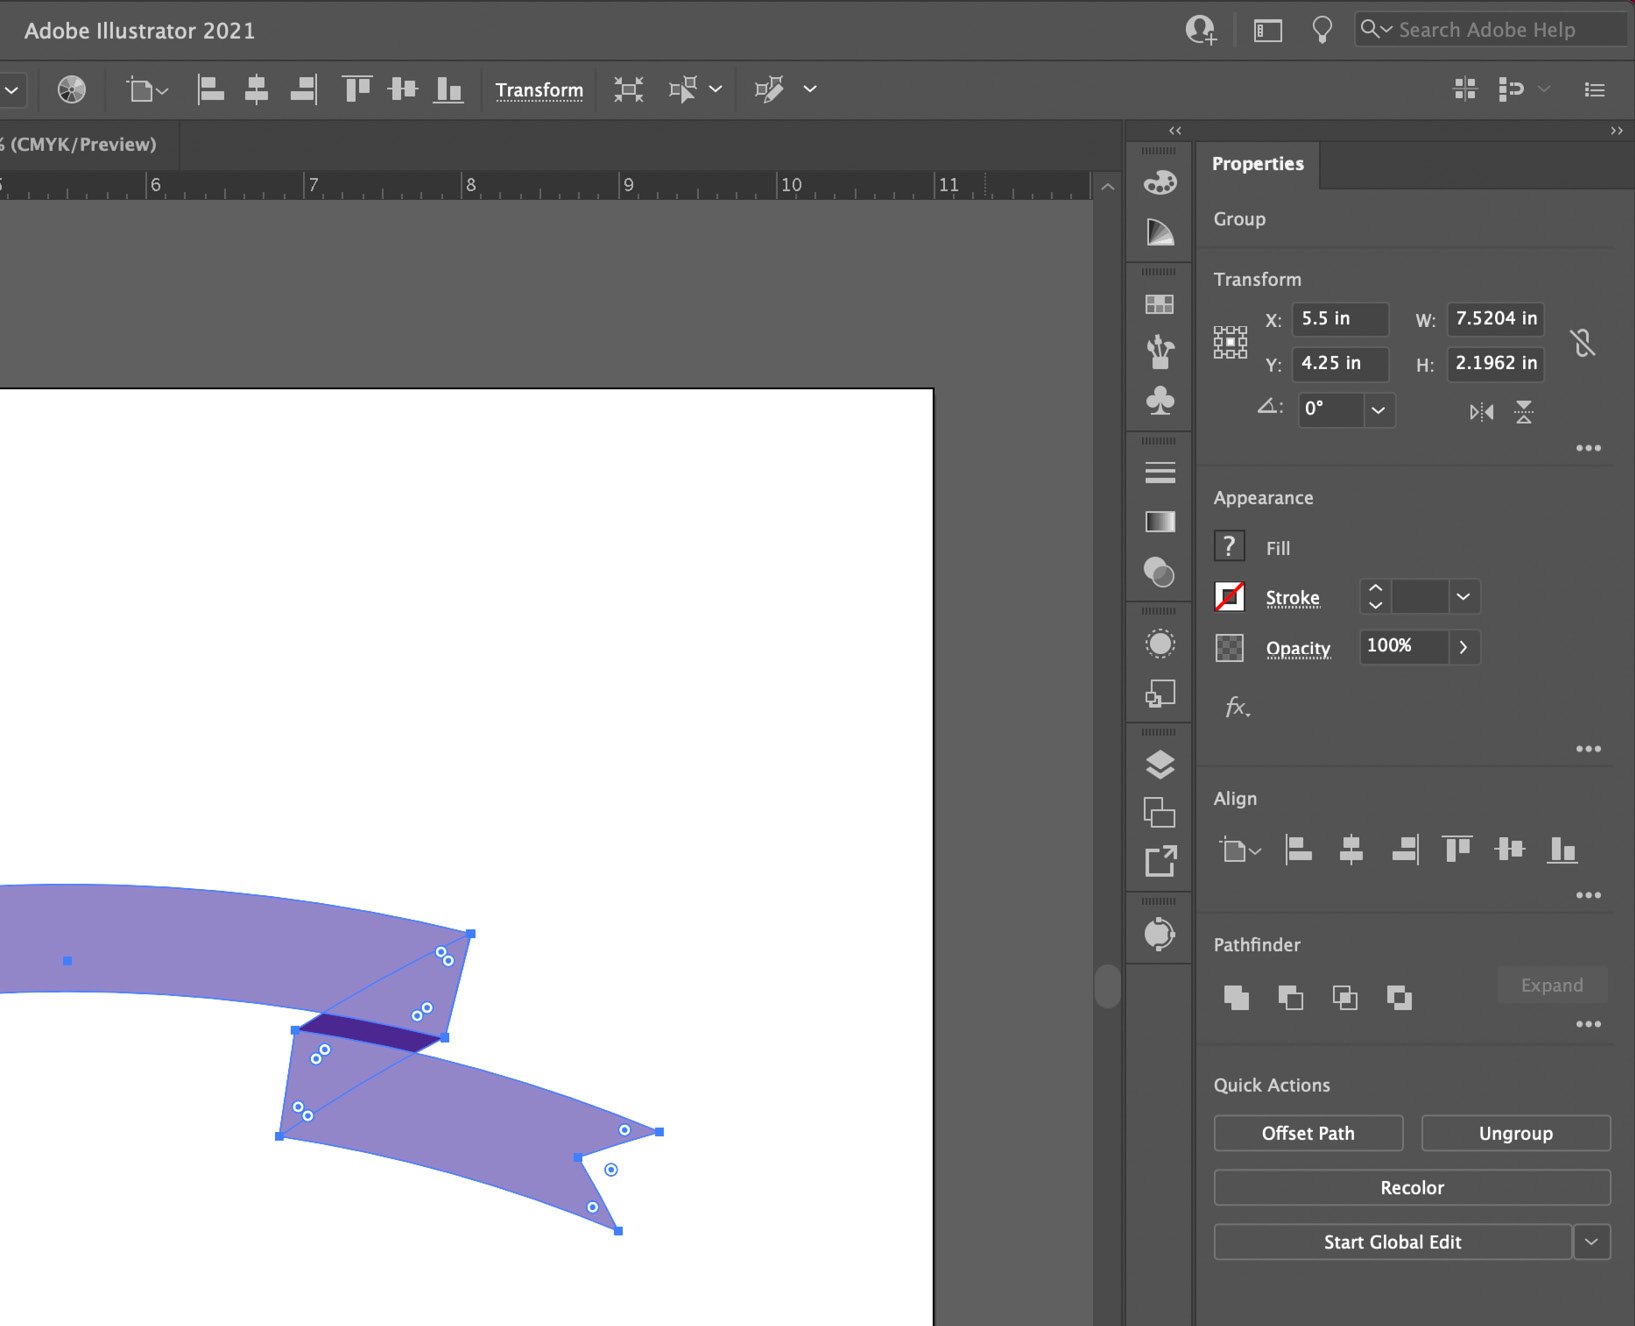
While using the Selection tool, you will find the document's properties in the Properties panel when nothing is selected. From this panel, you can change the unit of measurement, add artboards, and many more options. Located at the bottom of this panel will always be Quick Actions. This area showcases several shortcut buttons that may accelerate your efforts. In the scenario shown in Figure 1.13, the two buttons available to you will be Document Setup and Preferences. Once an item or items becomes selected, the panel changes to display the properties available for that specific situation:

Figure 1.14 – Properties panel showing options based on selection
Several manipulations can be accomplished using this panel, including access to the aforementioned Appearance panel. Many of the options are available there, while any additional options can be accessed using the More Options button located in the lower-right corner of each section.
You should now feel comfortable with setting up and adjusting your workflow for a variety of intended tasks, while continually becoming more efficient with your process of creation. You may find that your current situation still requires a more precise layout, though. In such cases, I would highly recommend the use of the following compositional aides.


