Getting acquainted with Blender
When Blender starts up, the Splash Screen can be dismissed by left-clicking outside the screen.
Note
The screenshots in this book use a custom color palette for print and a smaller window to minimize wasted screen space. Customizing the color palette will be discussed briefly later but these cosmetic changes will not affect the instructions presented at all.
The Blender interface is broken into several different customizable panels to keep things organized.
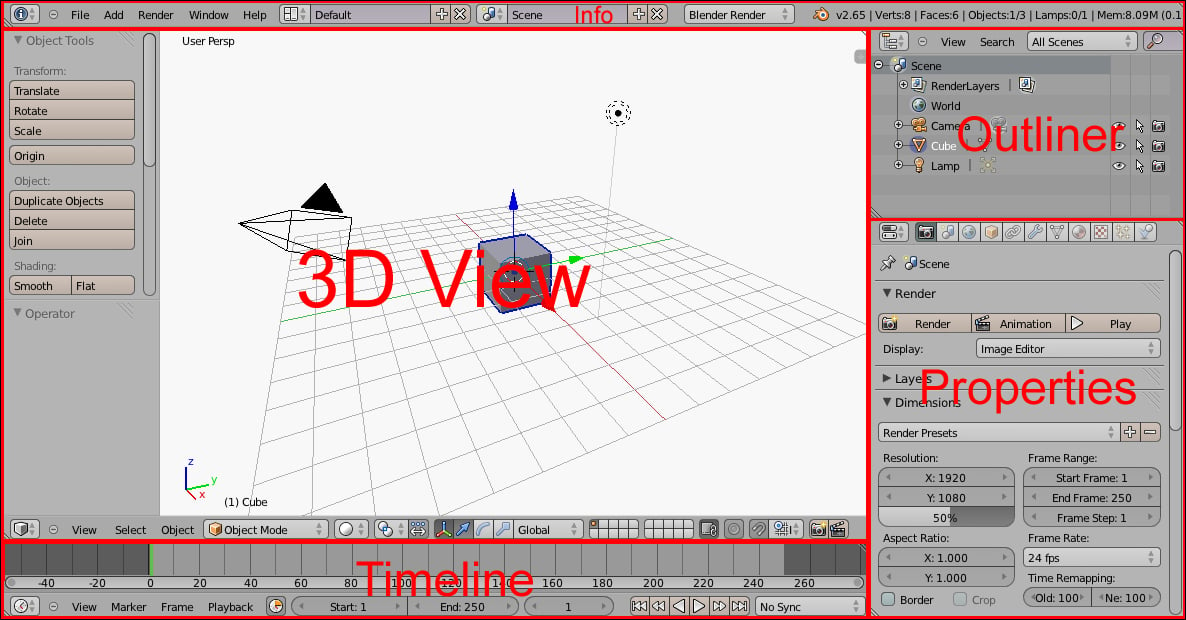
Each panel has resizing widgets in the upper-right and lower-left corners. By clicking on these widgets the panels can be split to add more panels or expanded into the territory of another to collapse panels at the user's preference. However, for now the default panels will be discussed as they provide the most common functionality for beginners.
The 3D View panel
The main window where things will be happening is the 3D View panel. The largest portion of the 3D view consists of the viewport where most of the work will take place.
On the left-hand side of the 3D View panel is a tool bar that consists of tools relevant to the selection and mode. If the tool bar is ever not visible it can be revealed (or hidden again) by pressing T or by clicking on the plus icon on the right-hand side that will appear when the toolbar is hidden. The specific tools in this bar will be explored as they are needed in the projects.
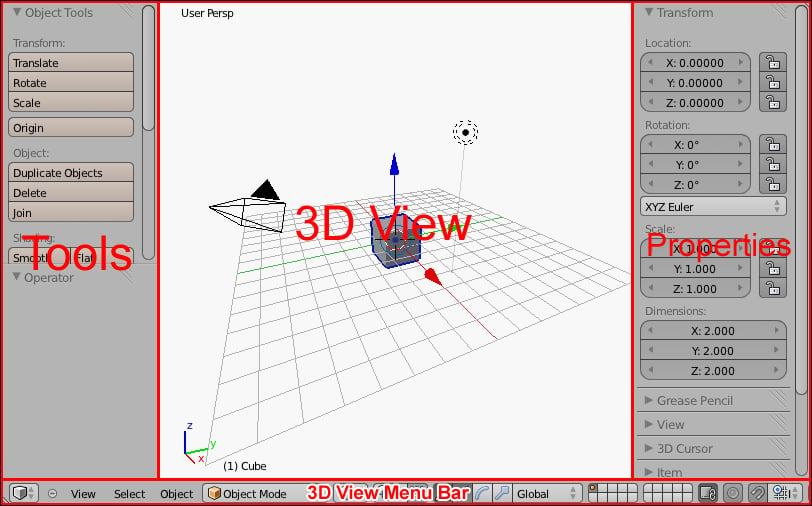
There is another plus icon on the right that will bring up the viewport properties with properties relevant to the current selection or the viewport. This can also be revealed or hidden by pressing the N key. Again, the specifics will be explored further as needed.
At the bottom of the 3D View panel is the 3D view menu bar with additional options followed by menus and icons related to editing and views. Hovering the mouse over each button will show what they are for.
The Outliner panel
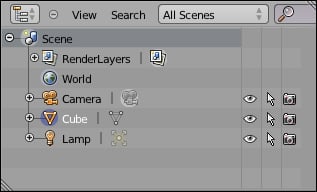
The Outliner panel contains a hieratical view of all the objects in the scene. Each object can be selected by clicking on their name or the object can be hidden, locked, or excluded from rendering.
Note
Rendering means making a high quality picture from a scene for things such as animation or presentations. Doing a proper render includes setting up scene lights, cameras, textures, material properties, and many other functions that will not be explored in this book as it does not do anything that helps produce models for printing. However, exploring this functionality outside of this book can be good when trying to show off the models if printing them is not an option.
The Properties panel
The Properties panel is broken up into many tabs indicated by small icons. Hovering over the icons will show the name of the tab. For modeling the two tabs that will be used the most are the object and modifier tabs. Specific exploration of the tools contained therein will be done as needed.

The Info panel
On the top of the Blender windows is the Info panel. On the left-hand side of the Info panel there is an easy to navigate menu similar to the menu in most applications. This menu can be collapsed by clicking on the + button next to it and expanded by clicking the same. On the far right of the Info panel there is data about the current scene. If the data cannot be seen, hover the mouse over the panel, and use the middle scroll wheel or click-and-hold the middle mouse button (pressing the wheel like a button) and moving the mouse to pan the panel until the desired data is visible.
The Timeline panel
The Timeline panel is only relevant to doing animation and can be effectively ignored or collapsed for the purposes of this book.
Note
Because this book is only using a limited subset of Blender's functionality some things such as the Timeline panel could be customized away. However, since it is not the focus of this book to tell the reader how to customize their version of Blender, and because Blender has a much broader application, the screenshots that follow will have the Timeline panel visible. The reader is encouraged to explore Blender's other functionalities such as rendering and animation at their leisure and desire.
Proper stance
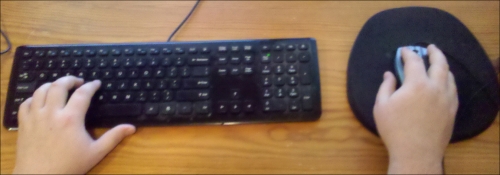
While all of Blender's functions are available from buttons and menus on the screen, typical Blender users rely heavily on hotkeys and shortcuts. Already the T and N keys have been discussed to bring up or collapse the Tools and Properties tabs in the 3D view. For this reason it is recommended that to use Blender have one hand on the mouse and the other hand on the keyboard at all times. This tends to be a common stance for many people but is mentioned for the few for whom learning this will be of great help.
Blender customization
One of Blender's strengths is its customizability. Almost every feature from the look and color, right down to the keystrokes and hotkeys are used for every action in Blender. Customization is accomplished in the Properties menu accessed from the File | User Preferences menu.
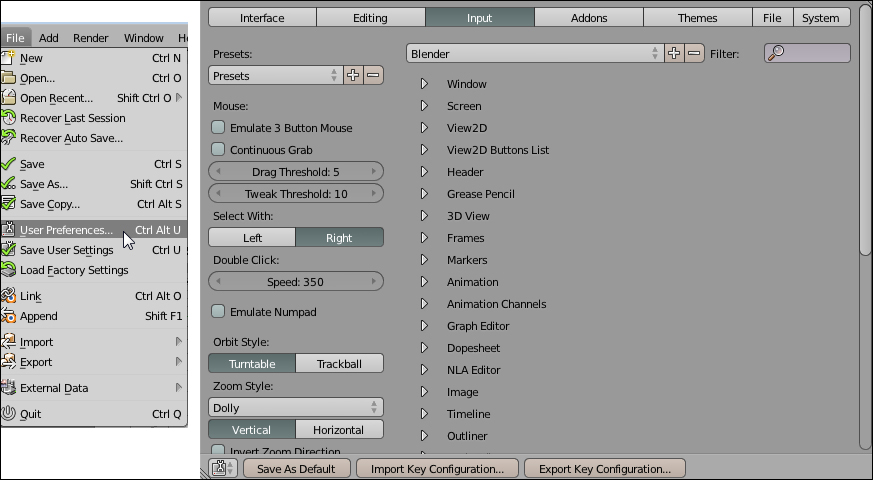
The buttons across the top, switch to the various categories. Each category is packed with options. A full exploration of these options is beyond the scope of this book but the reader is encouraged to explore these options and make Blender their own.
For instance if the reader is using a setup where a middle mouse button is unavailable, Blender contains an option to emulate the middle mouse button by pressing Alt along with left-click. Other systems may require other accommodations many of which are available in this menu.
Setting up for Mac OSX
Mac OSX users require special consideration. Blender is made for a three button mouse. If a single button mouse is all that is available, click when the instructions say Left-Mouse Button, use Alt with click for Middle-Mouse Button, and press command with click for Right-Mouse Button.
General Blender tips
Blender employs some conventions that are unique to its environment and as such getting acquainted with its most common quirks early can avoid frustration.
First and perhaps most importantly, Ctrl + Z for undo works in Blender will undo a multitude of mistakes. Undo in Blender remembers many past steps allowing backing up to a point before a grievous error was made. Remembering this when following along with the blueprints that follow will save the reader much frustration.
Next, the location of the mouse pointer is important when using hotkeys. For example the T and N keys for the Tools and Properties tabs do not bring up those tabs if the mouse pointer is not hovering over the 3D View. If the mouse is hovering over a different panel the reaction could be unpredictable. Pressing the A key with the mouse over the 3D View will toggle selection of all objects in the scene. Pressing the A key with the mouse over the Object Tools tab will collapse the expandable menu hiding all the options of that menu.
Blender uses the right-click on the mouse to select objects by default. This is perhaps the most counter intuitive thing for first time users, particularly because it will be encountered so frequently. But not everything has been swapped, just object selection. This behavior can of course be customized. If the reader would like to customize selection to the left mouse button then it is left to them to adjust the instructions accordingly.
Finally, the relation of Blender units to real life units is not by default defined in Blender. Generally it is just easier to remember that 1 grid point will translate to 1 millimeter in the printed object. As the scale is increased Blender inserts darker grid lines every 10 grid lines by default which correlate to centimeters. So the default cube in the default scene would measure 2 mm on each side, which is less than 1/10 of an inch, which is very small.
Suggested shortcuts
In the projects in this book, when a new idea is introduced it will first be introduced with detailed steps. Once a process is taught the next time the name of the operation and the shortcut for that process will be all that is given. For instance the first time the scale operation is introduced in Chapter 2, Mini-mug, the process is laid out including how to start, modify, and end the operation, but later an instruction like "scale (S) the object" is all that will be given. This does not mean that the keyboard shortcuts are the only way to do an operation but they are often the preferred method for experienced Blender users. The reader is free to accomplish the operation in any way that is comfortable for them.


