Click on OK to return to the Data Editor window. To confirm that the software is ready for use, go to the File menu and select Open Data. Navigate to the location where SPSS Statistics was installed, and down through the folders to the SamplesEnglish subfolder. The path shown here is typically where the sample SPSS data files that ship with the software get installed:
C:Program FilesIBMSPSSStatistics24SamplesEnglish
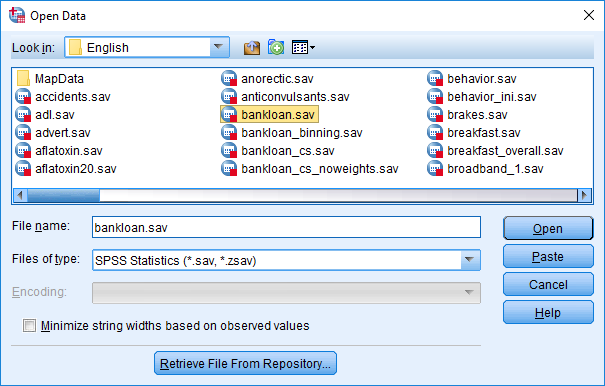
A list of sample SPSS data files (those with a .sav extension) will be displayed. For this example, select the bankloan.sav file, as shown in the following screenshot, and click on Open:
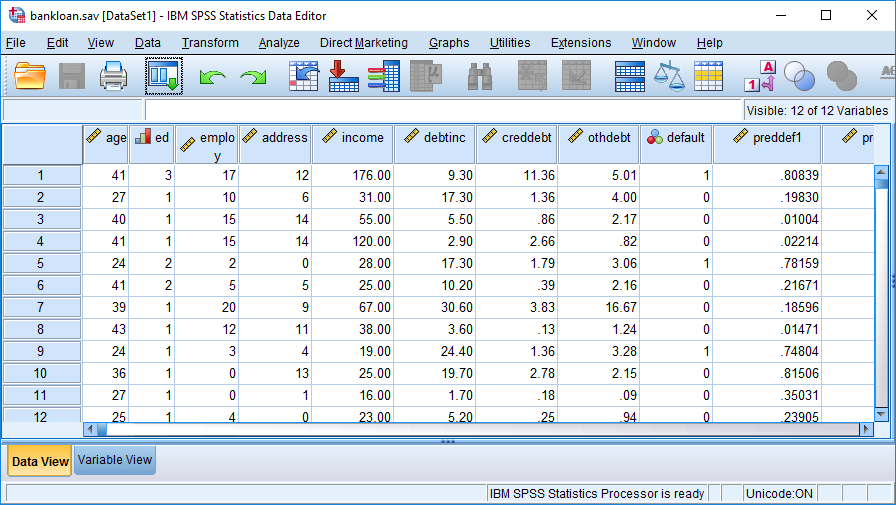
The Data Editor window now displays the name of the file just opened in the title bar with the fields (variables in SPSS terminology) as the column names and the actual values in the rows. Here, each row represents a bank customer and the columns contain their associated information. Only the first 12 rows are visible in the following screenshot, but after scrolling down, you will see more.
There are 850 rows in total:
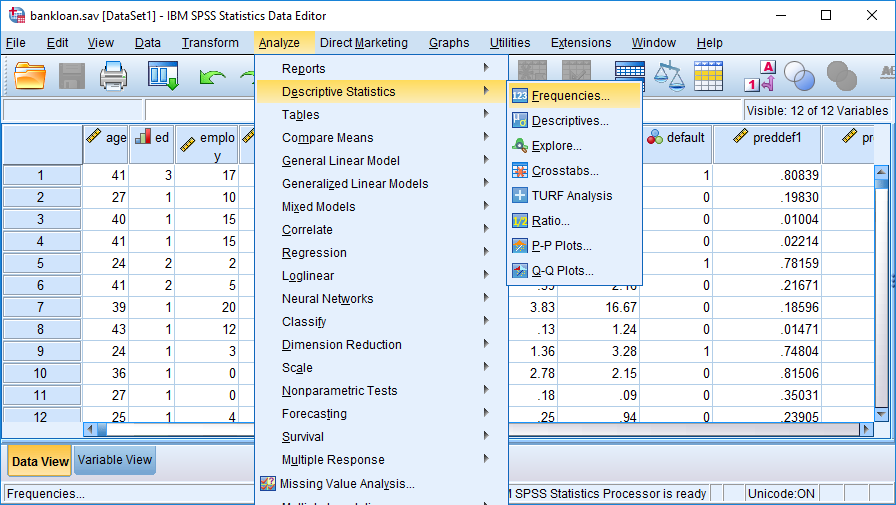
Go to the Analyze menu and select Descriptive Statistics | Frequencies, as shown in the following screenshot:
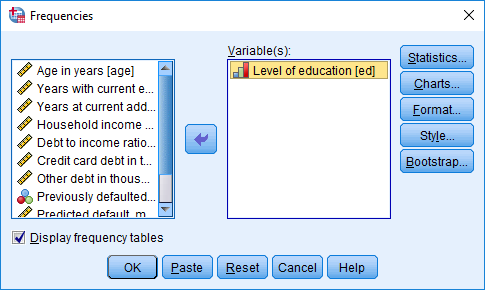
The dialog box shown in the previous image allows you to select fields and obtain basic descriptive statistics for them.
For this initial check of the software installation, select just the education field, which is shown by its label, Level of education, as shown in the following screenshot. You can double-click on the label or highlight it and use the arrow in the middle of the screen to make the selection:
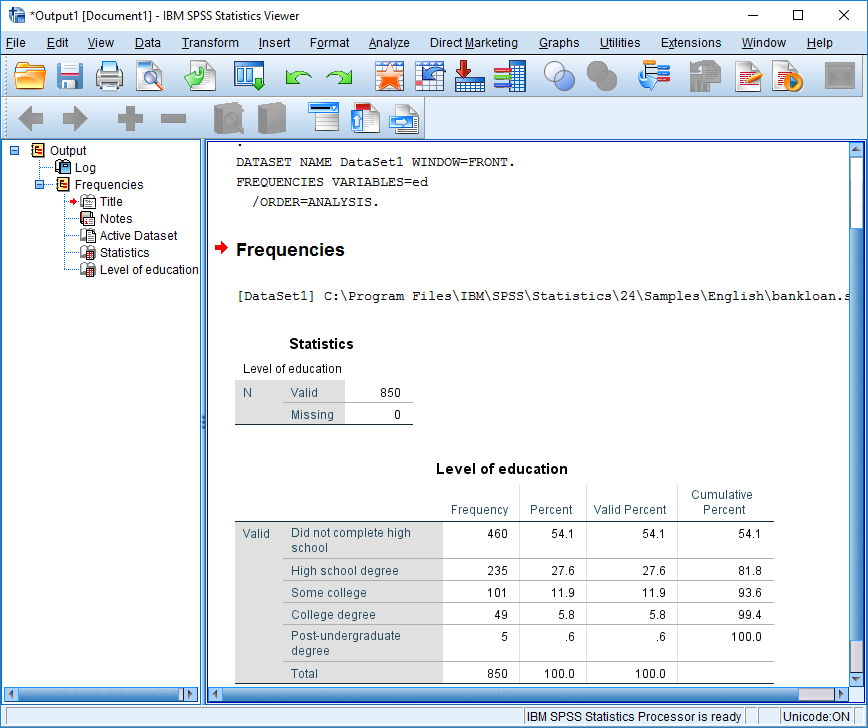
The descriptive statistics requested for the education field are presented in a new output window as shown in the following image. The left side of the output window is referred to in SPSS as the navigation pane and it lists the elements available for viewing in the main portion of the window. The frequency table for education shows that there are five levels of education present in the data for the bank's customers and that over half, 54.1%, of these 850 customers did not complete high school. This very simple example will confirm that the SPSS Statistics software is installed and ready to use on your machine.
Refer to the following image for a better understanding of descriptive statistics and the navigation pane:
To complete this check of the installation process, go to the File menu and select Exit at the bottom. You will be prompted to save the newly-created output window, which was automatically assigned the name, *Output1. There is no need to save the results of the frequency table that was created, but you can do so if you like.


