Playing with Go
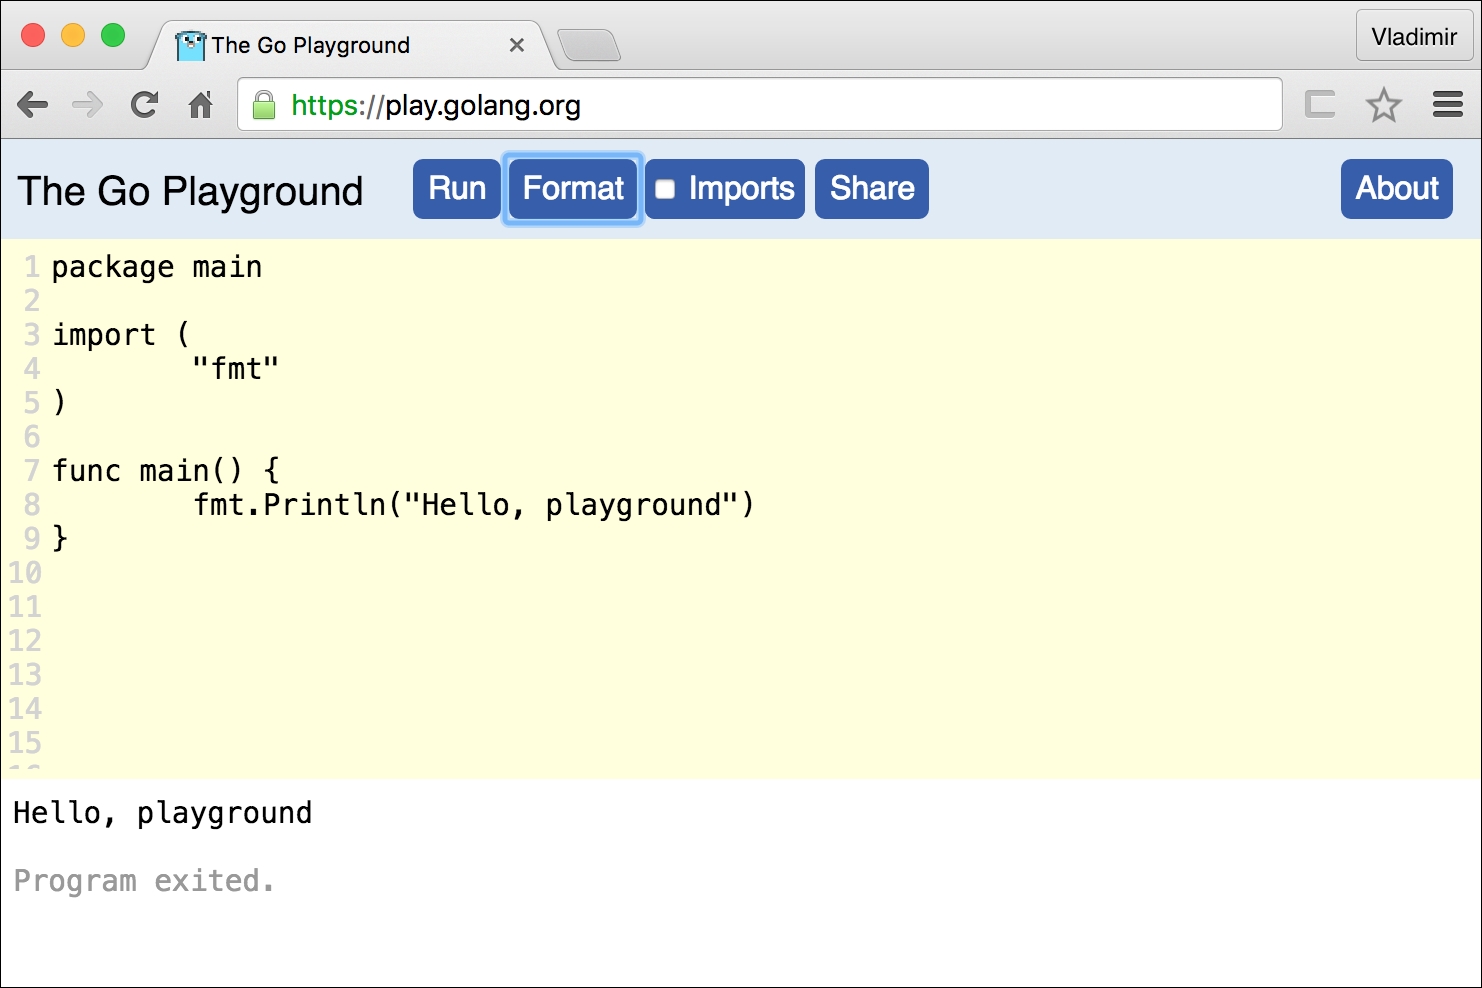
Before we jump head-first into installing and running Go tools on your local machine, let us take a look at the Go Playground. The creators of the language have made available a simple way to familiarize yourself with the language without installing any tools. Known as the Go Playground, it is a web-based tool, accessible from https://play.golang.org/, that uses an editor metaphor to let developers test their Go skills by writing code directly within the web browser window. The Playground gives its users the ability to compile and run their code on Google's remote servers and get immediate results as shown in the following screenshot:

The editor is basic, as it is meant to be used as a learning tool and a way to share code with others. The Playground includes practical features such as line numbers and formatting to ensure your code remains readable as it goes beyond a few lines long. Since this is a free service that consumes real compute resources, Google understandably imposes a few limitations on what can be done with Playground:
You are restricted on the amount of memory your code will consume
Long-running programs will be killed
Access to files is simulated with an in-memory filesystem.
Network access is simulated against the loopback interface only
No IDE required
Besides the Go Playground, how is one supposed to write Go code anyway? Writing Go does not require a fancy Integrated Development Environment (IDE). As a matter of fact, you can get started writing your simple Go programs with your favorite plain text editor that is bundled with your OS. There are, however, Go plugins for most major text editors (and full-blown IDEs) such as Atom, Vim, Emacs, Microsoft Code, IntelliJ, and many others. There is a complete list of editors and IDE plugins for Go which can be found at https://github.com/golang/go/wiki/IDEsAndTextEditorPlugins.
Installing Go
To start programming with Go on your local machine you will need to install the Go Toolchain on your computer. At the time of writing, Go comes ready to be installed on the following major OS platforms:
Linux
FreeBSD Unix
Mac OSX
Windows
The official installation packages are all available for 32-bit and 64-bit Intel-based architectures. There are also official binary releases that are available for ARM architectures as well. As Go grows in popularity, there will certainly be more binary distribution choices made available in the future.
Let us skip the detailed installation instructions as they will certainly change by the time you read this. Instead, you are invited to visit http://golang.org/doc/install and follow the directions given for your specific platform. Once completed, be sure to test your installation is working before continuing to use the following command:
$> go version
go version go1.6.1 linux/amd64
The previous command should print the version number, target OS, and the machine architecture where Go and its tools are installed. If you do not get an output similar to that preceding command, ensure to add the path of the Go binaries to your OS's execution PATH environment variable.
Before you start writing your own code, ensure that you have properly set up your GOPATH. This is a local directory where your Go source files and compiled artifacts are saved as you use the Go Toolchain. Follow the instructions found in https://golang.org/doc/install#testing to set up your GOPATH.
Source code examples
The programming examples presented throughout this book are available on the GitHub source code repository service. There you will find all source files grouped by chapters in the repository at https://github.com/vladimirvivien/learning-go/. To save the readers a few keystrokes, the examples use a shortened URL, that starts with golang.fyi, that points directly to the respective file in GitHub.
Alternatively, you can follow along by downloading and unzipping (or cloning) the repository locally. Create a directory structure in your GOPATH so that the root of the source files is located at $GOPATH/src/github.com/vladimirvivien/learning-go/.


