Navigating the Check Point User Center
The Check Point User Center is the portal for access to a variety of resources, and the place where you will create or manage your Check Point accounts, users, and products. It is also a place where you generate and download licenses and support contracts.
It is accessible at https://usercenter.checkpoint.com.
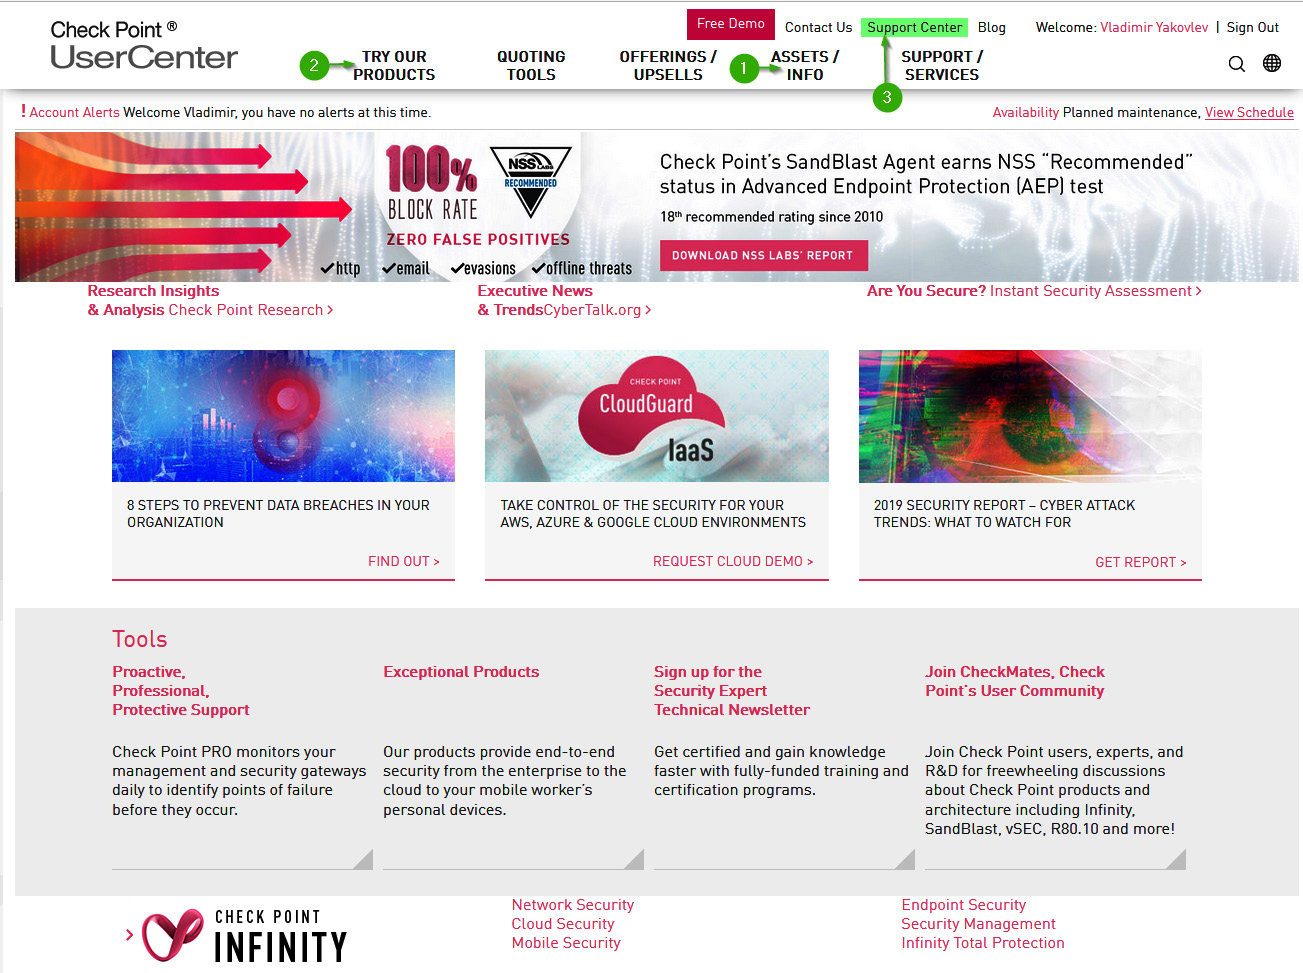
Figure 1.9 – User Center
We will be using the ASSETS/INFO and TRY OUR PRODUCTS sections to obtain and maintain our lab licenses as we go through the book.
From the User Center, you can get to Support Center, a place where you can open and manage Service Requests (SRs), report security issues, subscribe to or access the PRO Support portal (a proactive monitoring and reporting service), and gain access to the technical documentation, alerts, subscriptions, product downloads, and search capabilities across SecureKnowledge articles, downloads, documentation, and CheckMates community posts and discussion threads.
The following screenshot shows Support Center:
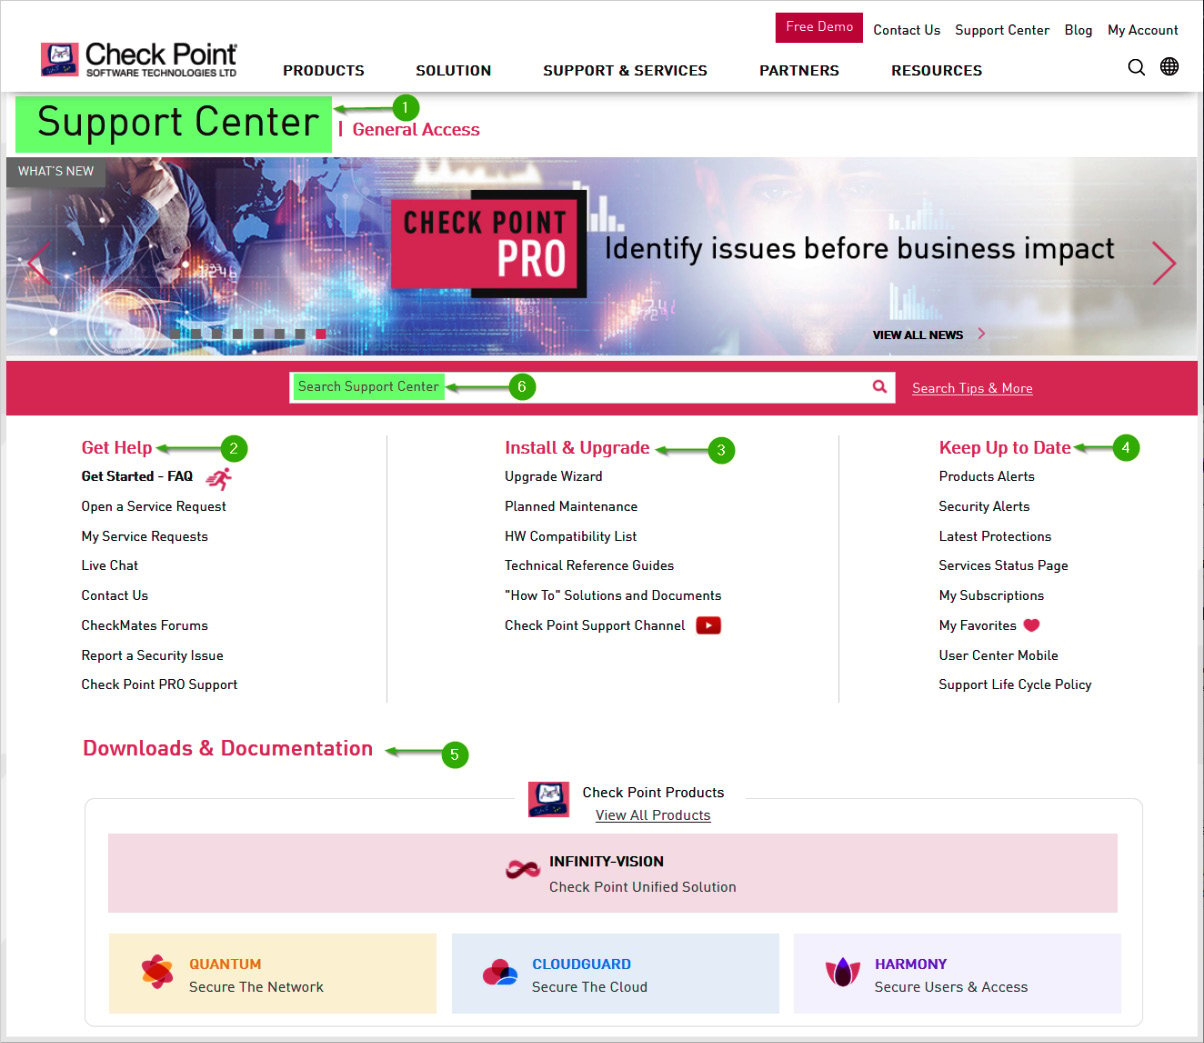
Figure 1.10 – Support portal
Both portals are interlinked, but if you know what you need, it is simpler to get to the right place through a corresponding link.
The Support Center may be accessed at https://supportcenter.checkpoint.com.
Important Note
While it is not necessary to register with Check Point in order to download and try their firewall product, this trial will be limited to 15 days. To extend it beyond the initial 15 days, you will have to go through the registration process to request a trial or lab license(s).
Since we must learn how to register and manage users and accounts and how to license the product, we will now start with the registration process.
Follow these steps to register as a portal user and create an account:
- In your browser, go to https://usercenter.checkpoint.com.
- When prompted with the Sign In screen, click on Sign Up Now.
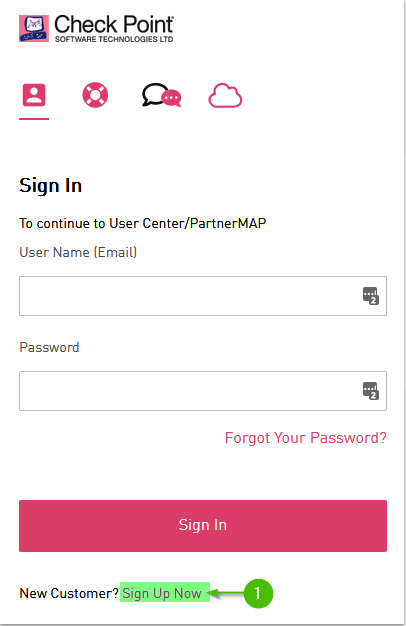
Figure 1.11 – Sign Up Now
Populate the fields with your information and then click Submit.
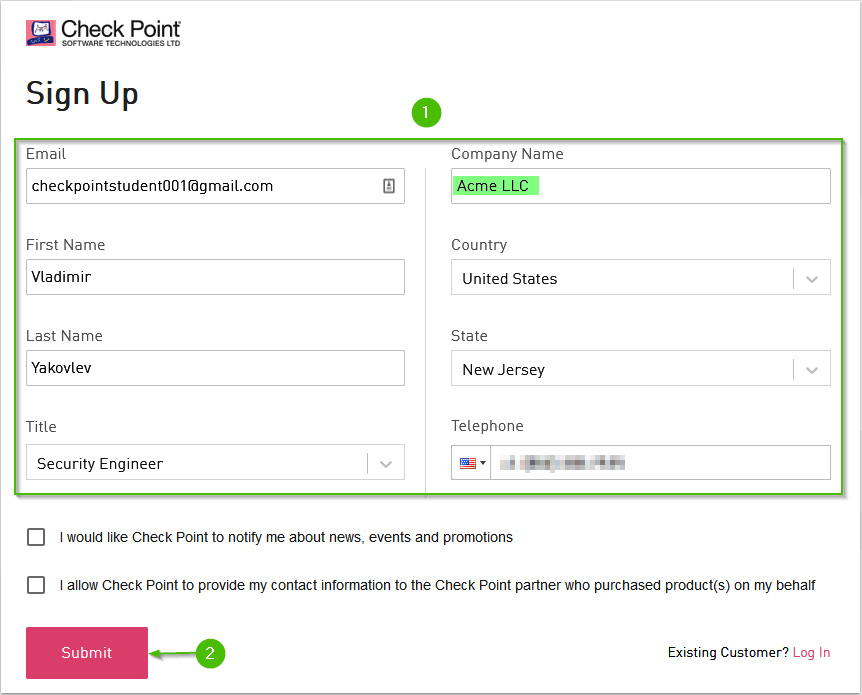
Figure 1.12 – Sign Up; user information
- The Success! popup will appear; check your mailbox to continue.
- Click on Confirm Email in the body of the message.
- Create and confirm a suitably strong password using a combination of uppercase and lowercase letters, numbers, and symbols and then click Submit.
- Click Sign In.
- Enter your username (the same as the email in step 2 and the password from step 5) and then click Sign In.
- Once you are logged in for the first time, click on your username in the top-right portion of the screen and then click on the Security shield icon on the left to configure the Multifactor Authentication (MFA).
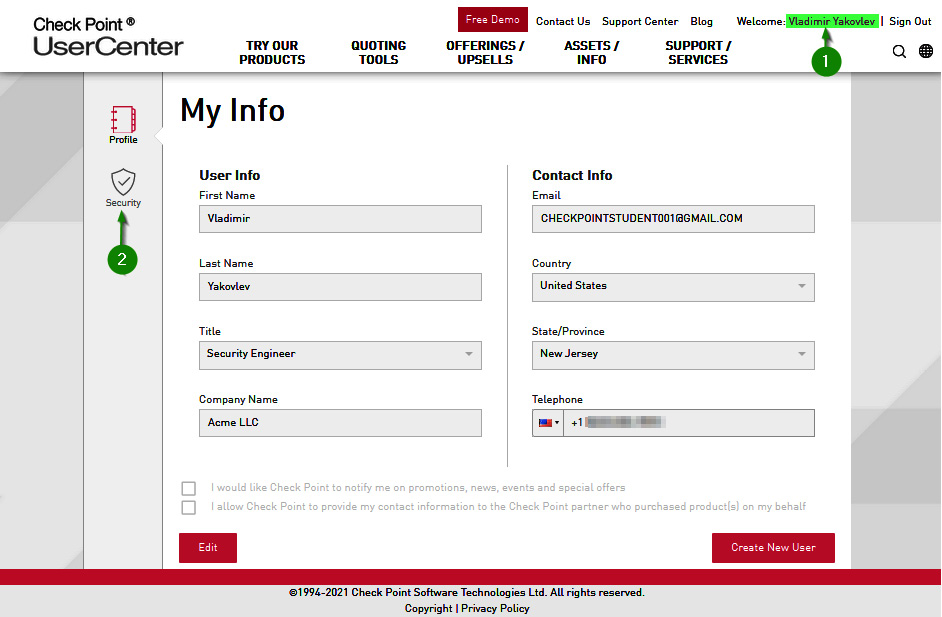
Figure 1.13 – Securing User Center access
- Toggle the 2-Step Verification switch to the On position:
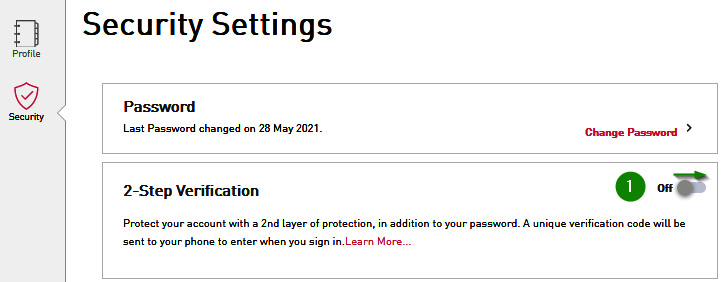
Figure 1.14 – Turning on 2-Step Verification
- Enter your mobile phone number, verify that the Text Message option is selected, and then click Verify Phone.
- Enter the code received via text message and then click Activate.
- Your phone number is now shown as Verified. Click on the Display Backup codes arrow.
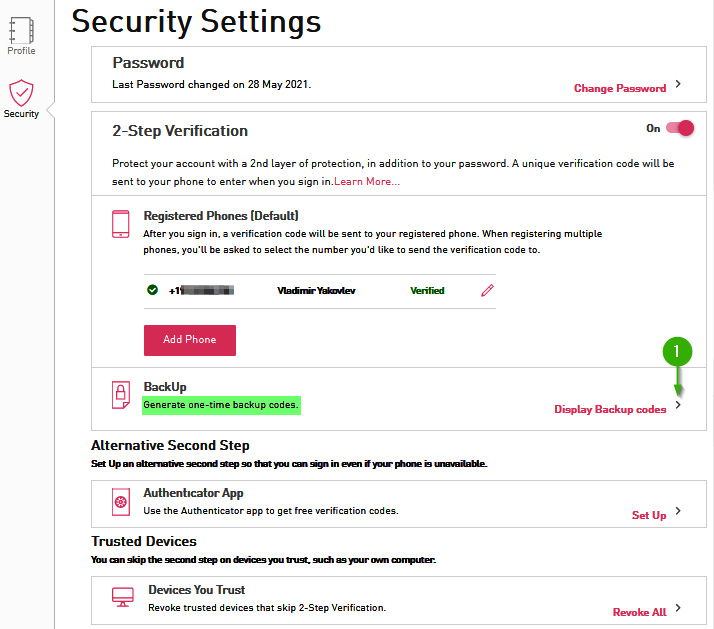
Figure 1.15 – Backup codes for 2FA
- Click on Generate New Backup codes. When backup codes are displayed, click Print. If you do not have a printer connected, print codes to PDF. Click Close.
- In the Authenticator App section, click the arrow to the right of Set Up.
- Choose your mobile phone platform and then click Next.
- If you do not have an authentication application on your phone, install either Microsoft Authenticator or Google Authenticator or your preferred MFA application. When installed, or if already available, add the new account to it by scanning the QR code and then click Next.
- If the scan fails (observed on very high-resolution monitors with particular brightness and contrast), click on CAN'T SCAN IT?, manually enter the key into the authentication manager, and then click Next.
- Enter the dynamically generated one-time code and click Next. Note the time remaining for the action on your phone while doing it.
- The authentication app now becomes the default method for the second factor. Let's look at the following screenshot:
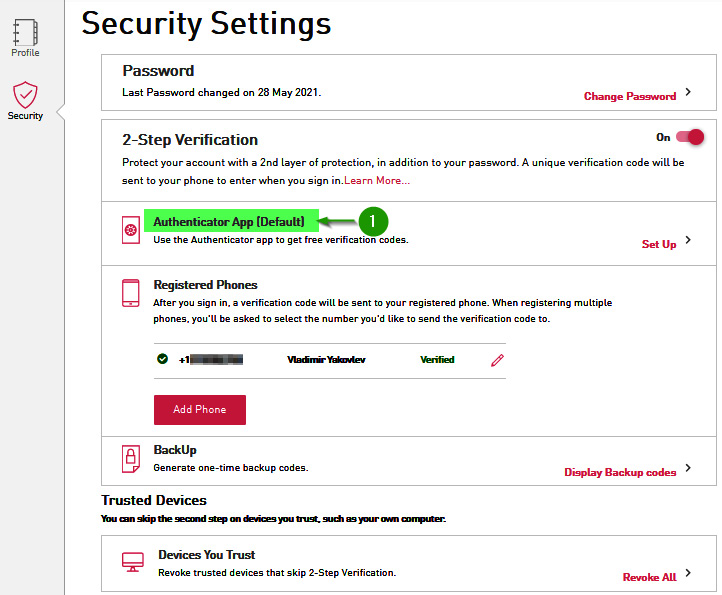
Figure 1.16 – Authentication app as the default 2FA
We can now securely log on to the User Center and access its resources.


