Navigating in SketchUp
One of the main things that makes SketchUp so easy to work in is the fact that you are always moving through your 3D model. Unlike other 3D modeling programs, SketchUp allows you to navigate in 3D space without the use of special viewports or widgets to change how you are viewing your model in 3D space.
Basic navigating can be thought of as three distinct pieces:
- Orbit
- Zoom
- Pan
The great thing about the way the SketchUp navigation is set up is that you can use the Orbit and Zoom commands without leaving the input or modification command you are currently using! In fact, depending on the hardware you are using, you can change the views of your model while in the middle of creating or modifying geometry.
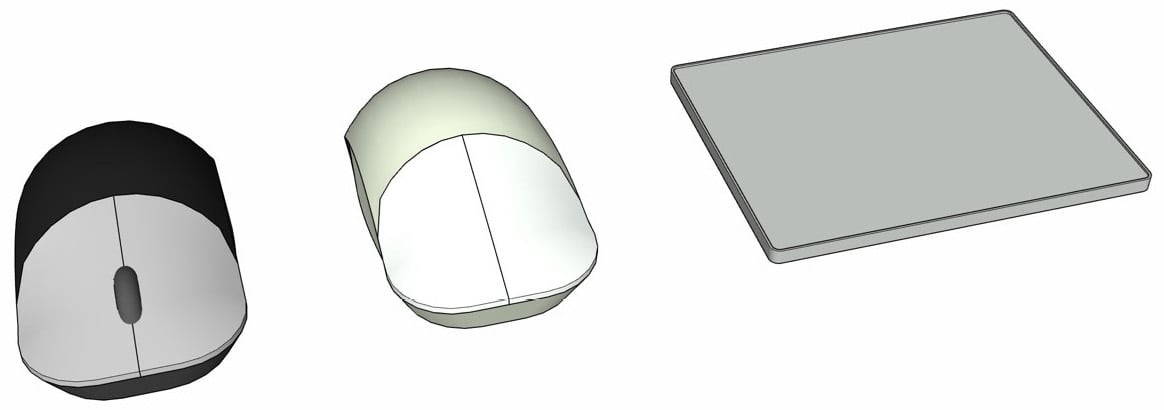
The navigation commands can be used in one of three ways, depending on your hardware. It is generally accepted that the best way to navigate in SketchUp is with a three-button mouse, but it is possible to do it with a standard two-button mouse or with a trackpad:

Figure 1.1 – Left to right, a three-button mouse, a two-button mouse, and a touchpad
When we talk about using a three-button mouse, we are talking about a mouse with a trackwheel in the middle of the left and right mouse buttons. While not actually a third button, the track wheel allows quick access to both zooming and orbiting commands with one finger, which can be a huge time-saver while designing. In the next sections, we will talk about how to use the commands with any of the hardware mentioned and which ones might be preferable.
It may seem odd to learn how to use any navigation technique other than the primary one (if you have a three-button mouse, why learn to use a trackpad for navigation?), but any SketchUp master knows that you cannot depend on hardware alone. I have many stories about needing to open or modify a model while on the go with no place to use my mouse, having to navigate with a touchpad, or using SketchUp at a customer site where only an old two-button mouse was available. Knowing how to use any of the hardware options will ensure your ability to move through a SketchUp model, regardless of your input device.
Speaking of Hardware Options…
We will be discussing using other hardware such as tablets or 3D mice in Chapter 10, Hardware to Make You a More Efficient Modeler.
Navigating with the Orbit, Zoom, and Pan icons
Obviously, your primary focus when using SketchUp will be to create and edit 3D geometry. While this will be the primary focus of most of this book, it is important to stop and look at the commands you will use more often than any input command or tool – the navigation commands:

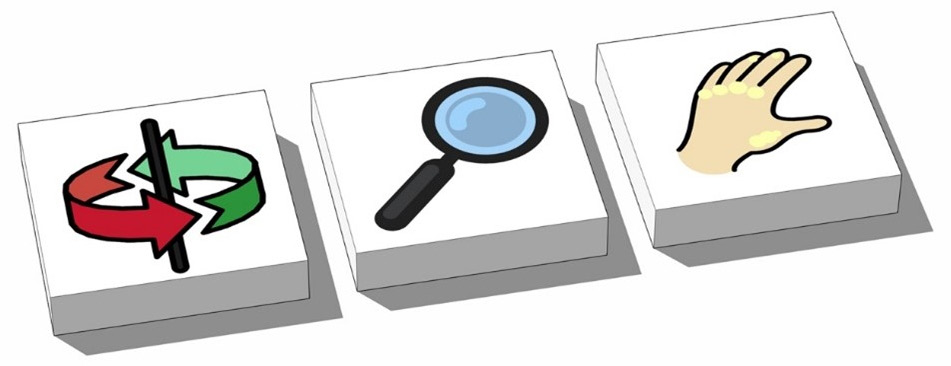
Figure 1.2 – The Orbit, Zoom, and Pan (hand) icons are part of the default toolbar
Regardless of your input hardware, you can always use the Orbit and Zoom icons to move through your model. The best part about using these icons is that you can use them in the middle of any command. Once you are done, you will be returned to where you were before you clicked the icon. Let’s give it a try:
- Use the Rectangle command to draw a rectangle on the ground.
- Click the Push/Pull icon on the Standard or Large toolbar.
- Click and release on the rectangle.
The face of the rectangle should move up and down on your screen as you move your cursor. Now, let’s see what happens when you start using the Orbit command.
- Click the Orbit icon on the toolbar.
Notice how your Push/Pull state freezes? This will allow you to spin around your model without having to finish the Push/Pull command. The Push/Pull is paused until you complete your Orbit.
Click and Release or Click and Drag
Unless otherwise noted, input and editing should be done by click and release, rather than clicking and dragging. While SketchUp will allow you to do either in many cases, click and release will allow you to do things such as change your views or add modifiers to a command without having to hold down the mouse button the whole time.
While in the Orbit command, you can click anywhere on your model and use that point as a handle to spin your entire model in 3D space.
Centering Your Orbit
Notice that the camera spins around the center of your view. How you orbit around your model will depend on how your model is situated in your current view. This may mean using a combination of Zoom, Pan, and Orbit commands to get to the ideal view of your model.
Remember, while it can seem as though you are moving a piece of your model, it is important to remember that you are actually spinning the entire 3D workspace. You are effectively moving your camera, or your view of your 3D model, and not the geometry in the model.
Now that we have finished orbiting, let’s get back to Push/Pull.
- Click on the Push/Pull icon again.
Notice how you are back to Pushing/Pulling the face of the original rectangle? Remember, entering the Orbit command will temporarily suspend the current command and return you to it once the orbit is complete.
Let’s give Zoom a quick try! While still dragging the face of the rectangle around, activate the Zoom command.
- Click on the Zoom icon.
Notice how the Push/Pull freezes again and you click and drag the magnifying glass up and down your model to zoom in and out? Once again, you can click back on the Push/Pull icon to return to your command.
- Click on the Push/Pull icon again.
Another command that you may want to learn to use via the toolbar is Zoom Extents. This command will blow the model up as large as it can get on your screen. This can also be clicked at any point during input or editing. Unlike the Orbit and Zoom commands, you cannot access this command via hardware; the toolbar icon or menu command is the only way to use Zoom Extents.
Finally, the Pan icon (the one with the hand) can be used to grab your model by a point and move it around without turning it. Pan moves the entire model normal to your view, so instead of spinning around your model, you will be moving straight up, down, and side to side. Just like Zoom and Orbit, the Pan command will suspend your current action until you return to the command you were originally in.
Navigating with a touchpad
Anyone designing on a laptop has had that experience when they have had to whip out SketchUp on the go and take a look at a model using just the hardware on the laptop. While many laptop users rely on an external mouse as their primary means of input, there are those special few who actually prefer to use a touchpad when they can!
Using a touchpad to navigate is a process of combining modifier keys or buttons with gestures on the touchpad. These keys will vary depending on your operating system:
- To orbit your model on a Windows computer, hold down the middle button.
- On a Mac, hold down the Control and Command keys.
Just like orbiting with the buttons, the active command suspends until you are done moving. The advantage of using this process is that you don’t have to click back to the command to resume. As soon as you release the middle button/modifier keys, you are just back in the command!
Zoom works in very much the same way, except you do not need to use any keys. Regardless of the operating system, you can zoom in or out by sliding two fingers up or down the touchpad.
To pan while using a touchpad, you will add a modifier key to Orbit. Just as with Orbit, the modifier key will change depending on your operating system:
- To pan your model on a Windows computer, press Shift while orbiting (middle button and Shift).
- On Mac, press the Shift key while orbiting (Control + Command, and Shift).
I know that this can seem like a lot of keys to hold down, especially on a Mac, but with a little practice, it really can become second nature.
Navigating with a three-button mouse
It has been said that the best hardware is the hardware that you have available to you. This is mostly true, but many SketchUp users will say that the best input device to use is a three-button mouse. The reason is the third “button.” With the scroll wheel, you can instantly start orbiting or zooming without the need to press any keys or click any toolbar icons.
To zoom, you only need to roll the scroll wheel up and down. The point that is under your cursor at the time that you start scrolling will be the center of your zoom. You will zoom in or out of that single point.
Zooming Direction
Zooming direction is controlled by the operating system. You may need to modify your system settings to toggle between Natural and Reverse scrolling. This will change whether scrolling up is a zoom-in or a zoom-out. Neither one is inherently better for SketchUp. Use the one that feels the most natural for you.
To orbit with a three-button mouse, you simply have to press down on the scroll wheel. While holding the scroll wheel, you will move the entire model in 3D space. The location that your cursor was at when you pressed down on the scroll wheel will act as a handle to spin the model around.
Middle Mouse Button
System settings and hardware drivers may give you the option to program the middle button. This can be a great way to add functionality to your mouse, but for SketchUp, it is important to have the scroll wheel click set to middle button. Without it, you will not be able to orbit using the scroll wheel.
Finally, panning is performed by pressing the Shift key while in orbit. Double-clicking the scroll wheel over any point in the model will pan the model to center that point on your screen.
The best way to navigate in SketchUp
With practice, any one of the input devices mentioned previously can become efficient tools for navigating SketchUp. Far and away though, most users find that a three-button mouse allows them to spend less time getting to the view they need and more time actually modeling. If you have been using a touchpad or a two-button mouse (or a one-button mouse, yikes!), you should consider getting hold of a three-button mouse. The addition of a button dedicated to moving your model in 3D space is a huge time-saver and will help navigating to become second nature.
Now that we have covered how to navigate through a SketchUp model, let’s dive into what actually makes up a SketchUp model.


