Connecting to the ADB
The easiest way to connect to the database is using SQL Developer Web, which is part of the cloud database menu (Database Actions).
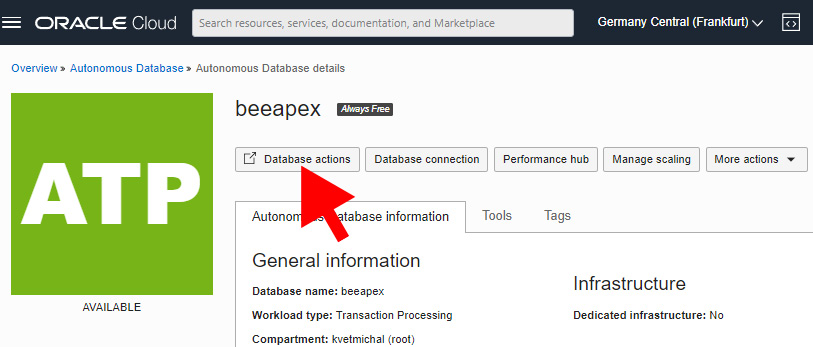
Figure 1.8 – Launching SQL Developer Web
A new browser tab will open, requesting the Username and Password details. In our case, we will provide the details of the administrator user that were set up when the database was defined and that were applied in the provisioning process.
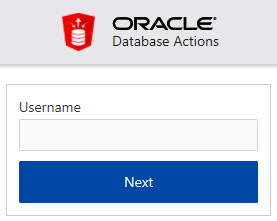
Figure 1.9 – Launching SQL Developer Web – username definition
Figure 1.9 shows the main screen of SQL Developer Web. It provides the interface for defining SQL scripts, along with the environment for data modeling, APEX application building, as well as managing AJD databases and defining and deploying REST APIs. There are also other categories for easy data loading and exporting using wizards, administration, and monitoring interfaces.
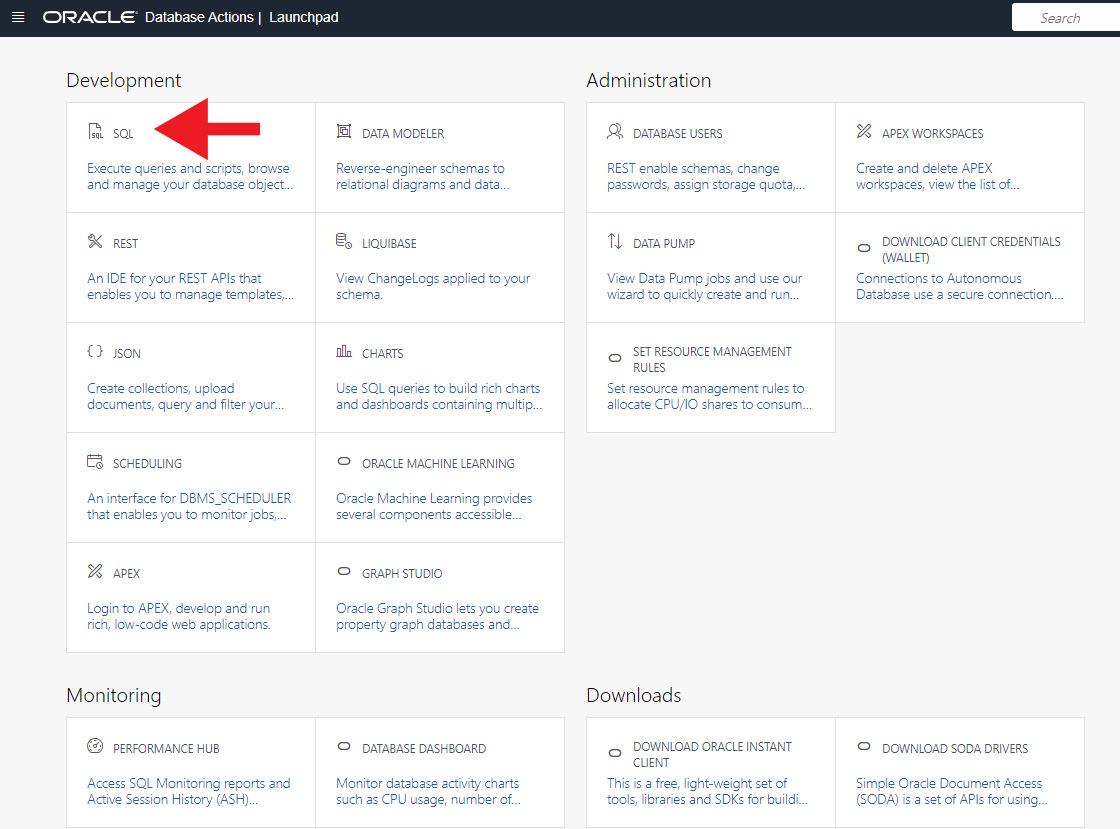
Figure 1.10 – SQL Developer Web – main screen
By clicking on the SQL button (the red arrow in the preceding figure), a new window is launched, consisting of three parts, as shown in the following screenshot:

Figure 1.11 – SQL Developer Web – SQL section
The left part consists of the data dictionary reference, highlighting the created objects (the yellow arrow (1) in the preceding figure). The upper part is used for SQL statement definitions and forms the core of the entire environment (the blue arrow (2)). The bottom part provides results and information summaries (the green arrow (3)).
Each ADMIN user automatically gets the privilege to use such a tool. They can also grant that privilege using the enable_schema procedure of ords_admin:
begin
 ords_admin.enable_schema
  (p_enabled => TRUE,
   p_schema => 'MICHAL', -- username for the grant
   p_url_mapping_type => 'BASE_PATH',
   p_url_mapping_pattern => 'michal',
   p_auto_rest_auth => NULL
  );
 commit;
end;
/
Besides this, REST services can be enabled in the Administration | Database Users section.
SQL Developer can also be launched locally in the desktop environment. It is downloadable from the official site:

https://www.oracle.com/tools/downloads/sqldev-downloads.html
You just need to choose the appropriate platform you are running (if you are using Windows, it is recommended to select the version, including the Java Development Kit (JDK), if it has not been installed manually before) and its version (the most up-to-date is preferred; new versions are released periodically).
Oracle SQL Developer Desktop does not need to be installed; just unzip the provided archive file. It is powered by Java and can be launched immediately. Before dealing with the database, the new connection must be defined. Click on the green plus symbol ( ) in the Connections section and specify the connection details. We will walk you through setting up the parameters and how to obtain them in the first phase. The filled-in dialog window is shown later in Figure 1.15.

The Name field of the connection is left to your preferences. Whatever you choose will then be listed in Connection List. Database Type is Oracle. SQL Developer Desktop can be used for managing different database system types if the particular drivers are installed. Leave Authentication Type set to Default. Username is ADMIN or any other user created in the ADB by you. The Password details for the ADMIN user were specified during the provisioning and can be changed at any time in the database section’s main menu (navigate to More Actions). Let Role be the default value for ordinary users. If the user belongs to a particular privilege group, such as SYSDBA, SYSOPER, and so on, choose the appropriate one. For example, ADMIN is the database administrator with SYSDBA privileges granted.
Connection Type must be changed to Cloud Wallet, prompting you to specify the Configuration File information, consisting of the connection details. The question now is how to get the Cloud Wallet configuration file. Return to the cloud console, navigate to the database, and click on the Database connection button to obtain your Wallet.
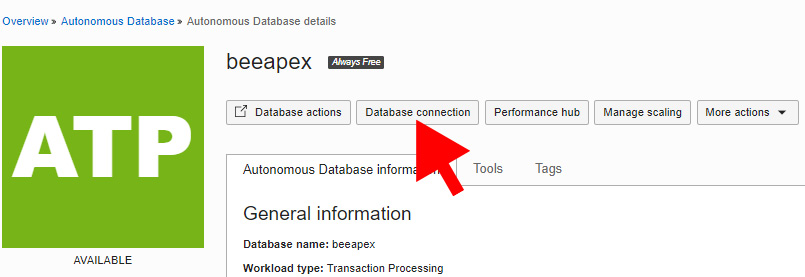
Figure 1.12 – Getting the Oracle Wallet
By clicking on the button, a new pop-up window opens. Client Credentials (Wallet) are typically downloaded for the instance; however, there is also an option to download a specific Regional Wallet (consisting of all instance wallets used for administration purposes). For development, the Instance Wallet type should be selected:

Figure 1.13 – Prompting Oracle Wallet
Cloud database connections are always secure, so you can provide the password for the wallet to be generated and downloaded. The downloaded wallet is a ZIP archive containing the following files:
ewallet.sso: This consists of the encryption wallet details.sqlnet.ora: This specifies the general wallet location and encryption types.tnsnames.ora: This provides connection details – protocols, hosts, ports, and other parameters. The downloaded file consists of file connect strings delimited by the name, as well as parameters – Low, Medium, and High are preferred for the analytical interface, with Tp and Tpurgent for transactional processing.
Note that the connection strings can be listed when the wallet is generated in the Connection Strings subsection. The following screenshot shows an example of a connection string.
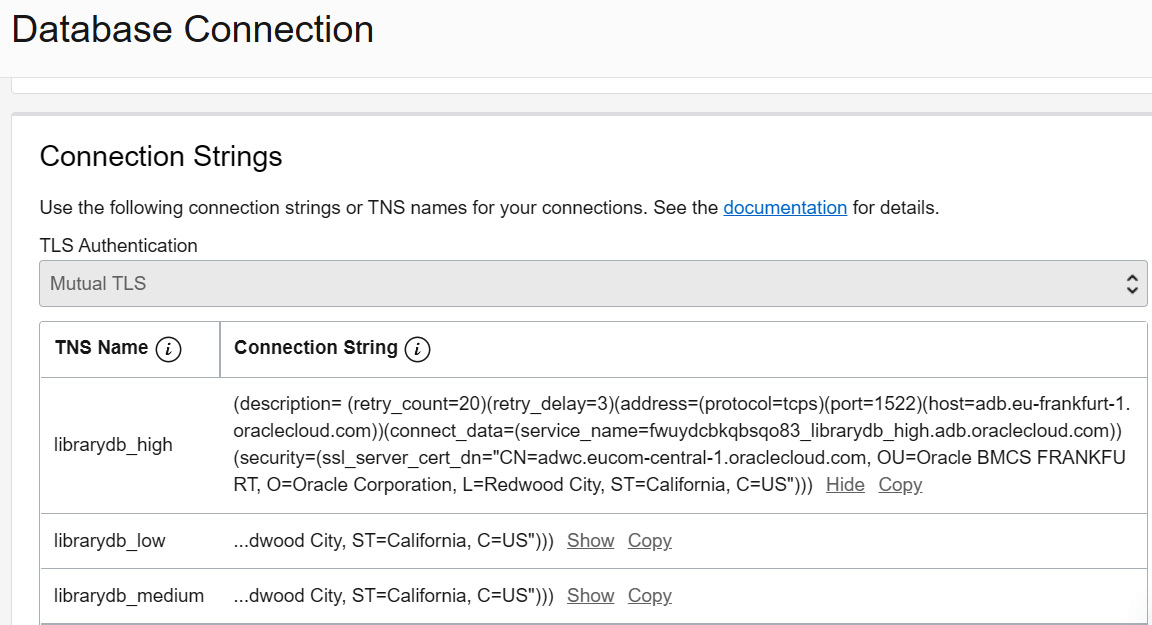
Figure 1.14 – Connection string list
The downloaded wallet can then be referenced in SQL Developer Desktop by specifying the Configuration File path (the yellow arrow (2) in the following screenshot), followed by the used service type (Low, Medium, High, Tp, or Tpurgent) (the red arrow (1)):
1
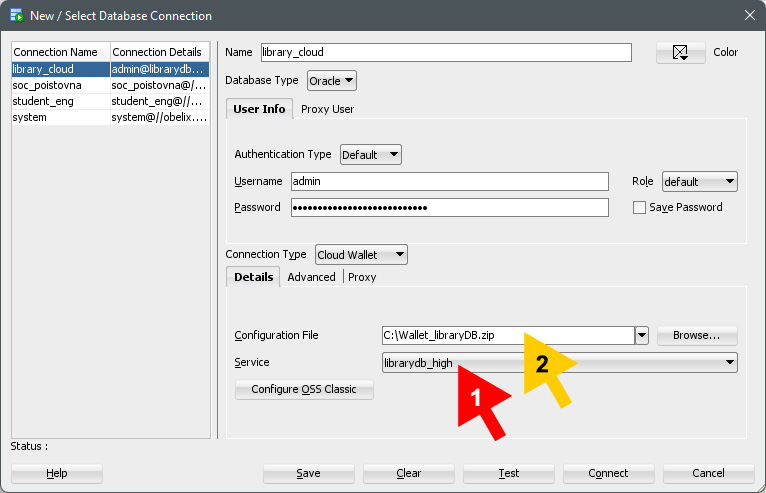
Figure 1.15 – Creating a new connection in SQL Developer Desktop
Passwords can be optionally stored in an encrypted format. The list of stored connections and encrypted passwords can be found in the application data. For Windows, the location is as follows:
%APPDATA%\SQL Developer\system<VERSION>\o.jdeveloper.db.connection.<VERSION>\connections.json
For Linux, the analogous path is the following:
~/.sqldeveloper/system<VERSION>/o.jdeveloper.db.connection.<VERSION>/connections.json
This file contains all the parameters specified during the connection definition.
The downloaded wallet consists of encryption keys, as well as connection details. This wallet is used by the users, developers, managers, administrators, and all other IT staff to access the Oracle Cloud databases. However, what if someone leaves the company? How can we ensure that some particular data cannot be used later on? The solution is to use wallet rotation, which invalidates existing client keys for the database instance owned by the cloud account in a region. It can be done immediately or after a grace period (from 1 to 24 hours). Even besides instances where people leave a company, it is also generally beneficial to rotate wallets regularly based on the organization’s policies. Wallet rotation can be done by clicking on the Rotate wallet button shown in Figure 1.13.
Now, the connection is specified and a new session is created, where you can write commands or statements:
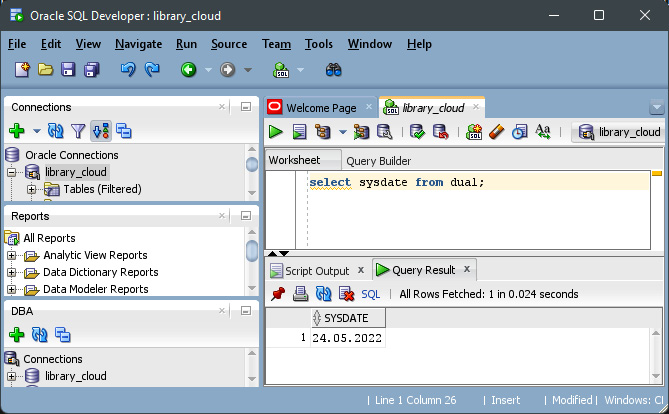
Figure 1.16 – SQL Developer Desktop
The preceding screenshot shows a select statement, providing you with the current date and time value. What about the output format? How can we reference individual elements, time elements, and particular time zones? We can already perceive the complexity of the whole problem here. A complete description of date and time management in the Oracle database environment will be covered in later chapters. Enjoy!
Throughout this chapter, we have often referenced the term resource sharing. However, what this means in practice is explained in the following section. We will focus on the database system instance itself and summarize the processes and memory structures. To ensure the best performance and optimize the access strategy, it is beneficial to understand the data flow, core elements, memory structures, and database and instance interconnection.


