High Pass sharpening
Another useful way of applying sharpness to an image is to combine a fairly obscure filter, High Pass, with a layer Blend Mode. The High Pass filter applies a mid-gray mask over the image, which highlights differences in edge contrast—much like the masking feature we saw in the Unsharp Mask tool. The gray areas are exempt from sharpening while the lighter edges that you see in the gray field get sharper. If you really want your images to pop, try this using the Hard Light blend mode, although Soft Light and Overlay also work.
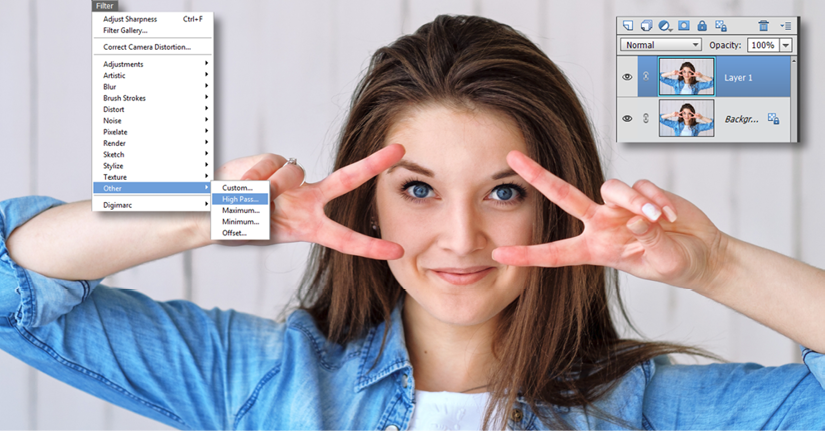
Step one: To achieve this technique, first duplicate the layer (Layer>Duplicate) and choose the High Pass filter from the Filter>Other menu.
Below: This is what the High Pass filter looks like at a value of 10 pixels. Weird. In essence, the popping effect we are about to see is added to the parts of the image that are not mid-gray—essentially, the highlighted edges of the subject only.