Project – creating a new level
To help you better understand what we’ve covered, I will be creating a project as I progress through each chapter. This way, you will see how I apply the steps outlined in this book. It is strongly recommended that you do the same. Choose a small project you have already completed to save time on modeling and be able to focus on the creative aspects. This way, you’ll have a reference for your shots and a quality target to strive for. Ideally, the project should be a small interior scene, not cluttered with too many props and objects. I will be recreating The Cliff House by MacKay-Lyons Sweetapple Architects.
Let’s start our project:
- Launch Unreal Engine 5 and create a new project using either the Blank template or the Archvis template from the Architecture section. Remember to name the project appropriately.
- Next, we must create our main level. Right-click inside Content Browser and select New Folder or click the Add button on the left. Name it
maps. There are conventions for folders and names. While you can choose your filenames, it’s advisable to follow these conventions. The folder for levels is usually named maps, regardless of how unusual it may seem. - On the top bar, click File and then New Level. Choose Blank Archvis Template from the options provided. Although starting with a completely blank level is preferable, for teaching purposes, we’ll use the blank Archvis template as it contains some basic elements such as lights, sky, and fog; we haven’t covered these yet but they’re useful for pre-visualization purposes.
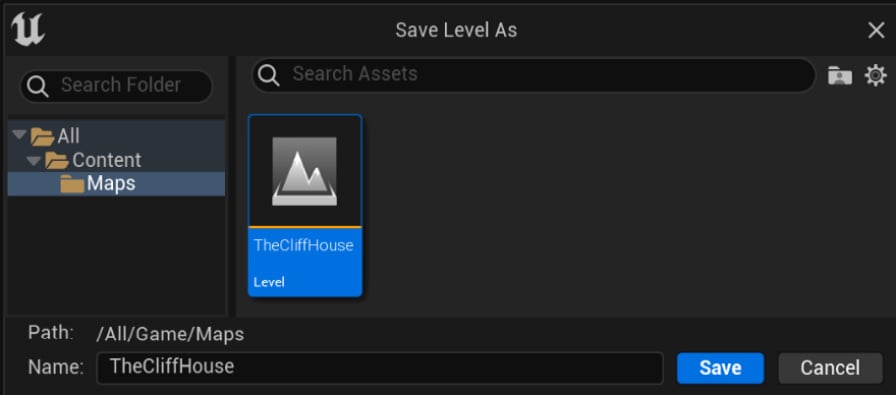
An empty level will open. Save it immediately by clicking File | Save Current Level and place it inside the
mapsfolder you created. Give it an appropriate name; in my case, this isTheCliffHouse:

Figure 1.10: Saving the new level
- Navigate to the menu bar, select the Plugins option, and enable any necessary plugins (mainly Datasmith and Movie Render Queue; refer to the How to deal with plugins section of this chapter for more information).
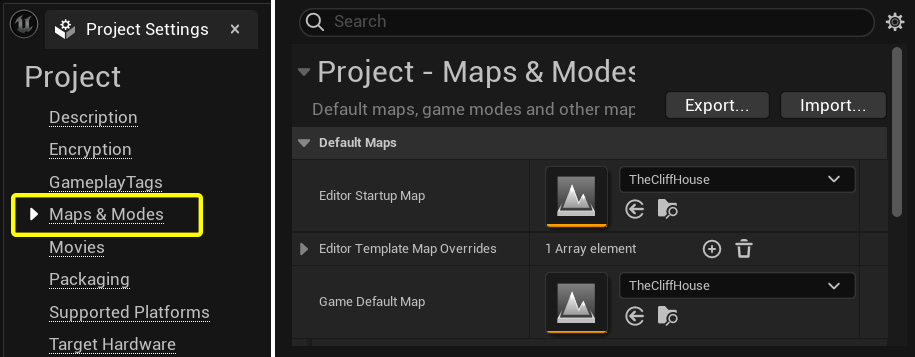
- To view your scene immediately upon opening it, go to Project Settings, select Maps & Modes, and replace the current map in the Editor Startup Map and Game Default Map fields with the one you created previously. This will ensure that the default map is not displayed every time you open your scene:

Figure 1.11: Changing the default map
Done? Great! We are ready to start building our scene.


