Configuring Tenant Data Upload in Microsoft CQD
Microsoft CQD is available to organizations that use Microsoft Teams to show call and meeting quality at an organization-wide level. CQD helps optimize network performance and quality.
Uploading your tenant data is recommended by Microsoft. There are two types of tenant data files – building and endpoint.
To upload tenant data, we need to follow these steps:
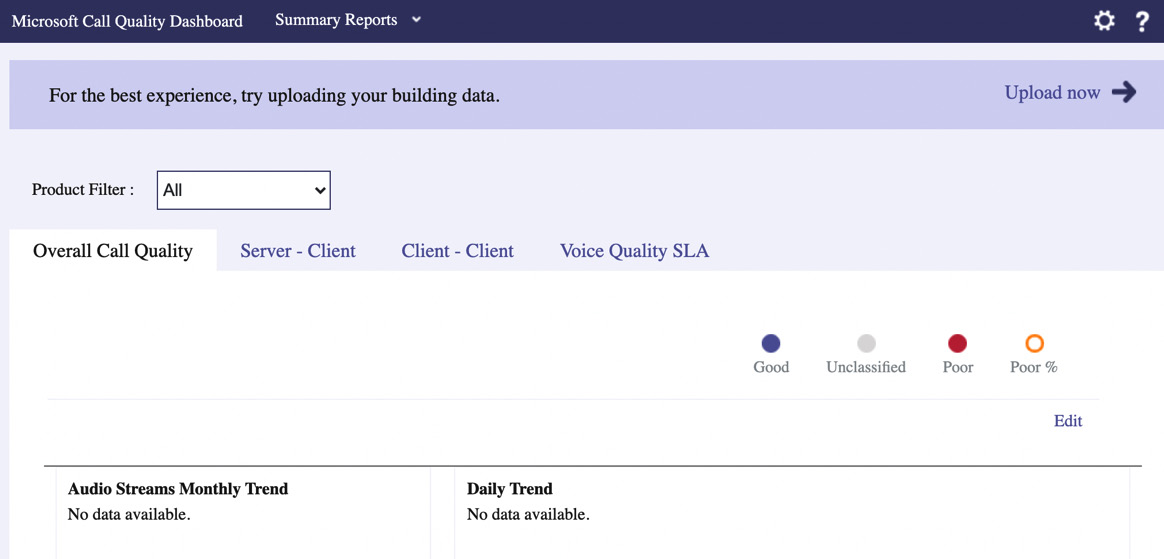
- Open Microsoft CQD from the Teams admin center at https://admin.teams.microsoft.com and navigate to Analytics & Reports | Call quality dashboard. You can also navigate directly to https://cqd.teams.microsoft.com. The following screenshot shows CQD:

Figure 1.18 – Microsoft CQD
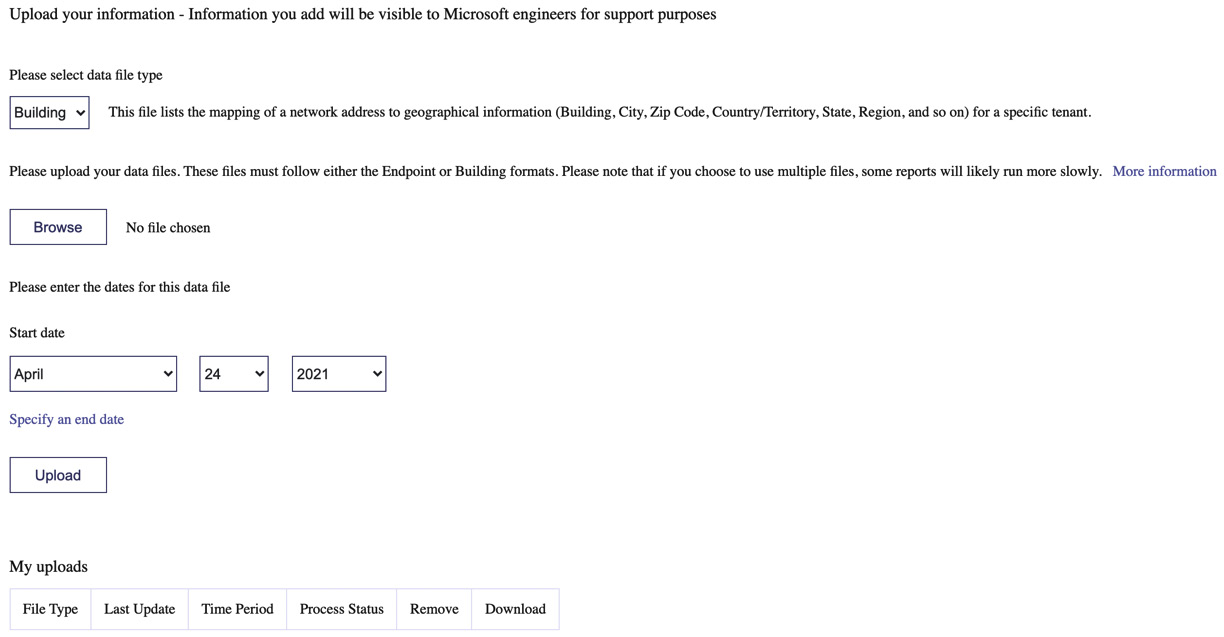
- Click on the cogwheel at the top right of the page, then select Tenant Data Upload. This will take you to the following page:

Figure 1.19 – The Tenant Data Upload page
- First, you must upload building data. You can do this by creating and uploading a building map. Microsoft's guide on the tools you can use to create your building map can be found at https://docs.microsoft.com/en-us/microsoftteams/cqd-building-mapping.
- Once you have created and uploaded your building map, you need to create and upload a tenant data file. A template for this file can be downloaded from https://github.com/MicrosoftDocs/OfficeDocs-SkypeForBusiness/blob/live/Teams/downloads/locations-template.zip?raw=true.
Further details on this process can be found at https://docs.microsoft.com/en-us/microsoftteams/cqd-upload-tenant-building-data. Uploading your building and tenant data is highly beneficial if you wish to interpret your CQD data because it makes it easier to view locations and endpoints in the dashboard.
Next, we'll look at configuring reporting labels for Microsoft Teams.


