Learning the basics of the nano editor
If you feel that the Vim editor is too complicated for you, we can feel your pain. That's why choosing the editor you're going to work with is a subjective choice. We'd like to offer another much simpler editor to the table, called nano.
Getting ready
Keep the CLI1 virtual machine powered on and let's continue editing our files.
How to do it…
We're going to edit the words file that we copied in the previous recipe. Before that, let's just make sure that nano is installed by typing in the following command:
sudo apt-get -y install nano
Let's now open the file called words from the root directory by typing in the following command:
nano /root/words
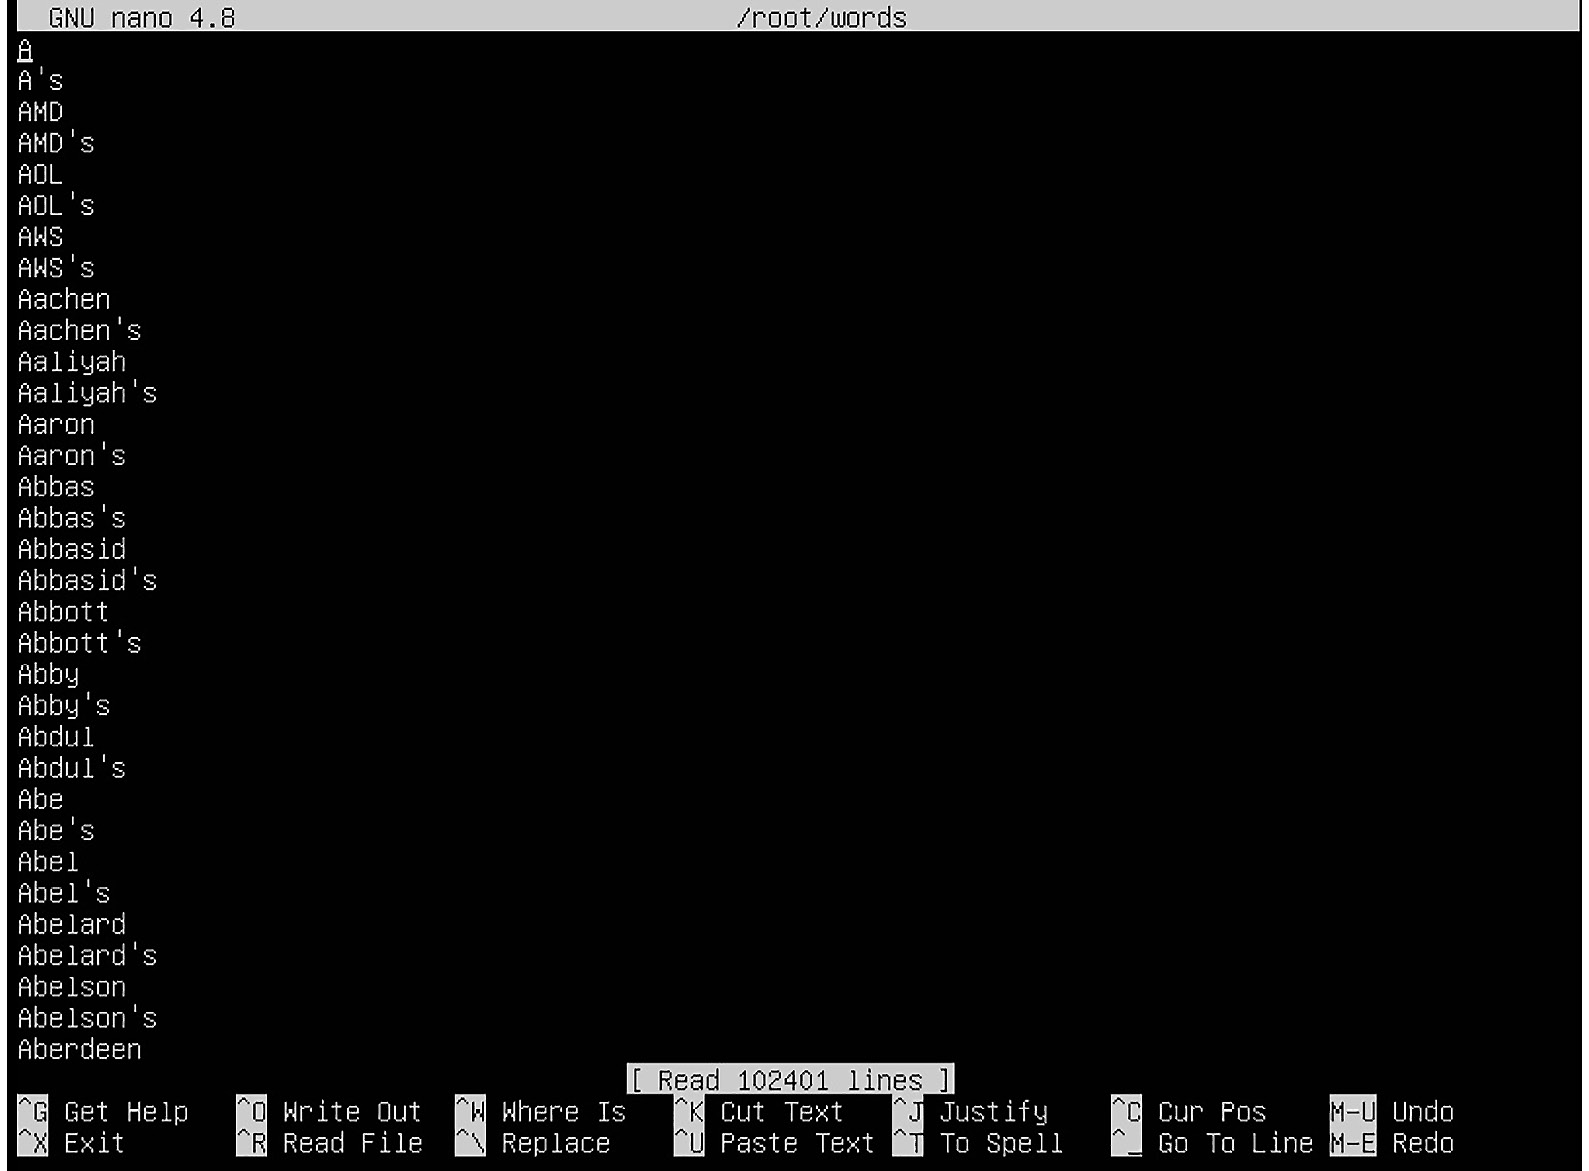
Our file should be opened in the nano editor, as shown in the following screenshot:

Figure 2.10 – Starting editing with the nano editor
For those of us who are more prone to using text editors such as Notepad or Wordpad, nano should be a bit more familiar territory. It doesn't have the scope of capabilities or advanced functionality that Vim has, but for the most part, that might not be so important, at least not for most text file editing operations. Or is it really that simple? Let's check it out.
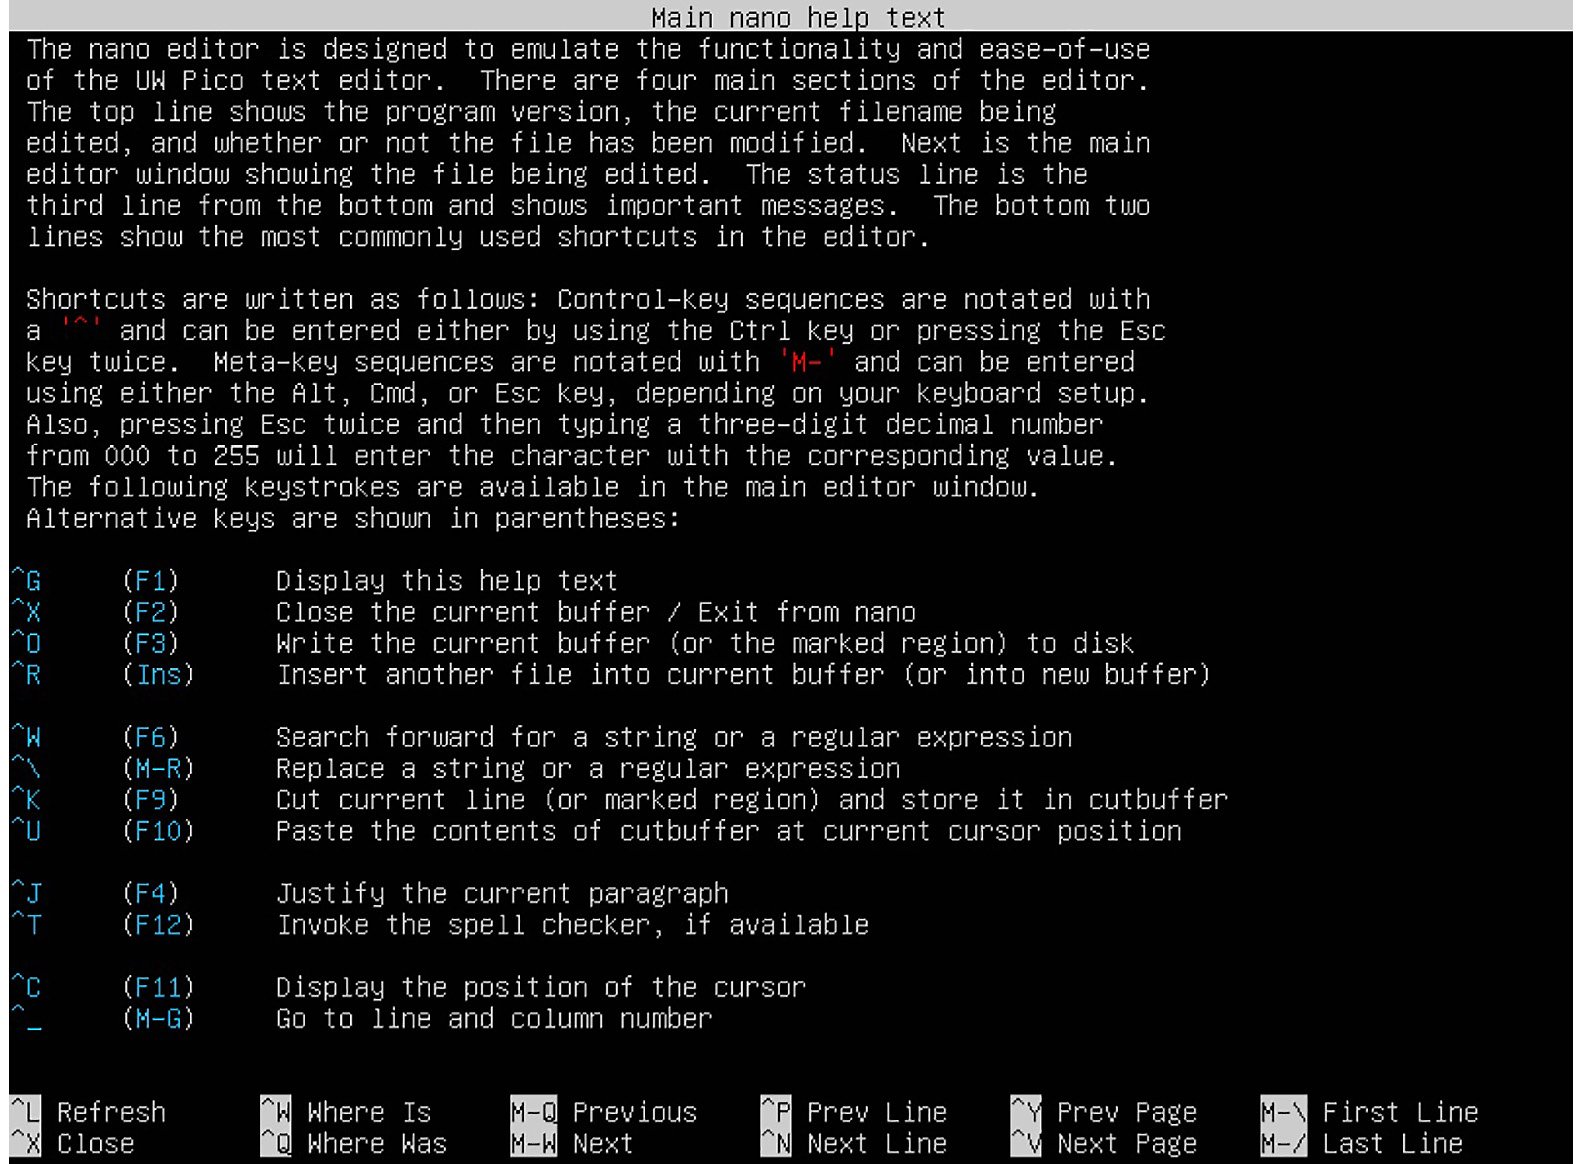
Editing in nano works in the same fashion as with other regular editors – we just need to explain the lower part of the screenshot (the part where we can see Help, Exit, and so on). In nano, if we need help, we need to press Ctrl + g. This is the result that we'll get:

Figure 2.11 – nano help
We can spend our time scrolling through this help window if we want to. But, for starters, let's just say that this ^ character means press the Ctrl key.
So, on our first nano screenshot, ^G means Ctrl + G, ^X means Ctrl + X, and so on. It still isn't as easy as using some text editors that a lot of people use on Microsoft Windows, but it's a bit more user-friendly than Vim. If nothing else, some of the commonly used commands are right at the bottom of our screen so that we don't have to learn all of the key sequences or research them online before we consider using the editor.
If we want to close our help window from the second nano screenshot, we just need to press Ctrl + X. This will get us back to the state shown in the first nano screenshot.
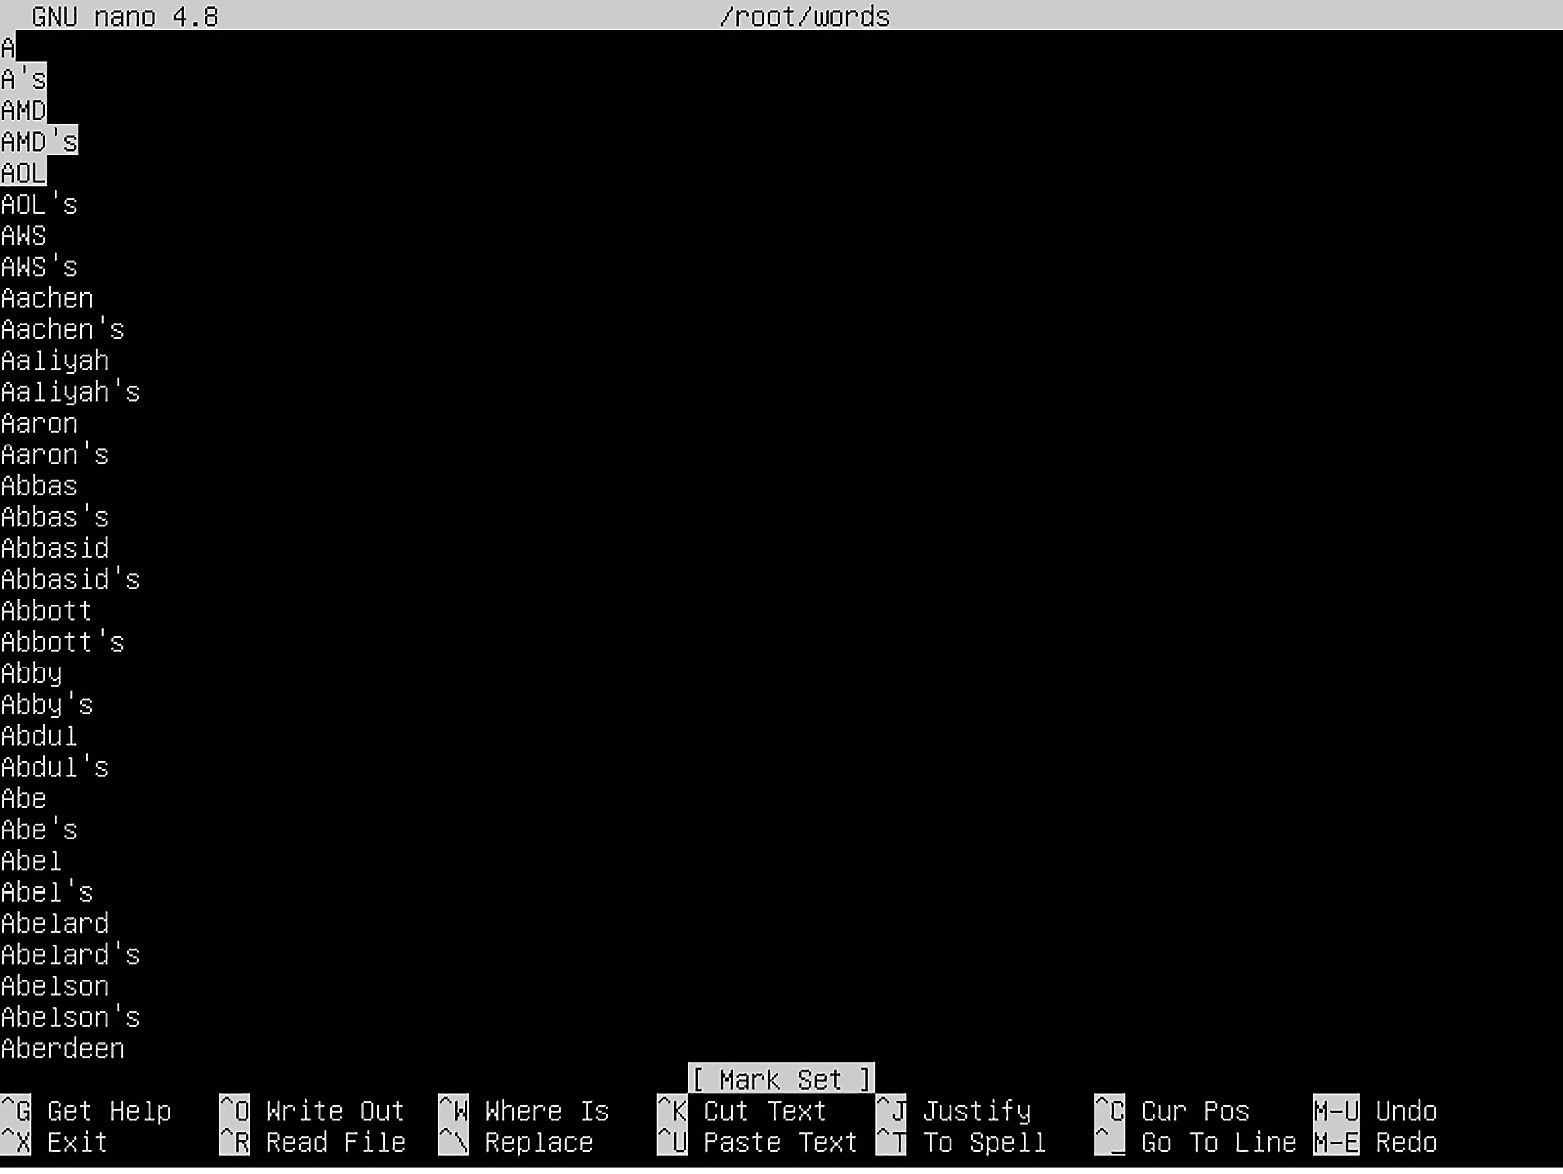
If we want to delete a line, we need to use Ctrl + K. If we need to delete multiple lines, things start to get a bit more complex. We first need to select the content that we want to delete (Ctrl + Shift + 6), use the cursor to move to the place that we want to delete to, and then press Ctrl + K. Let's say that we want to delete five lines. So, selecting content that we want to delete looks like this:

Figure 2.12 – After pressing Ctrl + Shift + 6 and using the cursor keys to go down five lines, we're ready for Ctrl + K
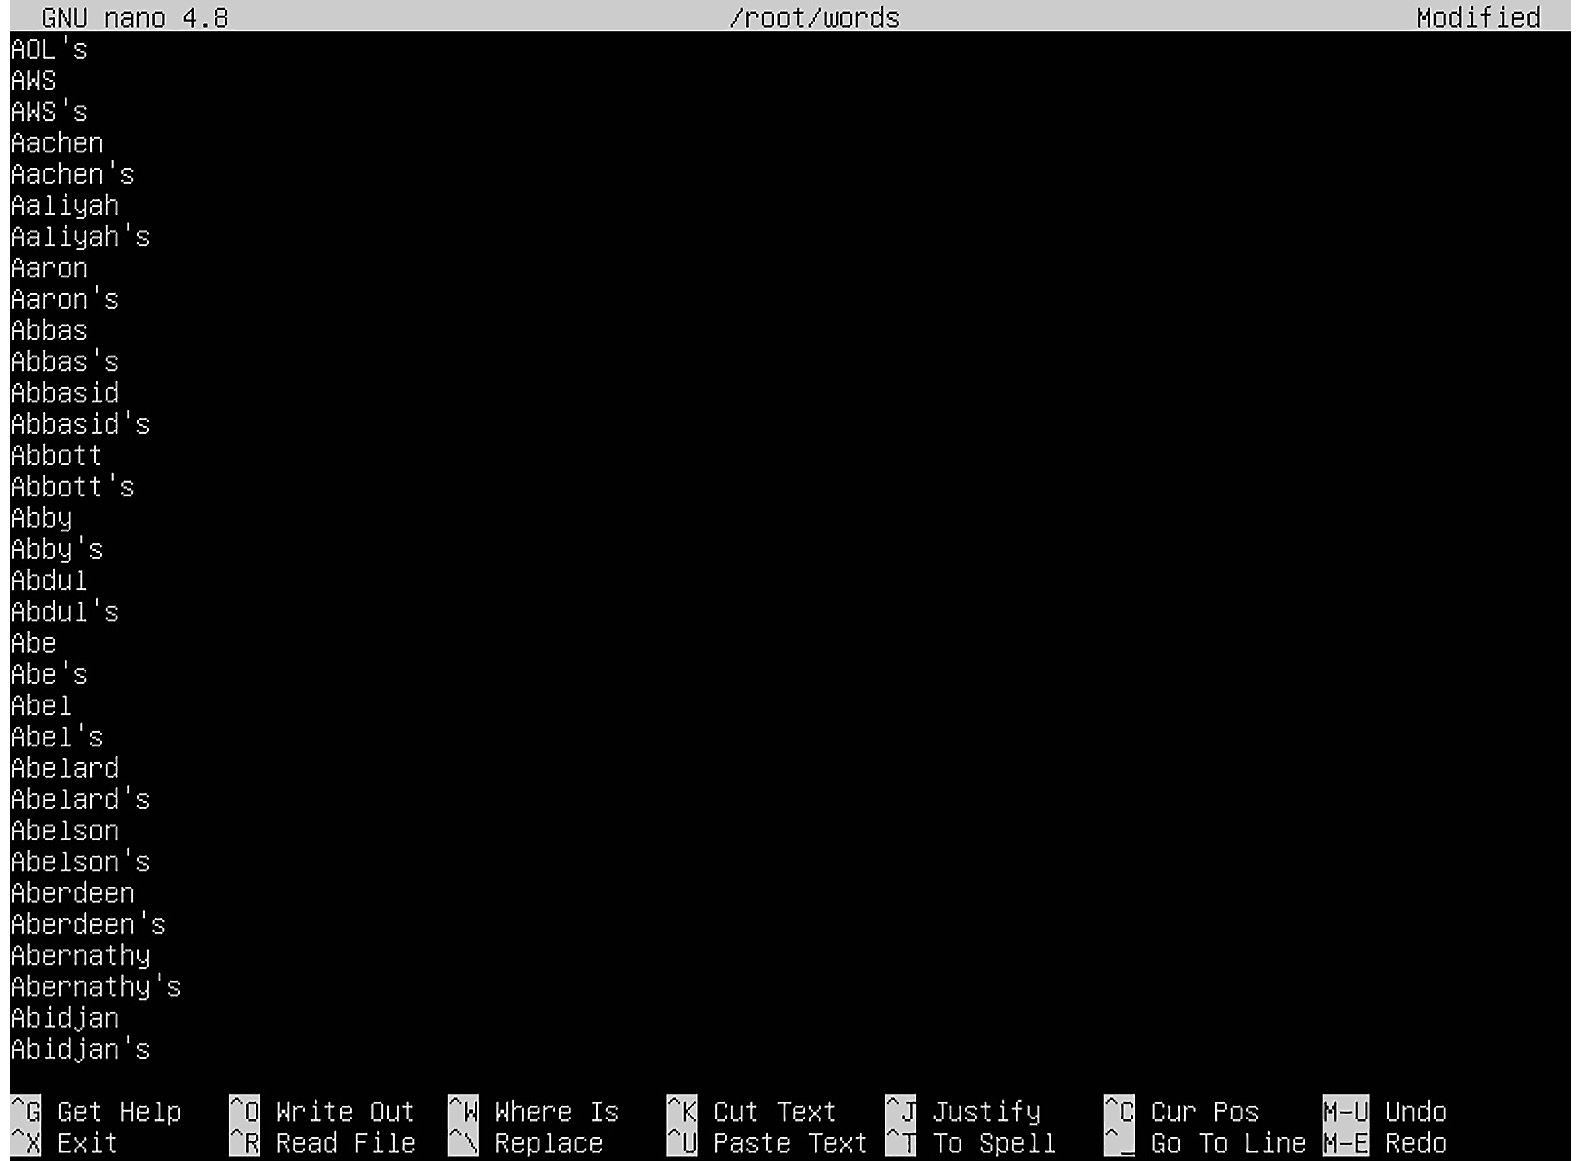
After we have selected the correct text, we just need to press Ctrl + K to delete it. The result will look like this:

Figure 2.13 – Five lines successfully deleted – result!
The same idea applies to doing a copy and paste operation on a paragraph. We'd use Ctrl + Shift + 6 and the cursor to mark the text, Alt + 6 to put the copied text in the copy and paste buffer, and then use Ctrl + U to paste it wherever it needs to be pasted in nano. Saving the file is equivalent to using Ctrl + X to exit, and then confirming that we want the changes to be saved to a file.
There's more…
If you need to learn more about nano, check out the following links:
- The nano editor cheat sheet: https://www.nano-editor.org/dist/latest/cheatsheet.html
- How to use nano: https://linuxize.com/post/how-to-use-nano-text-editor/


